Table of Contents
Advertisement
Quick Links
Advertisement
Table of Contents

Related Manuals for Travis Industries Fireplace Manual 21 DV Fireplace


Summary of Contents for Travis Industries Fireplace Manual 21 DV Fireplace
- Page 3 Minimum Framing Dimensions ...9 Clearances ...9 Nailing Brackets...10 Corner Installations ...11 Raised Fireplaces...11 Gas Line Location ...12 Fuel ...12 Gas Line Connection...12 Gas Inlet Pressure ...12 Optional Gas Line Location ...13 Electrical Line Location ...13 Optional Electrical Line Location ...13 Electrical Line Connection...14 Altitude Considerations ...15 Vent Clearances ...15...
- Page 4 Look for this label: For LPG only | Pout 11” W.C. If the label is present, the heater is equipped for LP (propane). If the label is absent, the heater is equipped for NG (natural gas).
- Page 5 This Manual...
- Page 6 13-5/8”* 4-7/8”* 6-5/8” NOTE: a 1/2” clearance is required to the sides, rear, and top of the fireplace. 35-7/8” Nailing Brackets See “Gas Line Requirements” for Details on the Gas Inlet 13-5/8” 45° 15” 17-5/8”* 8” External Diameter 4-7/8”* 34-1/8” 20-1/8”...
- Page 8 See the section "Termination Requirements" See the section "Vent Requirements" Thermostat Wire (either side) Gas Line (left side or beneath) See the section "Hearth Requirements" See the section "Minimum Framing Dimensions" See the section "Mantel Requirements" Non-combustible facing (see the section "Facing Requirements") See the section Drywall...
- Page 9 The fireplace enclosure must be a minimum 48" above the base of the fireplace. NOTE: Do not build into the area above the fireplace (except for the required framing members). HINT: We recommend installing the shaded framing after the fireplace is in place.
- Page 10 There are two nailing brackets on the sides of the fireplace. Follow the directions below to prepare the nailing brackets. Once in place, nail or screw the nailing brackets to the framing. 1/2” Facing For installations using 1/2” facing (1/2” drywall or other facing) fold the larger tab out 90°.
- Page 11 22-1/4" Min. 24-7/8" Recommended Min. 1/2" Clearance NOTE: do not insert any material into the 1/2" gap along the front of the fireplace. Ceiling Minimum 57" Optional Hearth Raised Platform 5-1/2" Min. 6-1/2" Recommended 1/2" Standoffs Fireplace Enclosure (min. 48")
- Page 12 The left side gas inlet is located 2-3/4" above the base of the fireplace. 4" 1/2" F.P.T. Gas Line (1/2" M.P.T.) This fireplace is designed either for natural gas or for propane (but not for both). Check the sticker on the top of the gas control valve to make sure the correct fuel is used (see illustration on page 4).
- Page 13 Remove the two screws near the gas inlet (save these screws). Phillips Screwdriver Position the gas inlet assembly over the hole in the baseplate (do not secure at this time). Position the cover plate over the gas inlet hole on the left side of the fireplace and secure using the nuts removed in step “b”.
- Page 14 Remove the cover from the fireplace junction box. Electrical Connector Attach the common (white), ground (exposed or green) wires, and hot (black) wires from the power source to the electrical connector (attached to the fireplace). Remove the cover plate on the bottom of the fireplace (save these nuts).
- Page 15 Min. 2" Clearance Above the Vent 1/2" Clearance to the front of vent before the 0" Clearance to the first firestop. side of vent after the first firestop. Use a firestop when passing through any wall (WARNING: some firestops provide a 1" clearance above the vent -- 2"...
- Page 16 Vertical Vent Requirements Use a roof flashing and storm collar whenever passing through the roof Use a ceiling firestop whenever passing through a ceiling (or enclosure and at every floor penetration. Vertical Termination (use the "High Wind Terminatin" Combustible Use a firestop when passing through a wall. Make Framing sure there is a 2"...
- Page 17 Rotate the adjustment plate to change the restrictor position. To Adjust the Restrictor: Determine a restrictor position (see the charts under "Approved Vent Configurations") Remove the screw with a 1/4" magnetic nutdriver. Rotate the adjustment plate until the correct index hole is below the pivot point (the pivot point is slotted, use a slotted screwdriver to turn the adjustment plate) Vent...
- Page 18 40' (max) Restrictor Position # 6 35 feet Restrictor 30 feet Position # 4 25 feet NOTE: Two 45° elbows may be used. 20 feet 15 feet 10 feet 6' (min) 5 feet 0 feet 40' (max) NOTE: Restrictor positions are based upon lab tests.
- Page 19 14 feet (max) 10 feet 5 feet 0 feet NOTE: If using 6-5/8" diameter vent, a minimum 12" vertical rise is required. NOTE: Horizontal sections require a 1/4" rise every 12" of travel. NOTE: Restrictor positions are based upon lab tests. The ideal restrictor position Restrictor Position # 1 14 feet...
- Page 20 NOTE: Measure clearances to the nearest edge of the exhaust hood. Roof Surface 11” Min. Roof 6” Min. Eaves...
- Page 21 Floor Mounted Fireplaces Raised Fireplaces Fireplace Stand Do not build a hearth or other item above the baseplate (this area must remain clear for the access door). If installed in front of carpet or other flooring, the fireplace must be raised so the base of the unit is above the carpet surface or flooring material.
- Page 22 Any material that protrudes more than 3/4” in front of the facing is considered a mantel and must meet the mantel requirements in this manual. NOTE: The facing tucks behind the flanges. Recommended Order of Installation We recommend installing the facing (drywall, tile) under the notch at the front of the fireplace (“a”) - then install the sides and top (“b”...
- Page 23 Facing - Top View Fireplace 1/2" Nailing Bracket 1/2" Face White Tape Gasket (attached to fireplace) Facing - Side View Face Gasket Fireplace Wall Trim (1/16" thick) 1" 3/8" 1/8" Wall Trim...
- Page 24 Recommended Order of Installation We recommend installing the facing (drywall, tile) under the notch at the front of the fireplace (“a”) - then install the sides and top (“b” and “c”) NOTE The facing tucks under the notch at the front of the fireplace (3/8”...
- Page 25 Top View - Tile Facing NOTE: When installed, there must be a minimum 1/8” gap between the face and facing. Side View - Tile Facing NOTE: The fireplace is shifted back on the shelf to accommodate the facing thickness. 3-d View - Tile Facing Recommended Order of Installation We recommend installing the tile under the notch at the front of the fireplace then working your way...
-
Page 26: Side View
Arched Face Thick Facing Template Part # 225-20040 The Arched Face Thick Facing Template is a separate component that is required when using an arched face with facing that extends beyond the face (e.g.: brick, river rock). It attaches to the top stand-off with the included screws. - Page 27 Maximum Mantel Depth (b) 0” 1” 2” 3” 4” 5” 6” 7” 8” 9” 10” 11” 12” 9” 8” 7” Mantel 6” Height 5” Above 4” Face (a) 3” 2” 1” 0” If you have a tapered mantel, measure the mantel height at the point where it protrudes 3/4”...
- Page 28 Open the four latches holding the glass frame in place (start with the two below the glass) - follow the directions shown to the right. Glass Frame NOTE: Lift the glass You may need to lift the glass frame up and frame while re-attaching.
- Page 29 NOTE: The spring pins can be installed with the glass frame in place or removed. To re-install the spring pin, first insert this end into a 1/4” key. Insert the spring pin into this bracket with the pins aligned vertically. Push in slightly and twist 1/4 turn.
- Page 30 NOTE: This notch here is for the pilot hood. Make sure the log is correctly aligned so the notch allows the flame to travel from the pilot hood to the burner holes. Make sure the "cut out" on the bottom of the log installs over the pilot assembly.
- Page 31 Place the twig so the pin on the rear log inserts into the hole on the twig. Place the upright log as shown. When installed the top is parallel with the burner and there is a gap under the right "leg". Place the ember chunks along the perimeter of the burner (do not place over...
- Page 32 To adjust the pilot flame, turn this screw. Clockwise lowers the flame while counter-clockwise raises it. ADJUSTING THE AIR SHUTTER Pushing the control to the right gives the flame less air (closed) - making it more orange. Pushing to the left gives the flame more air (open), making it more blue.
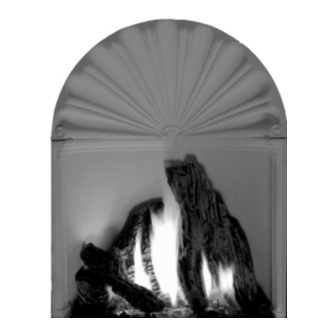
- Page 33 Correct Flames Lifting Flames Burner Lifting flames indicate The flames should burn right off the top of the burner ports insufficient draft (restrictor is set too high). (if they are too blue, adjust the air control). Ghosting Flames Burner Ports (holes) Ghosting flames indicate insufficient air (restrictor set too...
- Page 34 PLATED SURFACES: Make sure the plated surfaces are clean before starting the fireplace. Any marks left on plated surfaces may become etched in place. Clean plated surfaces with denatured alcohol and a soft cloth. Lift and rotate the face forward until the top brackets lock into the upper slots.
- Page 35 The Pilot Flame can be found below the back log. ON/OFF Switch Blower Control An instruction card for operating the fireplace is attached to the inside of the fireplace here. Replace it for easy reference. Pilot Igniter Swing the control cover down to access the gas control valve and pilot igniter.
- Page 36 5 minutes PILOT IGNITER 30 seconds...
- Page 37 After the pilot has been started... See the instructions included with the remote for details on operation. See the instructions Use this switch to included with the turn the main burner remote for changing on and off manually. the battery. Flame Height Adjustment Knob Turn counter-clockwise to adjust the flame higher, clockwise to lower.
- Page 38 Turn the dial all the way counter-clockwise until it clicks off. The appliance will creak with change of temperature. Pilot Flame The pilot flame, which remains on, makes a very slight "whisper" sound. Gas Control Valve As the gas control valve is turned on and off you will hear a dull clicking sound.
- Page 39 Check the walls and ceiling of the firebox for Before Disassembly - deterioration. Check the pilot flame. It should touch the thermocouple and thermopile. Thermopile Pilot Hood Thermocouple Make sure the burner is not warped or damaged. Check the burner holes.
- Page 41 When heated, the thermopile generates electricity (a very small amount measured in "Millivolts"). Pilot Flame The pilot flame is a time-proven component that eliminates the possibility of gas buildup inside the firebox. Gas Valve This high-technology valve automatically shuts off all gas if it does not receive a signal from the thermocouple.
-
Page 42: Millivolt Wiring
Millivolt Wiring (for gas control valve) 120 Volt Wiring (black) Power In Common Molex (white) Connector Ground (green) Optional Blower Gas Control Valve Optional Regulator Solenoid BURNER ASSEMBLY - B33 FAN, CONV, MOUNT GROMMETS (4) FLEX PIPE, 3/8"od x 8" BLK - GLASS LATCH ASSY, ALL UNITS INJECTOR, PILOT - LP (35) KNOB (PLASTIC), RHEOSTATS... - Page 44 Check with your dealer in advance for any costs to you when arranging a warranty call. Mileage or service charges are not covered by this warranty. This charge can vary from store to store. Adjustable Air Restrictor, Pressure Relief Mechanisms, Barometric Control Mechanism (for models with Remote Heat Ducts), Glass Attachment Mechanism...
- Page 45 Lift up on the left side of the burner, then slide the burner to the left and up to remove. Burner Replacement: Make sure the screw on the bottom of the burner inserts into this hole. The mixing tube slides onto the orifice.
- Page 46 Burner Orifice Use a 1/2” open end wrench to unscrew the burner orifice. NOTE: Screw the LP orifice in so the orifice shoulder 5/16” protrudes 5/16” (indicating full insertion). Lift the pilot hood off the pilot assembly. Slide the air shutter all the way to the left.
- Page 47 Remove and discard the three screws using a slotted screwdriver of Torx T-20. To adjust the pilot flame, turn this screw (NOTE: if totally unscrewed gas will come out of this port). Clockwise lowers the flame while counter-clockwise raises it. Remove and discard the regulator, diaphram, spring and center post.
- Page 48 WARNING Turn off gas to the appliance and make sure it has fully cooled prior to conducting service. Steel Liner Tilt the steel liner forward and pull it out of the firebox (pull the top edge out first). Lift the back of the liner so the tab disengages from this slot on the niche shelf.