Table of Contents
Advertisement
Quick Links
WPG-370
Wireless Presentation Gatway
User Guide
IMPORTANT: Please read this User Guide to obtain important information on installing
and using your product in a safe manner, as well as registering your product for future
service. Warranty information contained in this User Guide will describe your limited
coverage from ViewSonic Corporation, which is also found on our web site at http://
www.viewsonic.com in English, or in specific languages using the Regional selection
box in the upper right corner of our website. "Antes de operar su equipo lea cu
idadosamente las instrucciones en este manual"
Model No. VS15180
Advertisement
Table of Contents

Related Manuals for ViewSonic WPG370


Summary of Contents for ViewSonic WPG370
-
Page 1: User Guide
Warranty information contained in this User Guide will describe your limited coverage from ViewSonic Corporation, which is also found on our web site at http:// www.viewsonic.com in English, or in specific languages using the Regional selection box in the upper right corner of our website. - Page 2 If the batteries, accumulators and button cells included with this equipment, display the chemical symbol Hg, Cd, or Pb, then it means that the battery has a heavy metal content of more than 0.0005% Mercury, or more than 0.002% Cadmium, or more than 0.004% Lead. ViewSonic...
- Page 3 EN 301 489-17 EN 62311 Notified Countries: Germany, UK, Netherlands, Belgium, Sweden, Denmark, Finland, France, Italy, Spain, Austria, Ireland, Portugal, Greece, Luxembourg, Estonia, Latvia, Lithuania, Czech Republic, Slovakia, Slovenia, Hungary, Poland and Malta. --- 經型式認證合格之低功率射頻電機,非經許可,公司、商號或使用者均不得擅自變更頻率,加大功率或變 更原設計之特性及功能。 --- 低功率射頻電機之使用不得影響飛航安全及干擾合法通信:經發現有干擾現象時,應立即停用,並改善至 無干擾時方得繼續使用。 前項合法通信,指依電信法規定作業之無線電通信低功率射頻電機需忍受合法通信或工業、科學及醫療用電 波輻射性電機設備之干擾。 ViewSonic...
- Page 4 3. Lead in high temperature type solders (i.e. lead-based alloys containing 85% by weight or more lead). 4. Lead as an allotting element in steel containing up to 0.35% lead by weight, aluminium containing up to 0.4% lead by weight and as a cooper alloy containing up to 4% lead by weight. ViewSonic...
- Page 5 WPG-370_UG_ENG Rev. 1A 01-13-13 Serial Number: Purchase Date: Product disposal at end of product life ViewSonic respects the environment and is committed to working and living green. Thank you for being part of Smarter, Greener Computing. Please visit ViewSonic website to learn more. USA & Canada: http://www.viewsonic.com/company/green/recycle-program/ Europe: http://www.viewsoniceurope.com/uk/support/recycling-information/ Taiwan: http://recycle.epa.gov.tw/recycle/index2.aspx...
-
Page 6: Table Of Contents
Table of Contents Chapter 1: Product Introduction ......................2 1-1 Package Contents ........................2 1-2 Hardware Recommendation ....................... 3 Presentation Mode : ..................... 3 Intel WiDi Mode: ......................3 Media Streaming Mode ....................4 1-3 Highlights ........................... 5 1-4 Hardware Setup/Installation....................... 6 Connect your device ..................... -
Page 7: Chapter 1: Product Introduction
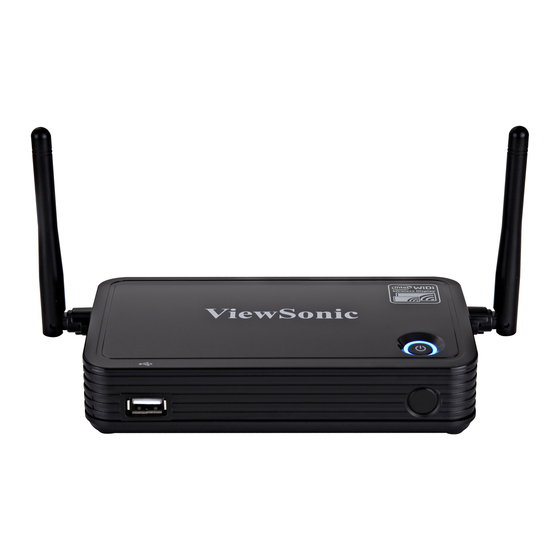
Chapter 1: Product Introduction Congratulations on your purchase of ViewSonic Wireless Presentation Gateway WPG-370. This section introduces you to the WPG-370 (referred to as the WPG in this user guide). 1-1 Package Contents (1) WPG-370 (2) AC adapter with UK/EU/US plug... -
Page 8: Hardware Recommendation
1-2 Hardware Recommendation WPG-370 supports real time presentation, Intel Wireless Display® & Multimedia Media streaming play back functions. (1) Presentation Mode : WPG-370 is designed to able to stream video/music/photo contents from PC (Windows 7 /Window 8 only) to your TV through this device. PC or Notebook Ÿ... -
Page 9: Media Streaming Mode
Intel® Centrino® Advanced-N 6205 for Desktop Intel® Centrino® Wireless-N + WiMAX 6150 Intel® Centrino® Advanced-N + WiMAX 6250 Intel® Centrino® Ultimate-N 6300 Intel® My WiFi Technology (Intel® MWT) and Intel® Wireless Display must be Software pre-installed and enabled. Windows 7 64-bit*, Home Premium, Ultimate or Professional Windows 7 32-bit*, Home Premium, Ultimate, Professional or Basic Windows* 8 32-bit and 64-bit editions (3) Media Streaming Mode... -
Page 10: Highlights
1-3 Highlights Thanks again for choosing the product. This product allows multiple users to connect to the same projector by wired or wireless network and avoiding the hassle of using VGA or HDMI cable. Features 802.11 a/b/g/n Wireless compatibility 802.11n 2.4GHz & 5GHz dual band standards Supports both Wireless and Ethernet connectivity VGA or HDMI connections Wireless multimedia streaming up to Full HD 1080p... -
Page 11: Hardware Setup/Installation
(2) Connect power and push power button to turn on WPG-370. After few seconds, when you see the below screen: the device is assigned an IP address, the system is in Presentation mode and ready to do PC mirror from your PC/Mac. Please connect to WPG370 via Wi-Fi. - Page 12 (3) You can switch between Presentation mode, Intel WiDi® Adapter mode and Media Streaming mode by pushing the button twice at the side of box (next to USB connector).
-
Page 13: Chapter 2: Using Wpg-370 On Presentation Mode
Chapter 2: Using WPG-370 on Presentation Mode 2-1 Switch WPG-370 to Presentation Mode Push mode selection button on the WPG-370 till you see the screen below, the box is ready for Presentation Mode connection. 2-2 Check the IP address of WPG When WPG is powered on, check the connected display, you can find the IP address and login code Instruction Page:... - Page 14 You can connect to WPG by the IP address of the connection type you’re using (wired /wireless).
-
Page 15: Connect To Wpg By Wireless Network
2-3 Connect to WPG by wireless network Use your computer’s Wireless Network Connection window to access an available wireless network. Select the device from the list. Click Connect. The default device name is WPG-370. Note: If using a wireless client other than Windows, the screen above may look differently. For more details, see your PC user guide. -
Page 16: Using Application Software
2-4 Using application software You can install WPG370 application in the CD ROM or download the application from internet. (1) Install application in CD-ROM... - Page 18 (2) Download application from Internet.
- Page 19 Before you can download the application on the internet, you must connect to Internet. If you have a AP router that connect to internet, you can follow the setting below to bridge WPG370 to the AP router and then connect to internet. For more information, please refer to 2.4.8 AP Bridge setting.
- Page 20 WPG will auto detect ‘Server IP’ please input login code as shown on instruction page. If login code is correct, application software will appear.
-
Page 21: Using Application Software
2-4-2 Using application software Name Function Description Menu Access menu list. Play Start / pause presentation. When pausing a progressing presentation, the displaying image will freeze; press play button again to resume Minimize Minimizes Application Software window Close Closes Application Software window Stop Stop a progressing presentation... -
Page 22: Menu List
2-4-3 Menu List Besides the buttons, you can also click ‘Menu’ button to access menu list. Item Description Information Check the information of connected WPG. Projection Control Controls the projection: Play: Start presentation. Pause: Pauses presentation. Stop: Stop presentation. Output Resolution: Changes display resolution and you can check Web Configuration menu Use the web browser to connect to the IP... -
Page 23: Connect To Web Configuration Menu
2-4-4 Connect to Web Configuration Menu Please key IP address and suffix(/remote/admin.html) in browser, Ex:, 192.168.59.254/remote/admin.html. Item Description Application download Download application from Internet Mode switch Switch between Presentation, Intel WiDi®, and Media streaming mode... -
Page 24: Status & Info
2-4-5 Status & Info Displays system information, like system software version and IP address. Many useful information can be obtained here when you need help about system configuration and firmware upgrade. -
Page 25: Network Setting
2-4-6 Network Setting Displays and configures the network settings. Item Description Obtain an IP address WPG will obtain an IP address from Automatically DHCP server automatically. Use the following IP Set WPG IP address manually. Fill Address the fields below to setup IP address. - Page 26 DNS Server Please input the IP address of the DNS (Domain Name Service) server. Click ‘Apply’ button to save the settings. NOTE: When the configuration settings are changed, you must restart the network connection. You can restart the network connection by clicking “Restart” on the web configuration menu.
-
Page 27: Wireless Settings
2-4-7 Wireless Settings Configures wireless network settings. (1)‘Basic’ Settings Displays and configures the wireless settings. Item Description Wireless Function Select ‘Enable’ to enable wireless network function; ‘Disable’ to disable it. Mode Select wireless mode. Only AP (Access Point) mode is supported. Device Name Input the Device Name of presentation gateway here. - Page 28 (2) “Security” Setting Encryption: Disabled Disables wireless encryption. Encryption: WEP Enable WEP encryption. Wireless clients must support WEP encryption and know the encryption key you set here. NOTE: When the configuration settings are changed, you must restart the network connection. You can restart the network connection by clicking “Restart” on the main menu. Encryption: WPA +WPA2 Enable WPA + WPA2 encryption.
-
Page 29: Band Setting
(3) Band Setting Item Description Band Select the wireless band. Available options are: 2.4GHz (B+G+N) - 802.11b, 802.11g, and 802.11n clients. 5GHz (B+G+N) - 802.11b, 802.11g, and 802.11n clients. -
Page 30: Ap Bridge Setting
Step1: Connect LAN to the AP router Step2: Go to Web Conguration page => Wireless Setting => Virtual AP setting => Bridge to Ethernet. Then you can bridge WPG370 to Internet. Note: WPG 370 must connect to AP router and can’t connect to WAN directly. - Page 31 Bridge to Wireless/ Wireless connection Step1: Go to Web Conguration page => Wireless Setting => Virtual AP setting => Bridge to Wireless. Step2: Click Wireless connection button. Then there will show the Wireless AP list on the screen. Please choose the AP you want to connect.
-
Page 32: Projection Setting
2-4-9 Projection Setting Displays and configures the projection setting. Item Description Instruction Page Language Select the displaying language. Selection HDMI Output Resolution Select HDMI output resolution for projection. VGA Output Resolution Select VGA output resolution for projection. NOTE: When the configuration settings are changed, you must restart the network connection. You can restart the network connection by clicking “Restart”... -
Page 33: Password Setting
2-4-10 Password Setting Displays and configures the password setting. Item Description Current Password Input current password here. New Password / New Password: Enter new password. Confirmed Confirmed Password: Confirmed the Password new entered password. Click ‘Apply’ button to save the settings. NOTE: When the configuration settings are changed, you must restart the network connection. - Page 34 2-4-11 Restart Restart WPG when the device is not working properly or to apply changes made on web Click ‘OK’ to restart the WPG-370, or click ‘Cancel’ to abort.
-
Page 35: Firmware Upgrade
2-4-12 Firmware Upgrade Upgrade the firmware of this WPG. Select ‘Auto’, WPG will check if there is any firmware upgrade once WPG-370 connects to Internet. Note: It’s recommended to use wired Ethernet connection to perform firmware upgrade. -
Page 36: Logout
2-4-13 Logout If you wish to logout from web configuration menu, click ‘Logout’. -
Page 37: Chapter 3: Using Wpg-370 On Intel Widi Mode
Chapter 3: Using WPG-370 on Intel WiDi Mode 3.1 Switch WPG-370 to Intel WiDi Mode Push mode selection button on the WPG-370 till you see the screen below, the box is ready for Intel Wireless Display connection. 3.2 Connect to WPG-370 by Intel WiDi For Intel WiDi platform devic Please follow the next steps to do Intel WiDi connection click the Intel WiDi icon from your PC desktop. - Page 38 Click “ Scan for available adapters” and then connect to the adapter with same ID on the screen. 2. For the first connection, users need to type the password show on the projector or TV screen.
- Page 39 3. After the connection successful, PC screen will be projected to the screen of TV or projector.
-
Page 40: Chapter 4: Using Wpg-370 On Media Streaming Mode
Chapter 4: Using WPG-370 on Media Streaming Mode 4.1 Switch WPG-370 to Media Streaming Mode Push mode selection button on the WPG-370 till you see the screen below, the box is ready for Media Streaming Mode connection. - Page 41 In Media Streaming mode, you can streaming photo/music/video from your PC, Smartphone or tablet. Or play video/Music/photo form USB Please follow the instruction to do media streaming. 1. Connect to WPG-370 in Wi-Fi AP list. Play media by WiFi streaming, we recommend software/AP as following : For more information Please check user manual of each software.
-
Page 42: Appendix A: Support Resolution
You can play Video, Photo or music that you select. Appendix A: Support resolution Interface Output resolution 800x600@60Hz 、1024x768@60Hz 、 、 、 1280x800@60Hz 1280x1024@60Hz 1366x768@60Hz HDMI NTSC,PAL,480p,576p,720p50Hz,720p60Hz,1080i50Hz,1080i60hz,1080p50Hz,1080p60Hz Appendex B: WPG-370 Support Media Format Video Format Format File extension MPEG-1 mpg, mpeg MPEG-2 mpg, mpeg MPEG-TS... -
Page 43: Audio Format
3gp, 3gpp 3GP2 3g2, 3gpp2 DVR-MS dvr, dvr-ms Audio Format Format File extension LPCM pcm, wav, l16 ogg, oga, ogv Photo Format Format File extension jpg, jpeg...