Table of Contents
Advertisement
Available languages
Available languages
Advertisement
Table of Contents

Related Manuals for Keurig K15


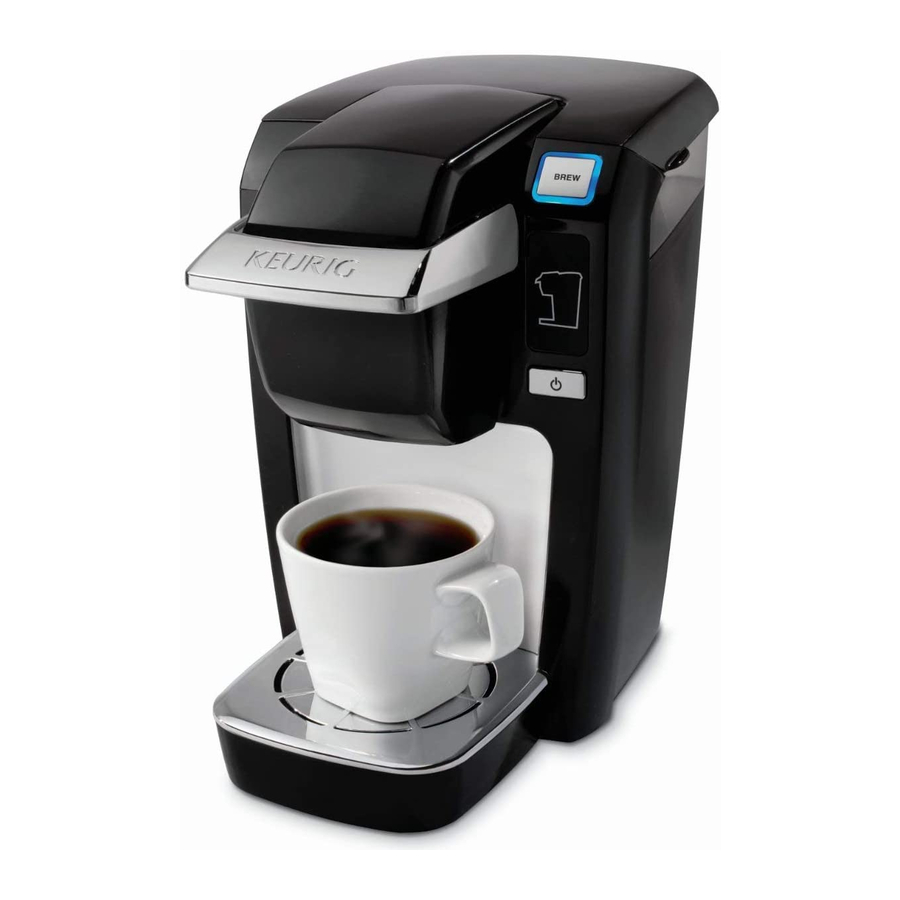
Summary of Contents for Keurig K15
- Page 1 USE & CARE GUIDE GUIDE D’UTILISATION ET D’ENTRETIEN...
-
Page 2: Important Safeguards
(ground) A HOT COCOA/OTHER POD, Do not place on or near a hot Contact Keurig Customer Service prong from the Power Cord or use RUN A HOT WATER BREW gas or electric burner, or in a to report any malfunction of or an adapter. -
Page 3: Table Of Contents
(2) the cord should be arranged USER GUIDE TABLE OF CONTENTS needles that puncture pods, one so that it will not drape over the KEURIG CLASSIC SERIES | ® above the Pod Holder and the countertop or tabletop where it... -
Page 4: Buttons & Indicators
As a safety feature, your brewer will automatically shut off at any stage when it is idle for longer than 90 seconds. Press the Power Button to restart. K15 SERIES BREWER If the brewer shuts off while the BREW Button was flashing blue, lift and lower the Handle to reset. -
Page 5: Quick Tips & To Dos
QUICK TIPS & TO DOS TO DO Register your brewer at Keurig.ca. We’ll send you a special “thank you” when you do. Join for special savings on Keurig® brand pods when purchased on Keurig.ca 1 | LET’S GET BREWING! - Page 6 1 | LET’S GET BREWING! INITIAL CLEANSING & FIRST BREW Remove all tape and cardboard. Plug Press the Power Button. The Add Water For accurate measuring, do not fill if the Lift the Handle. Water starts to drain the Power Cord into an independent, Indicator will flash blue.
-
Page 7: Section 1 Initial Cleansing & First Brew
1 | LET’S GET BREWING! INITIAL CLEANSING & FIRST BREW As a safety feature, brewer automatically shuts off Wait until all water has drained The BREW Button will flash blue. after 90 seconds. If completing the initial cleansing (5 seconds) into the brewer before Press the BREW Button. - Page 8 2 | TIPS & MAINTENANCE CARING FOR YOUR BREWER Regular cleaning of the brewer’s external components CLEANING THE COLD WATER RESERVOIR is recommended. It is normal over time for discoloration, spotting, or staining to appear in the Cold Water • Brewer external housing Reservoir.
- Page 9 2 | TIPS & MAINTENANCE CARING FOR YOUR BREWER CLEANING THE K-CUP® POD To remove the K-Cup® Pod Holder To replace the Funnel, just snap it back To replace the K-Cup® Pod Holder HOLDER ASSEMBLY Assembly from the brewer, lift the into the K-Cup®...
- Page 10 30 minutes before continuing with the rinse. • Turn on your brewer. • Pour one third (4.6 oz.) of the Keurig® Descaling Solution into the cold Water Reservoir then add fresh water to the 10 oz. fill level.
-
Page 11: Caring For Your Brewer
HAVE QUESTIONS? WE’RE HERE TO HELP! room temperature for at least 2 hours before powering on. Keurig is committed to your satisfaction. If you have questions, just give us a call to have them answered quickly without leaving the comfort of your home. -
Page 12: Section 3 Troubleshooting
3 | TROUBLESHOOTING TROUBLESHOOTING BREWER DOES NOT HAVE POWER brew. If the brewer loses power during the brew process, the brewer may need to be reset when power is restored. To reset, simply lift and lower the Handle. • Make sure the Power Button has been pressed. The Add Water Indicator should flash blue after pushing the Power Button. -
Page 13: Section 4 Warranty
Keurig® brewer. Any damage to or malfunction of your obtain an Authorization to Return number (ATR). Keurig® brewers returned without an ATR brewer resulting from the use of non Keurig® K-Cup® pods and accessories may not be number will be returned to the sender without servicing. -
Page 14: Section 5 Helpful Hints
Your brewer makes one fresh beverage at a time. You will need to add fresh water caught in the Drip Tray. Be sure to empty the Drip Tray when the red Drip Tray each time you brew. Unlike other Keurig® brewers, the K15 does not store water in Overflow Indicator pops up. - Page 15 (mise CAPSULE DE CHOCOLAT CHAUD incendies, des chocs électriques ou OU POUR UNE AUTRE BOISSON clientèle de Keurig pour signaler à la terre) de la fiche du cordon des blessures. DE SPÉCIALITÉ, PROCÉDEZ À tout mauvais fonctionnement ou d’alimentation, ni utiliser...
- Page 16 TABLE DES MATIÈRES DU GUIDE D’UTILISATION ou d’un comptoir pour éviter qu’un pointues qui perforent les capsules, enfant puisse le saisir ou que quelqu’un KEURIG® SÉRIE CLASSIQUE | une au-dessus du support à capsules trébuche accidentellement et et l’autre en dessous. Pour éviter tout (3) la rallonge doit être munie d’une prise...
- Page 17 ARRÊT AUTOMATIQUE Cette fonction de sécurité permet à votre système d'infusion de s’éteindre automatiquement SYSTÈME D'INFUSION MODÈLE K15 durant toute étape d’inactivité pendant plus de 90 secondes. Appuyez sur le bouton de mise en marche pour rallumer le système. Si le système d'infusion s’éteint lorsque le Guide de niveau d’eau...
- Page 18 CONSEILS RAPIDES ET CHOSES À FAIRE À FAIRE Enregistrez votre système d'infusion à Keurig.ca. Nous vous enverrons un « remerciement » spécial quand vous le ferez. Abonnez-vous à l'infolettre pour obtenir des rabais sur vos achats de capsules de marque Keurig® sur Keurig.ca...
- Page 19 1 | COMMENÇONS À INFUSER! NETTOYAGE INITIAL ET PREMIÈRE INFUSION Retirez tout le ruban adhésif et le carton. Appuyez sur le bouton de mise en marche. Pour mesurer l’eau avec exactitude, ne Soulevez la poignée. L’eau commence à Branchez le cordon d’alimentation dans L’indicateur Ajouter de l’eau clignotera remplissez pas le réservoir si la poignée est s’écouler du réservoir d’eau froide dans le...
- Page 20 1 | COMMENÇONS À INFUSER! NETTOYAGE INITIAL ET PREMIÈRE INFUSION Attendez que toute l’eau se soit écoulée Le bouton INFUSION clignotera en bleu. À titre de dispositif de sécurité, le système d'infusion s’éteint automatiquement après 90 secondes. Si vous (5 secondes) dans le système d'infusion Appuyez sur le bouton INFUSION.
- Page 21 2 | CONSEILS ET ENTRETIEN ENTRETIEN DE VOTRE SYSTÈME D'INFUSION Le nettoyage régulier des éléments externes du système NETTOYAGE DU RÉSERVOIR D’EAU FROIDE d'infusion est recommandé. Il est normal qu’au fil du temps une décoloration, des salissures ou des taches apparaissent •...
- Page 22 2 | CONSEILS ET ENTRETIEN ENTRETIEN DE VOTRE SYSTÈME D'INFUSION NETTOYAGE DE L’ASSEMBLAGE Pour enlever l’assemblage du support à Pour remettre l’entonnoir, enclenchez-le de Pour remettre l’assemblage du support ® ® ® ® DU SUPPORT À CAPSULE K-CUP capsule K-Cup du système d'infusion, nouveau dans le support à...
- Page 23 30 minutes avant de continuer le rinçage. ÉTAPE 1 : PREMIER RINÇAGE AVEC LA SOLUTION DE DÉTARTRAGE • Mettez votre système d'infusion en marche. • Versez un tiers (136 ml (4,6 oz)) de la solution de détartrage Keurig ® dans le réservoir d’eau froide, puis ajoutez de l’eau fraîche jusqu’au niveau de remplissage de 296 ml (10 oz).
- Page 24 AVEZ-VOUS DES QUESTIONS? NOUS SOMMES LÀ POUR VOUS AIDER! reposer à température ambiante pendant au moins deux heures avant de le mettre Keurig s’engage à assurer votre satisfaction. Si vous avez des questions, sous tension. appelez-nous pour obtenir rapidement des réponses sans quitter le confort de votre domicile.
- Page 25 3 | DÉPANNAGE DÉPANNAGE LE SYSTÈME D'INFUSION NE S'ALLUME PAS le processus d’infusion, il se peut que vous deviez réinitialiser le système d'infusion lorsque l’alimentation est restaurée. Pour réinitialiser, soulevez et abaissez simplement la poignée. • Assurez-vous d’avoir appuyé sur le bouton de mise en marche. L’indicateur Ajouter de l’eau devrait clignoter en bleu après avoir appuyé...
- Page 26 Keurig ® du service à la clientèle de Keurig pour obtenir un numéro d’autorisation de retour (NAR). . Tout dommage ou ®...
- Page 27 L’EAU APPROPRIÉE FAIT TOUTE LA DIFFÉRENCE Pour le meilleur café, thé ou chocolat chaud, Keurig recommande d’utiliser de l’eau en ARRÊT AUTOMATIQUE bouteille ou filtrée. Nous déconseillons d’utiliser de l’eau distillée ou de l’eau d’osmose Cette fonction de sécurité...
- Page 28 Keurig Green Mountain, Inc. 33 Coffee Lane Waterbur y, VT 05676, É.-U. 1.800.361.5628 P/N | Pièce n° | Pieza n. PT0000001012 Rév. A 12/15...