
Related Manuals for Invacare Comet Series PRO


Summary of Contents for Invacare Comet Series PRO
- Page 1 Invacare® Comet Series ALPINE+ ULTRA Comet , Comet , Comet en Scooter User Manual This manual MUST be given to the user of the product. BEFORE using this product, read this manual and save for future reference.
- Page 2 All rights reserved. Republication, duplication or modification in whole or in part is prohibited without prior written permission from Invacare. Trademarks are identified by ™ and ®. All trademarks are owned by or licensed to Invacare Corporation or its subsidiaries unless otherwise noted.
-
Page 3: Table Of Contents
4.6 Adjusting backrest angle ......23 Contents 4.7 Adjusting the lordosis support (Comet ULTRA only) ..24 4.8 Adjusting the headrest . - Page 4 6.13 Switching the low speed mode on and off ... . 36 11 Troubleshooting ....... . 52 6.14 Activating and deactivating curve control during bend 11.1 Diagnosis and fault repair .
-
Page 5: General
If you find that the font size in the print version of the user manual damage to property if it is not avoided. is difficult to read, you can download it as a pdf from the Invacare Gives useful tips, recommendations and information website (see back page of this manual). -
Page 6: Regulations
The fact that we estimate a service life for this product does not constitute an additional warranty. 1.8 Limitation of liability Invacare accepts no liability for damage arising from: • Non-compliance with the user manual •... -
Page 7: Safety
Safety 2 Safety WARNING! Risk of injury if the power is switched off while the mobility device is in motion, due to it coming 2.1 General safety notes to an abrupt, sharp stop – If you have to brake in an emergency, simply release WARNING! the drive lever and allow the mobility device to come Risk of injury if mobility device is used in any... -
Page 8: Safety Information On The Electrical System
– Do not connect any electric devices to your mobility to 12 Technical data, page 55). device that are not expressly certified by Invacare for – The mobility device is only designed for use by a single this purpose. Have all electrical installations done by occupant whose maximum weight does not exceed your authorized Invacare dealer. - Page 9 Safety WARNING! WARNING! Risk of death, serious injury or damage when Risk of death, serious injury, or damage carrying along oxygen systems Corroded electrical components due to water or liquid Textiles and other materials that normally would not exposure can result in death, serious injury, or damage. –...
-
Page 10: Safety Information On Electromagnetic Interference
Invacare® Comet Series WARNING! WARNING! Risk of death or serious injury Risk of malfunction due to electromagnetic Electric shock can cause death or serious injury interference – To avoid electric shock, inspect plug and cord for – Do not switch on or operate portable transceivers or cuts and/or frayed wires. -
Page 11: Safety Information On Driving And Freewheel Mode
Safety 2.4 Safety information on driving and freewheel WARNING! mode Risk of injury if the mobility device tips over (continued) WARNING! – Never use the mobility device to transport more than Risk of injury if the mobility device tips over one person. -
Page 12: Safety Information With Regard To Care And Maintenance
– DO NOT attempt to carry out maintenance work process pay increased attention to the tip stability of that is not described in this user manual. Such repair the mobility device. and/or service MUST be performed by a qualified technician. Contact a provider or Invacare technician. 1603455-A... -
Page 13: Safety Information Regarding Changes And Modifications To The Mobility Device
Seating systems, additions and accessory parts which which result from unnoticed wear, it is important that have not been approved by Invacare for use with this mobility device undergoes an inspection once this mobility device can affect the tipping stability and every year under normal operating conditions (see increase tipping hazards. -
Page 14: Labels On The Product
– The CE marking is invalidated if components or accessories are replaced or added that have not been approved for this product by Invacare. – In this case, the company that adds or replaces the components or accessories is responsible for the... - Page 15 Safety Explanation of symbols on labels Identification of HD version (Comet only). Date of manufacture. Identification of the position of the springs on the chassis This product complies with at the rear (Comet only). Directive 93/42/EEC concerning medical devices. The launch Battery label under the cover date of this product is stated at the rear.
- Page 16 Invacare® Comet Series This symbol indicates the “Drive” position of the coupling lever. In this position the motor is engaged and the motor brakes are operational. You can drive the mobility device. This symbol indicates the “Push” position of the coupling lever.
-
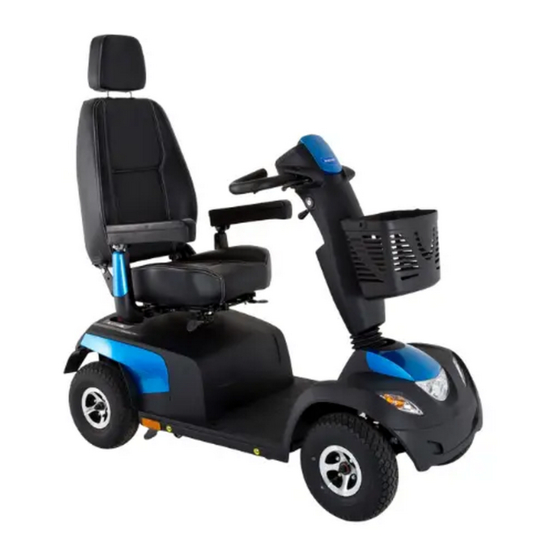
Page 17: Components
Components 3.2 Operating console (LED version) 3 Components Arrangement 3.1 Main parts of the scooter A Disengaging lever A Status display B Unlocking lever for sliding seat rails (front right below seat) B Switching on/off curve control (reduction of speed when driving in a curve) C Unlocking lever for swivelling and removing seat (left under the seat, not visible in picture) - Page 18 Invacare® Comet Series I Low speed mode Reduced driving range. Battery capacity: <25% Recharge the batteries at the end of J Drive lever your journey. Status display Battery reserve = severely restricted Battery capacity: <20% driving range. Recharge batteries immediately! The ON/OFF diode (1) is used as a fault display (status display).
-
Page 19: Operating Console (Lcd Version)
Components 3.3 Operating console (LCD version) J Setting Arrangement K Drive lever Status display A Speed indication A Status display B Fault indication B Switching on/off curve control (reduction of speed when C Curve control indication driving in a curve) D Maintenance indication C Hazard lights E Head light indication... - Page 20 Invacare® Comet Series Battery indication gauge Low battery indication: Every time the scooter is activated or at work when battery capacity is lower than 25%, the electronic system will beep three times. Overdischarge protection: after a certain drive time on reserve battery power the electronic system switches the drive off automatically and brings the scooter to a standstill.
-
Page 21: Setup
– The mobility device is fitted with an individual, device Off and re-enter set-up specifications. Contact multiply adjustable seating system including adjustable Invacare, if mobility device still does not perform to legrests, armrests, a headrest or other options. These correct specifications. -
Page 22: Moving The Seat Position Forwards Or Backwards
Invacare® Comet Series 4.3 Adjusting the armrest width Note that there may be sections in this user manual, which are not relevant to your product, since this manual applies WARNING! to all existing modules (on the date of printing). Serious injury If one of the armrests is adjusted to a width which 4.2 Moving the seat position forwards or... -
Page 23: Adjusting The Armrest Height
Setup 4.4 Adjusting the armrest height Swivel up the armrest. Use the socket wrench to loosen the counternut A. Adjust the screw B until the desired setting angle of the armrest • Phillips screwdriver has been achieved. Re-tighten the counternut. 4.6 Adjusting backrest angle Comfort seat •... -
Page 24: Adjusting The Lordosis Support
Invacare® Comet Series Swelling the lordosis support more Ensure that the air vent screw (1) is closed fully clockwise. Pump air into the lordosis support using the rubber ball (2). The lordosis support will swell outwards more. Swelling the lordosis support less... -
Page 25: Disengaging The Seat To Rotate Or Remove It
Setup Removing the seat To raise headrest, push the release button A and lift headrest up to desired position. Pull the lever A to disengage the seat. To lower headrest, push the release button and lower headrest Hold the seat firmly by the backrest and front edge and remove to the desired position. -
Page 26: Adjusting The Angle Of The Steering Column
Invacare® Comet Series The rocker switch A for adjusting the seat lifter is located on the Push the lever A downwards to adjust the steering column. steering column. Hold the lever and move the steering column forwards or backwards until it fits to your requirements. -
Page 27: Accessories
You can find manufacturer's documentation with regard to correct fitting and use. more information about maintenance work on belts in the service manual, which is available from Invacare. Belt with metal buckle adjustable on one side 5.1.3 Installing the posture belt •... -
Page 28: Rollator Bracket
Check to ensure that the nut is tightened properly on the bolt. 5.2 Rollator bracket Your scooter can be fitted with an optional rollator bracket. Only the following rollators, which have been approved by Invacare, can be transported using this bracket: • Dolomite Jazz 600... -
Page 29: Removing The Rollator Bracket
Accessories 5.2.2 Removing the rollator bracket Dolomite Legacy 600 Invacare Banjo P452E/3 Loosen the screws (1). Pull the rollator bracket out of the fixtures. 5.2.3 Positioning the rear reflector CAUTION! Risk of accident due to poor visibility If you wish to use your mobility device on public roads... -
Page 30: Changing The Colored Shrouds
Invacare® Comet Series Change the armrest shroud Position the rear reflector as shown in the drawing. 5.3 Changing the colored shrouds Change the head shroud It is possible to change the color of your scooter by replacing the colored shrouds. - Page 31 Accessories Change the front side shroud Change the rear side shroud 1603455-A...
-
Page 32: Usage
Invacare® Comet Series 6 Usage 6.1 Getting in and out Pull the detent lever A. The armrest can be swivelled upwards to assist getting in and out. The seat can also be rotated to assist getting in and out. Turn the seat to the side. -
Page 33: Before Driving For The First Time
Usage 6.3.2 Safety information when ascending obstacles Information on turning the seat The detent automatically engages again in eight-turns. WARNING! Risk of tipping over – Never approach obstacles at an angle but at 90 6.2 Before driving for the first time degrees as shown below. -
Page 34: Parking And Stationary
Invacare® Comet Series 6.6 Use on public roads WARNING! Risk of tipping over The wheels may bear the note "Not For Highway Use". However, – Only ever drive downhill at a maximum of 2/3 of the the mobility device may be used on all traffic routes for which it is top speed. -
Page 35: Driving The Scooter
Switch off the scooter (keyswitch). The control system is programmed with standard values Press the unlocking knob A on the disengaging lever. in the works. Your Invacare provider can carry out Push the disengaging lever forwards. programming tailored to fit your requirements. -
Page 36: Switching The Lights On And Off
Invacare® Comet Series 6.9 Switching the lights on and off 6.12 Using the horn Press the Light key. Press the horn key. The light is switched on or off. An acoustic signal sounds. When the light is switched on, the LED beside the key and the Light 6.13 Switching the low speed mode on and off... -
Page 37: Mode Selection
Usage Deactivating curve control Adjusting modes You can adjust the modes to your requirements. Press the setting key for five seconds. The LED beside the key and the symbol for curve control in the LCD display (if fitted) Press the setting key to choose the mode you want to adjust. illuminate. -
Page 38: Adjusting The Display
Invacare® Comet Series display flash as confirmation. The LEDs are numbered as shown below. TIME mode: Press right indicator key to select hour or minutes. The keystroke combinations and LED codes for various options are Press left indicator key to change time. - Page 39 Usage Switch off the controls. Switch on the controls. The Buzzer Volume setup page illuminates after two seconds. Press and hold both direction indicator keys. Switch on the controls. Wait two seconds until the appropriate flash code displays on the battery charge display, then release the keys. Do not hold the keystroke combination down for more than five seconds.
- Page 40 Invacare® Comet Series Adjusting backlight (only LCD display) Adjusting time setup (only LCD display) Press the indicator keys A or B to adjust the backlight intensity. Press the indicator keys A or B to adjust the time setup. Press Setting mode key E for saving and enter the next setup Press Setting mode key E for saving.
-
Page 41: Controls System
16 hours minimum, neglecting the charge A defective main fuse may be replaced only after checking complete display! the entire electrical system. A specialized Invacare provider • Try to provide a 24 hour charge once a week to make sure that must perform the replacement. -
Page 42: How To Charge The Batteries
– Do not use the battery charger if it has been dropped be left unattended during charging. All charging devices which or damaged. are supplied by Invacare comply with these requirements. • You cannot overcharge the batteries when using the charger... -
Page 43: How To Disconnect The Batteries After Charging
Controls system 7.2.4 How to disconnect the batteries after charging • Pay attention to the Battery Charge Indicator! Charge the batteries when the Battery Charge Indicator shows that battery Disconnect the battery charger from the power supply. charge is low. Disconnect the battery charger from the scooter. -
Page 44: Transporting Batteries
Invacare® Comet Series • 7.2.9 Removing the batteries The depth of discharge affects the cycle life. The harder a battery has to work, the shorter is its life expectancy. Remove seat. Examples: Remove battery and motor compartment cover. – One deep discharge stresses the same as 6 normal cycles (green /orange display off). - Page 45 • Wash all objects that have come into contact with acid with lots of water. Disposing of dead or damaged batteries correctly Dead or damaged batteries can be given back to your provider or directly to Invacare. 1603455-A...
-
Page 46: Transport
Invacare® Comet Series 8.2 Transferring the mobility device to a vehicle 8 Transport WARNING! 8.1 Transport - General information The mobility device is at risk of tipping over if it is transferred to a vehicle while the user is still... -
Page 47: Transporting The Mobility Device Without Occupant
Invacare strongly recommends that you additionally disconnect or remove the batteries. Refer to Removing the batteries. • Invacare strongly recommends securing the mobility device to the floor of the transporting vehicle. 1603455-A... -
Page 48: Maintenance
Invacare® Comet Series be found in the service manual for this device, which can be obtained 9 Maintenance from Invacare. That manual, however, is intended to be used by trained and authorized service technicians, and describes tasks which 9.1 Maintenance introduction are not intended to be performed by the user. -
Page 49: Wheels And Tires
Maintenance Weekly If inspection Item Inspection check is not passed If inspection is not Drive wheels Check that the drive wheels Contact your Item Inspection check passed rotate without wobbling. It is provider. Armrests/side Check that armrests Tighten the screw or easiest to have someone stand parts are firmly attached... -
Page 50: Long-Term Storage
Re-connect the battery supply to the power module. you need to prepare it for storage to ensure a longer life for your • The batteries must be charged before use. mobility device and batteries. • Have the mobility device checked by an authorized Invacare provider. 1603455-A... -
Page 51: After Use
Electric components and printed circuit boards are disposed of as electronic scrap. • Exhausted or damaged batteries can be returned to your medical equipment supplier or Invacare. • Disposal must be carried out in accordance with the respective national legal provisions. -
Page 52: Troubleshooting
Invacare® Comet Series LED console 11 Troubleshooting 11.1 Diagnosis and fault repair The electronic system offers diagnostic information to support the technician during the recognition and rectification of faults on the scooter. If there is a fault, the status display (1) flashes several times, pauses, The electronic system reacts differently depending on the seriousness then flashes again. -
Page 53: Error Codes And Diagnostic Codes
Stops driving Ensure that the disengaging lever is in the engaged position. • There is a defect in the braking coil or in the cabling. Check the magnetic brake and cabling for open or short-circuited circuitry. Contact your Invacare provider. 1603455-A... - Page 54 Check the cabling for open or short-circuited circuitry. • Potentiometer is not correctly adjusted and must be replaced. Contact your Invacare provider. • Motor voltage error Stops driving The motor or its cabling is defective. Check the cabling for open or short-circuited circuitry.
-
Page 55: Technical Data
Technical data 12 Technical data 12.1 Technical specifications The technical information provided hereafter applies to a standard configuration or represents maximum achievable values. These can change if accessories are added. The precise changes to these values are detailed in the sections for the respective accessories. Note that in some cases the measured values may vary up to ±... - Page 56 Invacare® Comet Series ULTRA ALPINE+ Electrical system Comet Comet / Comet • • Motor 10 km/h: S1: 550 W, Maxpeak 1300 W 10 km/h: S1 650 W, Maxpeak 1800 W • 12.8 km/h: S1: 550 W, Maxpeak 1500 W •...
- Page 57 Technical data Dimensions according to ISO 7176–15 ALPINE+ ULTRA Comet Comet Comet • Total length 1450 mm • Drive unit width 665 mm ... 685 mm • Total width (armrest adjustment 730 mm ... 840 mm range) • • Total height 1255 mm 1290 mm •...
- Page 58 Invacare® Comet Series ALPINE+ ULTRA Weight Comet Comet Comet • • • Curb weight 136 kg 143 kg 148 kg ALPINE+ ULTRA Component weight Comet Comet Comet • Chassis approx. 63 kg • Batteries approx. 26 kg per battery •...
-
Page 59: Service
It is confirmed by stamp and signature that all jobs listed in the inspection schedule of the service and repair instructions have been properly performed. The list of the inspection jobs to be performed can be found in the service manual which is available through Invacare. - Page 60 Invacare® Comet Series 4th Annual Inspection 5th Annual Inspection Stamp of authorized provider / Date / Signature Stamp of authorized provider / Date / Signature 1603455-A...
- Page 61 Notes...
- Page 62 Notes...
- Page 63 Notes...
- Page 64 Invacare representatives/distributors Australia: Ireland: New Zealand: Canada: Invacare Australia PTY. Ltd. Invacare Canada LP Invacare Ireland Ltd, Invacare New Zealand Ltd 1 Lenton Place, North Rocks NSW 570 Matheson Blvd E. Unit 8 Unit 5 Seatown Business Campus 4 Westfield Place, Mt Wellington 1060...