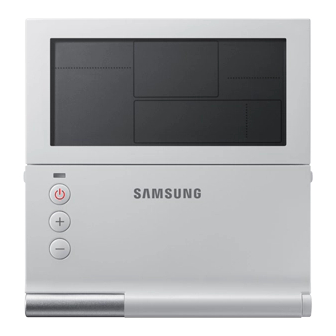
Samsung MWR-WE10 Scheduling Instructions
Wired remote control
Hide thumbs
Also See for MWR-WE10:
- Service manual (36 pages) ,
- Installation manual (25 pages) ,
- User manual (14 pages)
Advertisement
Quick Links
• Throughout the scheduling process, the LEFT and RIGHT buttons
will move forward and backward through each section of settings
• The UP and DOWN buttons will toggle or scroll through the options
in each section.
QS-DVMS-012017A
TECHNICAL BULLETIN:
MWR-WE10, MWR-WE10N, MWR-WE11N
Scheduling Instructions
www.SamsungHVAC.com
888-699-6067
Page
1 of 10
Advertisement

Related Manuals for Samsung MWR-WE10


Summary of Contents for Samsung MWR-WE10
- Page 1 TECHNICAL BULLETIN: MWR-WE10, MWR-WE10N, MWR-WE11N Page 1 of 10 Scheduling Instructions • Throughout the scheduling process, the LEFT and RIGHT buttons will move forward and backward through each section of settings • The UP and DOWN buttons will toggle or scroll through the options in each section.
- Page 2 TECHNICAL BULLETIN: MWR-WE10, MWR-WE10N, MWR-WE11N Page 2 of 10 Scheduling Instructions • This is the standard display while in normal operation. • It indicates that there are no events scheduled on this controller for the connected unit. • If there were events scheduled, a line would display under the days that have scheduling.
- Page 3 TECHNICAL BULLETIN: MWR-WE10, MWR-WE10N, MWR-WE11N Page 3 of 10 Scheduling Instructions • After pressing the RIGHT direction button, weekly will stop flashing and the first “S” (Sunday) will flash. • This is where you tell the controller the days of the week you would like the first event to occur.
- Page 4 • Once Saturday is reached, when the RIGHT button is pressed again you will advance to the next section • If there is a Samsung ERV also connected to the MWR-WE10* controller, UP and DOWN can be pressed to select “AC” or “ERV”...
- Page 5 TECHNICAL BULLETIN: MWR-WE10, MWR-WE10N, MWR-WE11N Page 5 of 10 Scheduling Instructions • The hour section should now be flashing • Press UP or DOWN to adjust the hour of the time for this event to occur • Press RIGHT, the minutes section should be flashing.
- Page 6 TECHNICAL BULLETIN: MWR-WE10, MWR-WE10N, MWR-WE11N Page 6 of 10 Scheduling Instructions • In the top left corner the mode should be flashing • Press UP and DOWN to scroll through all of the mode options (AUTO, COOL, DRY, FAN, HEAT •...
- Page 7 TECHNICAL BULLETIN: MWR-WE10, MWR-WE10N, MWR-WE11N Page 7 of 10 Scheduling Instructions • The temperature should be blinking • Press UP or DOWN to adjust the temperature for this schedule event • Press RIGHT to advance to the fan speed adjustment section •...
- Page 8 TECHNICAL BULLETIN: MWR-WE10, MWR-WE10N, MWR-WE11N Page 8 of 10 Scheduling Instructions • The screen now indicates the days of the week that have events scheduled with a line underneath • Up to 6 events per day can be scheduled • To add more, go through the same steps...
- Page 9 TECHNICAL BULLETIN: MWR-WE10, MWR-WE10N, MWR-WE11N Page 9 of 10 Scheduling Instructions • To review already programmed events, press SCHEDULE • Press RIGHT to select a single day of the week with an event that needs reviewed • Once to this day of the week, press UP to select •...
- Page 10 TECHNICAL BULLETIN: MWR-WE10, MWR-WE10N, MWR-WE11N Page 10 of 10 Scheduling Instructions • When ready to exit scheduling, press ESC to escape www.SamsungHVAC.com...