Table of Contents
Advertisement
Quick Links
Owners &
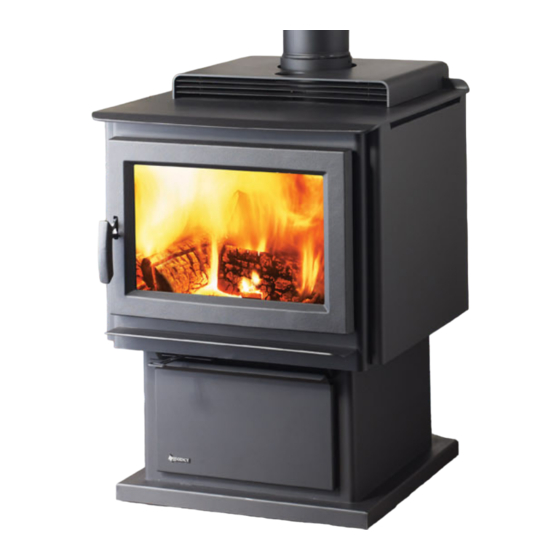
Freestanding Wood Fire
Installation Manual
www.regency-fire.com.au
MODEL:
Kingston F3502B
Installer: Please complete the details on the back cover
and leave this manual with the homeowner.
Homeowner: Please keep these instructions for future reference.
FPI - FIREPLACE PRODUCTS AUSTRALIA PTY LTD.
12.20.16
1-3 CONQUEST WAY HALLAM VICTORIA 3803
919-406b
Advertisement
Table of Contents

Related Manuals for Regency Kingston F3502B


Summary of Contents for Regency Kingston F3502B
- Page 1 Freestanding Wood Fire Installation Manual www.regency-fire.com.au MODEL: Kingston F3502B Installer: Please complete the details on the back cover and leave this manual with the homeowner. Homeowner: Please keep these instructions for future reference. FPI - FIREPLACE PRODUCTS AUSTRALIA PTY LTD.
- Page 2 The pride of workmanship that goes into each of our products will give you years of trouble-free enjoyment. Should you have any questions about your product that are not covered in this manual, please contact the REGENCY DEALER in your area.
-
Page 3: Table Of Contents
Safety Label for Kingston F3502B .........4 First Fire ..............15 Unit Dimensions ............5 Fan Operation ..............16 Residential Installation ...........6 Ash Disposal ..............16 Modular Installation Options ..........6 Safety Guidelines and Warnings .........16 Room Air - Important .............6 Maintenance ..............18 Stove Assembly Prior To Installation ......7... -
Page 4: Safety Label For Kingston F3502B
This is a copy of the data badge that accompanies each F3502B Freestanding Wood Fire. We have printed a copy of the contents here for your review. NOTE: Regency units are constantly being improved. Check the data badge on the unit and if there is a difference, the label on the unit is the correct one. -
Page 5: Unit Dimensions
dimensions UNIT DIMENSIONS F3502B Freestanding Woodfire |... -
Page 6: Residential Installation
WARNING: ONLY USE SPECIFIED COMPONENTS. The following items are required when assembling your Regency Stove. F3502B unit - the Rear Heat Deflector is supplied with the stove, but if you choose not to use it you must use the Airmate instead. -
Page 7: Stove Assembly Prior To Installation
Rear Heat Deflector PRIOR TO Assembly for F3502B 1) Push the INSTALLATION Regency logo The rear heat deflector is supplied with the stove into the two and must be installed unless the optional airmate The F3502B unit requires the pedestal attached holes in the has been selected. -
Page 8: Minimum Clearance To Combustible Materials
419mm Minimum Alcove Clearance to Combustible Materials The Regency Freestanding models have been alcove approved and must be installed with a listed double wall connector to the ceiling level. Note: Minimum alcove ceiling height - 83" (2108 mm) Vertical Termination} H = Maximum depth of alcove - 48"... -
Page 9: Thru-Wall Installation
installation THRU-WALL INSTALLATION Minimum vertical of 900mm before any 90˚. If using 45˚, refer to diagram. Horizontal Maximum of 900mm with 6.35mm rise per 0.3m. NOTE: Recommend using 2 - 45º instead of 90º to improve draft and performance (as per diagram). 6"... - Page 10 installation FLOOR PROTECTION A combustible floor must be protected by a non-combustible material (ie. tile, concrete board, or as defined by local codes) extending beneath the heater as follows: From sides : 200mm From Front : 300mm (from Glass) From Back of Appliance: 12 mm 12mm from outer rear heat shield to edge of cement sheet.
-
Page 11: Step-By-Step
installation STEP-BY-STEP 8. To complete your flue installation, install the flue pipe from the stove’s flue collar to the flue FLUE AND CONNECTOR support device. INSTALLATION 9. If you are using a horizontal connector, the flue connector should be as high as possible Note: These are a generic set of flue instal- while still maintaining the 457mm minimum lation instructions. -
Page 12: Stainless Steel Smoke Deflector Installation / Replacement
installation STAINLESS STEEL SMOKE DEFLECTOR INSTALLATION / REPLACEMENT: The stainless smoke deflector is located in the upper front area of the firebox. The deflector is held in place with 2 bolts Prior to the first fire, ensure deflector is seated properly and secured with 2 hand tightened bolts. Smoke deflector installed with 2 bolts. -
Page 13: Brick Installation
installation BRICK INSTALLATION Firebrick is included to extend the life of your stove and radiate heat more evenly. Install all firebricks per the diagram below and place in their correct positions. Do not use a grate. 1. Remove box of firebricks from inside unit. 2. -
Page 14: Fan Installation
installation FAN INSTALLATION Fan assembly for use only with the room heater marked to indicate such use. FAN INSTALLATION FAN OPERATION (240V FAN) AUTOMATIC 1) Remove the two screws from the top of the fan housing. To operate the fan automatically, push the bottom switch on the side of the fan housing to "AUTO"... -
Page 15: Operating Instructions
3. With the catalytic by-pass damper still in the fully draft - slide to the left to open, and to decrease Regency Stove causing a draft down your flue. open position, add two or three seasoned logs - slide to the right closed. The F3502B unit has If this occurs, slightly open a window near your to your fire in front to back configuration. -
Page 16: Fan Operation
Switching from "AUTO" to "MAN" or "HIGH" to 7. Your Regency stove can be very hot. You may be "LOW" may be done anytime. seriously burned if you touch the stove while it is... -
Page 17: Troubleshooting Guide
maintenance DO NOT BURN (WILL VOID WARRANTY): DO NOT BURN GARBAGE OR FLAM- • Treated wood 14. Do not store any fuel closer than 0.6m from your MABLE LIQUIDS SUCH AS GASO- • Tea Tree unit. Do not place wood, paper, furniture, drapes LINE, NAPTHA OR ENGINE OIL. -
Page 18: Maintenance
When wood is burned slowly, it produces tar and If the door gasket requires replacement 5/8" diameter other organic vapours combine with moisture to material must be used. Regency uses a gasket rope form creosote. The creosote vapours condense in 5/8" Medium Density (Part #846-530). A proper high the relatively cool chimney flue of a slow burning temperature gasket adhesive is required. -
Page 19: Catalytic Combustor
maintenance CATALYTIC COMBUSTOR ACHIEVING AND MAINTAINING CATALYST LIGHT-OFF: Step 1: Light the stove in accordance with instructions within this manual. The temperature in the stove and the gases entering the combustor must Step 2: With smoke routed through the catalyst (by-pass closed) be raised to between 260C to 371C for catalytic activity to be initiated. - Page 20 NOTE: Replacement combustors can be retrieved from Applied Ceramics or Contact your local Regency Dealer for details. DO NOT OPERATE THE APPLIANCE IF COMBUSTOR BECOMES INACTIVE - DO NOT OPERATE WITHOUT COMBUSTOR.
-
Page 21: Bypass Door Gasket Replacement
maintenance BYPASS DOOR GASKET REPLACEMENT 4. Slide bypass door assembly forward, lower complete assembly with care. 1. Allow the stove to burn out and cool down, until cool to touch. Lift lid on bypass door assembly to reveal gasket. 2. Open stove door to access bypass door. 5. -
Page 22: Secondary Air Tube Removal / Installation
maintenance SECONDARY AIR TUBE REMOVAL / BYPASS DOOR BOLT BRACKET ASSEMBLY INSTALLATION REPLACEMENT 1. Allow the stove to burn out and cool down, until cool to touch. If any of the bolts used to secure the bypass door become damaged - the 2. -
Page 23: Door Catch Adjustment
maintenance DOOR CATCH DOOR HINGE ADJUSTMENT ADJUSTMENT After a few fires, the door catch may require adjustment to renew a tight seal, If the door hinge ever requires adjustement, ensure that the bolt is put on as the door gasket will compress. Removal of a shim, shown in the diagram hand tight and tightened a further 1/2 turn using a wrench. -
Page 24: F3502B Stove Main Assembly
Flame shield and mixer 156-241 Removable Cast Handle 815-557 Rear Deflector 042-016 L/R stainless steel firebox filler 042-017 Gasket-Firebox Floor 051-085 Gasket Bypass Frame 948-223 Regency Logo Plate 051-510 Bypass Frame 3 Bolt Assembly (each) 919-552 Manual 24 | F3502B Freestanding Woodfire... -
Page 25: F3502B Stove Brick Layout
parts list F3502B STOVE BRICK LAYOUT 042-960 Brick Set Complete Fire bricks Quantity Size 114mm x 229mm 51mm x 229mm 89mm x 114mm 44mm x 114mm 114mm x 2194mm 44mm x 227mm 802-146 1.750 x 9.000 BRICK 802-165 7.375 x 4.500 CUT BRICK 802-128 1.875 x 4.500 BRICK 802-147... -
Page 26: Door Assembly
parts list DOOR ASSEMBLY Part # Description Part # Description 042-201 Door cast black (F3502B) 846-530 5/8" Medium Door gasket kit 106-541/P Aligner assembly 042-021 Gasket bracket 156-514 Removable cast handle assembly 904-513 Hex bolt 1/4-20 x 3/4 LG. 940-416/P Door glass 904-525 Washer 1/4"... - Page 27 notes F3502B Freestanding Woodfire |...
-
Page 28: Warranty
FPI Fireplace Products International Ltd. (“the manufacturer”) through its wholly owned subsidiary, Fireplace Products Australia Pty Ltd (for Australia and New Zealand customers) and sold under the Regency® brand of fireplace products (collectively referred to herein as “FPI”), extends this Limited Warranty to the original purchaser of this appliance provided the product remains in the original place of installation. - Page 29 Unit must be installed according to all manufacturers’ instructions as per the manual. All Local and National required codes must be met. The installer is responsible to ensure the unit is operating as designed at the time of installation. Revision Date: December 2016 Regency Wood Products Warranty F3502B Freestanding Woodfire |...
- Page 30 Products made or provided by other manufacturers and used in conjunction with the FPI appliance without prior authorisation from FPI may void this warranty. INCORRECT INSTALLATION IS NOT COVERED BY WARRANTY. A SERVICE OR CALLOUT FEE WILL BE CHARGED IN THESE CIRCUMSTANCES. Revision Date: November 2016 Regency Wood Products Warranty 30 | F3502B Freestanding Woodfire...
- Page 31 (including negligence), statute or otherwise. (b) Loss means any expense, cost or damage of any kind and includes Consequential Loss and a fine or penalty imposed by a statutory or other authority. Revision Date: December 2016 Regency Wood Products Warranty F3502B Freestanding Woodfire |...
- Page 32 Product Registration and Customer Support: Thank you for choosing a Regency Fireplace. Regency strives to be a world leader in the design, manufacture, and marketing of hearth products. To provide the best support for your product, we request that you complete a product registration form at http://www.regency-fire.com.au/Customer-Care/Warranty-Registration.aspx...
- Page 33 Product Registration and Customer Support: Thank you for choosing a Regency Fireplace. Regency strives to be a world leader in the design, manufacture, and marketing of hearth products. To provide the best support for your product, we request that you complete a product registration form found on our Web Site under Customer Care within ninety (90) days of purchase.
- Page 34 34 | F3502B Freestanding Woodfire...
- Page 35 Warranty (first six (6) years). Regency Fireplace Products will replace, at no charge to the consumer - 'one' only, VERSAGRID CATALYTIC CONVERTER that ceases to function within three (3) years from the date of purchase by the original consumer, provided that the following conditions are met: (1) A copy of the original invoice that include place and date of purchase must be submitted with the warranty claim.
- Page 36 Dealer Name & Address: ______________________________________________ ___________________________________________________________________ Installer: ___________________________________________________________ Phone #: ___________________________________________________________ Date Installed: ______________________________________________________ Serial No.: __________________________________________________________ Regency is a trademark of FPI Fireplace Products International Ltd. © Copyright 2016, FPI Fireplace Products International Ltd. All rights reserved. Printed in Canada...