Table of Contents
Advertisement
Quick Links
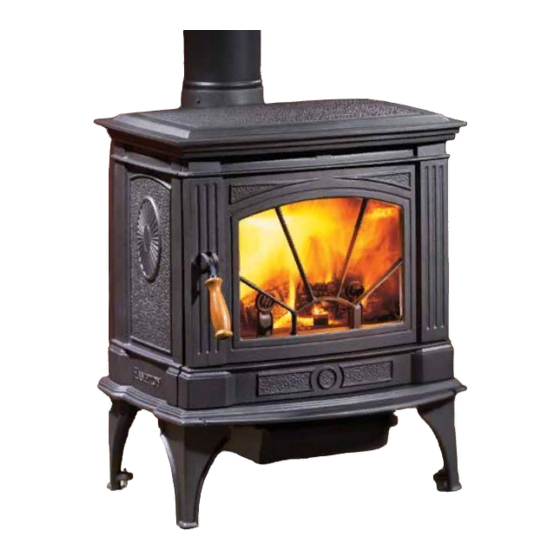
Freestanding Woodstove
Owners &
Installation Manual
www.hampton-fire.com
French Manual:
-http://ow.ly/ZvnBd
Manuel en Français
-http://ow.ly/ZvnBd
MODEL:
H200
Tested by:
Installer: Please complete the details on the back cover
and leave this manual with the homeowner.
Homeowner: Please keep these instructions for future reference.
919-547b
FPI FIREPLACE PRODUCTS INTERNATIONAL LTD. 6988 Venture St., Delta, BC Canada, V4G 1H4
12.29.16
Advertisement
Table of Contents

Related Manuals for Regency H200


Summary of Contents for Regency H200
- Page 1 French Manual: -http://ow.ly/ZvnBd Manuel en Français -http://ow.ly/ZvnBd MODEL: H200 Tested by: Installer: Please complete the details on the back cover and leave this manual with the homeowner. Homeowner: Please keep these instructions for future reference. 919-547b FPI FIREPLACE PRODUCTS INTERNATIONAL LTD. 6988 Venture St., Delta, BC Canada, V4G 1H4...
- Page 2 The following statements are required by the Environmental Protection Agency: “This manual describes the installation and operation of the Regency H200 wood heater. This heater meets the 2015 U.S. Environmental Protection Agency’s crib wood emission limits for wood heaters. Under specific test conditions this heater has been shown to deliver heat at rates ranging from 10,900 BTU/hr. to 19,400 BTU/hr.”...
-
Page 3: Table Of Contents
H200 Main Assembly ...........30 Recommended Heights For Woodstove Flue ....15 H200 Door Assembly ...........32 Mobile Home Installation ..........16 H200 Ash Drawer Assembly ........33 Listed Components For Mobile Home Installation ..17 H200 Fan Assembly ............34 Brick Installation ............18 Door Removal ..............18 Optional Short Leg Installation ........18... -
Page 4: Safety Label
ONLY WITH DOOR CLOSED - OPEN FEED DOOR TO FEED FIRE ONLY. DO NOT USE GRATE OR ELEVATE FIRE. BUILD WOOD MODÈLE : POÊLE À BOIS AUTOPORTANT EN FONTE HAMPTON - H200 FIRE DIRECTLY ON HEARTH. DO NOT OVERFIRE - IF HEATER OR CHIMNEY CONNECTOR GLOWS YOU ARE OVERFIRING. -
Page 5: Unit Dimensions With Standard Legs
UNIT DIMENSIONS WITH STANDARD LEGS 20-1/2” (522mm) 23-7/8” (606mm) 16” (406mm) 21 533 ” ( 22-1/8” (562mm) 15” (380mm) Hampton® H200 Cast Freestanding Woodstove... -
Page 6: Unit Dimensions With Optional Short Legs
UNIT DIMENSIONS WITH OPTIONAL SHORT LEGS 23-7/8” (606mm) 20-1/2” (522mm) 20-1/2” (522mm) 21” (533mm) 23-3/4” (604mm) 16-5/8” (421mm) Hampton® H200 Cast Freestanding Woodstove... -
Page 7: Installation
2) Bend the tabs on the rear heat shield inwards 90 degrees. Draft Control Lever Bend tabs inwards 90 degrees. 3) Slide the tabs on the rear heat shield in between the bolt and washer. Hampton® H200 Cast Freestanding Woodstove... -
Page 8: Residential Installation
Adding the ash drawer will allow for easier removal and transport of ashes. Ash Drawer Helps in reducing the overall height of the unit to accomodate a variety of installations. Using this option prohibits the Short Legs use of the ash drawer. Hampton® H200 Cast Freestanding Woodstove... - Page 9 "C" Vent single wall pipe is not approved for Mobile Home installations (refer to Mobile Home Instructions). Unit (with Heat Shield) From Unit From From Flue Center-Line Corner H200 15" (381mm) 10" (254 mm) 9" (229mm) 27" (686mm) 12-1/8" (308mm) 15-7/8" (403mm) Hampton® H200 Cast Freestanding Woodstove...
-
Page 10: Minimum Alcove Clearance To Combustible Materials
15" (381 mm) max. 9" (228 mm) Note: Floor Protection must extend 2" (51mm) Min. Mantel Height (from finished floor): 48" (1219 mm) to each side of the elbow. Max. Mantel Depth: 12" (305 mm) 10 | Hampton® H200 Cast Freestanding Woodstove... -
Page 11: Floor Protection
(hr)(ft)( R = 1/k x T = 1/0.84 x .75 = 0.893. specified R of 0.893. Since proposed system R is greater than required, the system is Thermal Resistance: acceptable. R = (ft )(hr)( )(K) Hampton® H200 Cast Freestanding Woodstove... -
Page 12: Step-By-Step Chimney And Connector Installation
5) Place the storm collar over the flashing, sealing the joints with a silicone caulking. 6) Fasten the raincap with spark screens (if required) to the top of your chimney. 12 | Hampton® H200 Cast Freestanding Woodstove... -
Page 13: Masonry Chimney
This unit is designed to use either 5.5" (140mm) or 6" (152mm) flue liner only within the confines of the masonry chimney as shown. When referencing installation or connection to masonry fireplaces or chimneys, the masonry construction must or shall be code complying. Hampton® H200 Cast Freestanding Woodstove... -
Page 14: Combustible Wall Chimney Connector Pass-Throughs
24 gage minimum sheet metal supports. See that the supports are fastened securely to wall surfaces on all sides. Make sure fasteners used to secure the metal chimney connector do not penetrate chimney flue liner. 14 | Hampton® H200 Cast Freestanding Woodstove... -
Page 15: Recommended Heights For Woodstove Flue
Inadequate draft will cause the appliance to leak smoke into the room through appliance and chimney connector joints. Ensure the heater is installed in areas that are not too close to neighbors or in valleys that would cause unhealthy air quality or nuisance conditions. Hampton® H200 Cast Freestanding Woodstove... -
Page 16: Mobile Home Installation
11) WARNING: DO NOT INSTALL IN A SLEEP- ING ROOM OF A MOBILE HOME. 12) Use silicone to create an effective vapour barrier at the location where the chimney or other component penetrates to the exterior of the structure. 16 | Hampton® H200 Cast Freestanding Woodstove... -
Page 17: Listed Components For Mobile Home Installation
LISTED COMPONENTS FOR MOBILE HOME INSTALLATION The Hampton H200 Cast Freestanding unit is approved for installation in a Mobile Home if one of the following pipe systems is used. AMERI-TECHS U.S. Installation* Canadian Installations* Qty.Part # Description 6DCC Connector... -
Page 18: Brick Installation
7) Place cast lid back on top of stove. 8) Re-install fan, if removed. 9) Place decal 918-700 (included with cast legs) on the back of the stove near the serial number decal. 18 | Hampton® H200 Cast Freestanding Woodstove... -
Page 19: Optional Blower/Fan Installation
An optional blower is available for the Hampton OPTIONAL BLOWER/FAN INSTALLATION H200. The blower is factory assembled, wired and ready for attachment to the stove. 1) Remove fan cover plate from back shield 4) Hook fan over the bolts. -
Page 20: Optional Side Shelf Installation
Gusset Side Casting Front Casting Left side of stove shown. Left Bracket 5) Place top back on stove. Bracket Cut-Out 3) Remove stove top. 20 | Hampton® H200 Cast Freestanding Woodstove... -
Page 21: Optional Ash Drawer Kit Installation
6) Push the ash plug into the hole inside the firebox and re-install the on the underside of the firebox) by removing the 2 nuts and bolts bricks and andirons. holding the 2 plates together from underneath the stove. Ash Plug Hampton® H200 Cast Freestanding Woodstove... -
Page 22: Operating Instructions
Two dry pieces banged together sound hollow; wet pieces sound solid and dull. • Dry wood weighs much less than wet wood. • Split a piece of wood. If the exposed surface feels damp, the wood is too wet to burn. 22 | Hampton® H200 Cast Freestanding Woodstove... -
Page 23: Operating Instructions
12) Before opening your door to reload, open open for too long. draft fully for approximately 10 to 15 seconds until fire has been re-established. This will minimize any smoking. How to Light & Maintain a Wood Stove Fire Hampton® H200 Cast Freestanding Woodstove... -
Page 24: Safety Guidelines And Warnings
11) Open the draft control fully for 10 to 15 seconds prior to slowly opening the door when refuelling the fire. 12) Do not connect your unit to any air distribu- 24 | Hampton® H200 Cast Freestanding Woodstove... -
Page 25: Ash Disposal
3) To remove the drawer, slide it out. When the drawer is completely out, slide the cover plate over the ash drawer and carry away. Pull out Ash Drawer Hampton® H200 Cast Freestanding Woodstove... -
Page 26: Maintenance
WARNING: Things to remember in case of a chimney fire: 1. Close all draft and damper controls. 2. CALL THE FIRE DEPARTMENT. Cleaning & Maintaining Your Wood Stove Glass Retainer 26 | Hampton® H200 Cast Freestanding Woodstove... -
Page 27: Front Door Gasket
Use the 3/16" allen key enclosed in the packaged manual to make this adjustment. Spacer Front of Bracket Handle Hex Head Lock Bolt Remove spacer washers Washer behind screws. Allen Key Hampton® H200 Cast Freestanding Woodstove... -
Page 28: Top Baffle Replacement
1/2" stainless steel hex bolts inside the firebox holding the top baffle assembly and remove. 2) Remove the five (7/16) socket 1/4 x 1" hex bolts from the Firebox Top Assembly and lift off. Top Baffle Removed 28 | Hampton® H200 Cast Freestanding Woodstove... - Page 29 Use only high temperature anti seize lube. (ie. never seize) Check glass for cracks Replace if required. Clean blower motor Disconnect power supply. Remove and clean blower. *DO NOT LUBRICATE* Inspect and clean chimney Annual professional chimney cleaning recommended. Hampton® H200 Cast Freestanding Woodstove...
-
Page 30: Parts List
FIREBOX INNER 22) 200-217 BRACKET HINGE 23) 200-361 FRONT VENTS CHARCOAL GREY 200-365 FRONT VENTS TIMBERLINE BROWN 24) 200-381 FRONT SKIRT CHARCOAL GREY 200-385 FRONT SKIRT TIMBERLINE BROWN 25) 220-042 SKIRT BRACKET (X2) 30 | Hampton® H200 Cast Freestanding Woodstove... - Page 31 Hampton® H200 Cast Freestanding Woodstove...
-
Page 32: H200 Door Assembly
BLACK VARNISH WOODEN HANDLE (CHARCOAL UNITS) 12) 904-018 1/4 FLAT WASHER x 5/8 O.D. 13) 904-525 1/4 LOCK WASHER 14) 904-751 1/4-20 x 4 1/2 HEX HEAD 15) 948-155 HINGE PIN 16) 948-163 CANE BOLT LATCH (LH) 32 | Hampton® H200 Cast Freestanding Woodstove... -
Page 33: H200 Ash Drawer Assembly
H200 ASH DRAWER ASSEMBLY PART# DESCRIPTION 200-911 ASH DRAWER PACKAGE 1) 942-110 ASH PLUG 2) 936-236 1/2" ROPE GASKET 3) 200-232 ASH DRAWER GUIDE RIGHT 4) 200-231 ASH DRAWER GUIDE LEFT 5) 820-249 ASH PLUG TOOL HANDLE Hampton® H200 Cast Freestanding Woodstove... -
Page 34: H200 Fan Assembly
FAN HOUSING FRONT 2) 220-022 FAN HOUSING BOTTOM 3) 220-036 SENSOR MOUNT 4) 200-227 FAN BRACKET RIGHT HAND 5) 200-228 FAN BRACKET LEFT HAND 6) 200-229 FAN HOUSING BACK 7) 910-157 8) 910-142 THERMODISC 34 | Hampton® H200 Cast Freestanding Woodstove... -
Page 35: H200 Fan Assembly
Hampton® H200 Cast Freestanding Woodstove... - Page 36 At all times FPI reserves the right to inspect reported complaints on location in the field claimed to be defective prior to processing or authorizing of any claim. Failure to allow this upon request will void the warranty. Revision Date: December 2016 Regency Wood Products Warranty 36 | Hampton® H200 Cast Freestanding Woodstove...
- Page 37 Freight damages for products or parts are not covered under the terms of the warranty. Products made or provided by other manufacturers and used in conjunction with the FPI appliance without prior authorization from FPI may void this warranty. Revision Date: December 2016 Regency Wood Products Warranty Hampton® H200 Cast Freestanding Woodstove...
- Page 38 Product Registration and Customer Support: Thank you for choosing a Regency Fireplace. Regency strives to be a world leader in the design, manufacture, and marketing of hearth products. To provide the best support for your product, we request that you complete a product registration form at http://www.regency-fire.com/Customer-Care/Warranty-Registration.aspx...
- Page 39 Product Registration and Customer Support: Thank you for choosing a Regency Fireplace. Regency strives to be a world leader in the design, manufacture, and marketing of hearth products. To provide the best support for your product, we request that you complete a product registration form found on our Web Site under Customer Care within ninety (90) days of purchase.
- Page 41 Hampton® H200 Cast Freestanding Woodstove...
- Page 42 42 | Hampton® H200 Cast Freestanding Woodstove...
- Page 44 Installer: Please complete the following information Dealer Name & Address: ______________________________________________ ___________________________________________________________________ Installer: ___________________________________________________________ Phone #: ___________________________________________________________ Date Installed: ______________________________________________________ Serial No.: __________________________________________________________ Hampton is a trademark of FPI Fireplace Products International Ltd. © Copyright 2016, Printed in Canada FPI Fireplace Products International Ltd. All rights reserved.