Table of Contents
Advertisement
Advertisement
Table of Contents

Related Manuals for ReliOn BP300


Summary of Contents for ReliOn BP300
- Page 1 INSTRUCTION MANUAL BP300 Automatic Blood Pressure Monitor Model 7400REL...
-
Page 2: Table Of Contents
TABLE OF CONTENTS Before using the Monitor Introduction ......................3 Safety information....................4 Intended use....................4 Operating the device................4 Risk of electrical shock ................5 Care and maintenance ................5 Operating Instructions Before taking a measurement ..................6 Know your unit......................7 Unit display ......................8 Display symbols ......................9 Irregular heartbeat symbol..............9 Movement error symbol .................9 Average value symbol ................9... -
Page 3: Introduction
® The ReliOn BP300 Automatic Blood Pressure Monitor, Model # 7400REL comes with the following components: • Monitor • Wide Range Cuff • AC Adapter • Instruction Manual printed in English and Spanish • Quick Start Guide Please read this instruction manual thoroughly before using the unit. -
Page 4: Safety Information
SAFETY INFORMATION INTENDED USE This monitor is designed to measure blood pressure and pulse rate of adults within the range of the designated arm cuff, following the directions provided in this instruction manual. The monitor is designed for home use. Read the Safety Information in this instruction manual before using this monitor. -
Page 5: Risk Of Electrical Shock
SAFETY INFORMATION Operate the device only as intended. Do not use the device for any other purpose. Dispose of the device, components and optional accessories according to applicable local regulations. Unlawful disposal may cause environmental pollution. Do not use a cellular phone near the device. It may result in an operational failure. Use only authorized parts and accessories. -
Page 6: Before Taking A Measurement
BEFORE TAKING A MEASUREMENT To ensure a reliable reading follow these recommendations: 1. Avoid eating, drinking alcohol, smoking, exercising, and bathing for 30 minutes before taking a measurement. Rest for at least 15 minutes before taking the measurement. 2. Stress raises blood pressure. Avoid taking measurements during stressful times. 3. -
Page 7: Know Your Unit
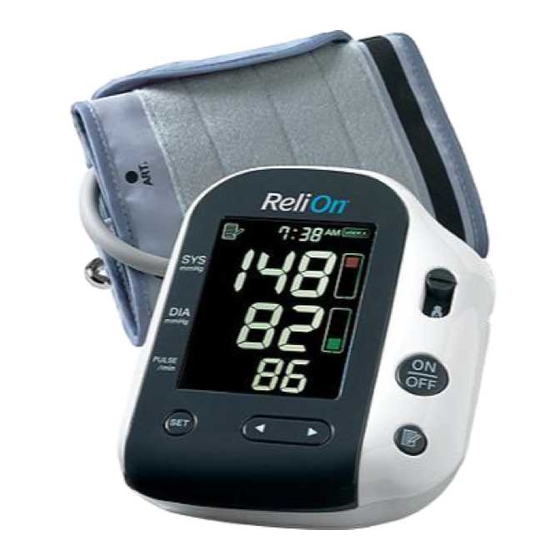
KNOW YOUR UNIT Main Unit: Display Battery compartment USER ID Selection Switch ON/OFF button Memory button Air Jack AC Adapter Jack Up/Down ( ) buttons button Components: Air tube Air plug AC Adapter Wide Range Cuff Instruction Quick Start Manual Guide... -
Page 8: Unit Display
UNIT DISPLAY Date/Time Display Average value symbol USER ID symbol (A/B) Memory symbol Systolic blood pressure Blood pressure level indicator Diastolic blood pressure Deflation symbol Movement error symbol Irregular heartbeat symbol Battery low indicator Pulse display and Memory number Heartbeat symbol... -
Page 9: Display Symbols
DISPLAY SYMBOLS IRREGULAR HEARTBEAT SYMBOL ( When the monitor detects an irregular rhythm two or more times during the measurement, the Irregular Heartbeat Symbol ( ) will appear on the display with the measurement values. An irregular heartbeat rhythm is defined as Normal Heartbeat a rhythm that varies by 25% less or 25% Pulse... -
Page 10: Using The Ac Adapter
USING THE AC ADAPTER IMPORTANT SAFETY INSTRUCTIONS SAVE THESE INSTRUCTIONS - DANGER - TO REDUCE THE RISK OF FIRE OR ELECTRIC SHOCK, CAREFULLY FOLLOW THESE INSTRUCTIONS. For connection to a power supply not in the U.S.A., use an attachment plug adapter of the proper configuration for the power outlet. -
Page 11: To Connect The Ac Adapter
USING THE AC ADAPTER TO CONNECT THE AC ADAPTER 1. Insert the AC Adapter Plug into the AC Adapter Jack on the right side Housing of the monitor as illustrated. 2. Plug the AC Adapter into a 120V AC outlet (60 cycles). Cord TO DISCONNECT THE AC ADAPTER 1. -
Page 12: Battery Installation
BATTERY INSTALLATION 1. Press the hook on the top of the battery cover and lift the cover off in the direction of the arrow. Battery Cover 2. Install 4 “AA” size batteries so the + (positive) and - (negative) polarities match the polarities of the battery compartment as indicated. -
Page 13: Setting The Date And Time
SETTING THE DATE AND TIME Set the monitor to the current date and time before taking a measurement for the first time. 1. TO START THE SETTING Press the SET button to adjust the date and time. The year flashes on the display. 2. - Page 14 SETTING THE DATE AND TIME 3. SETTING THE MONTH Press the Up button ( ) to advance by one month. Press the SET button to set the current month. The day flashes on the display. 4. SETTING THE DAY Press the Up button ( ) to advance by one day.
-
Page 15: Applying The Arm Cuff
APPLYING THE ARM CUFF CAUTION Read all of the information in the instruction manual and any other literature in the box before operating the unit. CAUTION This device is intended for use in measuring blood pressure and pulse rate in the adult population. Do not use this device on infants or persons who cannot express their intentions. -
Page 16: Applying The Cuff On The Right Arm
APPLYING THE ARM CUFF APPLYING THE CUFF ON THE RIGHT ARM When taking a measurement using the right arm, use this instruction for Step 3. Right Arm Apply the cuff to your right upper arm so the arrow and the air tube runs along the inside of your arm. -
Page 17: Taking A Measurement
TAKING A MEASUREMENT The monitor is designed to store the blood pressure and the pulse rate in the memory for two people (USER A or USER B) every time a measurement is completed. 1. Sit on a chair with your feet flat on the floor. Place your arm on a table so the cuff is level with your heart. - Page 18 TAKING A MEASUREMENT 4. Inflation stops automatically and the measurement is started. As the cuff deflates, decreasing numbers appear on the display and the Heartbeat Symbol ( ) flashes. 5. When the measurement is complete, the arm cuff completely deflates. Your blood pressure and pulse rate are displayed. Systolic blood pressure above 139 mmHg Yellow...
- Page 19 TAKING A MEASUREMENT 6. Press the ON/OFF button to turn the monitor off. NOTE: The monitor will automatically turn off after 2 minutes. WARNING Contact your physician for specific information about your blood pressure. Self-diagnosis and treatment using measured results may be dangerous. Follow the instructions of your physician or licensed healthcare provider.
-
Page 20: Special Conditions
TAKING A MEASUREMENT SPECIAL CONDITIONS CAUTION Inflating to a higher pressure than necessary may result in bruising where the cuff is applied. If your systolic pressure is known to be more than 220 mmHg, press and hold the ON/OFF button until the monitor inflates 30 to 40 mmHg higher than your expected systolic pressure, after the cuff starts to inflate. -
Page 21: Using The Memory Function
USING THE MEMORY FUNCTION The monitor automatically stores up to 100 sets of measurement values (blood pressure and pulse rate) for each user (A or B). When 100 sets of measurement values are stored, the oldest record is deleted to save the most recent values. AVERAGING FUNCTION The monitor calculates the average reading based on the three most recent sets of measurement values taken within 10 minutes of the most recent reading. -
Page 22: To Delete All Values Stored In The Memory
USING THE MEMORY FUNCTION 3. Press the Down button ( ) to display the most recent set of measurement values on the screen. The values are displayed from the most recent to the oldest. • The Memory number appears for NOTES: a second before the pulse rate is Alternating display... - Page 23 USING THE MEMORY FUNCTION 2. While holding the Memory button ( ), press the ON/OFF button down for more than 2 seconds until the display appears as it does in the following illustration. 3. Press the ON/OFF button to turn the monitor off. NOTE: The monitor will automatically turn off after 2 minutes.
-
Page 24: Care And Maintenance
CARE AND MAINTENANCE To keep your blood pressure monitor in the best condition and protect the unit from damage, follow the directions listed below: Do not forcefully bend the arm cuff or air tube. Do not fold tightly. Clean the monitor with a soft dry cloth. Do not use any abrasive or volatile cleaners. -
Page 25: Error Indicators
ERROR INDICATORS SYMBOL CAUSE CORRECTION Insert the plug securely. Refer to Air plug disconnected. “Applying the Arm Cuff”. Apply the arm cuff correctly. Refer to Arm cuff not applied correctly. “Applying the Arm Cuff”. Air is leaking from the Replace the cuff with a new one. arm cuff. -
Page 26: Troubleshooting Tips
TROUBLESHOOTING TIPS PROBLEM CAUSES AND SOLUTIONS Replace all four batteries with new ones. No power. Check the battery installation for proper placement No display appears on the unit. of the battery polarities. Blood pressure varies constantly. Many factors including stress, time of day, how you wrap the Measurement values appear too cuff, may affect your blood pressure. -
Page 27: Fcc Statement
FCC STATEMENT Note: POTENTIAL FOR RADIO/TELEVISION INTERFERENCE (for U.S.A. only) This product has been tested and found to comply with the limits for a Class B digital device, pursuant to part 15 of the FCC rules. These limits are designed to provide reasonable protection against harmful interference in a residential installation. -
Page 28: Limited Warranty
PURPOSE. IMPLIED WARRANTIES AND OTHER TERMS THAT MAY BE IMPOSED BY LAW, IF ANY, ARE LIMITED IN DURATION TO THE PERIOD OF THE ABOVE EXPRESS WARRANTY. RELION SHALL NOT BE LIABLE FOR LOSS OF USE OR ANY OTHER SPECIAL, INCIDENTAL, CONSEQUENTIAL OR INDIRECT COSTS, EXPENSES OR DAMAGES. -
Page 29: Specifications
SPECIFICATIONS Model: 7400REL (HEM-8722-WM) Display: LCD Digital Display Measurement Range: Pressure: 0 to 299 mmHg, Pulse: 40 to 180/min. Accuracy/Calibration: Pressure: ±3mmHg or 2% of reading Pulse: ±5% of reading Inflation: Automatic by electric pump Deflation: Automatic pressure release valve Rapid Air Release: Automatic exhaust valve Measurement Method:... - Page 30 Distributed by Wal-Mart Stores, Inc., Bentonville, AR 72716 © 2013 Wal-Mart Stores, Inc. 9494942-9B Made in China...