Vertex Standard EVX-534 Service Manual
Uhf digital/analog transceiver
Hide thumbs
Also See for EVX-534:
- Operating manual (49 pages) ,
- Service manual (30 pages) ,
- Operating manual (52 pages)
Table of Contents
Advertisement
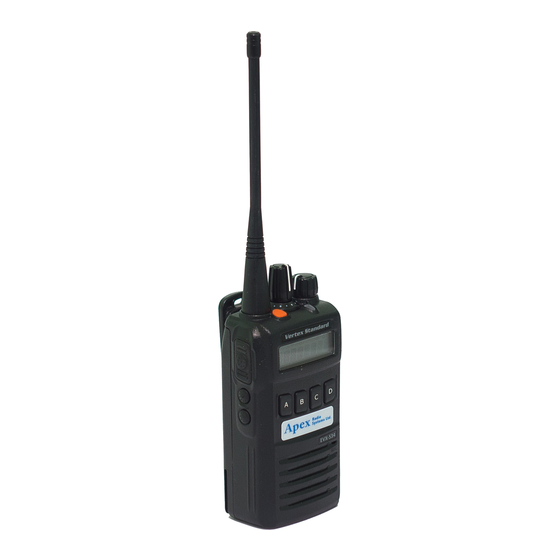
UHF Digital/Analog Transceiver
EVX-534/-539
( Full Dot Matrix LCD Version )
Service Manual
Introduction
This manual provides technical information necessary for servicing the
EVX-534/-539 UHF Hand-Held Digital/Analog Transceiver.
Servicing this equipment requires expertise in handling surface-mount
chip components. Attempts by non-qualified persons to service this equip-
ment may result in permanent damage not covered by the warranty, and
may be illegal in some countries.
Two PCB layout diagrams are provided for each double-sided circuit
board in the transceiver. Each side of is referred to by the type of the ma-
jority of components installed on that side ("leaded" or "chip-only"). In
most cases one side has only chip components, and the other has either a
mixture of both chip and leaded components (trimmers, coils, electrolytic
capacitors, ICs, etc.), or leaded components only.
While we believe the technical information in this manual to be correct,
Vertex Standard assumes no liability for damage that may occur as a result
of typographical or other errors that may be present.
Your cooperation in pointing out any inconsistencies in the technical in-
formation would be appreciated.
This transceiver is assembled using Pb (lead) free solder, based on the RoHS specification.
Only lead-free solder (Alloy Composition: Sn-3.0Ag-0.5Cu) should be used for repairs performed on this appa-
ratus. The solder stated above utilizes the alloy composition required for compliance with the lead-free specifica-
tion, and any solder with the above alloy composition may be used.
Risk of explosion if battery is replaced by an incorrect type. Dispose of used batteries according to the instructions.
EIA (CE) Model .......................................3
EVX-534 ..................................................4
EVX-539 ..................................................5
EVX-534/-539 UHF Service Manual
Important Note
CAUTION
Contents
Parts List ......................................................6
Block Diagram .............................................7
Circuit Description .....................................8
Alignment...................................................10
MAIN Uuit Circuit Diagram ....................21
DISPLAY Uuit Circuit Diagram ..............24
Vertex Standard LMR, Inc.
©
2015 Vertex Standard LMR, Inc.
EC129U90D
A
D
B
C
?
EVX-534
1
A
2
3
ABC
DEF
4
B
5
6
GHI
JKL
MNO
7
PQ
C
CXL
8
9
WX
RS
TUV
YZ
DEL
D
OK
0
#
EVX-539
1
Advertisement
Table of Contents

Related Manuals for Vertex Standard EVX-534


Summary of Contents for Vertex Standard EVX-534
-
Page 1: Table Of Contents
(trimmers, coils, electrolytic capacitors, ICs, etc.), or leaded components only. While we believe the technical information in this manual to be correct, Vertex Standard assumes no liability for damage that may occur as a result EVX-534 EVX-539 of typographical or other errors that may be present. -
Page 2: Specifications Usa (Na) & Except Eia (Ce) Models
Antenna Impedance: 50 ohm (unbalanced) Dimension (W x H x D): 2.3” x 4.4” x 1.5” (58.4 x 112.5 x 37.5 mm) (EVX-534/-539 with FNB-V133LI-UNI) 2.3” x 4.4” x 1.8” (58.4 x 112.5 x 45 mm) (EVX-534/-539 with FNB-V134LI-UNI) Weight (Approx.): 11.0 oz (312 g) (EVX-534 with FNB-V133LI-UNI, Antenna, &... -
Page 3: Eia (Ce) Model
Antenna Impedance: 50 ohm (unbalanced) Dimension (W x H x D): 58.4 x 112.5 x 37.5 mm (EVX-534/-539 with FNB-V133LI-UNI) 58.4 x 112.5 x 45 mm (EVX-534/-539 with FNB-V134LI-UNI) Weight (Approx.): 312 g (EVX-534 with FNB-V133LI-UNI, Antenna, & Belt Clip) 358 g (EVX-534 with FNB-V134LI-UNI, Antenna, &... -
Page 4: Exploded View & Miscellaneous Parts Evx-534
EVX-534 Exploded View & Miscellaneous Parts CB6641000 CB6928000 FRONT CASE SUB ASSY EVX-534 FRONT CASE ASSY Disconnect the Speaker Connector from the MAIN Unit when remove the Front Case of the transceiver. CB6642000 MIC/SP CAP ASSY isconnecTing The peaker onnecTor 1. -
Page 5: Evx-539
BIND HEAD TAPTITE-B M2X5 ( 3 ) U24105001 BIND HEAD TAPTITE-B 2X10 ( 3 ) U24110001 Non-designated parts are available only as part of a designated assembly. U44105001 PAN HEAD TAPTITE-B M2X5 PAN HEAD TAPTITE-B M2X15 ( 3 ) U44115001 EVX-534/-539 UHF Service Manual... -
Page 6: Parts List
19.2MHz TTS27NSC-A7 19.2MHZ H9501380 XF1501 XTAL FILTER 1D50807GQ8 50.85 H1102493 SHIELD CASE COVER (FET) RA125020A SPONGE RUBBER (LIGHT GUIDE) RA1580800 PORON SHEET (16X10) RA1534700 NUT 2 pcs (C065) RA090590A PAN HEAD TAPTITE-B 5 pcs M2X5 U44105001 DISPLAY UNIT CB6927000 BIND HEAD TAPTITE-B 2 pcs 2X10 (3) U24110001 PAN HEAD TAPTITE-B 2 pcs M2X15 (3) U44115001 When replace a chip fuse, use the part of the same type and value. EVX-534/-539 UHF Service Manual... -
Page 7: Block Diagram
Block Diagram EVX-534/-539 UHF Service Manual... -
Page 8: Circuit Description
DINIA). justed audio is amplified by Q1003 (TDA2822L). As a result, the audio signal provides up to 700 mW (@16-ohm, BTL) for the internal speaker, or up to 350 mW (@4-ohm, OTL) for the external speaker. EVX-534/-539 UHF Service Manual... - Page 9 Q1524 (2SC5005) in case of the reception. In the transmission, the output is modulated to the FM (or digi- tal) in the custom IC Q1522 (RODINIA), and then supplied to the transmitter section described previously. EVX-534/-539 UHF Service Manual...
-
Page 10: Alignment
Alignment Introduction Required Test Equipment The EVX-534/-539 series has been aligned at the factory for r Radio Tester with calibrated output level at 600 MHz the specified performance across the entire frequency range r In-line Wattmeter with 5% accuracy at 600 MHz specified. - Page 11 During alignment, you may select the value among dBµV, µV (EMF or PD), or dBm by the “UNIT” box. When perform the RX Tune and SQL alignment, the RF level shows this unit according to this setting. EVX-534/-539 UHF Service Manual...
- Page 12 4. After getting the desired frequency, click the “PTT” button or press the “SPACE” bar to stop transmitting. 5. Click the “OK” button to finish the frequency alignment and save the data. EVX-534/-539 UHF Service Manual...
- Page 13 (ADJ Type) located at the bottom of the screen, as needed. Basic: “Low-edge / band center / high-edge” and select the channel for alignment (Default). Single: Alignment value changes only on the selected chan- nel. All Freq: Alignment value changes on all channels. ê EVX-534/-539 UHF Service Manual...
- Page 14 Normal RSSI Level (Wide/Narrow) Tight RSSI Level (Wide/Narrow) Other alignment items has not extra step; only one step proce- dure. ê 6. Click the “OK” button, then the data will be saved and the alignment is finished. EVX-534/-539 UHF Service Manual...
- Page 15 (ADJ Type) located at the bottom of the screen, as needed. Basic: “Low-edge / band center / high-edge” and select the channel for alignment (Default). Single: Alignment value changes only on the selected chan- nel. All Freq: Alignment value changes on all channels. EVX-534/-539 UHF Service Manual...
- Page 16 Type) located at the bottom of the screen, as needed. Basic: “Low-edge / band center / high-edge” and select the channel for alignment (Default). Single: Alignment value changes only on the selected chan- nel. All Freq: Alignment value changes on all channels. EVX-534/-539 UHF Service Manual...
- Page 17 (ADJ Type) located at the bottom of the screen, as needed. Basic: “Low-edge / band center / high-edge” and select the channel for alignment (Default). Single: Alignment value changes only on the selected chan- nel. All Freq: Alignment value changes on all channels. EVX-534/-539 UHF Service Manual...
- Page 18 5. Click the “OK” button to finish the DCS Deviation alignment and save the data. You may align the deviation level by any DCS code (default: 532) by changing the value of the “DCS Code” box located at the bot- tom of the screen, if needed. EVX-534/-539 UHF Service Manual...
- Page 19 Data” box from the computer’s keyboard 4. After getting the desired deviation, click the “PTT” button or press the “SPACE” bar to stop transmitting. 5. Click the “OK” button to finish the MSK Deviation alignment and save the data. EVX-534/-539 UHF Service Manual...
- Page 20 1. Press the “Seq Tone” button to open the “Sequential Tone De- viation Alignment” window. 2. Entering the desired value in the “New” box from the comput- er’s keyboard. 3. Click the “OK” button to finish the Sequential Tone Deviation alignment and save the data. ê EVX-534/-539 UHF Service Manual...
-
Page 21: Main Uuit Circuit Diagram
MAIN Unit Circuit Diagram ( FR025490B: Interface & Power Supply Sections ) EVX-534/-539 UHF Service Manual... - Page 22 MAIN Unit Circuit Diagram ( FR025490B: Control Section ) EVX-534/-539 UHF Service Manual...
- Page 23 MAIN Unit Circuit Diagram ( FR025490B: RF Section ) EVX-534/-539 UHF Service Manual...
-
Page 24: Display Uuit Circuit Diagram
DISPLAY Unit Circuit Diagram ( FR027620B ) EVX-534/-539 UHF Service Manual... - Page 25 No portion of this manual may be reproduced without the permission of Vertex Standard LMR, Inc. Vertex Standard is a trademark of Vertex Standard LMR, Inc. All other trademarks are the property of their respective owners. ©2015 Vertex Standard LMR, Inc.