Comtech EF Data cdm-570a Revision
Hide thumbs
Also See for cdm-570a:
- Installation and operation manual (682 pages) ,
- Installation and operation manual (624 pages)
Advertisement
Quick Links
Re‐Flashing Your CDM‐570A/570AL Satellite Modem
I.
Introduction: Firmware Files, Naming, Versions, and Formats
1) MAKE SURE TO OPERATE THE CDM‐570A/L WITH ITS LATEST AVAILABLE FIRMWARE.
2) ETHERNET IP FUNCTIONALITY IS AVAILABLE ONLY WHEN THE CDM‐570A/L IS
EQUIPPED WITH THE OPTIONAL IP PACKET PROCESSOR.
The CDM‐570A/L Satellite Modem is factory‐shipped with its latest version of operating firmware. If you
need to update the modem firmware, you may download the update from the Comtech EF Data Web
site (www.comtechefdata.com). You may also receive the firmware update archive file via e‐mail from
Comtech EF Data Product Support.
You may perform the firmware update, without opening the CDM‐570A/L, remotely over satellite (when
the unit is equipped with the optional IP Packet Processor), or by directly connecting a user‐supplied
Microsoft Windows‐based PC to the CDM‐570A/L 'M&C 100' 10/100 Ethernet port (for units without the
optional IP Packet Processor) or the 'Traffic 100' 10/100 Ethernet port (for units equipped with the
optional IP Packet Processor).
Do these steps:
Download the firmware update archive file via the Internet, or acquire the file from Comtech EF
Data Product Support, and transfer the files to the User PC.
Use Windows Command‐line to transfer, via File Transfer Protocol (FTP), the extracted firmware
files from the User PC to the CDM‐570A/L standby firmware image.
Use the CDM‐570A/L front panel or the CDM‐570A HTTP Interface to configure the modem to
operate using the updated firmware image.
To verify the correct firmware number, see Step 1 in the next section of this guide. The firmware
download files are available from Comtech EF Data in two archive file formats: *.exe (self‐extracting)
and *.zip (compressed). Some firewalls will not allow downloading of *.exe files; in this case, download
the *.zip file instead. If applicable, one version prior to the current release is also available for
download.
For additional help with "zipped" file types, refer to the help files provided with the "PKZIP
for Windows", "WinZip", or "ZipCentral" file archiving programs. Comtech EF Data does not
support "PKZIP for DOS" due to file naming conventions.
Re‐Flashing Your CDM‐570A/570AL Satellite Modem
1
FLG‐CDM570A Revision 1
Advertisement

Related Manuals for Comtech EF Data cdm-570a


Summary of Contents for Comtech EF Data cdm-570a
- Page 1 Re‐Flashing Your CDM‐570A/570AL Satellite Modem Introduction: Firmware Files, Naming, Versions, and Formats 1) MAKE SURE TO OPERATE THE CDM‐570A/L WITH ITS LATEST AVAILABLE FIRMWARE. 2) ETHERNET IP FUNCTIONALITY IS AVAILABLE ONLY WHEN THE CDM‐570A/L IS EQUIPPED WITH THE OPTIONAL IP PACKET PROCESSOR. The CDM‐570A/L Satellite Modem is factory‐shipped with its latest version of operating firmware. If you need to update the modem firmware, you may download the update from the Comtech EF Data Web site (www.comtechefdata.com). You may also receive the firmware update archive file via e‐mail from Comtech EF Data Product Support. You may perform the firmware update, without opening the CDM‐570A/L, remotely over satellite (when the unit is equipped with the optional IP Packet Processor), or by directly connecting a user‐supplied Microsoft Windows‐based PC to the CDM‐570A/L ‘M&C 100’ 10/100 Ethernet port (for units without the optional IP Packet Processor) or the ‘Traffic 100’ 10/100 Ethernet port (for units equipped with the optional IP Packet Processor). Do these steps: Download the firmware update archive file via the Internet, or acquire the file from Comtech EF Data Product Support, and transfer the files to the User PC. Use Windows Command‐line to transfer, via File Transfer Protocol (FTP), the extracted firmware files from the User PC to the CDM‐570A/L standby firmware image. Use the CDM‐570A/L front panel or the CDM‐570A HTTP Interface to configure the modem to operate using the updated firmware image. To verify the correct firmware number, see Step 1 in the next section of this guide. The firmware download ...
-
Page 2: Getting Started: Prepare For The Firmware Download
1 Stop Bit Parity=NO Port Flow Control=NONE Display New line Rx/Tx: CR Local Echo=ON C. On the CDM‐570A/L – Turn on/connect the power source. (LEFT) Standard CDM-570A/L AC Unit (RIGHT) Optional CDM-570A/L -48V DC Unit D. Identify the firmware information and Ethernet Traffic (M&C) IP Address using one of the following methods: Re‐Flashing Your CDM‐570A/570AL Satellite Modem 2 FLG‐CDM570A Revision 1 ... - Page 3 Chapter 6. FRONT PANEL OPERATION Chapter 7.5 HTTP (Web Server) INTERFACE Chapter 8. SERIAL‐BASED REMOTE PRODUCT MANAGEMENT Using the CDM‐570A/L Front Panel menus: Base Modem Firmware Info – Use the SELECT: UTIL Firmware Info Image#1 or Image#2 Bulk menu branches, as shown in this example: Bulk#1: MM/DD/YY FW-0020683* #.#.# IP Packet Processor Firmware Info – Use the SELECT: UTIL Firmware Info PaP menu branches, as shown in this example: PaP: MM/DD/YY FW-0020781* #.#.# Ethernet IP Address – Use the CONFIG: Rem Ethernet Address menu branch, as shown in this example: Ether IP Address/Range: 192.168.001.011/24 ◄ ►,▲▼ Using the CDM‐570A HTTP Interface (via the User PC Web Browser – this assumes that you have already noted the Traffic/Management IP Address, which was previously required to ...
- Page 4 Ethernet IP Address – Use the ‘Configuration | LAN’ page to view the IP Address/Mask, as shown in this example: Using the CDM‐570A/L Serial Remote Interface (via the User PC / terminal emulator program): Firmware Info – Use the <0/SWR? (condensed) or <0/FRW? (detailed) remote query. Ethernet Traffic IP Address – Use the <0/IPA? remote query. 2) Next, create a temporary folder (subdirectory) on the User PC for the firmware archive download. Drive letter “c:” is used in these examples. Any valid, writable drive letter can be used. Typical for all tasks: Type the command without quotes, and then press Enter to execute. There are several ways to create a temporary folder on a Windows‐based PC: A. Use the Windows Desktop to create and rename the temporary folder. Right‐click anywhere on the desktop to open the popup submenu, and then select New > Folder to create a temporary folder on the desktop. Right‐click on the new folder and then select “Rename” from the popup submenu. Rename this folder to "temp" or some other convenient, unused name. ...
- Page 5 B. Use Windows Explorer to create and rename the temporary folder. Select File > New > Folder to create a temporary folder. This creates the new folder in the active folder. Right‐click the “New Folder” folder name, and then rename this folder to "temp" or some other convenient, unused name: C. Use the ‘Run’ and ‘Browse’ windows to create and rename the temporary folder. Select [Start] on the Windows taskbar, and then click the Run... icon. This opens the ‘Run’ window. Click [Browse] in the ‘Run’ window. This opens the ’Browse’ window. Click the Create New Folder icon in the ‘Browse’ window. This creates the new folder. Right‐click the “New Folder” folder name, and then rename this folder to “temp” or some other convenient, unused name: D. Use Windows Command‐line to create the temporary folder. First, click [Start] on the Windows taskbar, and then click the Run... icon (or, depending on Windows OS versions prior to Windows 95, click the MS‐DOS Prompt icon from the Main Menu). ...
- Page 6 o For Windows 95 or Windows 98, type “command” (or, for any Windows OS versions later than Windows 98, type “cmd” or “command”): o Alternately, from [Start], select All Programs > Accessories > Command Prompt. o Finally, from the Command‐line prompt (c:\>), type “mkdir temp” or “md temp” (mkdir and md stand for make directory), and then click [OK]: There should now be a "temp" folder created and available for placement of the firmware file download. Re‐Flashing Your CDM‐570A/570AL Satellite Modem 6 FLG‐CDM570A Revision 1 ...
-
Page 7: Download And Extract The Firmware Update
III. Download and Extract the Firmware Update If you have already completed this procedure using CEFD document “Re‐Flashing Your Comtech EF Data Product” (CEFD P/N FLG‐FLASHINTRO_rx.pdf, where ‘x’ is the document revision number), continue to Section IV. Performing the Ethernet FTP Upload Procedure. 1) First, download the firmware update file from the Comtech EF Data Web site: A. Go online to www.comtechefdata.com. B. On the Main page – under Support Information or the Support tab, select the Software Downloads hyperlink. C. On the Software Downloads page – click Download Flash and Software Update Files. D. On the Flash & Software Update Files page – select the (Select a Product Line) Satellite Modems hyperlink. E. On the Satellite Modems product page – select the CDM‐570A & CDM‐570AL products hyperlink. F. Select the appropriate firmware archive EXE or ZIP file download hyperlink. G. - Page 8 For the Base Modem firmware update (where ‘*’ is the revision letter and ‘#.#.#’ is the firmware version number): FW‐0020683*_#.#.#.bin – the Firmware Bulk image file, and CDM‐570A_FW‐0020683*_ReleaseNotes_v#.#.#.pdf – the Firmware Release Notes PDF file. For the IP Packet Processor firmware update (where ‘*’ is the revision letter and ‘#_#_#’ is the firmware version number): Without 3XDES – FW‐0020781*_CDM‐570A_PaP_#_#_#.bin – or – With 3XDES – FW‐TBDx.bin – and – CDM‐570A_PaP_Release_Notes_v#.#.#.pdf (or a variation of this filename, where ‘*’ is the revision letter and ‘#.#.#’ is the firmware version). 3) Confirm availability of the firmware files in the temporary folder. There are several ways you may view the contents of the temporary folder on a Windows‐based PC: A. From the Windows Desktop: Double‐left‐click the “temp” folder saved to the Windows Desktop. Use Windows Explorer to locate, and then double‐left‐click the “temp” folder. Use the Browse window ([Start] > ...Run > [Browse]) to locate, and then double‐click the “c:\temp” folder. ...
- Page 9 IV. Perform the Ethernet FTP Upload Procedure 1) You may proceed with the firmware update procedure under the assumptions that: Your CDM‐570A/L is connected to a user‐supplied, Windows‐based PC, and: o Your PC serial port is connected to the CDM‐570A/L “Remote Control” port with a standard user serial cable. o Your PC Ethernet port is connected to the CDM‐570A/L IP Packet Processor “Traffic 100” Ethernet port with a user‐supplied hub, switch, or direct Ethernet cable connection. o Your PC is running a terminal emulation program (for operation of the CDM‐ 570A/L’s Serial Interface) and a compatible Web browser (for operation of the CDM‐570A HTTP Interface). Your CDM‐570A/L firmware and Ethernet Traffic/Management IP Address has been noted using either the CDM‐570A/L’s Serial Interface or the CDM‐570A HTTP Interface ‘Admin | Firmware | Base Modem’ / ‘Admin | Firmware | Packet Processor’ and ‘Configuration | LAN’ pages, respectively. The latest firmware files have been downloaded or otherwise received from Comtech EF Data and are available on the User PC in an accessible temporary folder. 2) Modem redundancy features must be disabled prior to update. 3) When updating firmware on modems equipped with the IP Packet Processor, you must upload both the Base Modem and IP Packet Processor firmware files, and select the firmware slots prior to rebooting the modem. ...
-
Page 10: Upgrading Firmware
C. Type “bin” to set the binary transfer mode. D. Type “prompt” and then “hash” to facilitate the file upload. To begin the file transfer transfer file FW‐0020683*_#.#.#.bin (where ‘*’ is the revision letter and ‘#.#.#’ is the version number): o If the IP Packet Processor is not installed or is installed but inactive: Type "put FW‐0020683*_#.#.#.bin a:\bulk.bin:" to begin the file transfers – the destination “a:\bulk.bin” must be all lower case. o If the IP Packet Processor is installed and active: Type “put FW‐0020683*_#.#.#.bin” (make sure you do not type the destination “a:\bulk.bin” as was done for the previous upload option). For either option, it will take several minutes to transfer the file and update the firmware image. E. Once the file transfers, Command‐line displays the upload result, similar to: ftp: XXXXXXX bytes sent in XX.XXSeconds XXX.XXXKbytes/sec. In the event you receive the “Connection closed by remote host.” message, wait another minute before continuing. The firmware upload sometimes takes longer than the FTP client allows. F. Once the FTP upload is complete, as the upgrade process continues, the modem front panel displays: ... - Page 11 On the CDM‐570A HTTP Interface ‘Admin | Firmware | Packet Processor’ page, use the ‘Upgrade To’ drop‐down list to select Latest, Image 1, or Image 2. Click [Submit] to save. You may proceed once you have specified the file transfer destination slot. 4) Use Command‐line to initiate the FTP session with the modem. A. Type "ftp xxx.xxx.xxx.xxx" (where ‘xxx.xxx.xxx.xxx’ is the CDM‐570A/L Ethernet Traffic/Management IP Address). B. Enter the Admin User Name and Password to complete login. C. Type "bin" to set the binary transfer mode. D. Type "prompt", and then type "hash" to facilitate the file upload. E. Type “put FW‐0020781*_CDM‐570A_PaP_#_#_#.bin” to begin the file upload. It will take several minutes to transfer and write the files to flash memory. Once the file transfers, Command‐line displays the upload result, similar to: 200 Port OK 150 Opening data connection 226 Packet Processor upgrade complete – Safe to reboot. ftp: XXXXXXXX bytes sent in X.XXSeconds XXXX.XXKbytes/sec.
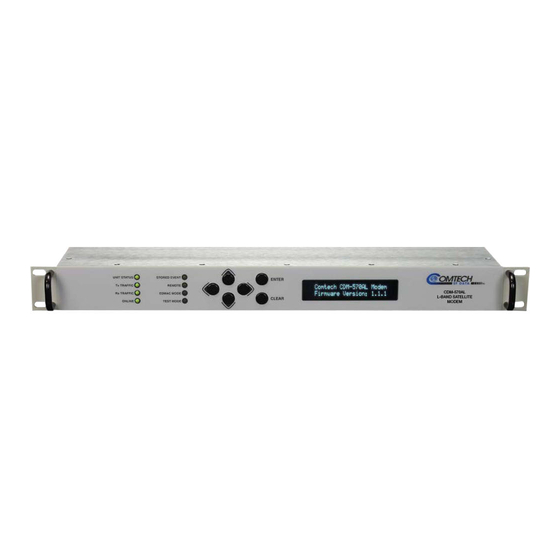
- Page 12 A. Using the modem front panel menus: First, to select the desired Boot Image, make sure that you are operating in LOCAL mode (CONFIG: Remote Local). For the Base Modem firmware image, go to the SELECT: Utilities Firmware Select ▲▼ menu branch and use the arrow keys to select the Next Reboot Image as 1 or 2. Press the front panel ENTER key when done. B. Using the CDM‐570A HTTP Interface: For the Base Modem firmware, go to the ‘Admin | Firmware | Modem’ page. Use the ‘Next Reboot, will use’ drop‐down list to select Latest, Image#1 or Image#2. Click [Submit] to save. For the IP Packet Processor firmware, go to the ‘Admin | Firmware | Packet Processor’ page. Use the ‘Boot From’ drop‐down list to select Latest, Image#1 or Image#2. Click [Submit] to save. Reboot the CDM‐570A/L. You may perform a ‘soft reboot’ or a ‘hard reboot’ as follows: For a soft reboot, use the CDM‐570A HTTP Interface ‘Admin| Reboot’ page. Click [Reboot Now]. Both the web page and the modem front panel will display messages similar to “Rebooting, Please wait...” as reboot commences. For a hard reboot, from CDM‐570A/L rear panel, turn off or otherwise disconnect, and then turn on/reconnect the power source to execute reboot of the modem. The system reboot is complete once the modem front panel displays the top‐level “splash” screen: Comtech CDM-570AL Modem Firmware Version: #.#.# ...