Advertisement
Advertisement
Table of Contents

Related Manuals for SRAM Elixir 5


Summary of Contents for SRAM Elixir 5
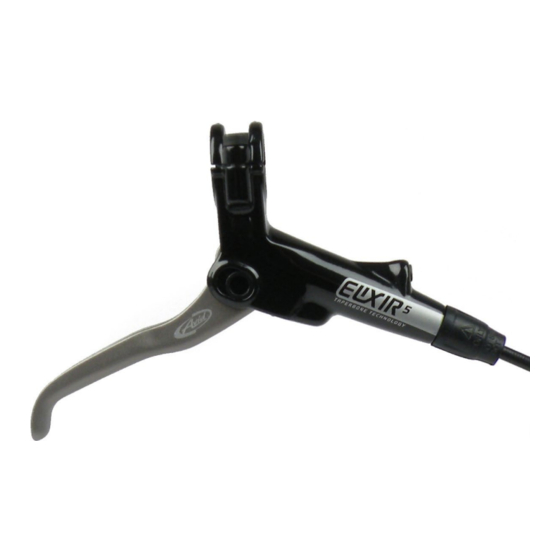
- Page 1 2012 Elixir ™ Service Manual GEN.0000000003519 Rev C...
- Page 2 For order information, please contact your local SRAM distributor or dealer. Information contained in this publication is subject to change at any time without prior notice. For the latest technical information, please visit our website at www.sram.com. Your product‘s appearance may differ from the pictures/diagrams contained in this catalog.
-
Page 3: Table Of Contents
Table of ConTenTs elixir 5 brake lever overhaul ............................5 PaRtS aNd toolS NEEdEd foR SERviCE: ................................. 5 elixir 5 brake Caliper overhaul ..........................15 PaRtS aNd toolS NEEdEd foR SERviCE: ................................15 avid brake hose lengTh adjusTmenT .........................21 PaRtS aNd toolS NEEdEd foR SERviCE: ................................21 avid brake bleed proCedure ............................ - Page 4 SAFETY FIRST! at SRaM, we care about YoU. Please, always wear your safety glasses and protective gloves when servicing your componentry. Protect yourself! Wear your safety gear! important: Your parts may look different from those illustrated.
-
Page 5: Elixir 5 Brake Lever Overhaul
• Bench vise or 10 mm open end wrench • oil pan • isopropyl alcohol • avid High-Performance 5.1 dot fluid or dot 4 fluid, or avid dot Grease or dot 5.1 or 4 compatible grease • Clean, lint-free rag elixir 5 brake lever overhaul... - Page 6 ExplodEd vIEw - ElIxIR 5 bRAkE lEvER ASSEmblY a. lEvER BodY f. lEvER BladE/PUSHRod aSSEMBlY B. lEvER SPRiNG G. PiStoN/BladdER aSSEMBlY C. REaCH adjUSt kNoB H. Pivot BUSHiNGS d. REaCH adjUSt SCREW i. lEvER Bolt E. Pivot PiN elixir 5 brake lever overhaul...
- Page 7 You will also need to install all new seals and a new hose. elixir 5 brake lever overhaul...
- Page 8 C a u T i o n Eye Hazard: do not look directly into the lever body while performing this step. the internal reach adjust knob/spring assembly is preloaded and will come out of the lever body quickly. Wear safety glasses. elixir 5 brake lever overhaul...
- Page 9 Use your finger to push the pivot pin out of the lever body. Remove the lever blade along with the pushrod. the pivot bushings may fall out of the lever blade, this is ok. Simply re-insert them into the lever blade. elixir 5 brake lever overhaul...
- Page 10 Replace the entire piston/bladder/snap ring assembly with a new assembly. lubricate the new assembly by dipping it into avid High-Performance 5.1 dot fluid. You can also use avid dot Grease, or dot 5.1 or 4 compatible grease, as a lubricant. elixir 5 brake lever overhaul...
- Page 11 You can use the 2 mm hex in the vise to support the assembly from inside the fluid flow port as you push the lever blade and pushrod into the piston. elixir 5 brake lever overhaul...
- Page 12 Slide the lever bolt through the hole in the pivot pin. Hold the lever blade in the closed position to slide the piston spring over the threaded end of the bolt. elixir 5 brake lever overhaul...
- Page 13 Use a 3 mm hex to turn the lever bolt clockwise until it is snug. then turn the bolt counter-clockwise 1/4 turn until the slot in the bolt is aligned with the chamfered hole in the reach adjust knob. 3 mm elixir 5 brake lever overhaul...
- Page 14 2.8-3.4 N∙m (25-30 in-lb) so there is no gap. then tighten the bottom bolt to the same torque. 4 mm 2 . 8 -3 . 4 N ∙ m ( 2 5 -3 0 i n - l b) elixir 5 brake lever overhaul...
-
Page 15: Elixir 5 Brake Caliper Overhaul
Re-install the caliper (or mounting bracket with attached caliper) on the bicycle. You may need to re-center the caliper to the rotor. if you removed the caliper without an adapter, or removed it from the adapter, it will need to be re-centered. Spin the wheel and check brake function. elixir 5 brake caliper overhaul... - Page 16 Pull and remove both brake pads and h-spring. if the total thickness of the backing plate and pad friction material is less than 3 mm, the brake pads need to be replaced. Click here for detailed brake pad removal instructions elixir 5 brake caliper overhaul...
- Page 17 Brake fluid will leak, so hold the caliper over a container to catch the fluid. 8 mm Use a 5 mm hex to remove the caliper body bolts . 5 mm Separate the caliper body halves and open the caliper assembly. elixir 5 brake caliper overhaul...
- Page 18 Point the caliper in a safe direction. Cover the piston with two rags to prevent the piston from causing injury or becoming lost. Repeat this process for the other caliper body half. hose connection port elixir 5 brake caliper overhaul...
- Page 19 Make sure the o-ring is seated in the recessed gland. do not scratch the o-ring gland with the pick. Use a sharp pick to remove and replace the o-ring located on the compression fitting. elixir 5 brake caliper overhaul...
- Page 20 “avid brake bleed procedure” for instructions. elixir 5 brake caliper overhaul...
-
Page 21: Avid Brake Hose Length Adjustment
a v i d b r a k e h o s e l e n g T h a d j u s T m e n T after completing the hose length adjustment, it will be necessary to bleed the brakes for optimal performance. see the section, “avid brake bleed procedure”... - Page 22 Make sure the hoses are properly secured to the bicycle and check the routing of each hose. account for suspension movement and be sure the handlebars can move freely by turning the bars all the way from side to side. Pull the hose boot away from the lever to access the compression nut.
- Page 23 determine where you need to cut the hose by holding it up to the lever in the position you like. Make sure to leave a gentle bend in the hose with enough length to freely turn the bars all the way from side to side. double-check this measurement because you can’t go back after you cut.
- Page 24 for models with a compression nut and a hex hose stop: While continuing to push the hose into the hose stop, use an 11 mm open end wrench to hold the hose stop in place and use an 8 mm flare nut wrench to tighten the compression nut to the proper torque.
-
Page 25: Avid Brake Bleed Procedure
Supplemental video instruction is available at www.sram.com/en/service. Wa r n i n g : • Avid highly recommends the use of nitrile gloves when handling DOT fluids. - Page 26 When bleeding avid brakes, keep in mind that you are simply forcing air bubbles out of the system. We recommend that you bleed your brakes at least once a year to ensure optimal performance. if you ride frequently or in aggressive terrain, you should bleed your brakes more often.
- Page 27 for models with Contact point adjustment and a rotating bleed port screw located on the contact point adjuster: rotate the adjuster in the direction opposite the arrow until it stops, then rotate the adjuster back just enough to place the bleed screw at its highest point. for models with Contact point adjustment and a fixed bleed port screw: rotate the adjuster in the direction opposite the arrow on the adjuster knob until it stops.
- Page 28 Hold both syringes upright. Gently push on the caliper syringe plunger to move fluid from the caliper syringe into the lever syringe until the lever syringe is increased to 1/2 full and the caliper syringe is decreased to 1/4 full. You should see bubbles form in the lever syringe.
- Page 29 once the large bubbles at the caliper have stopped, apply a small amount of pressure on the syringe plunger and slowly let the pressure extend the brake lever you have been holding with your finger. if you fastened the lever with a zip-tie or rubber bands, remove these first but keep the lever pulled in with your finger, then apply pressure on the syringe plunger.
- Page 30 once the large bubbles at the lever have stopped, apply a small amount of pressure on the syringe plunger then remove the syringe and re-install the bleed port screw. There will be a small amount of excess DOT fluid that spills out as you remove the syringe and re-install the bleed port screw, this is normal.
-
Page 31: Disc Brake Pad Installation Instructions
d i s C b r a k e p a d i n s T a l l a T i o n i n s T r u C T i o n s Remove pad retainer bolt. Start by removing the e-clip on the wheel side of the caliper, then unthread the retainer bolt using a 2.5 mm hex wrench. -
Page 32: Disc Brake Pad And Rotor Bed-In Procedure
d i s C b r a k e p a d a n d r o T o r b e d - i n p r o C e d u r e all new brake pads and rotors should be put through a wear-in process called ‘bed-in’. the bed-in procedure, which should be performed prior to your first ride, ensures the most consistent and powerful braking feel along with the quietest braking in most riding conditions. - Page 33 www.sram.com...