Table of Contents
Advertisement
Advertisement
Table of Contents

Related Manuals for BIXOLON SRP-770/UPS


Summary of Contents for BIXOLON SRP-770/UPS
- Page 1 KN04-00016A Rev. 1.05...
- Page 2 USER’S MANUAL SRP-770/UPS, SRP-770-999 LABEL PRINTER www.samsungminiprinters.com...
-
Page 3: Safety Precautions
Safety Precautions In using the present appliance, please keep the following safety regulations in order to prevent any hazard or material damage. WARNING Violating following instructions can cause serious injury or death. Do not plug several products in one You must use only the supplied adapter. multi-outlet. - Page 4 CAUTION Violating following instructions can cause slight wound or damage the appliance. Keep the desiccant out of children’s Install the printer on the stable surface. reach. If the printer falls down, it can be broken and you can hurt yourself. If not, they may eat it.
-
Page 5: Table Of Contents
Table of Contents 1. Unpacking ................. 5 & Repacking 2. Samsung Label Printer ..............6 3. Connecting the Power Supply ............7 4. Connecting the Interface Cable ..........8 5. Installing or Replacing the Paper Roll ........9 6. Setting the Dip Switches ............. -
Page 6: Unpacking & Repacking
1. Unpacking & Repacking Your printer box should include these items. If any items are damaged or missing, please contact your dealer for assistance. Note : Please keep the packing materials(①,②,④,⑥) for future repacking to send a printer for repairs. ⑦... -
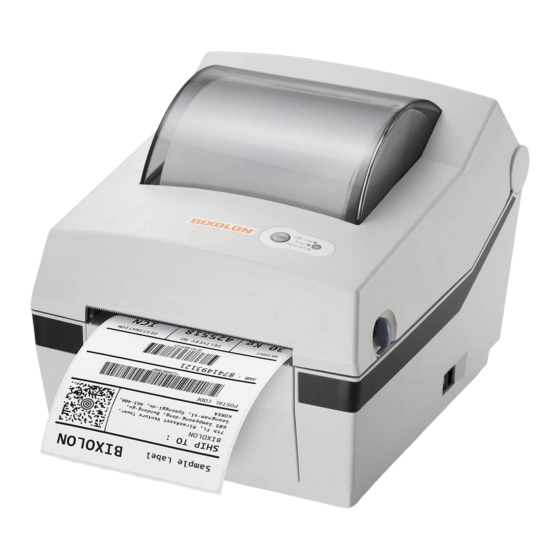
Page 7: Samsung Label Printer
2. Samsung Label Printer Status Indicator Feed Button Cover Peel-off Power Switch Cover Open/Close Printer Head Paper Holder Paper Guide Paper(gap) Sensor Paper Adjuster Peel-off Sensor Power Connector Dip Switch Interface Connectors (RS-232C, IEEE1284, USB) -
Page 8: Connecting The Power Supply
3. Connecting the Power Supply CAUTIONS: When connecting or disconnecting the power supply from the printer, make sure that the power supply is not plugged into an electrical outlet. And the power supply’s rated voltage and your outlet’s voltage do not match, contact your dealer for assistance. -
Page 9: Connecting The Interface Cable
4. Connecting the Interface Cable Universal Serial Bus Parallel Interface Serial Interface (USB) RS-232 default setting is 19200 baud, no parity, 8 data bits and 1 stop bit... -
Page 10: Installing Or Replacing The Paper Roll
5. Installing or Replacing the Paper Roll ① Open Cover ② Open Guides ③ Install Roll ④ Close Guides to the Width of the paper ⑤ Close Cover... -
Page 11: Setting The Dip Switches
6. Setting The Dip Switches 6-1. Setting the Dip Switches The Dip Switches are located on the bottom of the printer. The Dip Switches are used to set the Printer to perform various functions. Follow these steps when changing Dip Switches setting : Turn the printer power switch off. - Page 12 6-3. The default dip switches setting. The default dip switch settings are as follows. SAMSUNG SRP770 UPS2.03 2006.3.13 =============================================== Speed [ 2.5 Density Low [ 0 ] High I / F Serial Parallel 9600 19200 57600 115200 ] Even ] Parity ] data bits 2 ] stop bits...
-
Page 13: The Self Test
7. The Self Test The self-test checks whether the printer has any problems. (You cannot perform this procedure if using the printer’s label peel-off option) If the printer does not function properly, contact your dealer. The self-test checks the following; Make sure that paper roll has been installed properly. -
Page 14: The Hex Dump Mode
8. The Hex Dump Mode This mode is used to make sure that the printer receives the correct data from the host. In this mode all data which the printer gets are printed out in shape of the hexadecimal numbers. It can look like the garbage printing to people without any technical knowledge. The ways to start and exit from the hex dump mode is different according to the firmware version of the printer. -
Page 15: The Peel-Off
9. The Peel-off This function is used to separate label from liner automatically. CAUTIONS: 1) Peeler is for Label Paper only. 2) When the peeler switch is on, label is not printed before when the previous printed label is taken off from the peeler. 3) When the peeler function is not used, set peeler switch off. -
Page 16: Using Fan Fold Paper
10. Using Fan Fold Paper Insert paper through both the rear slot and guides. Adjust holders and guides to the width of the paper. Insert the paper Adjust holders papers and paper Fixed Adjust Guides Paper Fixed... -
Page 17: Cleaning Head
11. Cleaning Head Paper dust on the heating elements may lower the printer quality. In this case, clean the print head as follows : Cautions 1. Turn Off the printer power before cleaning. 2. Note that the thermal head becomes very hot during normal operation, creating the danger of burn injury. -
Page 18: Driver Install Guide
12. Driver Install Guide I. To install SRP770 windows driver 1. Insert CD-ROM included in your printer package then install guide program will appear automatically. Please click on Windows Drivers. - Page 19 2. You can see the driver auto-install program prepares to install driver matching your windows system. 3. If it is first time to install SRP770 windows driver, you can see the Welcome message as below. Please click on Next> to continue install procedure. ** If previous version driver is already installed in your system, some other type window will appear.
- Page 20 4. If you accept the license agreement, click on Yes to continue install procedure. 5. If you want to use USB interface with SRP770 printer, please select both “SAMSUNG SRP770” and “SAMSUNG USB Port Monitor” together and click on Next>.
- Page 21 6. Just wait until auto-installer program finishes drivers setup. 7. Click on Finish to exit auto-installer program.
- Page 22 8. You can see the SAMSUNG SRP770 driver is correctly installed in Printer folder.
-
Page 23: To Use Usb Interface
II. To use USB interface Microsoft windows basically supports Serial and Parallel interface without installing any port drivers but in case of USB interface, USB port driver should be pre-installed. Please follow next steps to properly install Samsung USB port driver in your system. . - Page 24 In Windows XP or 2000, - 1. 1) When you turn on the printer power switch first time after installing USB port driver, the OS recognize the printer and pop up the window to complete USB driver installation a. Please click on Next>. 2) Just wait…...
- Page 25 3) If the following message box appears while your installation, just click on Continue Anyway to continue install procedure. 4) Click on Finish to complete installation.
- Page 26 5) In Ports Tab of SRP770 Properties window, select SSUSB0: and click on Apply.
- Page 27 In Windows 98 or Me, 1) When you turn the printer power switch first time after installing USB port driver, the OS recognize the printer and pop up the window to complete USB driver installation. Just wait. 2) In Details Tab of SRP770 Properties window, select SSUSB0: and click on Apply.
-
Page 28: Tip & Trouble Shooting
III. Tip & Trouble shooting 1. When the previous version driver of SRP770 is already installed your system, please remove that driver before installing new driver as follows. 1) If auto-installer search old version drivers in your system, the below windows will appear. - Page 29 2. If you meet the following message box while driver installation. Ans.) If you have used the old version auto-installer, that message box is likely to appear. Just click on Yes to replace old file with new file. 3. How to execute driver auto-install program if the install guide program will not automatically appear when you insert the CD-ROM.
- Page 30 5. When your system does not recognize USB connection after installing USB port monitor. Ans.) After deleting ‘USB print support’ (or other name marked by an exclamation mark) under Universal Serial Bus Controller in Device Manager, please re-install USB port monitor. During installing USB port monitor, I recommend to turn off printer power. You can open Device Manager window with following procedure.
- Page 31 13. Trouble-Shooting Table Category Symptoms Corrective Action Make sure the peeler switch is The printer won’t print any located on the OFF position. If When not using more after printing 1 page not, turn off the peeler switch Peeler function of label and the feed button and turn the printer’s power does not work.
- Page 32 【 Specification 】 Printing method Thermal line printing Dot density 203 dpi (8 dot/mm) Printing width 25.4 ~ 101.6 mm Paper width 38.1 ~ 104 mm Printing speed 127 mm/sec Receive Buffer Size 4K Byte Note : Printing speed may be slower, depending on the data transmission speed ※...