Table of Contents
Advertisement
Quick Links
Advertisement
Table of Contents

Related Manuals for Gaggenau EB 333


Summary of Contents for Gaggenau EB 333
- Page 1 Instruction manual EB 333 Oven...
-
Page 2: Table Of Contents
Table of contents Instruction manual Intended use Individual recipes Recording a recipe Programming a recipe Important safety information Entering names Starting recipes Causes of damage Change recipe Deleting recipes Environmental protection Saving energy Core temperature probe Environmentally-friendly disposal Inserting the core temperature probe into the food Setting the core temperature Familiarising yourself with your appliance Core temperature guidelines... - Page 3 Desserts Defrosting Preserving Disinfecting Drying Baking stone Roasting dish Acrylamide in foodstuffs Additional information on products, accessories, replacement parts and services can be found at www.gaggenau.com and in the online shop www.gaggenau.com/zz/store...
-
Page 4: Intended Use
Intended use Intended use This appliance may be used by children over the age of 8 years old and by persons with reduced physical, sensory or mental Read these instructions carefully. Only then will I n t e n d e d u s e capabilities or by persons with a lack of you be able to operate your appliance safely experience or knowledge if they are supervised... -
Page 5: Important Safety Information
Important safety information m Important safety information Warning – Risk of fire! Warning – Risk of scalding! I m p o r t a n t s a f e t y i n f o r m a t i o n Combustible items stored in the cooking ▯... - Page 6 Important safety information Risk of electric shock! A defective appliance may cause electric ▯ shock. Never switch on a defective appliance. Unplug the appliance from the mains or switch off the circuit breaker in the fuse box. Contact the after-sales service. Risk of electric shock! The insulation of an incompatible meat ▯...
-
Page 7: Causes Of Damage
Causes of damage Causes of damage Environmental protection C aution! The sections below list a number of energy-saving tips C a u s e s o f d a m a g e E n v i r o n m e n t a l p r o t e c t i o n and provide information on disposing of your appliance. -
Page 8: Familiarising Yourself With Your Appliance
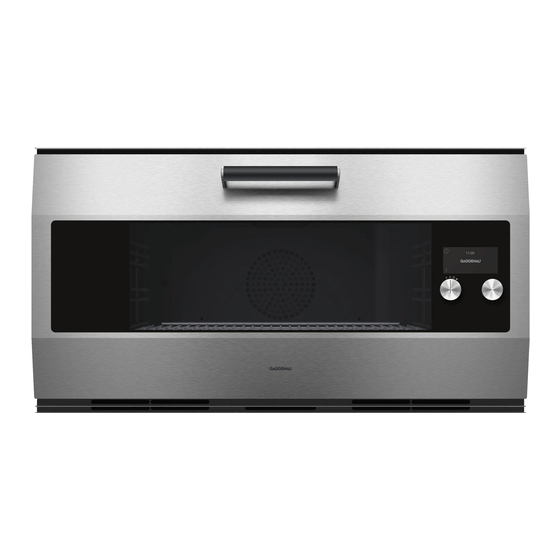
Familiarising yourself with your appliance Familiarising yourself with your appliance Use this section to familiarise yourself with your new F a m i l i a r i s i n g y o u r s e l f w i t h y o u r a p p l i a n c e appliance. -
Page 9: Display And Operating Controls
Familiarising yourself with your appliance Display and operating controls Symbols Symbol Function Start Ø Stop Pause/End Cancel Ž Delete ™ Confirm/save settings Selection arrow Call up additional information ’ Rapid heating with status indicator Call up individual recipes Record menu Edit settings Enter name Delete letters... -
Page 10: Colours And Display
Familiarising yourself with your appliance Colours and display Additional information Colours By touching the symbol, you can call up additional information. For example, information on the heating The different colours are used to guide the user in the function set or on the current temperature of the relevant setting situations. -
Page 11: Function Selector Positions
Familiarising yourself with your appliance Function selector positions Position Function/heating function Temperature range Application Default temperature "Off" position ž Light Hot air 50 - 300 °C Hot air: For cakes, biscuits and bakes on more than one level. 170 °C The fan in the back panel of the oven distributes the heat evenly throughout the cooking compartment. -
Page 12: Accessories
Familiarising yourself with your appliance Position Function/heating function Temperature range Application Default temperature Roasting dish function 50 - 220 °C Only with the roasting dish (optional accessory) 180 °C Heatable cast iron roasting dish for large joints of meat, bakes or festive roasts. Dough proving 30 - 50 °C Proving: For yeast dough and sourdough. -
Page 13: Before Using The Appliance For The First Time
Once the appliance has been connected to a power supply, the GAGGENAU logo will appear first for approximately 30 seconds. The "Initial settings" menu will then appear automatically. -
Page 14: Setting The Date
Before using the appliance for the first time Setting the date Ending initial set-up The preset date appears in the display. The day setting "Initial set-up complete" appears in the display. is already active. Confirm with ™. Set the day using the rotary selector. Touch the C symbol to switch to the month setting. -
Page 15: Activating The Appliance
When the door is open, the interior lighting switches off after a short time. Notes – Different displays are available for standby mode. The default setting is the GAGGENAU logo and the Basic clock. To change the display, refer to the settings section. -
Page 16: Operating The Appliance
Operating the appliance Switching on Operating the appliance Set the required heating mode using the function selector. The chosen heating mode and the default Cooking compartment temperature are displayed. O p e r a t i n g t h e a p p l i a n c e If you want to change the default temperature: The cooking compartment has four rack levels. -
Page 17: Timer Functions
Timer functions The timer menu closes and the time begins to count Timer functions down. The Š symbol and the countdown appear in the display. You use the timer menu to make the following settings: T i m e r f u n c t i o n s Š... -
Page 18: Cooking Time
Timer functions The timer menu is closed and the timing begins. The Set the desired cooking time using the rotary symbol and the elapsed time are shown in the display. selector. Press I to start. Pausing and restarting the stopwatch The appliance starts. -
Page 19: End Of Cooking Time
Timer functions End of cooking time To change the cooking time end: Call up the timer menu. Use C to select the 5 "Cooking You can delay the cooking time end to a later time. time end" function. Set the desired cooking time end using the rotary selector. -
Page 20: Long-Term Timer
Long-term timer Setting the long-term timer Long-term timer Set the function selector to ž. Touch the symbol. With this function, the appliance maintains a L o n g - t e r m t i m e r The default value 24 hrs at 85 °C appears in the temperature between 50 und 230°C with the "Hot air"... -
Page 21: Individual Recipes
Individual recipes Programming a recipe Individual recipes You can programme and save up to 5 preparation phases. It is possible to save up to 50 individual recipes. You I n d i v i d u a l r e c i p e s Turn the function selector to the desired type of can record a recipe. -
Page 22: Entering Names
Individual recipes Entering names Notes – The cooking time does not start counting down until Enter the name of the recipe in "ABC". the appliance has reached the set temperature. – You can use the rotary selector to change the temperature while the recipe is in progress. -
Page 23: Core Temperature Probe
Core temperature probe Inserting the core temperature probe Core temperature probe into the food Insert the core temperature probe into the food before The core temperature probe enables exact cooking to you place the food in the cooking compartment. C o r e t e m p e r a t u r e p r o b e the spot. -
Page 24: Setting The Core Temperature
Core temperature probe Setting the core temperature Notes – The measurable range is 15 °C to 99 °C. Outside Insert food into the oven interior with the core the measurable area, "--°C" is displayed for the temperature probe inserted. Insert the core current core temperature. -
Page 25: Core Temperature Guidelines
Core temperature probe Core temperature guidelines Food Core temperature guideline Use chilled food only, not frozen food. The details given Lamb in the table are guidelines. Results depend on the Leg of lamb quality and composition of the food. medium 60 –... -
Page 26: Rotisserie Spit
Rotisserie spit If you want to cook two small chickens (max. 1.5 kg/ Rotisserie spit chicken) at the same time, use retaining prongs either side of each chicken and screw them in to secure the chickens in place. Use the rotisserie spit to grill large roasts or poultry. R o t i s s e r i e s p i t Grilling with the rotisserie spit produces a crispy crust and even browning all-round. -
Page 27: Switching On The Rotisserie Spit
Roasting function Switching on the rotisserie spit Roasting function Set the required temperature and heating mode. Touch the symbol. The rotisserie spit begins to Only during "Roaster function": R o a s t i n g f u n c t i o n turn. -
Page 28: Child Lock
Child lock Activate the child lock Child lock Prerequisite: The function selector is set to 0. The appliance has a childproof lock to prevent children C h i l d l o c k Touch and hold the symbol for at least 6 seconds. operating it accidentally. -
Page 29: Basic Settings
- Date + GAGGENAU logo desired display. - Clock + date The selection is displayed. - Clock + date + GAGGENAU logo Display Reduced*/Standard If the 'Reduced' setting has been selected, only the most important information will be shown on the display after a short time. - Page 30 Basic settings Date Current date Sets the date. You can switch between year/ month/day using the symbol C. Temperature format °C* / °F Sets the temperature unit Language German* / French / Italian / Spanish / Select language for text display Portuguese / Dutch / Danish / Swedish Note: / Norwegian / Finnish / Greek / Turkish...
-
Page 31: Cleaning And Maintenance
Cleaning and maintenance Area Cleaning products Cleaning and maintenance Aluminium, matt Hot soapy water: Clean using a dish cloth black and then dry with a soft cloth. (inside of the door Use a fat dissolving agent (article no. With thorough care and cleaning your appliance will C l e a n i n g a n d m a i n t e n a n c e frame, side panels 00311297 from our after-sales service or... -
Page 32: Removing The Shelf Supports
Cleaning and maintenance Removing the shelf supports The shelf supports can be removed for cleaning. Removing the shelf supports Place a dishcloth in the cooking compartment to protect the enamel from scratches. Undo the knurled nuts ¨. Remove the shelf supports ©. You can clean the shelf supports in the dishwasher. -
Page 33: Pyrolytic Self-Cleaning
Caution! Fire risk! Loose food remainders, fat and roast juice can Gaggenau baking trays and grill trays are coated with catch fire. Wipe out the oven interior with a moist cloth. pyrolysis-proof enamel. To arrive at an optimum cleaning result, you are nevertheless advised to remove all ▯... -
Page 34: Trouble Shooting
Trouble shooting Trouble shooting Malfunctions often have simple explanations. Please Warning – Risk of electric shock! T r o u b l e s h o o t i n g read the following notes before calling the after-sales Incorrect repairs are dangerous. Repairs may only be service. -
Page 35: Replacing The Oven Light Bulb
After-sales service Replacing the oven light bulb After-sales service The oven light bulbs can be replaced. Heat-resistant halogen bulbs can be obtained from the After-sales service or from a specialist retailer. Always use halogen Our after-sales service is there for you if your appliance A f t e r - s a l e s s e r v i c e bulbs of the same type. -
Page 36: Tables And Tips
Tables and tips Tables and tips ▯ Always preheat the appliance to obtain the best ▯ T a b l e s a n d t i p s To prepare bulky food items, you can remove the cooking results. The cooking times specified refer shelf supports at both sides.Place the wire rack to a preheated appliance. -
Page 37: Vegetables
Tables and tips Vegetables ▯ ▯ Oven-roasted or oven-baked vegetables are a good Mix them thoroughly at least once during the alternative to pan-fried vegetables. The different cooking process. Once they are cooked, season flavours become more concentrated and, because them and sprinkle them with fresh herbs to taste. -
Page 38: Side Dishes And Meals
Tables and tips Side dishes and meals ▯ ▯ The best known oven-cooked side dishes are Grilled dishes such as bakes and gratins are potato-based, such as potato gratin. However, you particularly well suited to being prepared in the can also obtain excellent results when oven-cooking oven. - Page 39 Tables and tips Dish Accessories Level Tempera- Heating Cooking Comments ture function time in °C in min Feta Ovenproof Recipe tip: Place feta cubes in a dish with dish + wire oil, tomatoes, onion, garlic and rosemary rack and season with salt and pepper. Oven-baked cheese, Baking tray After 10 minutes, cut a cross into the soft...
-
Page 40: Fish
Tables and tips Fish ▯ ▯ For food hygiene reasons, fish should have a core Shorten the wooden skewers or, before skewering temperature of at least 62-70 °C after cooking. This the ingredients, leave the skewers to soak in water "Core is also the ideal cooking temperature. -
Page 41: Meat
Tables and tips Meat ▯ ▯ Use the core temperature probe so that you can For small portions (2 - 3 people), it is a good idea to "Core monitor the core temperature more easily. ~ use a heat-resistant baking dish or tin so that the temperature probe"... - Page 42 Tables and tips Dish Accessories Level Tempera- Heating Cooking Comments ture function time in °C in min Knuckle of pork Wire rack + 150/200 50*** Score the skin diagonally in both directions grill tray so that it is cross-hatched. This makes it nice and crispy.
-
Page 43: Poultry
Tables and tips Poultry ▯ ▯ Use the core temperature probe so that you can Use a roasting dish or other heat-resistant dish or monitor the core temperature more easily. Insert tin for dishes that involve adding a lot of liquid to this between the belly and the thigh, rather than in the roast. -
Page 44: Grilling And Roasting/Baking
Tables and tips Grilling and roasting/baking ▯ ▯ Do not grill food with the oven door open. If you use wooden skewers, they may char. To prevent this, shorten them as far as possible, leave ▯ For grilling, use the grill tray with the wire insert them to soak in water overnight before skewering (depending on the model, this may be an accessory the ingredients or use metal skewers. -
Page 45: Baking
Tables and tips Baking ▯ ▯ We recommend using dark-coloured metal baking If the cake is too dry, set the temperature a little tins, as these absorb heat more effectively.Place higher and reduce the cooking time. If the cake the baking tin in the centre of the wire rack. remains uncooked in the middle, set a lower temperature and increase the cooking time. - Page 46 Tables and tips Dish Accessories Level Tempera- Heating Cooking Comments ture function time in °C in min Yeast tray bakes Baking tray 30 - 40 Recipe tip: Top with plums, figs or onion and bacon. Lightly grease the baking tray or line it with greaseproof paper.
- Page 47 Tables and tips Dish Accessories Level Tempera- Heating Cooking Comments ture function time in °C in min Muffins Muffin tray/ With chocolate, nuts or raisins. Grease the paper muffin tray well. cases Cupcakes Cupcake Grease the cupcake tray well. tray/ paper cases Small cakes Baking tray...
-
Page 48: Raising Dough
Tables and tips Dish Accessories Level Tempera- Heating Cooking Comments ture function time in °C in min Baked items made Baking tray 12 - 15 from lye-dipped yeast dough, greaseproof frozen paper Croissants, Baking tray 25 - 30 frozen greaseproof paper Preheat the appliance to the specified temperature. -
Page 49: Desserts
Tables and tips Desserts ▯ ▯ Oven-cooked desserts are very easy to prepare – all Oven-cooked desserts are generally eaten hot, and that remains is to put them in the oven. This are very enjoyable particularly during the colder preparation method is useful for relatively large months. -
Page 50: Defrosting
Tables and tips Defrosting ▯ The oven is not suitable for defrosting whole chickens or joints of meat as this takes a very long ▯ time. Steam ovens and combination steam ovens To defrost food, use the "Defrost" heating function. can be used to defrost this kind of food much more ▯... -
Page 51: Preserving
Tables and tips Preserving ▯ ▯ Cook food as soon as possible after purchase or Place the preserving jars in a heat-resistant vessel after it has been harvested/picked/dug up. containing water. Make sure that they do not touch. Prolonged storage reduces the vitamin content and The water level must reach at least three quarters of means that food is on the verge of fermenting. -
Page 52: Drying
Tables and tips Drying ▯ ▯ Drying is a method of preserving food in which up Place the prepared food onto a wire rack or baking to 50% of the moisture contained in the food is tray covered with greaseproof paper. Turn the food removed by exposing it to dry heat. -
Page 53: Baking Stone
Tables and tips Baking stone ▯ ▯ You will need a baking stone and heating element – We recommend that you use a core temperature these are optional accessories. probe when baking bread. Insert the core temperature probe at the thickest point in the pizza ▯... -
Page 54: Roasting Dish
Tables and tips Roasting dish ▯ Tip: Rather than adding the fat to the roasting dish, You will need a roasting dish and heating element – brush oil over the meat. This ensures that the heat these are optional accessories. is transferred directly to the meat. -
Page 55: Acrylamide In Foodstuffs
Tables and tips Dish Accessories Level Tempera- Heating Cooking Comments ture function time in °C in min. Farmer's omelette Roasting Searing Sear all the ingredients apart from the dish + 10 - 15 eggs in the roasting dish to begin with; then pour the egg mixture over the top and continue cooking until the farmer's omelette is firm.