Secura Key Radio Key 600 Operating & Installation Manual
Stand alone proximity access control system
Hide thumbs
Also See for Radio Key 600:
- Operating & installation manual (24 pages) ,
- Quick start user manual (4 pages)

Related Manuals for Secura Key Radio Key 600

Summary of Contents for Secura Key Radio Key 600
- Page 1 Radio Key ® STAND ALONE PROXIMITY ACCESS CONTROL SYSTEM with PATENTED* DYNASCAN TECHNOLOGY ® Operating & Installation Guide Rev. J P/N 3320831 www.SecuraKeyStore.com (800) 878-7829 sales@securakeystore.com *Patent #6317027...
- Page 2 COPYRIGHT © 2008 SOUNDCRAFT, INC.
-
Page 3: Table Of Contents
Radio Key ® Operating & Installation Guide Table of Contents Introduction ..................... 1 Programming Radio Key 600 ..............3 ® Programming Hints .................. 7 Basic Operation ..................7 System Configuration ................8 Wiring ...................... 9 Power ......................11 Installation ....................14 Troubleshooting .................. - Page 4 THIS PAGE INTENTIONALLY LEFT BLANK...
-
Page 5: Introduction
RK-PS, a 12VDC plug-in power supply is optional. It is designed to power the RK600 only, and requires 120 VAC input. RK600-BB Back Box / Spacer is optional. It extends the RK600 out from the mounting surface and provides additional room for wiring. Secura Key 1... -
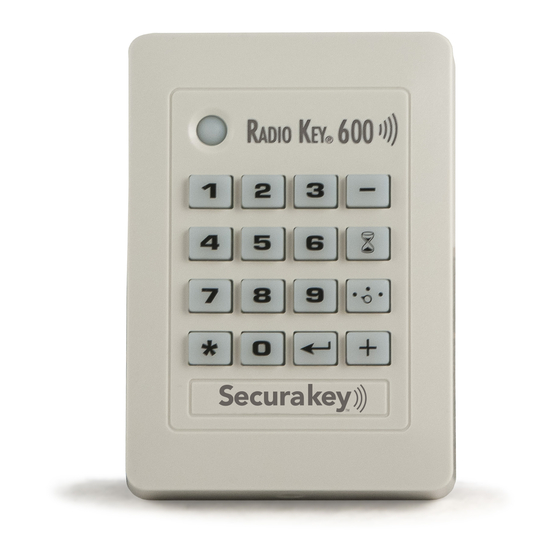
Page 6: Figure 1, Rk600 Components
Radio Key Operating & Installation ® RKAR RK600 Unit Auxiliary Reader (optional) Mounting Plate RK600-BB Back Box/ Spacer (optional) Figure 1 - RK600 Components Secura Key 2... -
Page 7: Programming Radio Key ® 600
User Number, which removes the previously stored Transponder ID or PIN Number from memory. NOTE: User Number and ID Number Values in the following examples are for demonstration purposes only; enter the appropriate values for your system. Secura Key 3... - Page 8 Number range you have selected, a red light and three beeps will occur, in which case, you must delete the entire range before proceeding. + 1 + (Starting User No. 1) (Ending User Number 10) (ENTER) (ADD) Secura Key 4...
- Page 9 Delete a Transponder by Entering Transponder ID: Enter Password. Press ENTER. Press VOID, press , enter the ID number printed on the Transponder, then press ENTER. A green light and beep means that the transponder was deleted. (VOID) (ENTER) (ID Number 995) Secura Key 5...
- Page 10 3. Door Unlocked -- LED blinks Green (Mode Number 2) (MODE) (ENTER) To Exit Programming Mode Immediately: Press MODE, then press 1, then press ENTER. This returns the unit to normal mode immediately, bypassing the 15 second time-out. (MODE) (ENTER) Secura Key 6...
-
Page 11: Programming Hints
If the Transponder ID Number is stored in memory, the latch relay is activated, unlocking the controlled door or gate and shunting any external alarms. A green light and a beep indicates that access is granted. Secura Key 7... -
Page 12: System Configuration
RK600 Unit or optional Auxiliary Reader is mounted directly on a metal surface, the reading distance decreases slightly. To reduce this effect, install the Spacer (optional) between the mounting surface and the mounting plate; this will restore most of the reading distance. Secura Key 8... -
Page 13: Wiring
From external alarm system’s Door Monitor Switch (for shunting) 2-cond, 18-22 AWG 250 feet From Exit Button or PIR From Optional Auxiliary 30 feet 2-cond unshielded 22 Reader AWG, plus a separate 4-cond, shielded 22- 24 AWG cable Secura Key 9... -
Page 14: Figure 2, Mov Wiring Diagram
Reader. Connect Plug P2 at the end of the cable to Socket J2 at the RK600 Unit. If the cable must be extended, for the best performance, use TWO SEPARATE CABLES: one unshielded, non-twisted, two-conductor wire to the Secura Key 10... -
Page 15: Power
filtered with no more than 1 VAC ripple (Peak to Peak). Do not run AC power in the same cable with DC power to the reader. WARNING RK600 will not operate on AC Voltage or with DC polarity reversed. Secura Key 11... -
Page 16: Figure 3, Wiring Diagram
USE UNSHIELDED CABLE FOR PINS IF COMMON POWER SUPPLY IS USED FOR BOTH THE RK AND ELECTRONIC DOOR LOCK BE SURE TO INSTALL THE MOV WHICH IS PROVIDED WITH THE ACCESS CONTROL UNIT Figure 3 - Wiring Diagram Secura Key 12... -
Page 17: Table 2, Connector P1 Color Coding
Table 3 - Connector P2 Color Coding Wire Application Wire Color Description Antenna Coil 1 White Coil 2 Blue LED, Red Orange LED Control Green Led, Green Beeper Yellow Beeper Control Bare Wire Connect to J1, Pin 2 Shield/ Drain Wire Secura Key 13... -
Page 18: Installation
If using the optional spacer, install the thick gasket between the spacer and the mounting surface, install the mounting plate and spacer using the two 6-32 x 1-1/2” screws supplied with the spacer, then place the thin gasket around the mounting plate (Figure 6). Secura Key 14... -
Page 19: Figure 4, Basic Installation
4. Apply power. The LED will flash once and the beeper will sound. Refer to beginning of this manual for programming and operating instructions. Mounting Plate Electrical Box RK600 or Auxiliary Wall Surface Reader Housing Figure 4 - Basic Installation Secura Key 15... -
Page 20: Figure 5, Wall Mounting On Metal Surface With Optional Spacer
Figure 5 - Wall Mounting on Metal Surface with Optional Spacer Spacer Alignment Optional Thick Optional Thin Pins Mounting Gasket Mounting Gasket Optional Post or Flange Mount Adapter Mounting Optional RK600 or Auxiliary Plate Spacer Reader Housing Figure 6 - Post/Flange Mounting Secura Key 16... -
Page 21: Troubleshooting
® encoded and do not use facility codes, you can buy them off-the-shelf from any Secura Key dealer. If you do not know who your dealer is, call Secura Key and we will recommend one near you. WARRANTY (U.S. and Canadian) “Secura Key products are warranted against defects in materials and workmanship for LIFE. -
Page 22: Specifications
Back Box / Spacer - Beige, Lexan ® RK-GM Glass Mount Adaptor This product complies with UL 294 Standards, CE (European Standards) and with the limits for a Class B digital device, pursuant to part 15 of the FCC Rules. Secura Key 18... - Page 23 Operation with non-approved equipment or unshielded cables is likely to result in interference to radio and TV reception. The user is cautioned that changes and modifications made to the equipment without the approval of the manufacturer could void the user’s authority to operate this equipment. Secura Key 19...
- Page 24 www.SecuraKeyStore.com (800) 878-7829 sales@securakeystore.com...