Table of Contents
Advertisement
Advertisement
Table of Contents

Related Manuals for AEG L61470WDBI


Summary of Contents for AEG L61470WDBI
- Page 1 User Manual L61470WDBI Washing Machine...
-
Page 2: Table Of Contents
17. TECHNICAL DATA..................... 35 FOR PERFECT RESULTS Thank you for choosing this AEG product. We have created it to give you impeccable performance for many years, with innovative technologies that help make life simpler features you might not find on ordinary appliances. Please spend a few minutes reading to get the very best from it. -
Page 3: Safety Information
ENGLISH SAFETY INFORMATION Before the installation and use of the appliance, carefully read the supplied instructions. The manufacturer is not responsible if an incorrect installation and use causes injuries and damages. Always keep the instructions with the appliance for future reference. - Page 4 Connect the mains plug to the mains socket only at • the end of the installation. Make sure that there is access to the mains plug after the installation.
-
Page 5: Safety Instructions
ENGLISH or pillows fitted with foam rubber pads should not be dried in the wash dryer. Fabric softeners, or similar products, should be used • as specified by the fabric softener instructions. Remove all objects from pockets such as lighters and •... -
Page 6: Water Connection
• Do not touch the mains cable or the • Do not dry the damaged items which mains plug with wet hands. contain padding or fillings. • Only for UK and Ireland: The • If you have washed your laundry with appliance has a 13 amp mains plug. -
Page 7: Product Description
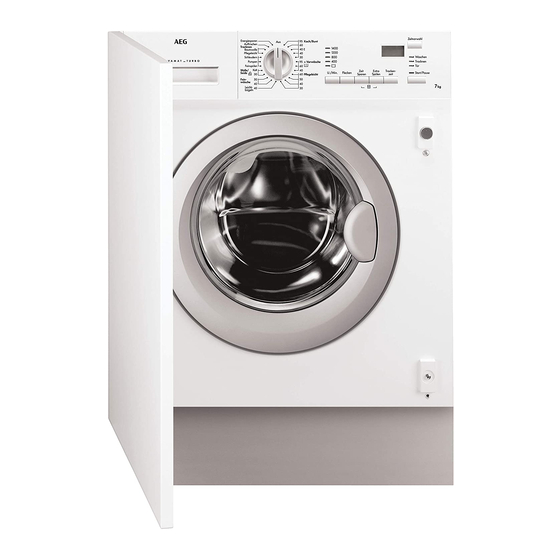
ENGLISH 3. PRODUCT DESCRIPTION 3.1 Appliance overview Detergent dispenser Water drain hose Control panel Mains cable Door handle Water inlet hose Rating plate Feet for the appliance level Drain pump filter Feet for the appliance level 3.2 Accessories Spanner To remove the transit bolts. Plastic caps To close the holes on the rear side of the cabinet after the removal of the transit... -
Page 8: Control Panel
To close the door, turn the device anticlockwise until the groove is vertical. 4. CONTROL PANEL 4.1 Control panel description 1400 40 E 1200 Programme knob Drying time button (Drying Time - Display Delay start button (Delay Start -... - Page 9 ENGLISH 4.2 Display The display shows the following information: Duration of the set programme When you set a programme, the display shows the duration in hours and minutes (for example 2.05). The duration is calculated automatically on the maximum load for each type of fabric.
-
Page 10: Programmes
Child safety lock This symbol comes on when you activate the child lock function. 4.3 Phase indicators After you have pressed the button Start/Pause, the Washing - indicator comes on. The appliance is operating. When you set a drying programme, the Drying - indicator illuminates and stays on during the drying phase. - Page 11 ENGLISH Programme Maximum load Programme description Temperature Maximum spin (Type of load and soil level) range speed Delicate fabrics as acrylics, viscose, polyester 3 kg items. Normal soil. 1200 rpm Delicates 40°C - 30°C 2 kg Machine washable wool, hand washable wool and delicate fabrics with «hand washing»...
- Page 12 Programme options compatibility Programme Time Extra Spin Delay Start Stains rinse Save ■ ■ ■ ■ ■ ■ Cottons ■ ■ ■ ■ ■ Cottons Economy ■ ■ ■ ■ ■ ■ ■ Cottons + Prewash ■ ■ ■...
-
Page 13: Consumption Values
ENGLISH Dryness Level Type of fabric Load Spin Suggested (kg) speed duration (rpm) (mins) Cupboard Dry Synthetics and mixed fab- 1200 90 - 100 For items to put away rics 1200 55 - 65 (jumpers, blouses, under- wear, household linen) Iron Dry Cottons and Linen 1400... -
Page 14: Settings
• The washing programme stops with • Press this button one time to set the water in the drum. The drum turns 'Shortened duration' for items with regularly to prevent the laundry daily soil. creases. • Press this button two times to set •... -
Page 15: Daily Use
ENGLISH 2. Put a small quantity of detergent in This removes all possible dirt from the the compartment for washing phase. drum and the tub. 3. Set and start a programme for cotton at the highest temperature without laundry. 10. DAILY USE 10.1 Loading the laundry Compartment for washing phase. - Page 16 The indicator Washing is on to indicate • Press button Start/Pause to set the that the appliance starts operating. appliance to PAUSE; • Press button Delay Start until the The indicator Drying is on to indicate the symbol ’ is displayed;...
-
Page 17: Daily Use - Drying Only
ENGLISH 10.9 Opening the door the indicator Door remains on. The door is locked. The water must be emptied When the appliance is working and out before opening the door. During this through the delay time, the door is time the drum continues to turn at locked. -
Page 18: Daily Use - Washing & Drying
If the laundry is not sufficient dry, set To have a good drying again a short drying time. performance do not exceed the maximum drying loads 11.3 End of the drying recommended in the user programme manual. Do not set a spin speed lower than the The appliance stops automatically. -
Page 19: Hints And Tips
ENGLISH 12.2 Washing & Timed Drying 1. Turn the selector dial to the position to switch the machine off. To have a good drying the appliance 2. Remove the laundry from the does not let you set a too low spin speed appliance. - Page 20 13.2 Stubborn stains 13.5 Water hardness For some stains, water and detergent is If the water hardness in your area is high not sufficient. or moderate, we recommend that you use a water softener for washing We recommend that you remove these machines.
-
Page 21: Care And Cleaning
ENGLISH 13.11 General Tips • = The item can not be tumble dried. Refer to the «Drying programmes» table to find the average drying times. 13.9 Drying cycle duration The experience will help you to dry the laundry in a more correct way. Take note The drying time can change depending of the duration drying time of the cycles done before. -
Page 22: Cleaning The Detergent Dispenser
14.5 Cleaning the detergent dispenser 14.6 Cleaning the drain filter The pump should be inspected regularly and particularly if: • The appliance does not empty and/or spin. • The appliance makes an unusual noise during draining due to objects such as safety pins, coins etc. - Page 23 ENGLISH 3. Place a container close to the pump to collect any spillage. A = Cover filter. B = Emergency emptying hose. 4. Release the emergency emptying hose, place it in the container and remove its cap cover. 5. When no more water comes out, unscrew the filter cover by turning it anti-clockwise and remove the filter.
-
Page 24: Frost Precautions
8. Put the cap back on the emergency emptying hose and place the latter back in its seat. Replace the filter into the pump by inserting it correctly into the special guides. Screw the filter cover firmly by turning it clockwise. -
Page 25: Troubleshooting
ENGLISH WARNING! Make sure that the temperature is more than 0 °C before you use the appliance again. The manufacturer is not responsible for damages caused by low temperatures. 15. TROUBLESHOOTING • - The appliance door is open or WARNING! not closed correctly. - Page 26 Problem Possible solution The appliance does not • Make sure that the water tap is open. fill with water properly. • Make sure that the pressure of the water supply is not too low. For this information, contact your local water authority.
-
Page 27: Installation
ENGLISH Problem Possible solution The washing results are • Increase the detergent quantity or use a different deter- not satisfactory. gent. • Use special products to remove the stubborn stains before you wash the laundry. • Make sure that you set the correct temperature. •... - Page 28 Use the gloves. Remove the external film. If necessary, use a cutter. Remove the cardboard top. Remove the polystyrene packaging materials. Remove the internal film. Open the door. Remove the polystyrene piece from the door seal and all the items...
- Page 29 ENGLISH Put one of the polystyrene packaging elements on the floor behind the appliance. Carefully put down the appliance with the rear side on it. Make sure not to damage the hoses. Remove the polystyrene protection from the bottom. Pull up the appliance in vertical position.
-
Page 30: Positioning And Levelling
Remove the three bolts. Use the key supplied with the appliance. Pull out the plastic spacers. Put the plastic caps in the holes. You can find these caps in the user manual bag. We recommend that you keep the packaging and the transit bolts for any movements of the appliance. -
Page 31: Water Drainage
ENGLISH • After having levelled the appliance, tighten the lock nuts. WARNING! Never place cardboard, wood or similar materials under the appliance to compensate for any unevenness in the floor. 16.3 The inlet hose • Connect the hose to the back appliance. Turn the inlet hose only left or right. - Page 32 • Making an U form with the drain hose. On the edge of a sink • Make sure that the plastic guide cannot move when the appliance drains. Attach the guide to the water tap or the wall. To a stand pipe with vent-hole •...
- Page 33 ENGLISH To a sink spigot • Refer to the illustration. Put the drain hose in the spigot and tighten it with a clip. • Make sure that the drain hose makes a loop to prevent that remaining particles go in the appliance from the sink. To a wall-pipe •...
-
Page 34: Preparation And Assembly Of The Door
16.6 Preparation and assembly of the door The appliance is originally pre-arranged for the assembly of a door opening from right to left. Door 16-22 mm The dimensions of the door should be: • width 595 - 598 mm •... -
Page 35: Technical Data
ENGLISH Counter-magnet WARNING! Do not remove the screw B. The appliance is prearranged for a magnetic closure of the door. To enable a correct operation of this device, it is necessary to screw the counter-magnet A (steel disk + rubber ring) in-to the inner side of the door. Its position must correspond to the magnet B on the appliance. -
Page 36: Environment Concerns
18. ENVIRONMENT CONCERNS marked with the symbol with the Recycle the materials with the symbol household waste. Return the product to Put the packaging in applicable your local recycling facility or contact containers to recycle it. Help protect the your municipal office. - Page 37 ENGLISH...
- Page 38 www.aeg.com...
- Page 39 ENGLISH...
- Page 40 www.aeg.com/shop...