Table of Contents
Advertisement
Available languages
Available languages
Quick Links
GEAppliances.com
. . . . . . . . . . . .2, 3
Operating Instructions
Features . . . . . . . . . . . . . . . . . . . . . . . . . .4, 5
Controls . . . . . . . . . . . . . . . . . . . . . . . . . .6-9
Dispenser* . . . . . . . . . . . . . . . . . . . . . . . . .10
Autofill* . . . . . . . . . . . . . . . . . . . . . . . . . . . .11
Water Filter . . . . . . . . . . . . . . . . . . . . . . . .12
Fresh Food Storage Options . . . . .13,14
Climate Zone & Temperature
Controlled Drawer . . . . . . . . . . . . . . .15,16
Freezer . . . . . . . . . . . . . . . . . . . . . . . . . . . .17
Automatic Ice maker . . . . . . . . . . . . . . .18
Care and Cleaning . . . . . . . . . . . . . . . . 19
Replacing the Lights . . . . . . . . . . . . . . . .20
Preparing to Install the
Refrigerator . . . . . . . . . . . . . . . . . . . . 21, 22
Installing the Refrigerator . . . . . . . 23-33
Installing the Water Line . . . . . . . . 34-36
Troubleshooting Tips
Normal Operating Conditions . . . . . . .37
Truth or Myth . . . . . . . . . . . . . . . . . . 40, 41
Consumer Support
Warranty for U.S. Customers . . . . . . . .42
RPWF Water Filter Cartridge Limited
Warranty . . . . . . . . . . . . . . . . . . . . . . . . .43
Performance Data Sheet . . . . . . . . . . .44
State of California Water Treatment
Device Certificate . . . . . . . . . . . . . . . . .45
Consumer Support . . . . . . . . Back Cover
*Select Models Only
Write the model and serial
numbers here:
Model # ____________________
Serial # ____________________
Find these numbers on a label
on the left side, near the middle
of the refrigerator compartment.
and GNE are Standard Depth Models (SD)
. . . . . . 38, 39
239D4106P009 49-60683-3 04-14 GE
Owner's Manual and
Installation Instructions
GE and GE Profile™ models
Models that start with PFE, GFE, DFE,
Models that start with PYE and PWE
are Counter Depth Models (CD)
cise
Pre
Fill
o
Aut
Fill
Lock
l
Contro
Light
Cub
ed
Wate
r
Advertisement
Chapters
Table of Contents

Related Manuals for GEAppliances GE SERIES


Summary of Contents for GEAppliances GE SERIES
-
Page 1: Table Of Contents
GEAppliances.com Safety Instructions ... .2, 3 Owner’s Manual and Installation Instructions Operating Instructions Features ......4, 5 GE and GE Profile™... -
Page 2: Safety Instructions
READ ALL INSTRUCTIONS BEFORE USING GE Appliances website For more information on your refrigerator’s operation, visit GEAppliances.com www. REFRIGERATOR SAFETY INFORMATION This is the safety alert symbol. This symbol alerts you to potential hazards that can kill or hurt you and others. All safety messages will follow the safety alert symbol and the word “DANGER”, “WARNING”, or “CAUTION”. -
Page 3: Proper Disposal Of Your Old Refrigerator
GEAppliances.com SAFETY (CONT.) WARNING Tip Over Hazard. Built-in style models (model PYE, CYE, and PWE) are top heavy, especially with any doors open. These models must be secured with the anti-tip floor bracket to prevent tipping forward, which could result in death or serious injury. -
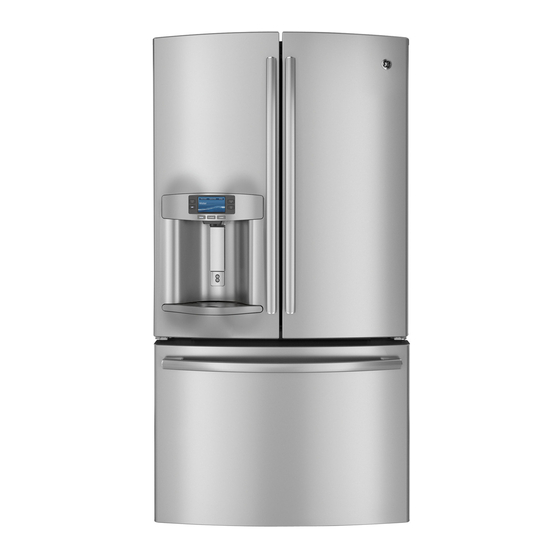
Page 4: Features
About the features. * Space-saving ice maker* QuickSpace™ shelf Ice maker and bin are located on the door creating more usable storage space. Functions as a normal full-sized shelf when needed and easily slides back to store tall items below. Showcase LED lighting Spillproof shelves LED lighting is positioned throughout the interior to spotlight areas... - Page 5 About the features. * GEAppliances.com Door ice bin* 1. Open left fresh food door. Latch 2. Pull down latch to release bin door. 3. Using handhold lift ice bucket up and out to clear locators in bottom of bin. 4. To replace the ice bucket, set it on the...
-
Page 6: Controls
About the controls with temperature settings. PFE29,PYE23P Control Style A, LCD External Control Temperature Express Mode Settings Control Precise Fill Cubed Lock Auto Fill Refrigerator Light Hold 3 Sec for °F/°C Recommended: 37 °F Cubed Water Crushed Actual Set PFE27, PYE23K Control Style B, LCD External Control Energy Smart Recommended: 0°F... - Page 7 About the controls with temperature settings. GEAppliances.com Changing the Temperature for Control Style A To turn OFF cooling system, access SETTINGS from the To Change the Refrigerator Temperature: HOME screen. Page over and tap COOLING SYSTEM ON. Access By: Temperature Button Temperature Press DONE to return to HOME screen.
-
Page 8: Additional Settings
About the controls - features. Control Style A, External Controls Control Style B, External Controls PFE27, PYE23K PFE29, PYE23P Freezer Refrigerator Temperature Express Mode Settings Control Precise Fill Cubed Lock Actual Temp Set Temp Turbo Freeze Turbo Cool Auto Fill Light Door Alarm Lock Controls... -
Page 9: Controls
About the controls - features.* GEAppliances.com GFE29, GFE27, Control Style C, External Controls DFE29 Freezer Refrigerator Actual Temp Hold 3 sec Set Temp Ice Top ON OFF EnergySmart Turbo Ice Bottom ON OFF Maker Replace Water Filter Cool Door Lock... - Page 10 About the dispenser.* If no water is dispensed when the refrigerator is first installed, Water & Ice Dispenser (See About the controls there may be air in the water line system. Press the dispenser with temperature settings & paddle for at least five minutes to remove trapped air from the About the control features) water line and to fill the water system.
- Page 11 About autofill.* GEAppliances.com To Use HANDS FREE AUTO FILL: • Center container on Recess Dispenser Tray (not touching bottom sensors) and remove hand from container • Press AUTO FILL To Stop AUTO FILL • Press CANCEL, to resume filling press AUTO FILL.
- Page 12 About the GE® RPWF water filter cartridge. e l i n i t r t r Water Filter Cartridge is fully seated in the holder, gently The water filter cartridge is located in one of the following places: swing the filter inward until it is in a Bottom-freezer (BF) refrigerators: vertical position.
- Page 13 About the fresh food storage options. Rearranging the Shelves Shelves in the refrigerator compartment are adjustable. To remove: Remove all items from the shelf. Tilt the shelf up at the front. Lift the shelf up at the back and bring the shelf out.
-
Page 14: Fresh Food Storage Options
About the fresh food storage options. Non-Adjustable Dairy Bin To remove: Lift the dairy bin straight up, To replace: Engage the bin in the molded door then pull out. supports and push down. The bin will lock in place. See page 33. Adjustable Bins on the Door Adjustable bins can easily be carried from Drop down tray *... -
Page 15: Controlled Drawer
About the climate zone and temperature controlled drawer. GEAppliances.com ClimateZone Keep fruits and vegetables organized in separate compartments for easy access. Excess water that may accumulate in the bottom of the drawers or under the drawers should be wiped dry. - Page 16 About the climate zone and temperature controlled drawer. How to Remove and Replace the Adjustable Deli/Produce Drawer To remove: To replace: Pull the drawer out to the stop position. Pull left and right slides until fully extended. Lift the front of the drawer up and out. Place drawer back in first and rotate drawer front down to seat on slide.
- Page 17 About the freezer. GEAppliances.com Freezer Basket and Drawer Basket. Drawer Utility Bin / Ice Bucket Non-Adjustable Bin in the Freezer To remove: push in plastic tab on either left or right side To replace: slide bin into location until it locks into place.
-
Page 18: Automatic Ice Maker
About the automatic ice maker. A newly installed refrigerator may take 12 to 24 hours to begin making ice. Automatic Ice Maker* You may hear a buzzing sound each time the ice maker fills with water. The ice maker will produce seven cubes Ice maker per cycle approximately 100–130 cubes Throw away the first few batches of ice to allow... -
Page 19: Care And Cleaning
Care and cleaning of the refrigerator. GEAppliances.com Cleaning the Outside The stainless steel panels, door handles and trim. Silver-accented plastic parts. Do not use appliance wax, polish, bleach, or other products Wash parts with soap or other mild detergents. Wipe clean containing chlorine on stainless steel. -
Page 20: Replacing The Lights
Replacing the lights. Refrigerator Lights (LEDs) There is LED lighting in fresh food compartment and on the bottom of the fresh food doors to light the freezer compartment.* An authorized technician will need to replace the LED light. If this assembly needs to be replaced, call GE Service at 1.800.432.2737 in the United States or 1.800.561.3344 in Canada. -
Page 21: Installation Instructions
Installation Refrigerator Instructions GE and GE Profile™ models Questions? Call 800.GE.CARES (800.432.2737) or visit our Website at: GEAppliances.com In Canada, call 1.800.561.3344 or visit our Website at: www.GEAppliances.ca BEFORE YOU BEGIN TOOLS YOU MAY NEED Read these instructions completely and carefully. - Page 22 Installation Instructions DIMENSIONS All measurements are given with leveling leg fully retracted. Case Depth w/o Counter Depth (CD) Models Only Standard Depth (SD) Models Only ” SD Doors 29 ” CD ” ” ” SD ” CD Height from floor to hinge ”...
-
Page 23: Installing The Refrigerator
Installation Instructions INSTALLING THE REFRIGERATOR REFRIGERATOR LOCATION REMOVE THE FRESH FOOD DOOR HANDLE • Do not install the refrigerator where the temperature Handle Design varies based on models, however will go below 60°F (16°C) because it will not run often Installation is same. -
Page 24: Installing The Refrigerator
Installation Instructions INSTALLING THE REFRIGERATOR (cont.) REMOVE THE REFRIGERATOR DOORS REMOVE THE REFRIGERATOR DOORS (cont) Securely tape the door shut with masking tape or have Disconnect the water line from the back of the unit by a second person support the door. pressing down on the dark grey collar while pulling up on the water line. - Page 25 Installation Instructions INSTALLING THE REFRIGERATOR (cont.) REMOVE THE REFRIGERATOR DOORS (cont) REINSTALLING THE REFRIGERATOR DOORS Reverse steps 1 through 4 to reinstall refrigerator, follow Note: for proper installation later, please follow the next step details below for critical alignments. carefully. Remove the tape and keeping the door as A Reinstall center hinge first and torque the screws to 65 straight as possible, open the door to 90º...
- Page 26 Installation Instructions INSTALLING THE REFRIGERATOR (cont.) REMOVE THE FREEZER DOOR REPLACING THE FREEZER DOOR Pull the freezer door open to full extension. Pull the slide Mechanism to full extension using both Remove 3 attachment screws, located at the bottom hands simultaneously. on each side of the freezer door using 3/8”...
- Page 27 Installation Instructions INSTALLING THE REFRIGERATOR (cont.) Instructions for adjusting freezer door gaps: IMPORTANT! The 6 mounting screws (3 on each side) are NOT interchangeable with the center or top hinge screws. Drawer screws have flat washer heads, and other screws have lines/ribs on washer heads. After installation of the freezer door, check for uniform gaps (top and bottom of right and left hand side) with the template provided.
- Page 28 Installation Instructions INSTALLING THE REFRIGERATOR (cont.) LEVEL THE FREEZER DOOR LEVEL THE FREEZER DOOR (cont.) Lift the door on the side requiring adjustment, rotate the cam to required position. 0 - Initial position 1 - Lift by 0.050” -1 - Lower by 0.050” -2 - Lower by 0.100 -3 - Lower by 0.150”...
- Page 29 (In Canada, call 1.800.561.3344.) refrigerator (see Figure 1). For installation instructions of the bracket, visit: www. Figure 1 – Installation Overview GEAppliances.com. 2 Wall Holes (In Canada, www.GEAppliances.ca.) Floor – Concrete (2 Holes) Floor Bracket to Install MATERIALS YOU MAY NEED Floor –...
- Page 30 Installation Instructions LOCATING THE ANTI-TIP FLOOR CONCRETE Wall and Floor Construction: AT-2 BRACKET (cont.) • Anchors required (not provided): 4 each 1/4” (6 mm) x 1-1/2” (38 mm) lag bolts Figure 2 – Acceptable 4 each 1/2” (12 mm) O.D. sleeve anchors Screw Placement Locations •...
- Page 31 Installation Instructions INSTALLING THE REFRIGERATOR (cont.) CONNECTING THE REFRIGERATOR If you are using copper tubing, insert the end of the TO THE HOUSE WATER LINE tubing into the refrigerator connection, at the back of the refrigerator, as far as possible. While holding the tubing, A cold water supply is required for automatic ice maker tighten the fitting.
- Page 32 Installation Instructions INSTALLING THE REFRIGERATOR (cont.) TURN ON THE WATER SUPPLY LEVEL THE REFRIGERATOR DOORS Remember a level refrigerator is necessary for getting the doors perfectly even. If you need help, review the previous section on leveling the refrigerator. When When the left the left...
- Page 33 Position the bin hooks over the bin locator and push forward until inserted fully. Push bin down until locked into posi- tion. Bin hook rear each side Bin locator each side GE Appliances General Electric Company Louisville, KY 40225 Refer to 239D4129P002 Pub No. 31-45498 GEAppliances.com...
-
Page 34: Installing The Water Line
Installation Instructions INSTALLING THE WATER LINE For PFE29 and PYE23P Models: If the refrigerator is BEFORE YOU BEGIN operated before the water connection is made to Recommended copper water supply kits are WX8X2, the ice maker, see ICE MAKER under SETTINGS menu WX8X3 or WX8X4, depending on the amount of tubing of the LCD Operations section and follow the screen you need. - Page 35 Installation Instructions INSTALLING THE WATER LINE (cont.) Install the shutoff valve on the nearest frequently WHAT YOU WILL NEED (CONT.) used drinking water line. NOTE: The only GE approved plastic tubing is that supplied in GE SmartConnect Refrigerator ™ SHUT OFF THE MAIN WATER SUPPLY Tubing kits.
-
Page 36: Installing The Water Line
Installation Instructions INSTALLING THE WATER LINE (cont.) FASTEN THE SHUTOFF VALVE CONNECT THE TUBING TO THE VALVE Fasten the shutoff valve to the cold water pipe Place the compression nut and ferrule (sleeve) with the pipe clamp. for copper tubing onto the end of the tubing and connect it to the shutoff valve. -
Page 37: Normal Operating Conditions
Normal operating conditions. GEAppliances.com Newer refrigerators sound different from older refrigerators. Modern refrigerators have more features and use newer technology. Do you hear what I hear? These sounds are normal. HUMMM... WHOOSH... The new high efficiency compressor may run faster and longer than your old refrigerator and you may hear a high-pitched hum You may hear the fans spinning at high speeds. -
Page 38: Troubleshooting Tips
Before you call for service… Troubleshooting Tips Save time and money! Review the charts on the following pages first and you may not need to call for service. Problem Possible Causes What to Do Water filter indicator light Water filter indicator must be reset Non-LCD models: remains lit after replacing filter -Press and hold reset button. - Page 39 Before you call for service… GEAppliances.com Troubleshooting Tips (cont) Problem Possible Causes What to Do No water or ice cube production* Supply line or shutoff valve is clogge Call a plumber Water filter is clogged Replace filter cartridge or remove filter and...
-
Page 40: Truth Or Myth
Before you call for service, review the detailed troubleshooting tips in the Owner’s SERVICE manual. If needed, service can be scheduled by visiting us online GEAppliances. com or calling 800.ge.CARES 800.432.2737 Truth or Myth Truth or Myth? Answer Explanation The refrigerator water filter may require replacement,... -
Page 41: Truth Or Myth
Before you call for service, review the detailed troubleshooting tips in the Owner’s SERVICE manual. If needed, service can be scheduled by visiting us online GEAppliances. com or calling 800.ge.CARES 800.432.2737 Truth or Myth (cont.) Truth or Myth? Answer Explanation Door removal is always required for installation. -
Page 42: Warranty
Customer Care technician. To schedule service, ® Proof of the original visit us online at GEAppliances.com, or call 800.GE.CARES purchase date is needed (800.432.2737). Please have serial number and model number to obtain service under the available when calling for service. - Page 43 RPWF Water Filter Cartridge Limited Warranty. Staple your receipt here. Proof of the original purchase Contact us at www.geapplianceparts.com, Appliance Service date is needed to or call 800.GE.CARES. obtain service Appliances 800-GE-CARES under the warranty. For The Period Of: We Will Replace, At No Charge To You: Thirty Days Any part of the water filter cartridge which fails due to a defect in materials or From the date of the...
-
Page 44: Performance Data Sheet
Performance Data Sheet Model: GE RPWF Use Replacement Cartridge RPWF. The concentration of the indicated substances in water entering the system was reduced to a concentration less than or equal to the permissible limit for water leaving the system as specified in NSF/ANSI Standard 42 and Standard 53. System tested and certified by NSF International against NSF/ANSI Standard 42 and Standard 53 for the reduction of substances listed below. -
Page 45: Device Certificate
State of California Department of Public Health Water Treatment Device Certificate Number 2110 Date Issued: November 16, 2011 Trademark/Model Designation Replacement Elements GE RPWF RPWF Manufacturer: 3M Purification Inc. The water treatment device(s) listed on this certificate have met the testing requirements pursuant to Section 116830 of the Health and Safety Code for the following health related contaminants: Microbiological Contaminants and Turbidity Inorganic/Radiological Contaminants... -
Page 46: Consumer Support
Register Your Appliance GEAppliances.com In the U.S.: communication and prompt service under the terms of your warranty, should the need arise. You may also mail in the pre-printed registration card included in the packing material. In Canada: www.GEAppliances.ca Printed in United States... - Page 47 GEAppliances.com Consignes de sécurité ..2-3 Manuel d’utilisation et instructions Consignes d’utilisation d’installation Fonctions ..... .4, 5 Commandes .
-
Page 48: Consignes De Sécurité
VEUILLEZ LIRE TOUTES LES CONSIGNES AVANT UTILISATION Site Internet d’Électroménagers GE Pour de plus amples informations sur le fonctionnement de votre GEAppliances.com réfrigérateur, consultez le site www. CONSIGNES DE SÉCURITÉ POUR LE RÉFRIGÉRATEUR Ce symbole représente une alerte de sécurité. Ce symbole vous avise de dangers possibles pouvant causer la mort, des blessures ou autres. -
Page 49: Conservez Ces Instructions
IMPORTANTES CONSIGNES DE SÉCURITÉ . VEUILLEZ LIRE TOUTES LES CONSIGNES AVANT UTILISATION . GEAppliances.com SÉCURITÉ (SUITE) Risque de basculement AVERTISSEMENT Les modèles encastrés (modèles PYE, CYE et PWE) sont plus lourds au niveau de leur partie supérieure, surtout avec les portes ouvertes. Ces modèles doivent être fixés à l’aide du système anti-basculement par fixation au sol pour éviter que l’appareil ne bascule vers l’avant, ce qui pourrait entraîner des blessures graves, voire mortelles. -
Page 50: Fonctions
A propos des fonctions. Clayette QuickSpace™ Machine à glaçons à faible encombrement * Elle s’utilise comme une clayette normale de pleine largeur. Elle se La machine à glaçons et son bac sont situés sur la porte permet- glisse vers l’arrière pour stocker des produits hauts. tant d’avoir un espace de stockage plus spacieux. -
Page 51: Filtre À Eau
A propos des fonctions. * GEAppliances.com Bac à glace de porte* 1. Ouvrez la porte gauche du Loquet compartiment de réfrigération. 2. Tirez le loquet vers le bas pour ouvrir la porte du bac. 3. A l’aide de la poignée, soulevez le seau à... - Page 52 À propos des paramètres de température. PFE29,PYE23P Type de commande A, LCD externe de contrôle Temperature Express Mode Settings Control Precise Fill Cubed Lock Auto Fill Refrigerator Light Hold 3 Sec for °F/°C Recommended: 37 °F Water Crushed Cubed Actual Set PFE27, PYE23K Type de commande B, LCD externe de contrôle Energy Smart...
- Page 53 À propos des paramètres de température. GEAppliances.com Modification de la température pour un style de contrôle A et Cafe Pour ACTIVÉ le système de refroidissement, accédez aux Modification de la température pour un style de contrôle A et Cafe : RÉGLAGES à...
- Page 54 À propos des contrôles - Funciones. Style de commandes A, Style de commandes B, PFE27, PYE23K PFE29, PYE23P Commandes externes Commandes externes Freezer Refrigerator Express Mode Settings Temperature Control Precise Fill Cubed Lock Actual Temp Set Temp Turbo Freeze Turbo Cool Auto Fill Light Door Alarm...
- Page 55 À propos des contrôles - Funciones.* GEAppliances.com Style de commandes C, GFE29, GFE27, Commandes externes DFE29 Freezer Refrigerator Actual Temp Hold 3 sec Set Temp Ice Top ON OFF EnergySmart Turbo Ice Bottom ON OFF Maker Replace Water Filter Cool...
- Page 56 A propos du distributeur.* Si l’eau n’est pas distribuée lorsque le réfrigérateur vient d’être installé, il y a peut-être de l’air dans le conduit d’eau. Appuyez Distributeur d’eau et sur le bras du distributeur pendant au moins cinq minutes pour de glace purger l’air contenu dans le conduit d’alimentation en eau et (Consulter la section...
- Page 57 À propos du remplissage automatique.* GEAppliances.com Pour utiliser le remplissage automatique mains libres : • Centrer le récipient dans la cavité du distributeur (sans toucher les capteurs du fond) et retirer la main du récipient. • Appuyer sur Remplissage automatique Pour arrêter le Remplissage automatique...
- Page 58 A propos de la cartouche RPWF du filtre à eau GE ® Water Filter Cartridge e l i n i t r t r is fully seated in the holder, gently The water filter cartridge is located in one of the following places: swing the filter inward until it is in a Bottom-freezer (BF) refrigerators: vertical position.
- Page 59 A propos du stockage des produits frais. GEAppliances.com Réorganisation des clayettes Les clayettes du réfrigérateur sont réglables. Pour les retirer : Retirez tous les aliments de la clayette. Soulevez l’avant de la clayette. Soulevez l’arrière de la clayette et sortez-la du réfrigérateur.
- Page 60 A propos du stockage des produits frais. Bac à produits laitiers non réglable Pour le retirer : Tirez le bac à produits laitiers Pour le remettre en place : Engagez le vers le haut, puis retirez-le. bac dans les supports de porte moulés et poussez-le vers le bas.
-
Page 61: Zone Climatisée & Tiroir À
A propos de la zone climatisée & du tiroir à température contrôlée GEAppliances.com Zone climatisée Conservez les fruits et les légumes dans des compartiments séparés pour un accès facile. Essuyez l’eau accumulée dans le fond ou en dessous des bacs. - Page 62 A propos de la zone climatisée & du tiroir à température contrôlée Retrait et remise en place du tiroir à charcuterie/à produits frais réglable Pour le retirer : Pour le remettre en place : Tirez le tiroir jusqu’à la butée. Tirez les glissières gauche et droite jusqu’à...
-
Page 63: Congélateur
À propos du congélateur. GEAppliances.com Panier et tiroir du congélateur Panier Tiroir Bac utilitaire Bac non réglable dans le congélateur Pour le retirer : Enfoncez la languette en plastique de chaque côté. Pour le remettre en place : Faites glisser le bac dans la position souhaitée jusqu’à... - Page 64 À propos de la machine à glaçons automatique. Il faut prévoir entre 12 et 24 heures avant qu’un réfrigérateur nouvellement installé commence à produire des glaçons. Machine à glaçons automatique * informations. Machine Vous entendrez un bourdonnement à chaque fois La machine à...
-
Page 65: Entretien Et Nettoyage
Entretien et nettoyage du réfrigérateur GEAppliances.com Nettoyage de l’extérieur Panneaux, poignées de porte et garniture en acier Pièces en plastique argenté. inoxydable. Lavez ces pièces avec du savon ou un autre détergent doux. Essuyez ensuite avec une éponge, un linge humide ou de l’essuie-tout. -
Page 66: Remplacement Des Ampoules
Remplacement des ampoules Ampoules du réfrigérateur (DEL) Le compartiment de réfrigération est équipé d’un éclairage à DEL. De plus, le bas de la porte du compartiment réfrigérateur est également équipé de DEL pour éclairer le compartiment de congélation Le remplacement des ampoules à DEL doit être effectué... -
Page 67: Instructions D'installation
Instructions Réfrigérateur d’installation Modèles GE and GE Profile™ Des Questions ? Appelez 800.GE.CARES (800.432.2737) ou consultez notre site internet : GEAppliances.com Au Canada, appelez le 1.800.561.3344 ou consultez notre site internet : www.GEAppliances.ca AVANT DE COMMENCER PRÉPARATION (suite) Lisez ces instructions entièrement et attentivement. - Page 68 Instructions d’installation DIMENSIONS Toutes les mesures sont données avec les pieds de mise à niveau escamotés. Modèle profondeur du comptoir (PC) seulement Modèle profondeur normale (PN) seulement Profondeur du réfrigérateur ” PN sans les portes 29 ” ” ” PC ”...
-
Page 69: Installation Du Réfrigérateur
Instructions d’installation INSTALLATION DU RÉFRIGÉRATEUR EMPLACEMENT DU RÉFRIGÉRATEUR RETRAIT DES POIGNÉES DE PORTE DU COMPARTIMENT DE RÉFRIGÉRATION • N’installez pas le réfrigérateur dans une pièce où les La conception des poignées varie en fonction des températures descendent en-dessous de 60°F (16°C) parce modèles, mais l’installation reste la même. - Page 70 Instructions d’installation INSTALLATION DU RÉFRIGÉRATEUR (suite) RETRAIT DES PORTES DU RÉFRIGÉRATEUR RETRAIT DES PORTES DU RÉFRIGÉRATEUR (suite) Maintenez la porte bien fermée à l’aide de ruban-cache Débranchez l’alimentation en eau à l’arrière de ou demandez à une deuxième personne de maintenir l’appareil en appuyant sur le collier gris foncé...
- Page 71 Instructions d’installation INSTALLATION DU RÉFRIGÉRATEUR (suite) RETRAIT DES PORTES DU RÉFRIGÉRATEUR (suite) REINSTALLATION DES PORTES DU Remarque : pour que l’installation se fasse correctement plus RÉFRIGÉRATEUR tard, veuillez suivre attentivement la prochaine étape. Inverser en sens inverse, étapes 4 à 1, pour réinstaller les Les portes du compartiment de réfrigération doivent portes du réfrigérateur.
- Page 72 Instructions d’installation INSTALLATION DU RÉFRIGÉRATEUR (suite) RETRAIT DE LA PORTE DU REINSTALLATION DE LA PORTE DU CONGÉLATEUR CONGÉLATEUR Tirez sur la porte du congélateur jusqu’à ce qu’elle soit Tirez simultanément avec les deux mains sur le complètement ouverte. mécanisme à glissières jusqu’à extension complète. Retirez les 3 vis de fixation, situées au bas de chaque Retirez le panier reposant sur les glissières.
- Page 73 Instructions d’installation INSTALLATION DU RÉFRIGÉRATEUR (suite) Instructions concernant l’ajustement des écarts de la porte du congélateur : IMPORTANT! Les 6 vis de montage (3 de chaque côté) ne sont PAS interchangeables avec les vis de la charnière centrale ou supérieure. Après l’installation de la porte du congélateur, vérifiez que les écarts sont uniformes (le haut et le bas des côtés gauche et droit) à...
- Page 74 Instructions d’installation INSTALLATION DU RÉFRIGÉRATEUR (suite) MISE À NIVEAU DE LA PORTE DU MISE À NIVEAU DE LA PORTE DU CONGÉLATEUR CONGÉLATEUR (suite) Soulevez la porte sur le côté nécessitant un réglage, faites tourner la came jusqu’à la position requise. 0 –...
- Page 75 1.800.626.8774 pour en recevoir un gratuitement. (Au Canada, appelez le 1.800.561.3344). Figure 1 – – Vue d’ensemble de l’installation Pour les instructions d’installation du système 2 trous dans le mur consultez le site : www.GEAppliances.com. Sol - Béton Système de (Au Canada, www.GEAppliances.ca) (2 trous) fixation au sol à...
- Page 76 Instructions d’installation POSITIONNEMENT DU SYSTÈME ANTI- Mur et plancher en BETON : AT-2 • Ancrages nécessaires (non fourni) : BASCULEMENT PAR FIXATION AU SOL 4 tire-fond d’ ¼ po (6 mm) x 1- ½ po (38 mm) 4 (suite) manchons d’ancrage d’ ½ po (12 mm) de diamètre Figure 2 –...
- Page 77 Instructions d’installation INSTALLATION DU RÉFRIGÉRATEUR (suite) Si vous utilisez un tuyau de cuivre, placez un écrou de RACCORDEMENT DU RÉFRIGÉRATEUR À compression et une bague (manchon) à l’extrémité LA CONDUITE D’EAU DE LA MAISON du tuyau qui vient de l’alimentation d’eau froide de la Une alimentation d’eau froide est requise pour faire maison.
- Page 78 Instructions d’installation INSTALLATION DU RÉFRIGÉRATEUR (suite) OUVRIR L’ALIMENTATION EN EAU MISE À NIVEAU DES PORTES DU RÉFRIGÉRATEUR Rappelez-vous qu’il est nécessaire que le réfrigérateur soit de niveau pour que les portes soient parfaitement de niveau. Si vous avez besoin d’aide, consultez la section précédente sur la mise à niveau du réfrigérateur.
- Page 79 Instructions d’installation INSTALLATION DU RÉFRIGÉRATEUR (suite) Modèles sans Instructions de montage du réfrigérateur (suggestion). distributeur Séparateur (sur certains modèles uniquement) Pour positionner les bacs dans les portes : Faites correspondre votre bac avec la lettre indiquée. Positionnez les crochets du bac sur le repère et le pousser en avant jusqu’à...
- Page 80 Instructions d’installation INSTALLATION DE LA CONDUITE D’EAU AVANT DE COMMENCER Pour les modèles PFE29 et PYE23P : Si le réfrigérateur est mis en marche avant le Nous recommandons les trousses d’alimentation raccordement de l’alimentation d’eau à la machine d’eau en cuivre WX8X2, WX8X3, WX8X4, selon à...
- Page 81 Instructions d’installation INSTALLATION DE LA CONDUITE D’EAU (suite) Installez le robinet d’arrêt sur la canalisation d’eau potable la plus proche. PIÈCES NÉCESSAIRES (suite) REMARQUE : Les seuls tuyaux en plastique FERMETURE DE L’ALIMENTATION D’EAU autorisés par GE sont fournis avec la trousse GE SmartConnect™...
- Page 82 Instructions d’installation INSTALLATION DE LA CONDUITE D’EAU (suite) FIXATION DU ROBINET D’ARRÊT BRANCHEMENT DU TUYAU AU ROBINET Fixez le robinet d’arrêt à la canalisation d’eau Placez un écrou de compression et une bague froide à l’aide du collier de serrage. (manchon) à...
- Page 83 Conditions normaux de fonctionnement. GEAppliances.com Les réfrigérateurs plus récents font des bruits différents de ceux des anciens. Les réfrigérateurs modernes proposent plus de fonctions et sont plus avancés sur le plan technologique. Entendez-vous ce que j’entends ? Ces conditions sont normaux.
-
Page 84: Conseils De Dépannage
Avant d’appeler à un réparateur… Conseils de dépannage Économisez du temps et de l’argent ! Consultez d’abord les tableaux dans les pages suivantes pour peut-être éviter de faire appel à un technicien. Problème Causes Possibles Solution La lumière indicatrice du filtre à eau L’indicateur du filtre à... - Page 85 Avant d’appeler à un réparateur… GEAppliances.com Conseils de dépannage (suite) Problème Causes Possibles Solution Pas de production d’eau ou de La ligne d’alimentation ou le robinet Appelez un plombier glaçons * d’arrêt est bouché Le filtre à eau est bouché...
-
Page 86: Entretien - Mythe Ou Réalité
Avant de faire appel à un technicien, parcourez les conseils de dépannage donnés dans ce ENTRETIEN manuel. Si nécessaire, une visite par un technicien de service peut être prévue en nous con- tactant en ligne sur GEAppliances.com ou par téléphone au 800.ge.CARES 800.432.2737 Mythe ou réalité Mythe ou réalité ? Réponse... - Page 87 Avant de faire appel à un technicien, parcourez les conseils de dépannage donnés dans ce ENTRETIEN manuel. Si nécessaire, une visite par un technicien de service peut être prévue en nous con- tactant en ligne sur GEAppliances.com ou par téléphone au 800.ge.CARES 800.432.2737 Mythe ou réalité Mythe ou réalité ? Réponse...
- Page 88 Agrafez votre facture ici. Customer Care®. Pour prévoir une réparation, consultez notre site Pour bénéficier du service GEAppliances.com ou appelez le 800.GE.CARE5 (800.432.2737). de réparation sous garantie, Veuillez avoir votre numéro de série et votre numéro de modèle à une preuve de la date d’achat portée de main lorsque vous appelez pour obtenir un service.
- Page 89 Certificat de garantie de la cartouche RPWF du filtre à eau. Agrafez votre facture ici. Pour Contactez-nous sur www.geapplianceparts.com obtenir le service sous garantie, Appliance Service une preuve de la date d’achat ou appelez le 800.GE.CARES. Appliances 800-GE-CARES initial est nécessaire. Pendant la période Nous remplacerons gratuitement : de garantie de :...
-
Page 90: Données De Performance
Fiche de données de performance GE RPWF Utilisez des cartouches de rechange RPWF. La concentration des substances indiquées dans l’eau alimentant le système a été réduite à une concentration inférieure ou égale à la limite autorisée pour l'eau en sortie du système, telle que l’exigent les normes NSF/ANSI 42 et 53. Les systèmes sont testés et certifiés par le NSF International conformément à... -
Page 91: Le Dispositif De Traitement
État de Californie Département de Santé Publique Dispositif de traitement de l’eau Numéro de Certificat 2110 Date d’émission : 16 novembre 2011 Marque / Nom du modèle Pièces de rechange GE RPWF RPWF Fabricant : 3M Purification Inc. Le(s) dispositif(s) de traitement de l’eau listé(s) sur ce certificat est conforme aux exigences statuées dans la Section 116830 du Code de Santé... -
Page 92: Assistance À La Clientèle
écrivez à l’adresse suivante : Responsable Principal, Relations Clientèle, Électroménagers GE, Appliance Park, Louisville, KY 40225 Au Canada : www.GEAppliances.ca, ou écrivez-nous à l’adresse suivante : Directeur, Relations Clientèle, Mabe Canada Inc. Suite 310, 1 Factory Lane Moncton, N.B. E1C 9M3 Enregistrement de votre appareil GEAppliances.com... - Page 93 GEAppliances.com Instrucciones de seguridad . . 2-3 Instrucciones de Funcionamiento Funciones ......4,5 Manual del Propietario e Instrucciones de Instalación...
-
Page 94: Instrucciones De Seguridad
LEA TODAS LAS INSTRUCCIONES ANTES DE USAR Sitio Web de Electrodomésticos de GE Para más información sobre el funcionamiento de su refrigerador, visite GEAppliances.com www. INFORMACIÓN DE SEGURIDAD DEL REFRIGERADOR Éste es el símbolo de alerta de seguridad. El mismo alerta sobre potenciales riesgos de muerte o lesiones tanto para usted con para otras personas. - Page 95 INFORMACIÓN IMPORTANTE DE SEGURIDAD. LEA TODAS LAS INSTRUCCIONES ANTES DE USAR. GEAppliances.com SEGURIDAD (CONT) Riesgo de Caída. ADVERTENCIA Los modelos con estilo incorporado (modelo PYE, CYE, y PWE) son inestables, especialmente con las puertas abiertas. Estos modelos deben ser asegurados con el soporte anti-volcaduras, a fin de evitar caídas hacia adelante, que podrían resultar en la muerte o lesiones graves.
-
Page 96: Funciones
Acerca de las funciones. Máquina de hacer hielo con ahorro de espacio* Estante de QuickSpace La máquina de hacer hielo y el recipiente están ubicados en la Funciona como un estante normal de tamaño completo cuando puerta, creando un espacio de almacenamiento con mayor uso. lo necesite y se desliza fácilmente hacia adentro para guardar artículos altos en la parte inferior. - Page 97 Acerca de las funciones.* GEAppliances.com Recipiente de hielo en la puerta* 1. Abra la puerta izquierda de comidas frescas. 2. Baje la traba para abrir la puerta del recipiente. Traba 3. . Uso del recipiente con sujeción manual hacia arriba y afuera para despejar los localizadores en la parte inferior del recipiente.
- Page 98 Sobre los controles con ajustes de temperatura. PFE29,PYE23P Estilo de Control A, Control Externo del LCD Temperature Express Mode Settings Control Precise Fill Cubed Lock Auto Fill Light Refrigerator Hold 3 Sec for °F/°C Recommended: 37 °F Crushed Cubed Water Actual Set PFE27, PYE23K Estilo de Control B, Control Externo del LCD Energy Smart...
- Page 99 Sobre los controles con ajustes de temperatura. GEAppliances.com Cambio de la Temperatura para el Estilo de Control A y Café Para apagar el sistema de enfriamiento, acceda a SETTINGS Para Cambiar la Temperatura del Refrigerador: (Configuraciones) en la pantalla HOME (Inicio). Dé vuelta la Acceda Por: Botón de Temperatura...
-
Page 100: Controles
Acerca de las funciones de los controles. PFE29, PFE27, Estilo de Control B, Controles Externos Estilo de Control A, Controles Externos PYE23P PYE23K Freezer Refrigerator Temperature Express Mode Settings Control Precise Fill Cubed Lock Actual Temp Set Temp Turbo Freeze Turbo Cool Auto Fill Light... - Page 101 Acerca de las funciones de los controles.* GEAppliances.com GFE29, GFE27, Estilo de Control C, Controles Externos DFE29 Freezer Refrigerator Actual Temp Hold 3 sec Set Temp Ice Top ON OFF EnergySmart Turbo Ice Bottom ON OFF Maker Replace Water Filter...
-
Page 102: Dispensador
Acerca del dispensador.* Si no se dispensa agua cuando el refrigerador se instala por Acerca del dispensador (Consulte acerca de primera vez, es posible que la tubería de agua posea aire. los controles con Presione la paleta dispensadora durante por lo menos cinco configuraciones de minutos para eliminar el aire atrapado de la tubería de agua y temperatura y acerca de las... - Page 103 Acerca del llenado automático.* GEAppliances.com Para Usar LLENADO AUTOMÁTICO CON MANOS LIBRES: • Centre el envase en la Bandeja del Dispensador de Receso (sin tocar los sensores inferiores) y retire la mano del envase • Presione AUTO FILL (LLENADO AUTOMÁTICO).
- Page 104 Acerca del cartucho del filtro de agua RPWF de GE ® 2. Mientras continúa asegurando que el Cartucho del filtro de agua cartucho esté completamente insertado El cartucho del filtro de agua está ubicado en uno en el sostén, gire suavemente el filtro hacia de los siguientes lugares: adentro hasta que quede en posición Refrigeradores con freezer en la parte inferior:...
-
Page 105: De Comidas Frescas
Acerca de las opciones de almacenamiento de comidas frescas GEAppliances.com Cómo Reorganizar los Estantes Los estantes del compartimiento del refrigerador son ajustables. Para retirar: Retire todos los artículos del estante. Incline el estante hacia arriba en la parte frontal. Levante el estante hacia arriba desde la parte trasera y retire el mismo. - Page 106 Acerca de las opciones de almacenamiento de comidas frescas. Recipiente de Lácteos No Ajustable Para retirar: Levante el recipiente de forma Para reemplazar: Adhiera el recipiente en los recta y luego empuje hacia afuera. soportes de puerta moldeados y empuje hacia abajo.
- Page 107 Acerca de climate zone (área climática) y del cajón con control de temperatura. GEAppliances.com ClimateZone Mantenga las frutas y verduras organizadas en compartimientos separados para un fácil acceso. El exceso de agua que se puede acumular en la parte inferior de los cajones o debajo de los mismos se deberá...
- Page 108 Acerca de climatezone (área climática) y del cajón con control de temperatura. Cómo Retirar y Reemplazar el Cajón Ajustable de Embutidos/ Productos Cultivados Para retirar: Para reemplazar: Empuje el cajón fuera de su posición final. Empuje los costados izquierdo y derecho hasta que estén completamente Levante la parte frontal del cajón hacia extendidos.
-
Page 109: Freezer
Acerca del freezer. GEAppliances.com Canasta y Cajón del Freezer Canasta Cajón Recipiente de Utilidades Recipiente No Ajustable en el Freezer Para retirar: Empuje hacia adentro la lengüeta plástica, ya sea hacia la izquierda o la derecha. Para reemplazar: Deslice el recipiente en la ubicación hasta que quede bloqueado. -
Page 110: Máquina De Hacer Hielo
Acerca de la máquina de hacer hielo automática. Puede llevar entre 12 y 24 horas que un refrigerador recién instalado comience a fabricar hielo. Máquina de Hacer Hielo Automática* Es posible que escuche un zumbido cada vez que la Máquina máquina de hacer hielo se llene de agua. -
Page 111: Cuidado Y Limpieza
Cuidado y limpieza del refrigerador. GEAppliances.com Limpieza de la Parte Exterior Los paneles de acero inoxidable, manijas de las Partes plásticas con acentos de plata. puertas y componentes. Lave las partes con jabón u otros detergentes suaves. Limpie con una esponja, una tela húmeda o toallas de papel. -
Page 112: Reemplazo De Las Luces
Reemplazo de las luces Luces del Refrigerador (LEDs) Hay una luz LED en el compartimiento de comidas frescas y en la parte inferior de las puertas de comidas frescas para iluminar el compartimiento del freezer.* Será necesario que un técnico autorizado reemplace las luces LED. - Page 113 GE (que contenga tubería, válvula de cierre, uniones e instrucciones) está disponible por un costo adicional a nivel minorista, visitando nuestro sitio web en GEAppliances.com (en Canadá en www.geappliances.ca) o en Parts and Accessories (Piezas y Accesorios), 800.626.2002 (en Canadá 1.800.661.1616).
- Page 114 Instrucciones de Instalación DIMENSIONES Todas las medicion es se dan con la pata niveladora completamente replegada. Modelos con Profunidad Estándar (SD) Únicamente Modelos con Profunidad de Mesada (CD) Únicamente Profundidad de Caja sin ” ” ” SD Puertas de 29 ”...
- Page 115 Instrucciones de Instalación CÓMO INSTALAR EL REFRIGERADOR RETIRE LA MANIJA DE LA PUERTA DE CÓMO INSTALAR EL REFRIGERADOR COMIDAS FRESCAS • No instale el refrigerador donde la temperatura llegue a El Diseño del Mango varía dependiendo de los modelos; ser inferior a los 60ºF (16ºC), ya que no se activará con la sin embargo, la instalación es igual.
- Page 116 Instrucciones de Instalación CÓMO INSTALAR EL REFRIGERADOR (cont.) RETIRE LAS PUERTAS DEL REFRIGERADOR RETIRE LAS PUERTAS DEL REFRIGERADOR (cont.) De forma segura encinte el cierre de la puerta con cinta Desconecte la tubería de agua de la parte trasera de de mascarar o pida a otra persona que sostenga la la unidad, presionando hacia abajo el collar gris oscuro puerta.
- Page 117 Instrucciones de Instalación CÓMO INSTALAR EL REFRIGERADOR (cont.) RETIRE LAS PUERTAS DEL REFRIGERADOR (cont.) REINSTALACIÓN DE LAS PUERTAS DEL REFRIGERADOR (cont.) Nota: Para una instalación posterior adecuada, siga el siguiente paso de forma cuidadosa. Las puertas de comidas frescas se deben RETIRAR e INSTALAR abiertas a 90º...
- Page 118 Instrucciones de Instalación CÓMO INSTALAR EL REFRIGERADOR (cont.) RETIRE LA PUERTA DEL FREEZER REEMPLAZO DE LA PUERTA DEL FREEZER Abra la puerta del freezer hasta su extensión completa. Empuje el Mecanismo de deslizamiento hasta su Retire los 3 tornillos adheridos, ubicados en la parte extensión completa usando ambas manos de forma inferior a cada lado de la puerta del freezer usando un simultánea.
- Page 119 Instrucciones de Instalación CÓMO INSTALAR EL REFRIGERADOR (cont.) ¡IMPORTANTE! Los 6 tornillos de montaje (3 en cada lado) NO son intercambiables con los tornillos de la bisagra central o superior. Luego de la instalación de la puerta del freezer, controle que los espacios sean uniformes (la parte superior e inferior del lado derecho e izquierdo) con la plantilla provista.
- Page 120 Instrucciones de Instalación CÓMO INSTALAR EL REFRIGERADOR (cont.) NIVELACIÓN DE LA PUERTA DEL FREEZER NIVELACIÓN DE LA PUERTA DEL FREEZER (cont.) Levante la puerta del lado que requiera ajustes, gire la leva hacia la posición requerida. 0 - Initial position 1 - Levante de a 0.050”...
-
Page 121: Instrucciones De Instalación
Canadá, llame al 1.800.561.3344). refrigerador (vea la Figura 1). Para acceder a instrucciones sobre el soporte, Figura 1 – Visión General de Instalación visite: www.GEAppliances.com. 2 Agujeros en la Pared Piso - Concreto (2 Agujeros) Soporte de... -
Page 122: El Refrigerador
Instrucciones de Instalación UBICACIÓN DEL SOPORTE DE PISO Construcción del Piso y la Pared de CONCRETO: AT-2 ANTI-VOLCADURAS (cont.) • Se requiere el uso de anclajes (no provistos): 4 tirafondos cada uno de ¼” (6 mm) x 1-1/2” (38 mm) Figura 2 –... - Page 123 Instrucciones de Instalación CÓMO INSTALAR EL REFRIGERADOR (cont.) Si usará tuberías de GE SmartConnectTM, las tuercas ya CÓMO CONECTAR EL REFRIGERADOR están ensambladas en la tubería. AL SUMINISTRO DE AGUA DEL HOGAR Si usará tuberías de cobre, inserte el extremo de la Se requiere un suministro de agua fría para el tubería en la conexión del refrigerador, en la parte trasera funcionamiento de la máquina de hielo automática.
- Page 124 Instrucciones de Instalación CÓMO INSTALAR EL REFRIGERADOR (cont.) ABRA EL SUMINISTRO DE AGUA NIVELACIÓN DE LAS PATAS DEL REFRIGERADOR Recuerde que es necesario que el refrigerador esté nivelado para que las puertas estén perfectamente apoyadas. Si necesita ayuda, revise la sección previa sobre nivelación del refrigerador.
- Page 125 Instrucciones de Instalación CÓMO INSTALAR EL REFRIGERADOR (cont.) Modelos sin Instrucciones de Ensamble del Refrigerador, ensamble sugerido. Dispensión Divisor (modelos selectos únicamente) Coloque los recipientes en las puertas: Enlace su recipiente con la letra mostrada. Posicione los ganchos del recipiente sobre el ubicador del recipiente y empuje hacia Parte trasera del adelante hasta que se inserte...
- Page 126 Instrucciones de Instalación CÓMO INSTALAR LA TUBERÍA DE AGUA ANTES DE COMENZAR Para los Modelos PFE29 y PYE23P: Si el refrigerador es utilizado antes de haber realizado la conexión Los kits de suministro de agua de cobre recomendados de agua a la máquina de hacer hielo, consulte son WX8X2, WX8X3 o WX8X4, dependiendo de ICE MAKER (Máquina de Hacer Hielo) en el menú...
-
Page 127: De Agua
Instrucciones de Instalación CÓMO INSTALAR LA TUBERÍA DE AGUA (Cont.) Instale la válvula de cierre en la tubería de agua LO QUE NECESITARÁ (CONT.) potable de uso frecuente más cercana. NOTA: La única tubería plástica aprobada es aquella provista con los Kits de Tuberías para Refrigerador de CIERRE EL SUMINISTRO DE AGUA GE SmartConnectTM. - Page 128 Instrucciones de Instalación CÓMO INSTALAR LA TUBERÍA DE AGUA (Cont.) AJUSTE LA VÁLVULA DE CIERRE CONECTE LA TUBERÍA A LA VÁLVULA Ajuste la válvula de cierre de la tubería de agua Coloque la tuerca de compresión y la fría con la abrazadera de la tubería. abrazadera de refuerzo (manga) para colocar la Abrazadera tubería de cobre en el extremo de la tubería y...
- Page 129 Condiciones de funcionamiento normal. GEAppliances.com El sonido de los refrigeradores nuevos es diferente al de aquellos más antiguos. Los refrigeradores modernos cuentan con más funciones y utilizan una tecnología más nueva. ¿Escuchas lo que yo escucho? Estos condiciones son normales.
-
Page 130: Consejos Para La Solución De Problemas
Antes de Solicitar el Servicio Técnico… Consejos para la Solución de Problemas ¡Ahorre tiempo y dinero! Primero revise los cuadros que aparecen en las siguientes páginas y es posible que no necesite solicitar reparaciones. Problema Causas Posibles Qué Hacer La luz indicadora del filtro permanece El indicador del filtro de agua debe ser Modelos sin LCD: encendida luego de reemplazar el... -
Page 131: Normal
Antes de Solicitar el Servicio Técnico… GEAppliances.com Consejos para la Solución de Problemas (cont.) Problema Causas Posibles Qué hacer No hay producción de agua ni de La línea de suministro o la válvula de Llame a un plomero cubos de hielo cierre están atascadas... -
Page 132: Mito
Antes de solicitar el servicio técnico, revise los consejos para la solución de problemas de forma detallada en el Manual del Propietario. En caso de ser necesario, se podrá SERVICIO programar el servicio técnico visitándonos a través de Internet en GEAppliances.com o llamando al 800.ge.CARES 800.432.2737. Verdad o Mito... - Page 133 Antes de solicitar el servicio técnico, revise los consejos para la solución de problemas de forma detallada en el Manual del Propietario. En caso de ser necesario, se podrá SERVICIO programar el servicio técnico visitándonos a través de Internet en GEAppliances.com o llamando al 800.ge.CARES 800.432.2737. Verdad o Mito (cont.) Verdad o Mito? (cont.)
- Page 134 Cliente (Customer Care ). Para programar una visita del servicio ® acuerdo con la garantía deberá técnico, visítenos en GEAppliances.com, o comuníquese al 800. contar con la prueba de la fecha GE.CARES (800.432.2737). Cuando llame para solicitar el servicio, original de compra.
- Page 135 Garantía Limitada del Cartucho del Filtro de Agua RPWF. Abroche su recibo aquí. Para acceder al servicio técnico de Póngase en contacto con nosotros Appliance Service acuerdo con la garantía deberá en la www.geapplianceparts.com, Appliances 800-GE-CARES contar con la prueba de la fecha o llame al 800.GE.CARES.
-
Page 136: Ficha Técnica De Rendimiento
Ficha Técnica de Rendimiento del Modelo: GE RPWF Use el Cartucho de Reemplazo de RPWF. La concentración de las sustancias indicadas en el agua que ingresa al sistema fue reducida a la concentración menor que o igual al límite aceptable para el agua que deja el sistema, como se especifica en NSF/ANSI Estándar 53. Sistema evaluado y certificado por NSF International contra NSF/ANSI Estándar 42 y Estándar 53 para la reducción de sustancias que figuran a continuación. - Page 137 Estado de California Department of Public Health (Departamento de Salud Pública) Número de Certificado del Dispositivo de Tratamiento del Agua 11-2110 Fecha de Emisión: 16 de noviembre de 2011 Designación de Marca/ Modelo Elementos de Reemplazo GE RPWF RPWF Fabricante: 3M Purification Inc. El dispositivo(s) de tratamiento del agua que figura en este certificado cumplió...
- Page 138 Consumer Support. Sitio Web de Electrodomésticos de GE GEAppliances.com En EE.UU.: ¿Desea realizar una consulta o necesita ayuda con su electrodoméstico? ¡Intente a través del Sitio Web de Electrodomésticos de GE las 24 horas del día, cualquier día del año! Para mayor conveniencia y un servicio más rápido, ahora puede descargar el Manual del Propietario, ordenar piezas o incluso programar el servicio técnico a través de...