Table of Contents
Advertisement
Quick Links
Advertisement
Table of Contents

Related Manuals for Wen APEX Pro 3710


Summary of Contents for Wen APEX Pro 3710
-
Page 2: Table Of Contents
Table of Contents Technical data…………………………………………………………… General safety rules……………………………………………………… 3 Additional safety rules…………………………………………………... Electrical requirements………………………………………………..…. 8 Know your table saw……………………………………………………. Unpacking……………………………………………………………….. Assembly and adjustments……………………………………………… Operation………………………………………………………………... Maintenance…………………………………………………………….. Trouble shooting………………………………………………………… Exploded view………………………………………………………….. Parts list…………………………………………………………………. Warranty statement……………………………………………………… Technical Data Model: 3710 Motor: 120V, 60Hz, 15A, 4800rpm Blade: 10 inch carbide tipped blade Arbor:... -
Page 3: General Safety Rules
Important Servicing requires extreme care and knowledge and should be performed only by a qualified service technician. For service, we suggest you return the tool to WEN PRODUCTS a division of Great Lakes ® Technologies, LLC for repair. When servicing, use only identical WEN replacement parts. -
Page 4: Personal Safety
When not in use, before servicing, when changing blades, bits, cutters, etc. All repairs, electrical or mechanical, should be attempted only by trained repairmen. Use only WEN replacement parts; any others may create a hazard. Use only accessories that are recommended by the manufacturer for your model. Accessories that may... -
Page 5: Additional Safety Rules
Additional Safety Rules Tool Care DO NOT ALTER OR MISUSE TOOL These tools are precision built. Any alteration or modification not specified is misuse and may result in dangerous conditions. AVOID GASEOUS AREAS Do not operate electric tools in gaseous or explosive at mospheres. Motors in these tools normally spark, and may result in a dangerous condition. - Page 6 d. NOT ripping workpiece that is twisted or warped or does not have a straight edge to guide along the rip fence. e. NOT releasing work until you have pushed it all the way past the saw blade. f. Using a Push Stick for ripping widths of 2" to 6" and an auxiliary fence and Push Block for ripping widths narrower than 2"...
- Page 7 spreader is in proper alignment with the saw blade. If ripping at the time, check to see if rip fence is parallel with the saw blade. Readjust as indicated. g. NEVER gang crosscut — lining up more than one workpiece in front of the blade (stacked vertically or horizontally outward on the table) and then pushing thru saw blade.
-
Page 8: Electrical Requirements
Electrical Requirements Double Insulated Tools Double Insulation is a design concept used in electric power tools which eliminates the need for the three wire grounded power cord and grounded power supply system. It is a recognized and approved system by Underwriter’s Laboratories, CSA and Federal OSHA authorities. IMPORTANT: Servicing of a tool with double insulation requires care and knowledge of the system and should be performed only by a qualified service technician. - Page 9 IMPROPER CONNECTION of the equipment grounding conductor can result in electric shock. The conductor with the green insulation (with or without yellow stripes) is the equipment grounding conductor. If repair or replacement of the electric cord or plug is necessary, DO NOT connect the equipment grounding conductor to a live terminal.
-
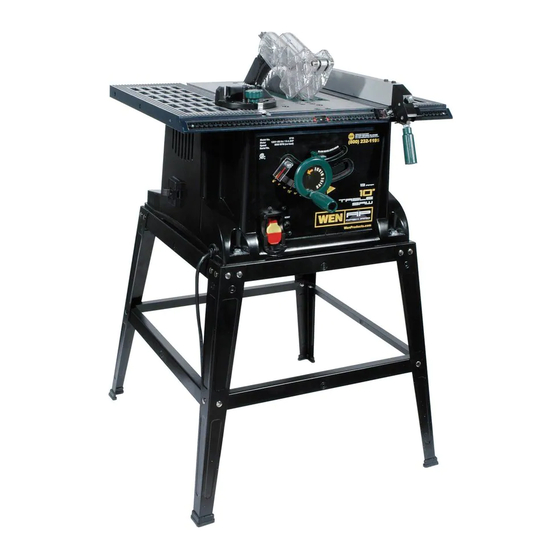
Page 10: Know Your Table Saw
Know Your Table Saw A Miter Gauge Hand Wheel B Blade Guard Leg Stand C Table ON/OFF Switch with Safety Key D Rip Fence Scale Blade Bevel Scale E Rip Fence Storage Miter Gauge Storage Blade Bevel Locking Lever... -
Page 11: Unpacking
Unpacking WARNING - to prevent accidental starting that could cause possible serious personal injury; assemble all parts to your saw before connecting it to power supply. Saw should never be connected to power supply when you are assembling parts, making adjustments, installing or removing blades, or when not in use. -
Page 12: Assembly And Adjustments
Assembly and Adjustments WARNING! Prior to performing any assembly procedures, make sure the 10" table saw is disconnected from its electrical power source. Assembling the Leg Stand (Figure 1) Warning: The stamped rails may have sharp edges. Be careful in handling the rails to prevent being cut. - Page 13 Mounting Table Saw to Workbench (Figure 3 & 4) If table saw is to be used in a permanent location, it should be fastened securely to a firm supporting surface such as a stand or workbench, using the four mounting holes, 1 (Figure 3) two of which are shown.
- Page 14 Mounting to Plywood (Figure 5) An alternative method of securing your table saw is to fasten the saw base to a mounting board 24" x 24" minimum size to prevent saw from tipping while in use. Any good grade of plywood with a 3/4" minimum thickness is recommended.
- Page 15 90° and 45° Positive Stops Adjustment (Figure 6, 7 & 8) Warning: To prevent personal injury, always disconnect the plug from power source before making any adjustments. The saw has positive stops that will quickly position the saw blade at 90° or 45° to the table. Make the following adjustments only if necessary.
- Page 16 Blade Parallel to Miter Gauge Groove Adjustment (Figure 9, 10 & 11) Warning: To prevent personal injury, always disconnect the plug from power source before making any adjustments. Warning: If the blade is misaligned by more than 1/8", do not attempt to align or operate the saw.
- Page 17 16. Stand the saw on its left side and tighten the four center adjustment nuts (7, Figure 11). 17. Place the saw upright and re-check the alignment to make sure the blade is parallel to the miter slot. Removal and Installation of the Blade (Figure 12, 13 &...
- Page 18 Installing the blade guard system Warning: To prevent personal injury, always disconnect plug from power source before installing or removing the blade guard. POSITIONING THE RIVING KNIFE (Figure 15 & 16) 1. Remove table insert using finger hole. 2. Raise the blade as high as it will go and set it perpendicular to table (0°...
- Page 19 Installing the anti-kickback device (Figure 18) While pulling out the attachment pin, attach the Anti-Kickback Device into the flat recessed area A of the riving knife (Figure 18). Slide the Anti-Kickback Device down until it drops into the recessed area – then release the attachment pin such that the Anti-Kickback Device locks onto the riving knife immediately behind the guard assembly.
-
Page 20: Operation
Operation Warning: For your own safety, always observe the following safety precautions. • Never make these cuts freehand (without using the miter gauge or other auxiliary devices) because the blade could bind in the cut and cause a KICKBACK or cause your fingers or hand to slip into the blade. - Page 21 safety key removed, the switch will not operate. NOTE: If the safety key is removed while the saw is running, the saw can be turned OFF, but cannot be restarted without inserting the safety key. Overload Reset Switch (Figure 19) To prevent accidental startup if the overload reset switch is pushed, the ON/OFF switch should be in the OFF position, and the plug should be removed from the power source while cool down takes place.
- Page 22 Repetitive Cutting (Figure 21) REPETITIVE CUTTING is known as cutting a quantity of pieces the same length without having to mark each piece (Figure 21). When making repetitive cuts from a long work piece, make sure it is supported. Warning: Never use the rip fence as a length stop because the cutoff piece could bind between the fence and the blade causing a kickback.
- Page 23 Bevel Crosscutting (Figure 23) BEVEL CROSSCUTTING is the same as crosscutting except that the wood is also cut at an angle … other than 90° with the flat side of the wood (Figure 23). Adjust the blade to the desired angle and lock it. Use the Miter Gauge in the groove to the RIGHT of the blade.
-
Page 24: Maintenance
Maintenance For your own safety, turn switch ―OFF‖ and remove plug from power source outlet before maintaining or lubricating your saw. Do not allow sawdust to accumulate inside the saw. Frequently blow out any dust that may accumulate inside the saw cabinet and the motor. Clean your cutting tools with a Gum and Pitch Remover. The cord and the tool should be wiped with a dry clean cloth to prevent deterioration from oil and grease. -
Page 25: Trouble Shooting
Trouble shooting WARNING: To avoid injury from an accidental start, turn the power switch off, remove the safety key and remove the plug from the power source before making any adjustment. PROBLEM CAUSE SOLUTION Saw will not start. 1. Saw not plugged in. 1. -
Page 26: Exploded View
Exploded View... -
Page 27: Parts List
Parts List Item # Stock # Description Item # Stock # Description 3710-001 3710-041 Spring washer 3710-002 Outer flange 3710-042 Socket head cap screw 3710-003 Blade 3710-043 Casing pipe 3710-004 Inner flange 3710-044 Flat washer 3710-005 Spring block circle 3710-045 Spin pin 3710-006 Front cover... - Page 28 Item # Stock # Description Item # Stock # Description 3710-081 Socket head cap screw 3710-121 Disk spring 3710-082 Spring washer 3710-122 Locking axis 3710-083 Flat washer 3710-123 Locking handle 3710-084 Swinging bracket 3710-124 Round pin 3710-085 Flat washer 3710-125 Screw 3710-086 Bolt...
- Page 29 Item # Stock # Description Item # Stock # Description 3710-164 lock knob 3710-205 Guiding rule 3710-165 lock knob cover 3710-206 Flat washer 3710-166 Ruler 3710-207 Splint 3710-168 Bolt 3710-208 Pull rod 3710-169 Back plate 3710-209 Spring 3710-170 Bolt 3710-210 Splint 3710-171 Screw...
-
Page 30: Warranty Statement
Limited Two Years Warranty WEN Products is committed to build tools that are dependable for years. Our warranties are consistent with this commitment and our dedication to quality. LIMITED WARRANTY OF WEN CONSUMER POWER TOOLS PRODUCTS FOR HOME USE GREAT LAKES TECHNOLOGIES, LLC ("Seller") warrants to the original purchaser only, that all WEN consumer power tools will be free from defects in material or workmanship for a period of two (2) years from date of purchase.