Table of Contents
Advertisement
Advertisement
Table of Contents

Related Manuals for Vivitar DVR 936


Summary of Contents for Vivitar DVR 936
-
Page 1: User Manual
DVR 936 Wi-Fi LifeCam Wearable Camcorder User Manual © 2009-2015 Sakar International, Inc. All rights reserved. Windows and the Windows logo are registered trademarks of Microsoft Corporation. All other trademarks are the property of their respective companies. -
Page 2: Table Of Contents
..................................18 AKING A HOTO Playback Mode ........................... 19 ..............................19 PLAYBACK COMPUTER ..............................19 ELETING APTURED MAGES Vivitar Action Cam - Mobile Device Application ................21 ..............................21 OBILE EVICE EQUIREMENTS ......................... 21 NSTALLING THE IVITAR CTION PPLICATION ....................... 22... - Page 3 ......................50 ETTING IDEOS FROM THE AMCORDER TO THE OMPUTER ! .................................. 51 ETTING TARTED ..................51 RANSFERRING MAGES ANUALLY FROM THE AMCORDER TO THE OMPUTER ..............................52 AMCORDER AINTENANCE ................................. 54 ROUBLESHOOTING Sakar Warranty Card ........................55 Technical Support ........................55...
-
Page 4: Introduction
Introduction Thank you for purchasing the Vivitar DVR 936 Full HD1080 LifeCam Wearable Camcorder. Everything you need to take high definition digital videos and photos is included with your camcorder. This unique, ultraportable camera design is adapted specifically for this camera and can be used to capture special moments in many different environments. -
Page 5: What's Included
1. Wi-Fi LifeCam Camcorder Magnet Mount 2. USB Cable 10. Tripod Mount 3. AC Charger 11. Head Mount 4. Vivitar Experience Installation CD 12. Bike Mount 5. Waterproof Casing 13. Helmet Mount (for waterproof 6. Suction Mount case) 7. Desktop Mount 14. -
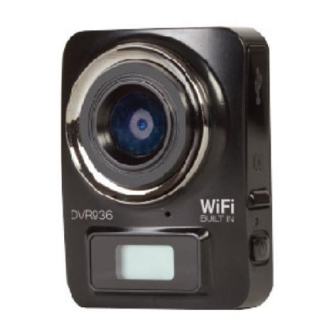
Page 6: Parts Of The Camcorder
Parts of the Camcorder 1. Lens 7. Mode Indicator 2. Microphone 8. Mode Button 3. LCD Display 9. LED Light Busy Indicator 4. USB Port / Micro SD Card Slot / Reset 10. Shutter Button 5. Power / Charger Light Indicator 11. -
Page 7: Camcorder Technical Specifications
Note: Accessible only via the App on your mobile device. Auto Power Off 3 minutes Interface USB 2.0 Battery Built in Lithium Battery System Requirements for WINDOWS XP (SP3), Vista (SP1), WINDOWS 7 or higher; Vivitar Experience MAC OSX v10.5.x and above... -
Page 8: Initial Camcorder Setup
Initial Camcorder Setup CHARGING THE BATTERY To charge the lithium battery: 1. Power off the camcorder. 2. Connect the included USB cable to the camcorder and connect the other end of the cable to a power source such as the included AC charger or to a computer. Please refer to the images shown below for reference. -
Page 9: Installing The Micro Sd Memory Card
NOTE: While the device is charging it cannot be used to capture images. When the camcorder is on, connecting it to a computer will not charge the device. Make sure the camcorder is powered off when recharging. Battery Indicator: Battery Indicator Description The battery level is full. -
Page 10: Powering On - Off / Using The Camcorder
4. The display screen will show an SD card icon , indicating that the SD card has been successfully installed. 5. To remove the card, gently press on the edge of the card to release it and pull the card out. IMPORTANT: ... -
Page 11: Using The Camcorder
Energy Save: In order to save the camcorder’s battery power, the camcorder automatically powers off after sitting idle for 3 minutes. USING THE CAMCORDER... -
Page 12: Main Camcorder Modes
Main Camcorder Modes Press the MODE button to toggle between the Time Lapse, Video and Photo Capture Modes. Video Capture Mode Use this mode to capture videos with your digital camcorder. To record a video, please check that the camcorder is in Video Mode. If the video icon is not displayed on the LCD screen, press the Mode button repeatedly until it appears. -
Page 13: Waterproof Case
Waterproof Case 1. Mode Button 2. Shutter Release Button 3. Wi-Fi Button 4. Power Button 5. Securing Latch 6. Tripod socket Your LifeCam comes with a waterproof casing for underwater action and added durability. To assemble your camera using the case, follow the instructions below: 1. -
Page 14: Powering On Your Camcorder
NOTE: A single hair or grain of sand can cause a leak. You can test by closing the case without inserting the camera. Submerse the case completely in water for about a minute. Remove the case from the water, dry off its exterior with a towel, and then open the case. If the entire interior is dry, the case is safe for use under water. -
Page 15: Lcd Display
LCD Display After turning on the Wi-Fi LifeCam Camcorder, the LCD displays the following: ICON DESCRIPTION Indicates that the camcorder is currently in Photo Capture Mode. CAMERA MODE ICON Indicates that the camcorder is currently in Video Capture Mode. VIDEO RECORDING ICON Flashing icon means the camcorder is recording a video. -
Page 16: Changing Camcorder Mode
In Photo Capture/Camera Mode, press the Shutter button to take photo. NOTE: Once connected via Wi-Fi to your mobile smartphone or tablet, and you have launched the Vivitar Action Cam app, the modes can be switched via the Vivitar Action Cam app. See ‘Using the Vivitar Action Cam Application’... -
Page 17: Video Capture Mode
The video is automatically saved to the camcorder’s Micro SD Memory card. NOTE: You can also enter Video Capture Mode using the ‘Vivitar Action Cam’ app. Once the camcorder is successfully connected via Wi-Fi to the mobile app, the default mode is Video Capture Mode. -
Page 18: Time Lapse Mode
The video is automatically saved to the camcorder’s Micro SD Memory card. NOTE: You can also enter Time Lapse Capture Mode using the ‘Vivitar Action Cam’ mobile app. Once the camcorder is successfully connected via Wi-Fi to the mobile app, the default mode is Video Capture Mode. -
Page 19: Photo Capture Mode
The photo is automatically saved to the camcorder’s Micro SD Memory card. NOTE: You can also enter Photo Capture Mode using the ‘Vivitar Action Cam’ mobile app. Once the camcorder is successfully connected via Wi-Fi to the mobile app, the default mode is Video Capture Mode. -
Page 20: Playback Mode
Playback Mode Your captured videos and photos can be played back on your smartphone/tablet or via your computer. PLAYBACK MODE: COMPUTER 1. Connect your camcorder to your computer using the supplied USB cable. Connect the smaller end of the USB cable to the USB interface of your camcorder and the other end to the USB port of your computer. - Page 21 DELETING IMAGE FILES WHILE CONNECTED TO THE COMPUTER: After connecting to the computer, the camera enters portable disc mode. 1. After connecting the camcorder to your computer and opening the ‘JPG’ or ‘VIDEO’ folder with your image files, select the file(s) that you would like to delete. 2.
-
Page 22: Vivitar Action Cam - Mobile Device Application
Vivitar Action Cam - Mobile Device Application The Vivitar Action Cam application allows you to use your mobile device as a remote control for your Action Camcorder. You can remotely capture photos and record videos, adjust camera settings, and preview the photos and playback the videos taken by your LifeCam. You can also easily download the captured videos and photos from the LifeCam to your mobile device and then share these captured images online. -
Page 23: Connecting Your Action Cam To Your Mobile Device
CONNECTING YOUR ACTION CAM TO YOUR MOBILE DEVICE 1. LifeCam Camcorder: Make sure you have installed a TF card and power on your Camcorder. Power on the camcorder. Then press the Wi-Fi button on the Action Camcorder to enable the Wi-Fi connection. The Wi-Fi button’s red LED light blinks and the Wi-Fi icon appears on the LCD. -
Page 24: Using The Vivitar Action Cam Application
USING THE VIVITAR ACTION CAM APPLICATION HOME SCREEN The Vivitar Action Cam application gives you the option to connect three Vivitar Action Camcorders. Only one Action Cam can be connected at a time. The Home screen allows you to connect your camera(s) and enter the Video and Photo live capture modes. - Page 25 The following options appear on the Home screen: Connect and Add New Camera: Make sure your Mobile device and your Vivitar Action Cam are connected. See CONNECTING YOUR ACTION CAM TO YOUR MOBILE DEVICE for more information. The top section of the Home screen shows the list of Action Camcorders – those that are connected or disconnected.
- Page 26 Long tap the button of an added camera to open the following options: Connect: Tap Connect to reconnect and to open the connected Action cam live mode. Rename: Allows you to change the name of the camera displayed on the button. Delete: Removes the selected camera from the list.
- Page 27 Menu Tap Menu on the top right of the screen to view the following information: About Help (online) User Manual (online) License IMPORTANT - To access the online Help or User Manual: Please make sure your mobile device is connected to a Wi-Fi network with an Internet connection.
- Page 28 VIDEO CAPTURE MODE: REGULAR AND TIME-LAPSE After tapping and selecting your connected camera, the default mode is the Video Capture Mode. The application is in Live Camera Mode and you can now begin capturing your images. NOTE: When you rotate your mobile device you can capture your videos in Portrait and Landscape views.
- Page 29 Displays the current selected Video Resolution. VIDEO RESOLUTION Tap the icon to change resolution. The Resolution options include: FHD, HD, VGA PLAYBACK IMAGES FROM Tap to view thumbnails of the captured videos and photos CAMERA from your camera. NOTE: To playback videos, select and download to your mobile device.
- Page 30 PHOTO CAPTURE MODE After tapping and selecting your connected camera, the default mode is the Video Capture Mode. To change to Photo Capture Mode, slide the Switch Mode indicator to the Photo icon. The application is in Live Camera Mode and you can now begin capturing your images. ICON DESCRIPTION BACK...
- Page 31 The Resolution options include: 9M, 5M PLAYBACK IMAGES FROM Tap to view thumbnails of the captured videos and photos CAMERA from your camera. Tap photo thumbnail to view the photo full screen. CAMERA NAME Displays the name of the connected camera. CAMERA SETTINGS Tap to display the Camera Settings options.
-
Page 32: Camera Settings
CAMERA SETTINGS Tap the Camera Settings icon or tap the icons from the Live Camera Mode screen to access your Action Camcorder settings. Video Capture Mode Settings SETTING DESCRIPTION VIDEO RESOLUTION The Video Resolution options allow you to choose the desired (Accessed from the Live size of the videos taken by your camera. - Page 33 Regular Video Time-lapse NOTE: ‘REGULAR VIDEO’ or ‘TIME-LAPSE’ appears on the screen as per the selected setting. The ‘Frequency’ options represent the frequency of the electrical FREQUENCY current in fluorescent lighting sources in your locale. If your (Accessed via Settings) camera is set to a frequency that does not match your country’s electric current, you may see waves on the images taken by your camera.
- Page 34 Photo Capture Mode Settings SETTING DESCRIPTION PHOTO The Photo Resolution options allow you to choose the desired RESOLUTION size of the images taken by your camera. Keep in mind that images with a higher resolution will also take up more of your (Accessed from the Live memory on your camera’s memory card.
- Page 35 2S - 2 seconds delay 10S - 10 seconds delay The ‘Frequency’ options represent the frequency of the electrical FREQUENCY current in fluorescent lighting sources in your locale. If your (Accessed via Settings) camera is set to a frequency that does not match your country’s electric current, you may see waves on the images taken by your camera.
- Page 36 Media captured using your smartphone/tablet and saved to your mobile device. Media on My Camera The photos and videos that you captured using the Vivitar Action Cam application and the media you have previously captured using your camera can be viewed in Playback Mode.
- Page 37 PHOTOS Select the Photos tab on the top of the screen to view the photos on your camera’s Memory Card. Your captured photos are shown in Thumbnail view, with the latest captured photo at the top. The photos can be downloaded to your mobile device, shared or deleted. FULL SCREEN VIEW: View Photo 1.
- Page 38 THUMBNAIL VIEW: View Photos In Thumbnail View you can select a photo or photos to be deleted from your memory card, or downloaded to your mobile device. To Select Photos: SELECT (single or multiple photos): To select a photo tap and hold the thumbnail image. ...
- Page 39 - The .MOV files are streamed from your camera to play on your mobile device. Please note that the videos (that were captured with audio) are played back on the Vivitar Action Cam app on your mobile device without the captured audio.
- Page 40 THUMBNAIL VIEW: Videos In Thumbnail View the selected video(s) can be downloaded to your mobile device or deleted from your memory card. 1. To Select Videos: SELECT (single or multiple videos): To select a video, tap and hold the thumbnail image. ...
- Page 41 Gallery. The downloaded video saved to your mobile device may not playback using the Vivitar Action Cam app or the current native Android video player. If this is the case with your mobile device, you can use a third party Android app that supports .MOV files to playback...
- Page 42 PHOTOS Select the Photos tab to view the photos on your mobile device. The following options appear in the Thumbnail view: THUMBS VIEW: Tap Thumbs to view thumbnails of the photos on your mobile device. This is the default view when selecting ‘Photos’ from the Home screen. ...
- Page 43 2. To View Photo Slideshow: SLIDESHOW: Select the desired thumbnail images. Tap the (iOS) / (Android) Slideshow icon. The photos will then begin to be displayed as a looping Slideshow on you mobile device. Tap the Stop button then Cancel (iOS) or the Back (Android) button to stop the Slideshow.
- Page 44 ALBUMS VIEW: Photos Tap Albums to open the Albums list view. A list of albums appears. Each album is shown with a thumbnail photo image, album name and amount of pictures in the album. Tap on a specific album to view thumbnails of all the photos in the album. These photos can be selected and displayed as a Slideshow or shared.
- Page 45 THUMBNAIL VIEW: Videos In Thumbnail View you can playback a selected video or share your selected video. 1. To Play Your Video: PLAY VIDEO: Tap on a video thumbnail to view it in full screen mode. The selected video automatically begins to play in full screen. Use the onscreen controls to play, pause, rewind, fast forward and stop the playing video.
- Page 46 - If you have an account, you may be prompted to login to the selected Share option. - If you do not have an account in the selected social network, you will be prompted to add or create an account. Continue as instructed to complete the creation of your account.
-
Page 47: Vivitar Experience Image Manager Software
Vivitar Experience Image Manager Software COMPUTER SYSTEM REQUIREMENTS To be able to download videos and photos to your computer using the ‘Vivitar Experience Image Manager’ Software, you will need the following minimum configuration: WINDOWS OS MICROSOFT® Windows XP with Service Pack 3, Windows Vista with Service Pack 1 or Windows 7 ... -
Page 48: Installing The Software
INSTALLING THE SOFTWARE INSTALLING THE SOFTWARE – USING THE CD ROM You must be connected to the Internet to install and run the Vivitar Experience Image Manager Software. 1. Insert the installation CD into your CD-ROM drive. The installation screen should automatically open. - Page 49 On MACINTOSH OS: Click the “Quit” button when the installation is complete. Click the “Launch Vivitar Experience Image Manager” to open the application. 13. If you close the application you can run the Vivitar Experience Image Manager from the Programs (PC) or Applications (Mac) menu on your computer.
-
Page 50: Connecting The Camcorder To The Computer
INSTALLING THE SOFTWARE – USING THE ONLINE LINK The Vivitar Experience Image Manager Software can also be downloaded and installed via the following online links: WINDOWS OS: http://tinyurl.com/viviwin MAC OS: http://tinyurl.com/vivimac 1. Enter the appropriate URL (shown above) into a web browser on your computer. -
Page 51: Getting Videos From The Camcorder To The Computer
GETTING VIDEOS FROM THE CAMCORDER TO THE COMPUTER The Micro SD Memory card needs to be inserted. Do not disconnect the cable during transfer. Doing so will cancel the transfer of any files on their way to your computer. 1. Select the “Get Images” button from the Main menu. 2. -
Page 52: Getting Started
Edit images using automatic and manual tools Use automatic “Geotagging” with built in Google Maps For more details on how to use the Vivitar Experience Image Manager open the Help file or click the “Take a Tour” button on the application’s Home screen. -
Page 53: Camcorder Maintenance
MACINTOSH OS 1. Use the supplied USB cable to connect your camcorder to your computer’s USB port. 2. Power on the camcorder. ‘PCU’ appears on the camera’s screen. 3. The camcorder’s device icon appears on the desktop. 4. Click on the device icon and open the DCIM folder and the folder inside to view the media files. - Page 54 Please note that the memory card will get hot after long-term use. This is normal. It is recommended to backup the important data from your memory card to other media such as soft disk, hard disk or CD. ...
-
Page 55: Troubleshooting
Q: I deleted images using the Vivitar Experience Image Manager. The images were also deleted from my computer. How do I recover images that I accidently deleted? All images deleted using the Vivitar Experience Image Manager are sent to your computer’s... -
Page 56: Sakar Warranty Card
08817 Technical Support For technical support issues please visit our website at www.vivitar.com. You can find manuals, software and FAQ’s at the website. Can’t find what you are looking for? E-mail us at support@vivitar.com and one of our technical support team members will answer your questions.