Table of Contents
Advertisement
Quick Links
Advertisement
Table of Contents

Related Manuals for Vivitar DVR-840XHD


Summary of Contents for Vivitar DVR-840XHD
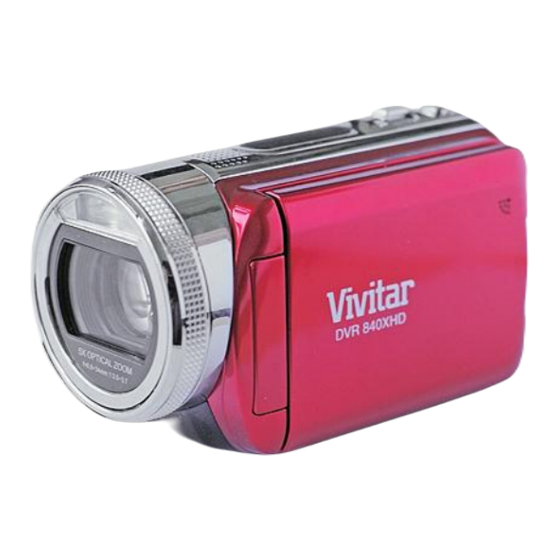
- Page 1 DVR 840XHD Digital Video Camcorder User’s Manual © 2009 Sakar International, Inc. All rights reserved. Windows and the Windows logo are registered trademarks of Microsoft Corporation. All other trademarks are the property of their respective companies.
-
Page 2: Table Of Contents
Connecting to a High Definition TV to view images ... 69 Connecting to a non High Definition TV to view images ... 70 Install the Vivitar Experience Image Manager Software ... 71 Connect your camcorder to the computer ... 74 Get photos and videos from your camcorder to your computer... -
Page 3: Introduction
Technical Specifications ... 80 Trouble Shooting... 82 Introduction Thank you for purchasing the DVR 840XHD Digital Video Camcorder. With your camcorder you can shoot high resolution H.264 video clips and take individual photos. In addition, 128 MB built-in memory allows you to take pictures and short movies without a memory card 32GB should to be inserted in order to expand the memory of your DVR camcorder. -
Page 4: What Your Digital Video Camcorder Includes
Supports external SD memory card up to 32GB Built-in Microphone Vivitar Experience Image Manager software for uploading and managing photos and videos to or from the most popular photo sharing and social network websites. What your digital video camcorder includes ... -
Page 5: Computer System Requirements For Windows Xp
Computer System Requirements for Windows XP To be able to download photos and videos to your PC, you will need the following minimum configuration: Pentium 4 processor or above with Windows XP service pack 2 512 MB RAM, with 100MB of free disk space ... -
Page 6: Computer System Requirements For Macintosh
Available USB Interface CD-ROM drive QuickTime 6 or higher Microsoft Internet Explorer 7 or higher Internet connection required Computer System Requirements for Macintosh Macintosh with Intel processor running Mac OS X v10.4.6 or later ... -
Page 7: A Quick Look At Your Digital Video Camcorder
A Quick Look at your Digital Video Camcorder... -
Page 9: Preparing Your Camcorder For Use
Preparing Your Camcorder for Use Battery Installation Your DVR camcorder requires a Lithium-ion rechargeable battery (included in packaging). Open the battery compartment on the bottom of the camcorder. Insert the batteries in accordance with the polarity (+ and - ) as indicated. Close the battery cover. -
Page 10: Inserting An Sd Memory Card
The battery cannot be charged by connecting the camcorder via the USB cable to the USB port of your computer. Inserting an SD Memory Card An SD compatible memory card of up to 32GB (not included) should be inserted into your DVR camcorder. - Page 11 Insert the SD memory card correctly in the direction shown. Press the memory card until you hear a “Click” sound. Note: After you insert an SD memory card, the that your SD memory card has been installed successfully, and the media you capture will now be stored on the card and not in the internal memory.
-
Page 12: Camcorder Buttons And Functions
Camcorder Buttons and Functions... -
Page 13: Dvr Functions And Menu Control
DVR Functions and Menu Control To power on the camcorder you need to flip open the LCD Screen. The Power button is situated on the inside of the camcorder. Power on Press the Power button to turn on your DVR. The green LED on the back of the camcorder will light up followed by the LCD monitor, indicating that your DVR is ready for use. -
Page 14: Capturing Videos
When there is insufficient battery power, a flashing red battery icon the LCD screen. The camcorder will automatically power off a few moments later Capturing Videos In order to start capturing videos (with audio) with your camcorder: 1. Aim the camcorder at the subject you wish to capture. The image you are capturing will appear on the LCD screen. - Page 15 When the internal memory is full, a “MEMORY FULL” message will flash on the LCD screen when you attempt to shoot further videos. Download the photo to your computer using the Vivitar Experience Image Manager software as described below in the section “Transfer photos and videos to your computer”...
- Page 16 To enter the setup submenu options for the Video mode press the OK/Menu button.
- Page 17 Press the Right/Left buttons to select the Video mode. Press the Up/Down button to select one of the Video mode options – Resolution, Stabilization or Motion Detect. Press the Right/Left button to select the setting that appears on the right hand side of the menu table.
- Page 18 Your camcorder is now ready to capture videos with the new settings you selected. Resolution Press the Down button to enter the Resolution submenu. Use the Right/Left button to move between the 5 video resolution settings – HD(1080p) / HD(720p) / WVGA 60 / VGA / QVGA. Press the OK/Menu button to confirm and save your choice.
- Page 19 Press the Exit button. Your camcorder is now ready to capture videos with the new settings you selected. The selected resolution icon appears on the top right corner of the LCD. Stabilization Press the Down button to enter the Stabilization submenu Use the Right/Left button to select either “On”...
- Page 20 Press the OK/Menu button to confirm and save your choice. Press the Exit button. Your camcorder is now ready to capture videos with the new settings you selected. If “On” is selected the Note: Stabilization is not supported in HD(1080p) and WVGA/60fps resolutions. Motion Detect Using this feature the camcorder will start to record videos automatically if it detects movement.
- Page 21 Press the Down button to enter the Motion Detect submenu. Use the Right/Left button to select either “On” or “Off”. Press the OK/Menu button to confirm and save your choice. Press the Exit button. Your camcorder is now ready to capture videos with the new settings you selected.
-
Page 22: Capturing Pictures
side of the LCD and the camcorder will start to record videos automatically if it detects a movement. The recording will also stop automatically if no movement is detected. Capturing Pictures You can use your camcorder to capture still pictures. Aim the camcorder at the object you wish to photograph. - Page 23 When the camcorder's internal memory is full, “MEMORY FULL” appears on the LCD screen when you attempt to press the Shutter button to take a photo. Either download the photo to your computer using the Vivitar Experience Image Manager software as described below in the section “Transfer photos and...
- Page 24 videos to your computer” or insert an SD card to continue taking more photos and videos. The number of photos that can be captured not only depends on the SD card’s capacity but also on the resolution selected. Better quality photos are taken at higher resolutions but these will also take up more memory on the card.
- Page 25 Press the Right/Left buttons to select the Picture mode. Press the Up/Down button to select one of the Picture mode options – Resolution, Flash or Selftimer. Press the Right/Left button to select the setting that appears on the right hand side of the menu table.
- Page 26 selected. Resolution Press the Down button to enter the Resolution submenu. Use the Right/Left button to move between the 3 picture resolution settings – High / Std / Low. Press the OK/Menu button to confirm and save your choice. Press the Exit button.
- Page 27 Your camcorder is now ready to capture photos with the new settings you selected. The selected resolution icon appears on the top left corner of the LCD. Flash The camcorder has 3 flash settings. You can change the flash setting by using the Right button on the camcorder dial or from within the Flash submenu.
- Page 28 Press the Down button to enter the Flash submenu. Use the Right/Left button to move between the 3 picture resolution settings – Auto / Red Eye / Off. Press the OK/Menu button to confirm and save your choice. Press the Exit button. Your camcorder is now ready to capture photos with the new settings you selected.
- Page 29 Note: The Flash will not activate if the batteries are low or if the camcorder is being charged. Selftimer You can set the Selftimer to up the camcorder and include yourself in the picture. Place the camcorder on a tripod or on a steady and flat surface. After pressing the Picture Shutter button the photo will be taken 10 seconds later.
- Page 30 Press the Down button to enter the Selftimer submenu. Use the Right/Left button to select either “On” or “Off”. Press the OK/Menu button to confirm and save your choice. Press the Exit button. Your camcorder is now ready to capture photos with the new settings you selected.
- Page 31 Press the Right/Left buttons to select the Effects mode. Press the Up/Down button to select one of the Effects mode options – Macro, Scene, Exposure and White Balance. Press the Right/Left button to select the setting that appears on the right hand side of the menu table.
- Page 32 Macro The camcorder has a close-up picture mode to allow you to take pictures at close range within 80cm. Press the Down button to enter the Macro Mode submenu. Use the Right/Left button to move between “Macro” or “Normal”. Press the OK/Menu button to confirm and save your choice. Press the Exit button.
- Page 33 selected. If “Macro” is selected, a Macro icon LCD. To revert to Normal mode select “Normal” in step 2. Scene The camcorder has a selection of built-in scenes. Select the scene that you want before taking the photo. will appear on the bottom left of the...
- Page 34 Press the Down button to enter the Scene submenu. Use the Right/Left button to move between the 7 options – Auto / Skin / Night / Backlight / Black and White / Classic / Negative. Press the OK/Menu button to confirm and save your choice. Press the Exit button.
- Page 35 when selected – Skin Exposure The camcorder adjusts image exposure automatically. In certain circumstances you may wish to adjust the exposure compensation manually. Press the Down button to enter the Exposure submenu. Use the Right/Left button to move between the 7 options – -1.0 EV / -0.6 EV / - , Night and Backlight...
- Page 36 0.3 EV / Auto / 0.3 EV / 0.6 EV / 1.0 EV. Press the OK/Menu button to confirm and save your choice. Press the Exit button. Your camcorder is now ready to capture photos with the new settings you selected.
- Page 37 Press the Down button to enter the White Balance (WB) submenu. Use the Right/Left button to move between the 4 options – Auto / Daylight / Fluorescent / Tungsten. The option selected is immediately previewed on the LCD. Press the OK/Menu button to confirm and save your choice. Press the Exit button.
- Page 38 Settings Your camcorder has 7 setting options – Sound (operation sound), Information, Time Setting, Format, TV, Language and Default Setting. To enter the setup submenu options for the Setting mode press the OK/Menu button. Press the Right/Left buttons to select the Setting mode. Press the Up/Down button to select one of the Setting mode options –...
- Page 39 Information, Time Setting, Format, TV, Language and Default Setting. Press the Right/Left button to select the setting that appears on the right hand side of the menu table. Press the OK/Menu button again to confirm and save your choice. Press the Exit button. Your camcorder is now ready with the new settings you selected.
- Page 40 Press the Down button to enter the Sound submenu. Use the Right/Left button to select “On” or “Off”. Press the OK/Menu button to confirm and save your choice. Press the Exit button. If you selected “On” the camcorder will emit a sound whenever a button is selected.
- Page 41 Press the Down button to enter the Information submenu. Use the Right/Left button to select “On” or “Off”. Press the OK/Menu button to confirm and save your choice. Press the Exit button. If you selected “On” the screen information will appear on the LCD. Selecting “Off”...
- Page 42 Press the Down button to enter the Time Setting submenu. An adjustable Time Setting menu appears. Use the Up/Down button to select – Year, Month, Day, Hour and Minute option. Use the Right/Left button to adjust the time setting for each option. Press the OK/Menu button to confirm and save your choice.
- Page 43 Format Please use this feature with caution. Using this feature will format either the internal built-in memory or the SD card if one is inserted in the camcorder. Once formatted all the media in the camcorder`s memory will be erased. This process is irreversible. Important: Before formatting download all images to the computer.
- Page 44 Press the Down button to enter the Format submenu. A Format message will appear on the LCD with a “Yes” or “No”. Use the Right/Left button to select the option you wish – “Yes” to continue with the format; “No” to cancel the format and revert back to the operational mode. Press the OK/Menu button to confirm and save your choice.
- Page 45 Select the appropriate TV standard for the area in which you are located. The choices are NTSC or PAL. Using the wrong TV system will result in the image flickering on playback.
- Page 46 Press the Down button to enter the TV submenu. Use the Right/Left button to select – NTSC (60Hz) or PAL (50Hz). Press the OK/Menu button to confirm and save your choice. Press the Exit button. Language Select the language of your choice. There are 10 languages from which to choose. Once the language is selected all the camcorder`s menus and information will appear in that language.
- Page 47 Press the Down button to enter the Language submenu. Use the Right/Left button to select the language of your choice – English, German, French, Italian, Spanish, Portuguese, Chinese Traditional, Chinese Simplified, Japanese and Korean. Press the OK/Menu button to confirm and save your choice. Press the Exit button.
- Page 48 Press the Down button to enter the Default Setting submenu. A Default Setting message will appear on the LCD with a “Yes” or “No”. Use the Right/Left button to select the option you wish – “Yes” to revert back to the original factory setting;...
-
Page 50: Camcorder Playback Modes
Camcorder Playback Modes... - Page 51 The Playback mode is for viewing and managing the photos and videos on the built-in memory or the SD card inserted in the camcorder. Press the Playback button beneath the dial for the Playback menu screen to appear. Use the Right/Left button to select the desired Playback mode - Movie or Picture. Press the OK/Menu button to enter that modes thumbnail preview folder.
-
Page 52: Movie Playback
Use the Right/Left button to select the desired video or photo you want to view. Press the OK/Menu button to view the selected video or photo. Movie Playback 1. In the Movie Playback thumbnail view select the movie you wish to view using the Right/Left button. - Page 53 3. The sequence number of the video, the duration of the video and the resolution at which the video was recorded appears above the video on the top of the LCD. 4. Press the Movie Shutter button to start playing the video. 5.
- Page 54 will appear on the LCD. 8. Press the Movie Shutter again to continue playing. Movie Playback Mode Menu In the Movie Playback mode press the OK/Menu button. The Movie Playback options appear.
- Page 55 Press the Up/Down button to select one of the options – Delete, Lock, Repeat One or Repeat All. Delete Movies Press the Down button to enter the Delete submenu. Select the Up button to delete all the videos; the Down button to delete the present video or the Exit button to Exit the mode.
- Page 56 Delete All On selecting the Up button, a Delete All message will appear on the LCD.
- Page 57 Use the Right/Left button to select either “Yes” or “No”. Press the OK/Menu button to confirm and save your choice. If you selected “Yes” all the videos in the Movie mode will be deleted. Delete One On selecting the Down button, a Delete One message will appear on the LCD. Use the Right/Left button to select either “Yes”...
- Page 58 Lock Movies In order to prevent movies being deleted by accident you can lock either all or single movies. Press the Down button to enter the Lock submenu. Select the Up button to lock all the videos; the Down button to lock the present video or the Exit button to Exit the mode.
- Page 59 A Lock icon will appear on the top of the LCD to show if the video is locked or not. To unlock the video simply press the same button as before in Step 2 when you locked the video. The Lock icon will disappear.
- Page 60 Repeat Movies Use this function to repeat playing either single movies or all the movies in the order they appear in the memory. Repeat One Press the Down button to enter the Repeat One submenu. Press the OK/Menu button for the selected movies to start playing. The same movie will repeat itself over and over.
- Page 61 Press the Movie Shutter to Pause/Play Press the Exit button to stop the repeat. Repeat All Press the Down button to enter the Repeat All submenu. Press the OK/Menu button for all the movies to start playing one after the other. Press the Movie Shutter to Pause/Play Press the Exit button to stop the repeat.
-
Page 62: Picture Playback
Picture Playback Use the Right/Left button to select the photo to view in the Picture thumbnail preview window Press the OK/Menu button to view the picture in full screen. Use the Right/Left button to go to the next or previous picture. To magnify the picture on the LCD, use the W/T zoom button To navigate around the magnified photo use the Up/Down/Left/Right... - Page 63 buttons. Press the OK/Menu button to exit the magnify mode. Picture Playback Mode Menu In the Picture Playback mode select a photo. Press the OK/Menu button the Picture Playback menu to appear.
- Page 64 Delete Press the Down button to select the Delete submenu Press the OK/Menu button to open the Delete Picture menu. Press the Right/Left button to select the Picture you wish to delete.
- Page 65 Press the Up button to delete all the pictures; The Down button to delete the selected picture only; Exit button to exit without deleting. Delete All If you selected Delete All a confirmation message screen will appear on the LCD.
- Page 66 Use the Right/Left button to choose “Yes” or “No” If you choose “Yes” all the unlocked pictures in the camcorder`s memory or the SD card if inserted will be deleted. This process is irreversible. Pressing “No” will cancel the delete process Press the OK/Menu button to confirm and save your choice.
- Page 67 A Delete One confirmation message screen will appear. Use the Right/Left button to select “Yes” or “No”. If you choose “Yes” the present picture if unlocked will be deleted from the camcorder`s memory or the SD card if inserted. This process is irreversible. Pressing “No”...
- Page 68 Use the Down button to select the Lock submenu. Press the OK/Menu button to open the Lock menu screen Use the Right/Left button to select the picture. Use the Up button to lock/unlock all the pictures. Use the Down button to lock/unlock the presently selected picture. Press the Playback button to Exit.
- Page 69 Make Slideshow This function automatically plays all the pictures in consecutive order. Press the Down button to select the Slideshow submenu. Press the OK/Menu button to start the slideshow. Press the OK/Menu button again to stop the slideshow and return to the Picture Playback mode menu.
-
Page 70: Connecting To A High Definition Tv To View Images
Connecting to a High Definition TV to view images Note: The camcorder will not be able to capture movies or snap pictures when it is connected to an HDTV. The LCD will also not display any image when connected to an HDTV. -
Page 71: Connecting To A Non High Definition Tv To View Images
Connecting to a non High Definition TV to view images Note: No image will appear on the LCD screen when the camcorder is connected to the... -
Page 72: Install The Vivitar Experience Image Manager Software
Warning: Do not plug your camcorder into the computer until the software installation is complete You must be connected to the internet to install and run the Vivitar Experience Image Manager software. Insert the installation CD into your CD-ROM drive. The installation screen should... - Page 73 On PC: The Vivitar Experience Image Manager Installer window appears. If the window does not appear, open the application’s CD/DVD drive and click on “Setup.bat” to launch the installer. On Macintosh: Click the icon to install the Vivitar Experience Image Manager.
- Page 74 On PC and Macintosh: Click the “I accept the terms of this license agreement” and then click “Next” to continue. 10. On PC only: Let the “Vivitar Experience Image Manager” installer create the folder to where the program will be installed, and then click “Install”.
-
Page 75: Connect Your Camcorder To The Computer
Connect your camcorder to the computer Use the USB cable that came with your camcorder to connect your camcorder to your computer. Turn the camcorder on. The first time you connect the device to the computer you will have to wait a few seconds until the computer recognizes the device. -
Page 77: Get Started
Get started! Using the Vivitar Experience Image Manager, you can upload and manage photos and videos to and from the most popular photo sharing and social networking sites - Facebook, Flickr, MySpace, Picasa, Photobucket and YouTube. -
Page 78: Transfer Media From My Camcorder To My Computer Manually (Using Windows)
Edit images using automatic and manual tools. Use automatic “Geotagging” with built in Google Maps. For more details on how to use the Vivitar Experience Image Manager open the Help file or click the “Take the Tour” button on the application`s Home page. -
Page 79: Transfer Media From My Camcorder To My Computer Manually (Using Macintosh)
Transfer media from my camcorder to my computer manually (Using Macintosh) Use the USB cable that came with your camcorder to connect your camcorder to your computer. The camcorder’s device icon appears on the desktop. Click on the device icon and open the DCIM folder and the folder inside to view the media files. -
Page 80: Sakar Warranty Card
Sakar Warranty Card This warranty covers for the original consumer purchaser only and is not transferable. Products that fail to function properly UNDER NORMAL USAGE, due to defects in material or workmanship. Your product will be repaired at no charge for parts or labor for a period of one year. -
Page 81: Technical Specifications
TECHNICAL SUPPORT For technical support issues please visit our website at www.vivitar.com. You can find manuals, software and FAQ’s at the website. Can’t find what you are looking for? E-mail us at support@vivitar.com your questions. For phone support in the US please call 1-800-592-9541, in the UK call 0800 917 4831. - Page 82 External Memory Lens Optical Zoom Self-timer File Format Focus Range Macro Focus Range Normal Microphone Speaker Recorder White Balance Exposure Flash Image Play Interface System Requirements TV out Battery Working Temperature SD card up to 32 GB Lens f=6.8 ~ 34mm; F3.5 ~3.7 Zoom HD (1080p):1X~10X (5X Optical + 2X Digital) .
-
Page 83: Trouble Shooting
Trouble Shooting 1. If the LCD image is not clear when shooting, how can the focus be adjusted? When taking photos and the object is within 80cm, use the Macro Mode which is a Submenu of the Effect Mode. 2. The flash is not working. The camcorder is in Macro Mode / The battery power is low. - Page 84 How do I recover photos that I accidently deleted? All images deleted using the Vivitar Experience Image Manager are sent to your computer`s Recycle or Trash Bin and can be retrieved from there.