Table of Contents
Advertisement
Quick Links
These instructions contain information on operating the scanner. Before reading these instructions, please read
the Quick Installation Guide enclosed with this unit.
Keep all documentation in a safe place for future reference.
Current model availability depends on your country/area. Please contact your dealer.
Operating Manual
Document Scanner
KV-S7097
Model No.
KV-S7077
Advertisement
Table of Contents

Related Manuals for Panasonic KV-S7097


Summary of Contents for Panasonic KV-S7097
- Page 1 Operating Manual Document Scanner KV-S7097 Model No. KV-S7077 These instructions contain information on operating the scanner. Before reading these instructions, please read the Quick Installation Guide enclosed with this unit. Keep all documentation in a safe place for future reference.
-
Page 2: Feature Highlights
Windows Vista refers to the Microsoft Windows Vista operating system (hereafter Windows Vista). • The explanations and screen shots in this manual are based on the Windows 7 operating system. • The illustrations in this manual are based on the KV-S7097. -
Page 3: About The Documentation
Utilities Scan Button Setting Tool Operating Manual Documents Control sheet Image Capture Plus is a Panasonic original application for configuring advanced scanning settings. ® ® Each document is a PDF document. To view documents correctly, install Adobe Reader For details about the control sheet, see "Using Control Sheets"... -
Page 4: System Requirements
■ System Requirements ® Computer PC/AT or compatible machine with a CD-ROM drive ® Intel Core™ 2 Duo 1.8 GHz or higher Interface USB 2.0 / USB 3.0 Note • For details about the system requirements, refer to [Read me first] in the Software / Manual CD-ROM. •... -
Page 5: Table Of Contents
Table of Contents Page Precautions ......... . . Component Identification . -
Page 6: Precautions
Precautions ■ Illegal Duplication It is unlawful to make duplication of certain documents. Duplicating certain documents may be illegal in your country/area. Penalties of fines and/or imprisonment may be imposed on those found guilty. The following are examples of items that may be illegal to duplicate in your country/area. •... -
Page 7: Roller Cleaning Paper
Only use the roller cleaning paper to clean the rollers. • For details about the roller cleaning paper, please refer to the Safety Data Sheet (SDS). Please ask your Panasonic sales company about obtaining the Safety Data Sheet. Note •... -
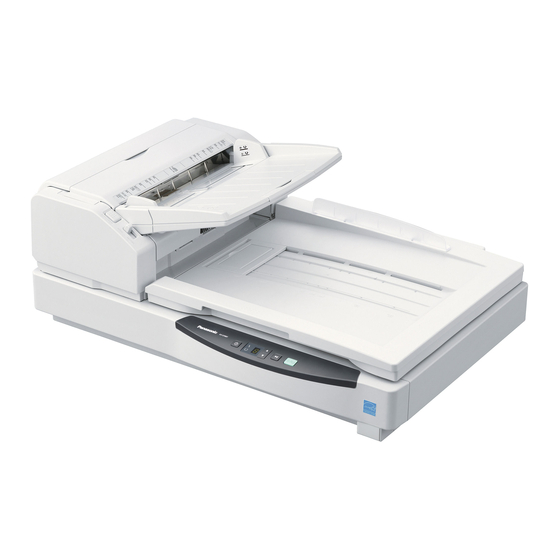
Page 8: Component Identification
Component Identification Document guide Hopper tray Hopper Hopper extension tray Document Back stopper guides selector Exit stopper ADF door : ADF door release Manual feed selector You can select the document feeding method. AUTO: Continuous scanning MANUAL: Manual scanning Document cover Exit tray Operation Panel For details, see "Operation Panel"... - Page 9 Component Identification Flatbed sheet Flatbed glass : Exit door release ADF glass (B) Exit door Reference plate (F) Reference plate (B) ADF glass (F)
-
Page 10: Operation Panel
Component Identification ■ Operation Panel Power button Press the power button for more than one second to turn the unit off. LED (Red) Lights when an error occurs. LED (Green) ’ Shows the scanner s status. 7-segment LED If you are using the scanner with Image Capture Plus, you can perform a push scan using the 7-segment LED. A registered job number is displayed on the 7-segment LED. -
Page 11: About Led
Component Identification ■ About LED The status of the scanner is displayed by the LED (Red) ( ) and the LED (Green) ( ), as shown in the table below: LED (Red) LED (Green) Status Power OFF Blinking (Fast) Warming up Ready mode or Scanning Blinking (Slow) Notification mode... -
Page 12: Viewing Operating Manual And Help Installed
[Scanner Manuals]. Select the manual. • The manual will open. Note • In Windows 8, select the [Panasonic Document Scanner] section on the Apps screen. ■ To view the help For Image Capture Plus Select [Start] [All Programs] [Panasonic] [Image Capture Plus] [Image Capture Plus Help]. -
Page 13: Loading Documents On The Adf
Loading Documents on the ADF ADF (Auto Document Feeder) enables multiple sheet scanning. Acceptable documents Document size: 48 mm~302 mm (1.9 in.~11.9 in.) 70 mm~432 mm (2.75 in.~17 in.) Paper weight: 31 g/m –127 g/m (8.3 lb.–34 lb.) Maximum number of sheets (new paper) loadable on the hopper Paper weight 80 g/m (21 lb.) - Page 14 Loading Documents on the ADF For documents with mixed page sizes and thicknesses The ratio of page thickness between the thickest and thinnest Document thickness pages must be less than 1.5. The ratio of width and height between the largest page and smallest page must be less than 1.5.
-
Page 15: Notes About Documents For Scanning
Loading Documents on the ADF ■ Notes about documents for scanning • Depending on the paper type, scanning results may be poor when you scan unacceptable documents, or even documents that should be acceptable. If a paper jam or double feeding occurs, or if the scanned image is stretched or distorted, or if scanning levels are uneven around the leading or rear edges of the document, try scanning again after doing the following:... -
Page 16: Scanning Documents With Pages Of Same Sizes
Loading Documents on the ADF ■ Scanning documents with pages of same sizes Notice • Please remove any staples from the document before scanning. • Glued or curled documents may cause a paper jam or damage the unit, so please scan using the flatbed. Set the manual feed selector to [Continuous scanning] [Continuous scanning] (AUTO) or... - Page 17 Loading Documents on the ADF Adjust the document guides slightly Document guide larger than the actual size of the documents. When using long paper, pull out the Hopper Hopper extension hopper extension tray from the hopper. tray Then raise and adjust the exit stopper to the position a little longer than the actual length of the document.
- Page 18 Loading Documents on the ADF Place the documents on the hopper Portrait with the side to be scanned facing up. Then push them in the direction of the arrow until they stop. • The number of sheets that can be loaded on the hopper at a time is approximately Fill indicator 200 sheets (paper weight: 80 g/m...
- Page 19 Loading Documents on the ADF Adjust the document guide to the size of the document to be scanned. Document guide Adjust the exit stopper to the size of the document to be output. • When scanning document that exceeds 432 mm (17 in.), close the exit stopper.
-
Page 20: Scanning Documents With Pages Of Different Sizes
Loading Documents on the ADF ■ Scanning documents with pages of different sizes For conditions when scanning documents with mixed page sizes, see "For documents with mixed page sizes and thicknesses" (page 14). • When scanning different size documents, scanned sheets may need to be reordered for optimum performance. Set the manual feed selector to [Continuous scanning] [Continuous scanning] (AUTO). - Page 21 Loading Documents on the ADF Align the document pages along one side. When using long paper, pull out the Hopper Hopper extension hopper extension tray from the hopper. tray Then raise and adjust the exit stopper to the position a little longer than the actual length of the document.
- Page 22 Loading Documents on the ADF Remove the document and lock the Document guides selector document guide. Slide the document guides selector in the direction shown in the illustration until the ( ) and ( ) marks are aligned to lock the document guide. Place the document on the hopper again and adjust the document guide according to the size of the document to be scanned.
-
Page 23: Adjusting The Left And Right Document Guides To Their Original Position
Loading Documents on the ADF ■ Adjusting the left and right document guides to their original position Unlock the document guide. Document guides selector Slide the document guides selector in the direction shown in the illustration until the ) and ) marks are aligned to unlock the document guide. -
Page 24: Loading Documents On The Flatbed
Loading Documents on the Flatbed One sheet or an entire book document can be scanned on the document glass. Scanning documents in this way is known as "scanning with the flatbed". Caution • Do not place printed materials containing magnetic ink characters or magnetic strip cards on the flatbed. Magnets are located in the flatbed cover (flatbed sheet) and may damage data stored on printed materials and cards. -
Page 25: Scanning Thick Documents
Loading Documents on the Flatbed Match the shorter side of the document Standard mark with the left edge of the flatbed glass. Longer side Match the longer side of the document with the standard mark. Shorter side • If the document is slanted, it will not be scanned properly. -
Page 26: Using Push Scan
Using Push Scan This scanner has a push scan function for starting scanning without operation through a computer. ■ Setting the scanning conditions Scanning conditions are set on the setting screen of each application. For details about the setting screen of each application, refer to the manual or help for that application. -
Page 27: Checking Events
Using Push Scan ■ Checking events Check the following if an application does not start up after being set by the Scan Button Setting Tool. Display the Scan properties screen. • If you are using Windows 10: Right-click [Start], select [Control Panel] [Devices and printers], right-click the scanner icon, and then display the [Scan properties] screen. -
Page 28: Using Control Sheets
Using Control Sheets Placing a control sheet in the middle of documents lets you change the scanning conditions for pages scanned after the control sheet. Also, you can change the folder used to save the scan data of documents scanned after the control sheet. -
Page 29: About Printing Control Sheets
Using Control Sheets ■ About Printing Control Sheets • Print the control sheet at the specified size; do not enlarge or reduce the size. • When printing the control sheet, make sure that the pattern is 25 mm (1 in.) from the top of the page and centered horizontally. -
Page 30: Changing The Reference Plate Setting
Changing the Reference Plate Setting You can choose a background color to be scanned from white (black) to black (white). The scanner comes from factory set to black. The reference plate (B), reference plate (F) and flatbed sheet setting must be changed simultaneously. -
Page 31: Flatbed Sheet Setting
Changing the Reference Plate Setting Close the exit door slowly until it clicks into place. ■ Flatbed sheet setting Document cover Turn off the scanner. Flatbed sheet Fold the hopper tray in the direction of Hopper tray the arrow ( ). Open the document cover ( ) and remove the flatbed sheet from the flatbed cover ( ). -
Page 32: Clearing Paper Jams
Clearing Paper Jams Torn documents, thin documents or documents that are creased on the top edge may cause paper jams. If a paper jam occurs, remove the jammed sheet according to the following procedure. ■ Removing paper jams from the paper slot Push the ADF door release to open the ADF door ADF door. -
Page 33: Removing Paper Jams From The Exit Path
Clearing Paper Jams ■ Removing paper jams from the exit path Pull the exit stopper and raise the hopper tray. Hopper tray Exit stopper Pull the exit door release, open the exit Exit door release door and pull the jammed document. •... -
Page 34: Cleaning The Unit
Cleaning the Unit ■ Outside of the scanner • Do not use commercially available cleaners, detergent, thinner, or benzine. (Doing so may cause defor- mation, discoloration or damage.) • Clean the unit at least once a month. Turn the power off. Clean the cover with a soft cloth. -
Page 35: Cleaning The Paper Feed Roller, Separation Roller, And Double Feed
Cleaning the Unit ■ Cleaning the paper feed roller, separation roller, and double feed prevention roller Turn the power off. ADF door Push the ADF door release to open the ADF door. ADF door release Use the roller cleaning paper (KV-SS03) Paper feed roller to remove the dirt from the surfaces of Separation roller... - Page 36 Cleaning the Unit Use the roller cleaning paper (KV-SS03) to remove the dirt from the surface of Double feed prevention roller the double feed prevention roller. Note • When wiping off the dirt on the roller sur- faces, hold the rollers to prevent them from rotating, and wipe the roller all the way around them proceeding from one end to the other in the direction of the...
-
Page 37: Cleaning The Drive Rollers And Free Rollers
Cleaning the Unit ■ Cleaning the drive rollers and free rollers Turn the power off. Drive rollers Drive rollers Push the ADF door release to open the ADF door. Use the roller cleaning paper (KV-SS03) to remove the dirt from the surfaces of the 4 drive rollers. -
Page 38: Cleaning The Drive Rollers, Free Rollers, And Exit Rollers
Cleaning the Unit ■ Cleaning the drive rollers, free rollers, and exit rollers Turn off the scanner. Exit door release Pull the exit door release to open the exit door. Use the roller cleaning paper (KV-SS03) to remove the dirt from the surfaces of Exit rollers the 4 drive rollers and the 2 exit rollers. -
Page 39: Cleaning The Reference Plates And Adf Glasses
Cleaning the Unit Close the exit door. • When you close the exit door, close it securely until it is locked. ■ Cleaning the reference plates and ADF glasses Turn off the scanner. ADF glass (F) Pull the exit door release to open the Reference plate (B) exit door. -
Page 40: Cleaning The Paper And Waiting Sensors, Double Feed Detector
Cleaning the Unit ■ Cleaning the paper and waiting sensors, double feed detector Turn off the scanner. Reflector sheet for waiting sensor Push the ADF door release to open the Waiting sensor Paper sensor ADF door. Remove dust from the paper sensor and waiting sensor with a cotton swab. -
Page 41: Cleaning The Starting And Ending Sensors
Cleaning the Unit ■ Cleaning the starting and ending sensors Turn off the scanner. Ending sensor Pull the exit door release to open the exit door. Remove dust from the starting and ending sensors with a cotton swab. Starting sensor Remove dust from the reflector sheet for the starting and ending sensors Reflector sheet for... -
Page 42: Cleaning The Flatbed Glass
Cleaning the Unit ■ Cleaning the flatbed glass Turn off the scanner. Document cover Fold the hopper tray in the direction of the arrow. Hopper tray Open the document cover. Clean up the surface of flatbed glass with Flatbed sheet the roller cleaning paper (KV-SS03) to remove the dirt. -
Page 43: Replacing Consumable Roller Modules
Replacing Consumable Roller Modules ■ Replacing paper feed roller modules Recommended change: 300,000 scans Turn the power off. ADF door Push the ADF door release to open the ADF door. ADF door release Pull down the paper feed roller module in the direction of the arrow. - Page 44 Replacing Consumable Roller Modules Install the new paper feed roller module. Push the new paper feed roller module upwards in the direction of the arrow, so that it is locked by the magnets on both sides. Close the ADF door. •...
-
Page 45: Replacing Double Feed Prevention Roller
Replacing Consumable Roller Modules ■ Replacing Double Feed Prevention Roller Turn the power off. ADF door Push the ADF door release to open the ADF door. ADF door release Open the double feed prevention Double feed Indent prevention roller conveyor in the direction of the arrow Double feed prevention conveyor shown in the figure by using the indent... - Page 46 Replacing Consumable Roller Modules Install the new double feed prevention roller by matching the groove of its Groove shaft with the groove of the metal holder. Close the double feed prevention conveyor. Close the ADF door. • When you close the ADF door, close it securely until it is locked. Reset the After Replace Roller Counter in User Utility to 0.
-
Page 47: Troubleshooting
Troubleshooting If a problem occurs while the unit is being used, check the following items and check the scanner status with the User Utility. If the unit still malfunctions, turn it OFF, unplug the power cord and call for service. Symptom Possible Cause Remedy... - Page 48 Troubleshooting Symptom Possible Cause Remedy The document guides are not adjusted Adjust the document guides properly to to the size of the document to be the size of the document to be scanned. The document to be scanned scanned. (ADF) is set aslant on the hopper tray.
-
Page 49: Shading Adjustment
Shading Adjustment •What is the purpose of the shading adjustment? The shading adjustment function corrects variations in the lamp intensity and pixel sensor sensitivity, and reduces unevenness in density in scanned images. It can be carried out by means of the User Utility using the special shading paper, which is provided with this scanner. -
Page 50: Uninstalling The Software
In Windows XP, select [Add or Remove Programs]. Uninstall the following software programs. Program Name Publisher Image Capture Plus Panasonic System Networks Co., Ltd. Scan Button Setting Tool Panasonic System Networks Co., Ltd. IDREngine Panasonic System Networks Co., Ltd. Panasonic Scanner Manuals Panasonic System Networks Co., Ltd. -
Page 51: Repacking Instructions
Repacking Instructions It is highly recommended that you keep the original carton and ALL packing materials. If you need to transport or ship your scanner, please follow these instructions: • Use the original carton and all of the original packing materials. •... -
Page 52: Specifications
*1 The scanning speed differs depending on the host computer, the operating system, the application, the measuring method, the quantity of data in the image, and the paper type. The scanning speed depends on a measuring method of Panasonic. *2 When scanning a document larger than A5 size at high resolutions over 600 dpi, the scanning may fail due to insufficient memory. - Page 53 © Panasonic System Networks Co., Ltd. 2016 PNQX7912ZA DD0116AG0...