Table of Contents
Advertisement
Advertisement
Table of Contents

Related Manuals for Swann GuardianEye


Summary of Contents for Swann GuardianEye
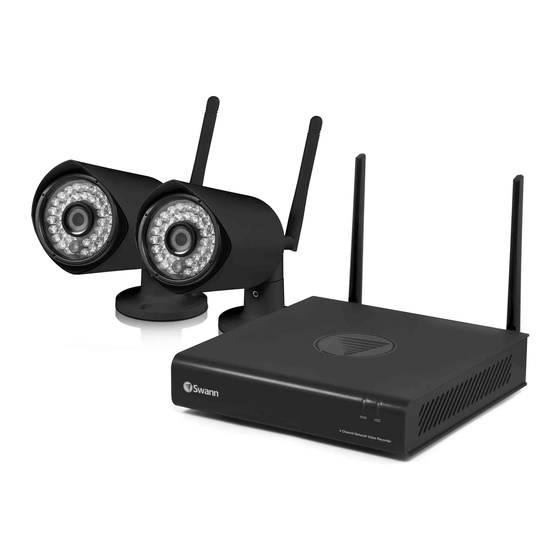
- Page 1 GuardianEye Monitoring System INSTRUCTION MANUAL...
-
Page 2: Important Information
• These devices must accept any interference received, including in- About this Manual terference that may cause undesired operation This instruction manual is written for the GuardianEye Monitoring Sys- Important Notice - All jurisdictions have specific laws and regulations tem and was accurate at the time it was completed. However, because relating to the use of cameras. -
Page 3: Table Of Contents
Contents Important Information System: General Contents Daylight Saving Chapter 1: Live View System: HDD Live View Mode System: Maintenance Live View Icons Network: General Chapter 2: Menu Network: Advanced Menu Layout Email Settings Chapter 3: Camera Configuration Network: WIFI Setting Recording: Encode System: System Information Channel: Device List... -
Page 4: Chapter 1: Live View
Live View 26/05/2015 9:30:15 Tue 26/05/2015 9:30:15 Tue Live View is the default display mode for your NVR. Each camera connected will be displayed on-screen. You can Camera 1 Camera 2 26/05/2015 9:30:15 Tue 26/05/2015 9:30:15 Tue check the status or operation of your NVR and cameras using the status icons and Menu Bar on the Live View Camera 4... -
Page 5: Live View Mode
Live View Mode Live View is the default display mode for your NVR. Each camera connected will be displayed on-screen. You can check the status or operation of your NVR and cameras using the status icons and Menu Bar on the Live View screen (right-click the mouse to display the Menu Bar at the bottom of the screen). -
Page 6: Live View Icons
Live View Icons The record icon indicates that your NVR is currently re- The network icon indicates that the camera is physically cording the camera’s video stream. connected to your network via its LAN connection. The audio icon indicates that the camera is selected for This Wi-Fi icon indicates that your NVR is running in Sta- live audio (click the “Audio”... -
Page 7: Chapter 2: Menu
Menu The Menu is where you control the various actions and options that are available on your NVR, such as ad- justing settings for motion detection and changing network modes. You can also access previously recorded video for playback and to export to a USB storage device such as a flash drive. -
Page 8: Menu Layout
Menu Layout By right-clicking the mouse, you can access the Menu to play back pre- select certain areas if you wish. The sensitivity and schedule can also viously recorded videos, to adjust settings for motion detection and to be changed according to your needs. When motion is detected, you can change system settings or upgrading the firmware. -
Page 9: Chapter 3: Camera Configuration
Camera Configuration The camera configuration options are available in the “Recording” and “Motion” menus and by clicking the “Channel” button on the Menu Bar. You can change the camera name, alter the encoding settings for Main Stream and Sub Stream, change the bitrate and frame rate and assign a different channel number for each camera detected. -
Page 10: Recording: Encode
Recording: Encode Camera No.: Resolution: Select a camera that you would like to configure. The default resolution is 1080P (1920 x 1080) for Main Stream (a lower resolution is also available). For Sub Stream the default Camera Name: Give your camera a relevant name. It can be up to 16 resolution is 640 x 360. -
Page 11: Channel: Device List
Channel: Device List Accessing the Device List displays the cameras that are currently con- To access the Device List, right-click the mouse then click the “Chan- figured, the IP address and status for each camera as well as the ability nel”... -
Page 12: Motion
Motion Channel: Select a camera that you would like to configure. • Use the “Copy to” button to apply all settings to the other cameras. Enable: Motion is enabled by default. Click the checkbox if you want to • Don’t forget to click “Apply” to save settings. disable motion detection. -
Page 13: Motion: Motion Detection
Motion: Motion Detection 2016/01/19 10:30:15 Tue Using the “Sensitivity” function, you can change the motion sensitivity for each time period available. Move the slider left or right Camera4 to change the sensitivity level. Detecting motion is an essential part of your security system. When mo- Right-click the mouse to access the sub-menu then click “Sensitivity”... -
Page 14: Motion: Schedule
Motion: Schedule The schedule is presented as a 24 hour 7 days a week grid and is colour coded to represent the event type. By default, a motion detection alarm schedule has been enabled for each camera. You can however change the schedule according to what fits in with your needs. -
Page 15: Motion Detection Tips
Motion Detection Tips Placement of the cameras Bedroom Backdoor Keep cameras 10 to 15 feet (3 to 4 metres) away from heating vents, where the sunlight shines in, and radiators. If a camera detects a swift change in motion, even that of a cloud passing quickly over direct sunlight shining into your living room, Motion Detection could be activated. -
Page 16: Chapter 4: Recording Configuration
Recording Configuration The recording schedule is accessi- ble from the “Recording” menu. From here you can change the schedule for each camera connected. By default, a motion detection alarm schedule has been enabled for each camera. How- ever, you can change the schedule ac- cording to what fits in with your needs. -
Page 17: Recording Schedule
Recording: Schedule The schedule is presented as a 24 hour 7 days a week grid and is colour sired recording mode (Normal, Motion or None) then click and drag the coded to represent the event type. By default, a motion detection alarm mouse over the squares corresponding to your desired time period. -
Page 18: Chapter 5: Playback & Backup
Playback & Backup The Search function gives you the abil- ity to search and play previously re- corded videos that are stored on your NVR’s hard drive. Each camera is pre- sented as a 24 hour grid and is colour coded to represent the event type. -
Page 19: Search: Video Search
Search: Video Search Please note Each camera is presented as a 24 hour grid and is colour coded to rep- - When playing back recordings, your NVR will con- resent the event type (Normal or Alarm). A monthly calendar is also tinue to monitor and record as normal, therefore playback perfor- visible alerting you on which days have recordings available (dates in red mance may be sacrificed to ensure reliable recording. -
Page 20: The Playback Interface
The Playback Interface Double-click a 26/05/2015 12:50:15 Tue 26/05/2015 12:50:15 Tue video channel to view full screen. Camera 1 Camera 2 26/05/2015 12:50:15 Tue 26/05/2015 12:50:15 Tue 1 2 3 9 10 1. Mute: 6. Pause/Single Frame: Mutes audio playback. Pauses playback. -
Page 21: Search: Backup
Search: Backup Please note By default, each video listed has been selected for backup. If you don’t - Depending on the number of files that have been want this, click the checkbox next to the “CH.” heading then click the selected, the backup process can be time consuming. -
Page 22: Chapter 6: System Configuration
System Configuration The options available here give you complete control on how your NVR is configured and how it operates. Some of the options such as screen resolu- tion, time zone, email configuration, password creation and Daylight Sav- ing Time are configured during the Wizard. -
Page 23: System: General
System: General Language: Select a language you would like the system menus to be internal clock with a time server. A message will appear on-screen stat- displayed in. In addition to the default English selection, both French ing sync time has been successful. Click “OK” to continue. and Spanish languages are available. -
Page 24: Daylight Saving
Daylight Saving Enable DST: Click the checkbox to enable. Offset: Select the time that Daylight Saving has increased by in your time zone. Adjust accordingly. Mode: Select to enable Daylight Saving by week or by date. Start Time/End Time: Set when Daylight Saving starts and ends, for ex- ample, 2 a.m. -
Page 25: System: Hdd
System: HDD This function gives you the option of formatting your NVR’s hard drive. If a new hard drive has been installed, it must be formatted before use. Format: Click this to format the hard drive. A message will appear on- screen stating that all your recordings will be deleted (If you have any recordings that are required, back them up to a USB storage device first). -
Page 26: System: Maintenance
System: Maintenance Enable auto reboot: It’s recommended to leave this enabled as it main- from a local source such as a USB flash drive (see above right screen- tains the operational integrity of your NVR. shot). To upgrade the firmware, click “Browse”, select the firmware file then click “OK”. -
Page 27: Network: General
Network: General As SwannLink Peer-to-Peer technology is utilised to communicate with to identify itself. A typical address might be “192.168.1.24” or something your network and mobile device, configuration of the network settings is similar. not required. If you have networking expertise and require specific set- Subnet Mask: This allows the flow of network traffic between hosts to be tings for your network, your NVR does have the ability to change them. -
Page 28: Network: Advanced
Network: Advanced Email Settings: Click the “Set” button if any changes are required to your email account - see page 29 for more information. Server Port: This is the port that your NVR will use to send information through. The default number will work in most situations. HTTP Port: This port is used to log into your NVR from a remote location. -
Page 29: Email Settings
Email Settings Please note Populate each field as shown above (the email addresses shown are - If you receive an error message, check that you examples only, don’t use these). You can input up to three email ad- have input your email address and password correctly and check dresses that you can send email alerts to. -
Page 30: Network: Wifi Setting
Network: WIFI Setting WIFI Mode: As mentioned in the Wizard quick start guide, the default mode of oper- Change from “AP” to “Station” mode - ation is AP mode. You can however change this to Station mode. At the next screen, select your Wi-Fi router then click the next button Station mode allows wireless communication with your router to gain (circle and triangle). -
Page 31: System: System Information
System: System Information Device Name: Give your NVR a relevant name. If you call our helpdesk for assistance, our staff may ask you to access this tab to assist them in solving any technical issues that you may be having. •... -
Page 32: Troubleshooting
Troubleshooting What can I do if my NVR no longer communicates with my cameras? It’s now time to reset each camera. Disconnect the camera’s power then hold down the reset button. Keep holding the reset button while At some point in time this may happen. You may have input your router’s plugging in the power cable, hold for 20 seconds then release. - Page 33 Troubleshooting (cont.) The second method is a little more complicated, so if the first method camera then connect this to your router. doesn’t work, please try this. Hold down the camera’s reset button. Keep holding the reset button An additional Ethernet cable is required, check the components includ- while plugging in the camera’s power cable, hold for 20 seconds then ed with your router, one should have been included.
-
Page 34: Glossary
Glossary AP Mode HTTP Port - This mode allows wireless communication with the provided - It stands for Hypertext Transfer Protocol and is the port that cameras, however your NVR must be physically connected to your rout- is used to log into your NVR. er to gain Internet access. - Page 35 Glossary SMTP Port - Is the port number used by a SMTP server. This is specified string that is associated with a single entity within a given system. By by your Internet service provider or by the email provider. entering your NVR’s UID into the SwannView Link app and software, al- lows you to communicate with your NVR without having to remember IP SMTP Server - It stands for Simple Mail Transfer Protocol and is the...
-
Page 36: Warranty Information
You must present your receipt as proof of date of purchase for warranty validation. Any unit which proves defective during the stated period will be repaired without charge for parts or labour or replaced at the sole discretion of Swann. The end user is responsible for all freight charges incurred to send the product to Swann’s repair centres. -
Page 37: Helpdesk & Technical Support
Technical Support E-mail: tech@swann.com Technical Support Website: support.swann.com Telephone Helpdesk USA Toll Free 1-800-627-2799 USA Parts & Warranty 1-800-627-2799 (M-F, 9am-5pm US PT) AUSTRALIA 1800 788 210 NEW ZEALAND Toll Free 0800 479 266 0808 168 9031 M480100216E | © Swann 2016...