Table of Contents
Advertisement
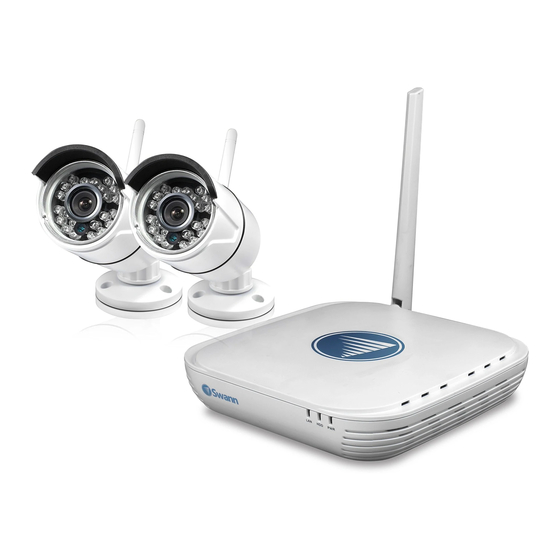
The Setup Wizard
Welcome to the Setup Wizard!
settings you need to get up and working. Please be patient as it can take a moment for the wizard to appear after turning on your NVR.
QW460200814E | © Swann 2014
The Setup Wizard automatically runs the first time you start your NVR and will guide you through all the important
During the wizard you will:
• Change Wi-Fi settings
• Choose a language
• Select a video standard
• Select a time zone
• Change display resolution
• Adjust the system time and
date
This quick start guide gives you the choice of configuring
your NVR to run in "AP" mode or "Station" mode. "AP" is the
default mode of operation and the recommended method of
configuration. In this mode the included cameras communicate di-
rectly with the NVR with no configuration required, however a cable
connection to your router is required for Internet access. In "Sta-
tion" mode the NVR and cameras connect to your Wi-Fi network.
This gives you the freedom of placing the NVR in different locations
without being tethered to your router. Wi-Fi booster devices can
also be used to extend the overall coverage allowing you to mount
the cameras that were once outside the range of the NVR.
EN
• Select settings for Daylight
Savings
• Configure an email account
for alert notifications
• Create a new security code
for the NVR
1
Advertisement
Table of Contents

Related Manuals for Swann NVK-460


Summary of Contents for Swann NVK-460
- Page 1 This gives you the freedom of placing the NVR in different locations without being tethered to your router. Wi-Fi booster devices can also be used to extend the overall coverage allowing you to mount the cameras that were once outside the range of the NVR. QW460200814E | © Swann 2014...
- Page 2 Introduction Please follow the instructions in the “Getting to know your NVR (blue Station Mode - To setup in this mode follow the instructions on page 4. colour)” quick start guide before commencing the Setup Wizard. Please make sure the NVR is connected to your router using the pro- vided Ethernet cable.
- Page 3 Wi-Fi Configuration - AP Mode AP mode allows wire- less communication with provided cameras, however the NVR must be con- nected to your router Click dialogue using the provided box to access the on- Ethernet cable for an screen keyboard. Click Internet connection the “abc”...
- Page 4 Wi-Fi Configuration - Station Mode 1. WIFI Mode - Click this to change to “Station” mode. Take note of the vices to your Wi-Fi network. Click “Show Key” to display your password warning message that appears then click “OK” to reboot the NVR. When so you confirm that you have input it correctly.
- Page 5 Wi-Fi Configuration - Station Mode (cont.) 4. Sync - Click the “Sync” button. The camera(s) connected to your rout- can communicate with your Wi-Fi network. A green Wi-Fi icon will ap- er will be displayed (see above screenshot). Click the checkbox to select pear at the top right indicating the NVR’s Wi-Fi signal strength.
- Page 6 General Configuration 1. Language UID & QR Code - Choose a language you would like the system menu to be - This is a unique ID number for your NVR. You will use displayed in. In addition to the default English selection, both Spanish this later when configuring the mobile app and Windows software.
- Page 7 System Time & Daylight Savings 1. System Time - The system date and time should be set correctly ac- If Daylight Savings does not apply to your locale, you can skip this step. cording to the time zone that you have selected. If the date and time 2.
- Page 8 Hard Drive/Configure Your Email 1. Format - As the hard drive inside the NVR is pre-formatted, you can Configure an email account to receive email alerts when events occur. skip this step. Go to (www.gmail.com) to create an account then input the details here. Click the next button (triangle) to continue.
- Page 9 Configure Security Code This bit is really easy. You just have to give your NVR a new security Click “Do not run wizard on start-up” to disable the Setup Wizard code (recommended) or you can use the default code which is “12345”. when you start your NVR and click “Finish”...
- Page 10 Live View Mode Live View is the default mode for the NVR. Each camera connected will be displayed on-screen. You can check the status or operation of your NVR and cameras using the status icons and Menu Bar on the Live View screen. Right-click the mouse to access the Menu Bar. Click and hold a Time &...
- Page 11 Live View Icons & Controls Menu Bar Status Icons 1. Menu 3. Search - Opens the main menu. - Click this to search and playback The motion icon indicates that the NVR is videos located on the NVR’s hard drive. You detecting motion from the camera.
- Page 12 Menu - Recording: Encode The encode function allows you to change the resolution and bi- trate for each camera connected. You can change settings for both “Main Stream” encoding and “Sub stream” encoding if you are experiencing difficulties viewing footage on your mo- bile device.
- Page 13 Menu - Recording: Schedule By default, a motion detection sched- ule has been ena- bled for each camera connected. You can Click square change the sched- in the schedule ule according to your change needs. The schedule recording mode. is presented as a 24/7 grid.
- Page 14 Menu - Search 18/09/2014 13:25:07 Thu The playback interface is quite similar to a computer’s media player. Select one or more cameras that you would like to playback or search synchronous playback (this is optional) and click “OK” to start playing. for.
- Page 15 Menu - Motion 28/08/2014 10:30:15 Thu Camera1 By default the camera’s entire view is enabled for motion detection. Select a camera that you would like to edit. motion detection will be. There are four time periods which you can de- fine different motion sensitivity values for.
- Page 16 Menu - Network: General Subnet Mask Most of these networking settings are not required when using Swan- - If a “Static” network has been selected, a subnet mask nLink P2P for remote access. If you have specific networking require- can be manually defined. ments, the NVR does give you the ability to change the default settings.
- Page 17 Menu - Network: Advanced UPNP Enable Most of these networking settings are not required when using Swan- - This is enabled by default. nLink P2P for remote access. If you have specific networking require- Use the “Default” function to revert back to the default settings. ments, the NVR does give you the ability to change the default settings.
- Page 18 If you’re looking at the “System Information” screen, you’ve probably is recommended that it be rebooted periodically. Select a day and time been directed to do so by Swann Technical Support. In the event that you when it’s unlikely there’ll be any activity for the NVR to record.