Table of Contents
Advertisement
Quick Links
Operating Instructions
DVD Recorder
Model No. DMR-ES30VEB
EJECT
PULL OPEN
DMR-ES30V
Dear customer: Before connecting, operating or adjusting this product, please read the instructions completely. Please keep this manual for future reference.
VHS RECORDING
PAL NTSC
CH
REC
DVD RECORDING
DVD-RAM/DVD-R/DVD-RW/+R
RAM
OPEN/CLOSE
VHS
PAL NTSC
DVD
CH
REC
DUBBING
VHS
DVD
/x1.3
Advertisement
Chapters
Table of Contents

Related Manuals for Panasonic DMR-ES30VEB


Summary of Contents for Panasonic DMR-ES30VEB
-
Page 1: Operating Instructions
Operating Instructions DVD Recorder Model No. DMR-ES30VEB VHS RECORDING DVD RECORDING DVD-RAM/DVD-R/DVD-RW/+R PAL NTSC EJECT OPEN/CLOSE PULL OPEN DUBBING /x1.3 DMR-ES30V PAL NTSC Dear customer: Before connecting, operating or adjusting this product, please read the instructions completely. Please keep this manual for future reference. -
Page 2: Table Of Contents
Table of Contents Page Page Page Playback functions 30-40 SETUP Before You Start 70-72 Tuning Important Safety Warnings / Caution 30-34 Playback Disc Care and Maintenance 35-36 JPEG playback Picture Included Accessories 36-37 MP3 playback Sound Sales and Support Information Display 38-40 76-77... -
Page 3: Before You Start
1. Read the operating instructions, the safety precautions, and the Thank you for your trust and your decision to purchase this top-quality device. Panasonic is one of the leading manufacturers information on setting up the unit on pages 4 - 5 thoroughly before you of entertainment electronics devices. -
Page 4: Important Safety Warnings / Caution
Important Safety Warnings The moulded three pin mains plug is supplied for your safety and convenience and must NOT be cut off. Fuse cover 1. Open the fuse A 5 amp fuse is fitted in the mains plug. cover with a If the fuse has to be replaced, it must be screwdriver. -
Page 5: Care And Maintenance
Caution Avoid exposing the unit to direct sunlight or other heat sources. Avoid sudden change in temperature or humidity, dew or condensation may form, causing malfunction. Dispose of batteries in accordance with the instructions given in this book. Place the unit on a flat, stable surface. Do not place heavy object on top of the unit. Your attention is drawn to the fact that recording of pre-recorded tapes or discs or other published or broadcast materials may infringe copyright laws. -
Page 6: Included Accessories
Guarantee Card EUR7720KT0 K2KA6CA00001 Sales and Support Information Direct Sales at Panasonic UK Order accessory and consumable items for your product with ease and confidence by telephoning our Customer Care Centre Customer Care Centre Mon - Thursday 9:00am - 5:30pm, Friday 9:30am - 5:30 pm (Excluding public holidays). -
Page 7: Remote Control
Remote control DVD/VHS Standby/on switch Turn the television set on and off. Press to switch the unit from on to standby mode or vice versa. In standby mode, the unit is still consuming Select the AV input on the television set. a small amount of power. - Page 8 Remote control DVD functions A/V cannels TRACKING/V-LOCK CH: Channel select button. AUDIO Depending on the disc, select the audio channel and or the sound track. Basic SLOW/ SLOW/SEARCH: Search or slow SEARCH motion playback SKIP/INDEX SKIP: Skip chapters, titles, or pictures. Navigation DIRECT NAVIGATOR Starts playback.
- Page 9 Remote control VHS functions A/V cannels CH: Channel select button. TRACKING/V-LOCK TRACKING/V.LOCK + / -: Optimisation of the playback picture AUDIO Press several times to select sound Basic playback mode. REW/FF: Fast forward or rewind from stop SLOW/ SEARCH mode. Forward or reverse scene search during playback mode.
- Page 10 SANSUI 05,31,33 WHITE WESTINGHOUSE 05,06 Some television models of the brands listed above, (e.g. older Panasonic units), cannot be operated using the remote control. Switching to AV input on your Panasonic television set Press AV. Each press of the button switches between TV reception and AV input.
- Page 11 Remote control If you use another Panasonic device at the same location, change the mode of the remote control so that you can operate the units independently of each other. FUNCTIONS Setting the remote control Setting the remote control mode for unit SETUP Press FUNCTIONS in stop mode.
-
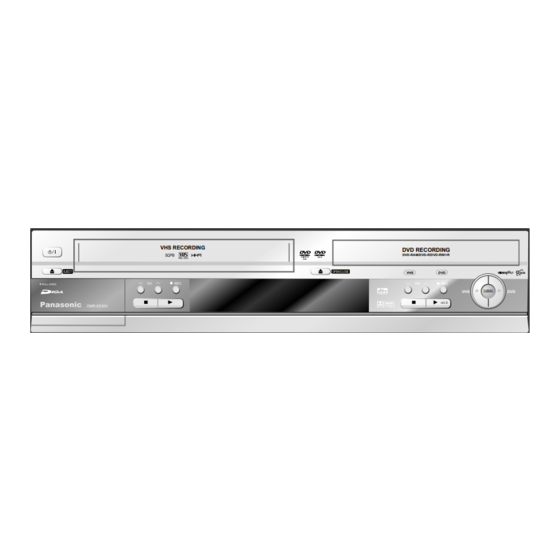
Page 12: Front Panel
VIDEO IN L/MONO - AUDIO IN - R /x1.3 DMR-ES30V DMR-ES30V Panasonic DMR-ES30V Standby/on switch Front Connections Press to switch the unit from on to standby mode or vice versa. In standby mode, the unit is still consuming a small amount of power. -
Page 13: Display
Display Information displays DVD mode Information displays in VHS mode VHS operating state, e.g. playback, search Disc is being read. DVD-RAM Disc type e.g.: DVD-RAM, DVD-R, DVD-Video, Video-CD. Tape Remain indicator VCD +RW SP: normal recording duration Tape speed Record mode XP, SP SP,LP, EP LP: double the recording duration... -
Page 14: Sockets
Sockets S VIDEO CLASS 1 LASER PRODUCT VIDEO RF IN AUDIO OPTICAL RF OUT AC IN~ DVD OUT AV2 (EXT) AV1 (TV) AC IN~ = Power supply DVD OUT VHS/DVD COMMON AV2 (DECODER/EXT) S VIDEO = S VIDEO out connector 21-pin Scart socket = connection of an external unit AV1 (TV) VIDEO... -
Page 15: Connecting With 21-Pin Scart Cable
Connecting with 21-pin Scart cable =Extra equipment for the connection shown: Follow the steps below. Aerial RF cable / Aerial cable, 21-pin Scart cable Disconnect the power of all units. AV1 21-pin Scart socket RF IN Aerial input Connect the Aerial to the RF IN (Aerial input) of the DVD Recorder DVD Recorder. -
Page 16: Setup With Q-Link
TV channel that is broadcasting time and date information is tuned. Note that you must first perform a station search. If you have a Panasonic television, Download in progress, please wait. RETURN: to abort [Download from TV] will be displayed automatically at the beginning of the station transfer. -
Page 17: Setup Without Q-Link (Automatic Tuning)
Setup without Q-Link (Automatic Tuning) Auto-Setup The automatic setup saves all available TV stations. If the station also broadcasts date and time, then the clock is also set automatically. Auto-Setup Switch on your television and select the AV channel. With the Stand-by/on switch turn on the DVD Recorder. Auto-Setup in progress, please wait. -
Page 18: Connecting With Rf Cable (Aerial Cable)
Connecting with RF cable (Aerial cable) You can connect the VCR/DVD to your TV set Aerial by using a RF cable / Aerial cable. Follow the steps described below. RF IN AC IN~ Aerial input Ensure TV Power is disconnected from DVD Recorder AC mains socket. -
Page 19: Auto Setup With Rf Cable (Aerial Cable) (Automatic Tuning)
Auto-Setup with RF cable (Aerial cable) (Automatic tuning) DVD Display Turn on your television set. With the Stand-by/on switch turn on the DVD Recorder. Automatic tuning for all available TV stations begins. Approximate duration is 5 minutes. After Automatic tuning has finished, press RETURN. The Owner ID screen will appear. - While Auto-Setup is running the first digit of the DVD Recorder display will flash. -
Page 20: Removing Interference
Removing Interference / Changing RF output channel In some cases, interference (lines or patterning) or a very poor picture may appear on the TV when the DVD Recorder is connected. If this happens, follow the steps below to change the video playback channel (RF output channel) to remove the interference. TV screen The picture with interference RF OUTPUT CHANNEL... -
Page 21: Checking The Settings After Auto-Setup
Checking the Settings after Auto-Setup FUNCTIONS Press FUNCTIONS to display the FUNCTIONS Menu. FUNCTIONS DVD-RAM Press to select [To Others] and then press ENTER. Disc Protection Off Press to select SETUP and then press ENTER. PLAYLISTS DIRECT NAVIGATOR FLEXIBLE REC Press to select Manual and then press ENTER to display the list of tuned TV stations and confirm that all available TV stations have been set correctly. -
Page 22: Connecting With Audio/Video Cable
Connecting with Audio/Video cable / S Video cable (only DVD) Aerial RF IN Follow the steps below. AUDIO/VIDEO output Aerial input DVD Recorder Disconnect the power of all units. S VIDEO VIDEO RF IN Connect the aerial to the RF IN (Aerial input) of the AUDIO OPTICAL DVD Recorder. -
Page 23: External Devices
S VIDEO IN S VIDEO cable After you have connected the cables, switch both devices on. Panasonic DMR-ES30V If the audio output of the other device is mono, connect it to the L/MONO socket. Both the left and the right channels will be recorded if the connection is made via the L/MONO socket. -
Page 24: Connecting To Satellite Receiver, Set Top Box
Connecting to Satellite Receiver, Set Top Box Connecting to Satellite Receiver, Set Top Box You can connect a Set Top Box to receive digital broadcast by aerial Aerial (DVB-T) signals or a satellite receiver (digital/analogue). = Extra equipment for the connection shown: 21-pin Scart cable , RF cable / Aerial cable RF cable /... - Page 25 Follow the steps described below. Ensure TV Power, External unit Power and DVD Recorder Power are disconnected from AC mains socket. Connect a 21-pin Scart cable (fully wired) to the AV2 21-pin Scart socket on the DVD Recorder and to the 21-pin scart socket on the External unit. Connect a 21-pin Scart cable (fully wired) to the AV1 21-pin Scart socket on the DVD Recorder and to the 21-pin Scart socket on the TV set.
-
Page 26: Component Video Out
COMPONENT VIDEO OUT = Extra equipment for the connections shown COMPONENT VIDEO OUT socket These sockets can be used for interlace or progressive output and deliver a clearer picture than the S VIDEO OUT socket. Connections via these sockets output colour difference signals ( / ) and brightness signals ( ) separately. Colours can be reproduced true to colour. -
Page 27: Handling Discs
Handling discs Handling discs If the surface of a disc that does not have or was removed from a cartridge is damaged, scratches, dirt, dust or fingerprints can compromise the recording, editing or playback. Such damage can also occur when the disc is inserted back into the cartridge. -
Page 28: Disc Formats
Disc formats Before playback Due to the disc programme structure set by the manufacturer, not all described functions may be able to be used. Depending on the disc type, the regional code and the recording conditions, it may not always be possible to play the discs listed. Playback and recording discs 4.7GB / 9.4GB, 12cm TIME SLIP function, CPRM compatible, supports 2 channel sound,... -
Page 29: Disc Formats
Disc formats DVD-Video Format (V) DVD-Video Recording Format (VR) This format corresponds with the commercially This format enables the free editing of Cartridge discs available DVD-Video. Recordings made with this recordings. Digital programmes that When the write-protection device is activated, unit must be finalised in order to be played back allow "one time only recording"... -
Page 30: Playback Functions
Playback Switch the unit on. Playback functions Playback Press OPEN/CLOSE to open the disc tray. Place the disc in the disc tray. 30 Playback, PAUSE during playback, Press PLAY . Cancelling playback, Resuming playback The disc tray is closed and playback begins. A menu appears on the television screen, The reading of the disc may take some time! Direct playback... - Page 31 Playback A menu appears on the television screen Use the number buttons to select an entry. e.g.: number or number DVD-A DVD-V or the number buttons to select an entry and confirm with ENTER. appears on the television screen, this function is not possible at the moment. The operation of the disc menu depends on the inserted disc.
- Page 32 Playback DIRECT NAVIGATOR Selecting programmes/titles for playback RAM -R -RW V +R -RW VR DIRECT NAVIGATOR TITLE VIEW DVD RAM You can display the menu during playback, recording and in stop mode using the DIRECT NAVIGATOR button. Press DIRECT NAVIGATOR. 12/ 9 THU to select the desired title and confirm with ENTER.
- Page 33 Playback Quick View (Play/ x1.3) Increase playback speed without negative effects on sound. Press and hold PLAY during playback. Press PLAY again to return to normal playback speed. DVD-RAM PLAY x1.3 Output takes place in PCM with a digital connection. Quick View is cancelled if SKIP or PAUSE is pressed or playback of a...
- Page 34 Playback TIME SLIP JET REW TIME SLIP RAM -R -RW V +R -RW VR Press TIME SLIP. to select the time that the playback should jump forward or back. If you press and hold the buttons, the time span increases or decreases minute-by-minute. Press ENTER to confirm the selected time.
-
Page 35: Jpeg Playback
JPEG playback JPEG Menu PICTURE (JPEG) VIEW CD (JPEG) CD(JPEG) Folder DISC Press DIRECT NAVIGATOR. The PICTURE (JPEG) VIEW appears on the screen. to select the desired picture and start picture playback using ENTER. Use STOP or DIRECT NAVIGATOR to return to PICTURE (JPEG) VIEW. To select a picture using the number buttons, press e.g. - Page 36 JPEG/MP3 playback FUNCTIONS CD (MP3/JPEG) CD(MP3/JPEG) MP3 Playback mode Playback MENU The following information on the file type appears at the beginning: Playback mode is set to MP3. Select "JPEG" from MENU in FUNCTIONS if you play Recording TIMER RECORDING MENU VIDEO Plus+ pictures (JPEG).
-
Page 37: Mp3 Playback
MP3 playback CD (MP3) This unit can play MP3 files that were recorded with a computer on a CD-R/RW. Files MENU Group 1 : Set Me Free are captured as t racks and folders as groups. Track Tree Total “TOTAL” includes all t in all groups of the disc. -
Page 38: Playback
Do not open the protective flap on the front side of the cassette and do not touch the tape. Use high-quality, brand-name tapes, for example from Panasonic. During the playback of cassettes that were recorded on a different VHS recorder, you may experience a lower picture quality. - Page 39 Playback Switch the unit on and insert a recorded video cassette. SLOW/ SEARCH FF FF Playback or backwards Image search forwards Press PLAY to start the playback. During playback, press or . The search speed increases by pressing the button twice From standby mode, you also start playback using PLAY .
-
Page 40: Setting The Track Position Manually
Playback SKIP/INDEX VHS index search system (VISS) Setting the track position manually The unit automatically sets the track position. If a cassette was This unit records special index signals with each recording. The recorded on another unit, it may be necessary to set the track index search function uses these signals. -
Page 41: Recording Functions
Recording RAM -R -RW V +R You can record up to 99 titles on one disc (+R: 49 titles). Recording functions If you use an unformatted DVD-RAM, you must format it before the first recording. The recording is saved in free areas on the disc. If there is no more space left on the target drive, you must delete recordings or use a new disc. - Page 42 Recording Providing a time for the end of the recording During record, press REC on the unit. The unit display changes with each press of the button: Counter Counter This is not possible with FLEXIBLE REC or TIMER-controlled recordings. If you press STOP , the recording will be stopped and the time setting deleted. DIRECT TV REC Direct TV recording (only for DVD recording)
- Page 43 Recording VHS recording/playback during a DVD recording While a channel is being recording on DVD, you can record another one on VHS. Recording modes and approximate recording DVD-RAM times in hours Single-sided Double-sided DVD-R When recording on DVD-RAM in EP mode (4.7 GB) (9.4 GB) (4.7 GB)
-
Page 44: Recording
TIMER-controlled recordings VIDEO Plus+ Remain 1:58 SP RAM -R -RW V +R You can programme up to 16 programmes per month in advance. 12:09:37 18/ 11 THU Insert a disc. VIDEO Plus+ Programming recordings with VIDEO Plus+ By entering a VIDEO Plus+ number, the TIMER-controlled recording is easy to set. The Enter PlusCode Number by using 0-9 keys. -
Page 45: Timer-Controlled Recordings
TIMER-controlled recordings PROG/CHECK Manual programming TIMER Remain 1:58 SP RECORDING 12:09:37 18/11 THU Press PROG/CHECK. The TIMER RECORDING screen appears. Disc Nr Name Datum No. Name Date Start Stop Stop Mode Mode Start space Confirm the highlighted line with ENTER. 01 BBC1 18/11 THU 0:00... - Page 46 TIMER-controlled recordings PROG/CHECK , changing or deleting TIMER RECORDINGS Checking TIMER Remain 1:58 SP RECORDING 12:09:37 18/11 THU Press PROG/CHECK. Disc Nr Name Datum No. Name Date Start Stop Stop Mode Mode Start space to select the TIMER RECORDING. 01 BBC1 MON-SAT 8:00 8:30 10.2.
-
Page 47: Recording
Recording Recording television programmes Insert a video cassette with an intact write-protection tab. Use CH , to select the channel. Press REC MODE to select the tape speed. Recording time for E-240 cassettes With each press of the button, the display switches from: SP SP - Normal mode: approx. -
Page 48: Timer-Controlled Recordings
TIMER-controlled recordings VIDEO Plus+ Video Plus+ Programming recordings with VIDEO Plus+ Insert a video cassette with intact write-protection tab. 8 3 5 4 2 - - - - Press VIDEO Plus+. Enter the VIDEO Plus+ number using the number buttons. to delete a number. - Page 49 TIMER-controlled recordings PROG/CHECK Manual programming Timer recording 1 / 3 Press PROG/CHECK. The Timer recording screen appears. Name Date Start Stop Confirm the highlighted line with ENTER. 1 BBC1 19/11 10:30 11:30 SP ON to select the name of the TV station. - - - - - - - - -.
-
Page 50: Timer-Controlled Recordings
TIMER controlled recordings Before TIMER recordings via external devices SETUP AV2 Settings AV2 Input Video You control the recording function via an external device (e.g. receiver) using EXT LINK. Ext Link 1 Ext Link Connect the external device with a 21-pin Scart cable to the AV2 socket. Tuning Adjust the Ext Link function for the connected device. -
Page 51: Timer Recording From Sat With Video Plus
TIMER recording from Sat with VIDEO Plus+ VIDEO Plus+ Codes for Satellite Receivers / Set Top Box This DVD Recorder is not designed to control (switch on or change channel) your satellite receiver or Set Top Box, however, it can be taught to recognise VIDEO Plus+ Codes for Satellite stations. -
Page 52: Recording From An External Device, E.g. A Camera
EXT LINK EXT LINK signals from DVD. VIDEO IN L/MONO - AUDIO IN - R S VIDEO IN S VIDEO cable Panasonic Press REC MODE to select the recording To select the DC channel press CH DMR-ES30V mode. or INPUT SELECT several times. -
Page 53: Manually Copying / Dubbing
Manually Copying / DUBBING With this function, you can copy directly from VHS to DUBBUNG DVD or from DVD to VHS. Manually Copying to DVD RAM -R -RW V +R RAM -R -RW V +R -RW VR Video cassettes can be copied to Start the playback. -
Page 54: Functions Selection Menu
FUNCTIONS Selection Menu FUNCTIONS You can access the main functions via the FUNCTIONS selection menu. The illustrations show DVD-RAM menus. The menu entries can be different depending on the disc or medium. MP3/JPEG, see page 35-37. Press FUNCTIONS in stop mode. to select a menu and confirm with ENTER. -
Page 55: Entering Text
FUNCTIONS Selection Menu FUNCTIONS Entering Text RAM -R -RW V +R You can give discs or programmes titles in various menus: In DIRECT NAVIGATOR, in PLAYLISTS, in DISC MANAGEMENT and when setting the TIMER-controlled recording. DIRECT NAVIGATOR PLAYLISTS DISC MANAGEMENT Disc Name Schreibschutz TERRALUNA... -
Page 56: Direct Navigator
FUNCTIONS Selection Menu FUNCTIONS DIRECT NAVIGATOR In DIRECT NAVIGATOR, you can archive, edit or start recordings after selecting a title. DIRECT NAVIGATOR TITLE VIEW DVD RAM Press FUNCTIONS in stop mode. Confirm DIRECT NAVIGATOR with ENTER. [Previous] or [Next] to select other pages and press ENTER. BBC1 12/ 9 THU Select the desired title and start playback with ENTER. -
Page 57: Erase Properties Edit
FUNCTIONS Selection Menu FUNCTIONS DIRECT NAVIGATOR You can delete titles in DIRECT NAVIGATOR or playback lists in PLAYLISTS. This deletes the title or playback list and it cannot be recovered. To Others Erase DIRECT NAVIGATOR PLAYLISTS Properties Edit Erase Erase RAM -R -RW V +R Erase... - Page 58 FUNCTIONS Selection Menu FUNCTIONS DIRECT NAVIGATOR Erase Press FUNCTIONS Properties Confirm DIRECT NAVIGATOR with ENTER. Chapter View In the TITLE VIEW menu, use to select the desired title. You can also enter the title with the number buttons. If you enter a number that is larger DIRECT NAVIGATOR TITLE VIEW DVD-RAM than the total number of the title, then the last title is selected.lt.
- Page 59 FUNCTIONS Selection Menu FUNCTIONS DIRECT NAVIGATOR Press FUNCTIONS. Erase Confirm DIRECT NAVIGATOR with ENTER. Properties In the TITLE VIEW menu, use to select the desired title. Edit Press SUB MENU. Chapter View Enter Name Set up Protection In the sub menu, use to select [Edit] and confirm with ENTER.
- Page 60 FUNCTIONS Selection Menu FUNCTIONS DIRECT NAVIGATOR Press FUNCTIONS. Erase Enter Name Confirm DIRECT NAVIGATOR with ENTER. Properties Set up Protection In the TITLE VIEW menu, use to select the desired title. Edit Cancel Protection Press SUB MENU. Partial Erase Chapter View In the sub menu, use to select [Edit] and confirm with ENTER.
-
Page 61: Chapter View
FUNCTIONS Selection Menu FUNCTIONS DIRECT NAVIGATOR RETURN Press FUNCTIONS DIRECT NAVIGATOR TITLE VIEW DVD-RAM Confirm DIRECT NAVIGATOR with ENTER. In the TITLE VIEW menu, use to select the desired title. Press SUB MENU. BBC1 12/9 THU BBC1 23/9 THU ITV 1/10 FRI ASTRAL AUTOMOBIL TERRALUNA... -
Page 62: Dubbing
FUNCTIONS Selection Menu FUNCTIONS DUBBING -RW VR Copying from DVD to VHS DUBBING Copy-protected DVD-V cannot be copied. Source Cancel All Press FUNCTIONS. Dubbing Direction Destination to select [DUBBING] and confirm with ENTER. Dubbing Mode VIDEO Cancel All: All created settings and copy lists will be deleted! Create List to select [Yes] and confirm with ENTER. - Page 63 FUNCTIONS Selection Menu FUNCTIONS DUBBING Editing items with the SUB MENU Cancel All Destination Remaining: 4:01 Size: 0:00(---%) You can delete all items from the copy list. Dubbing Direction Size Name of item 01 0:12 SP (---%) TERRALUNA Press SUB MENU. Dubbing Mode 01 0:12 SP (---%) Welt der Tiere VIDEO...
-
Page 64: Dubbing
FUNCTIONS Selection Menu FUNCTIONS DUBBING Cancel All: All created settings and copy Copying from VHS to DVD -RW V or finalised DVD -RW V to VHS lists will be deleted! Video cassettes can be copied to unfinalised discs. Press FUNCTIONS. DUBBING to select [DUBBING] and confirm with ENTER. -
Page 65: Playlists
FUNCTIONS Selection Menu FUNCTIONS PLAYLISTS To Others You can create and then edit a playlist from your favourite chapters of your recording. Insert a recorded disc. If write protection is activated, deactivate it. Creating a Playlist PLAYLISTS Create Press FUNCTIONS in stop mode. DVD-RAM 03 ITV 1/10 FRI... -
Page 66: Edit Playlists
FUNCTIONS Selection Menu FUNCTIONS PLAYLISTS To Others Select / Edit Playlists Press FUNCTIONS. DVD-RAM to select [To Others] and confirm with ENTER. Erase PLAY Confirm PLAYLISTS with ENTER. Properties to select a playlist. Chapter View You can play the playlist with ENTER. With SUB MENU, the sub-menu for editing the playlist appears. -
Page 67: Edit Chapter
FUNCTIONS Selection Menu FUNCTIONS PLAYLISTS To Others Edit Chapter Press FUNCTIONS. PLAYLISTS PLAYLIST VIEW DVD-RAM to select [To Others] and confirm with ENTER. Confirm PLAYLISTS with ENTER. In PLAYLIST VIEW, use to select a playlist. 23/ 9 THU 0:30 1/10 FRI 0:10 1/10 FRI 0:20 Press SUB MENU. - Page 68 FUNCTIONS Selection Menu FUNCTIONS PLAYLISTS To Others Edit Chapter PLAYLISTS CHAPTER VIEW DVD-RAM DVD-RAM In CHAPTER VIEW, use to select the desired chapter and press SUB MENU. 03 BBC1 1/10 FRI 0:00 In the sub menu, use to select the desired option and confirm with ENTER. Add Chapter Move Chapter Move Chapter...
-
Page 69: Setup
FUNCTIONS Selection Menu FUNCTIONS SETUP To Others Press FUNCTIONS in stop mode. to select [To Others] and confirm with ENTER. to select SETUP and confirm with ENTER. to select the desired sub menu and use to switch to setting. to select the desired setting and confirm with ENTER. to select the desired option and confirm with ENTER. - Page 70 FUNCTIONS Selection Menu FUNCTIONS SETUP To Others ENTER Tuning Manual SETUP Manual Entering a New Television Station Auto-Setup Restart to select an empty station position and confirm ENTER. Download from TV Tuning Enter the channel using Disc 0 0 0 0 0 0 0 0 0 0 0 0 0 0 0 0 0 0 0 0 0 0 0 0 0 0 0 0 0 0 0 0 0 0 0 0 0 0 0 0 0 0 0 0 0 0 0 0 0 0 0 0 0 0 0 0 0 0 0 0 0 0 0 0 0 0 0 0 0 0 0 0 0 0 0 0 0 0 0 0 0 0 0 0 0 0 0 0 0 0 0 0 0 0 0 0 9 9 9 9 9 9 9 9 9 9 9 9 9 9 9 9 9 9 9 9 9 9 9 9 9 9 9 9 9 9 9 9 9 9 9 9 9 9 9 9 9 9 9 9 9 9 9 9 9 9 9 9 9 9 9 9 9 9 9 9 9 9 9 9 9 9 9 9 9 9 9 9 9 9 9 9 9 9 9 9 9 9 9 9 9 9 9 9 9 9 9 9 9 9 9 9 Manual Tuning Picture...
- Page 71 FUNCTIONS Selection Menu FUNCTIONS SETUP To Others Tuning Manual ENTER Changing the Name of the Television Station Manual Tuning Name Name to select the name of the television station and confirm with ENTER. BBC1 to select [Name] and use to select the name field. BBC2 The cursor jumps to the first letter Change the letter using...
- Page 72 FUNCTIONS Selection Menu FUNCTIONS SETUP To Others Tuning Auto-Setup Restart ENTER Auto-Setup Restart Auto-Setup Restart Warning--all stored tuning data to select [Yes] and confirm with ENTER. The station search begins. will be lost ! To cancel the process, use to select [No] and confirm with ENTER Do you want to proceed ? or press RETURN.
-
Page 73: Disc
FUNCTIONS Selection Menu FUNCTIONS SETUP To Others Disc Setting ENTER Option ENTER SETUP Settings for playback Ratings Changing the Security Level Ratings Level 5 [Unlock Recorder] DVD-Audio Video mode Playback You can restrict the playback of DVD-Video by Return to level 8 Tuning Soundtrack Ratings... -
Page 74: Picture
FUNCTIONS Selection Menu FUNCTIONS SETUP To Others Picture Setting ENTER Option ENTER SETUP Comb Filter [ON] [Off] Comb Filter On: The picture becomes clear and contour-rich. This setting is always set to [On] if you Still Mode Automatic have selected [TV System - NTSC]. S-VHS Dubbing Setting Automatic Tuning... -
Page 75: Sound
FUNCTIONS Selection Menu FUNCTIONS SETUP To Others ENTER ENTER Sound Setting Option SETUP Dynamic Range [ON] [Off] Dynamic Range Compression Compression Bilingual Audio Selection DVD-V On: The level of quiet sections is increased and the level of loud sections is Digital Audio Output (only Dolby Digital) decreased. -
Page 76: Display
FUNCTIONS Selection Menu FUNCTIONS SETUP To Others ENTER ENTER Display Setting Option SETUP On-Screen [Automatic] [Off] On-Screen Messages Automatic Messages Grey Background Automatic: The screen messages are displayed on the screen. FL Display Bright Grey Background [ON] [Off] Tuning On: The grey background is displayed when there is no television reception. Disc Picture Sound... - Page 77 FUNCTIONS Selection Menu FUNCTIONS SETUP To Others Connection ENTER ENTER ENTER AV2 Settings AV2 Settings Option SETUP AV2 Settings TV Aspect 16:9 AV2 Input Perform the settings in the following sub menus for the Progressive connected device. TV System Ext Link Tuning AV1 Output Disc...
-
Page 78: Others
[MODE 1] [MODE 2] [MODE 3] Remote Control MODE 1 Clock Change the code of the remote control so that you can also use another Owner ID Panasonic DVD un it at the same time. Tuning Quick Start Clock Disc... -
Page 79: Clock Setting / Owner Id
FUNCTIONS Selection Menu FUNCTIONS SETUP To Others Others Setting ENTER Clock ENTER Clock Automatic Clock setting Time Date The clock will normally be set correctly during Auto-Setup however, in some circumstances 2005 the DVD Recorder cannot set the clock automatically. In this case, follow the operation steps below to manually set the clock. -
Page 80: Disc Management
FUNCTIONS Selection Menu FUNCTIONS DISC MANAGEMENT To Others Press FUNCTIONS in stop mode. DISC MANAGEMENT Remain 0:59(XP) Title No. 1 to select [To Others] and confirm with ENTER. DVD-RAM Used 0:01 to select DISC MANAGEMENT and confirm with ENTER. Disc Name to select the desired menu and confirm with ENTER. -
Page 81: Format Disc
FUNCTIONS Selection Menu FUNCTIONS DISC MANAGEMENT To Others If write protection is activated, deactivate it. DISC MANAGEMENT Remain 0:59(XP) Title No. 1 DVD-RAM Press FUNCTIONS in stop mode. Used 0:01 to select [To Others] and confirm with ENTER. Disc Name to select DISC MANAGEMENT and confirm with ENTER. -
Page 82: Auto-Play Select / Finalize
FUNCTIONS Selection Menu FUNCTIONS DISC MANAGEMENT To Others Press FUNCTIONS. DISC MANAGEMENT to select [To Others] and confirm with ENTER. Title No. 1 Remain 0:59(XP) DVD-R Used 0:01 to select DISC MANAGEMENT and confirm with ENTER. Disc Name to select the desired menu and confirm with ENTER. Auto-Play Select Top Menu Use FUNCTIONS to return to the FUNCTIONS menu. -
Page 83: Vhs Functions
VHS FUNCTIONS FUNCTIONS Settings in the VHS FUNCTIONS Menu VHS FUNCTIONS Timer recording Timer recording Timer-controlled recording QUICK ERASE QUICK ERASE Tape length : AUTO E - 240 Erase all recordings on a played tape. SQPB : AUTO Setting the tape length of the used cassette. : 4 : 3 Tape length AUTO... -
Page 84: Status Displays
STATUS displays When using the unit, information on the settings of the unit and the operating procedure appear on the telelvision screen. STATUS Displaying the information Press STATUS. Each time the button is pressed, the display switches from time - tape counter - tape remaining - tape. -
Page 85: Status Displays
STATUS displays STATUS Displaying the information Press STATUS. Press STATUS again. The display changes each time that the button is pressed. To exit the display, press STATUS. 1: Current medium 2: Current recording and playback state, input channel DVD-RAM Pause playback Record PLAY BBC1... -
Page 86: Display Menus
DISPLAY menus DISPLAY menus contain information about the disc or the unit. With DVD-Video you can use the repeat function, change subtitles and Angles, with DVD playback, you can change the picture and sound setting. Depending on the status of the unit (playback, stop), there are some entries that cannot be selected or changed. -
Page 87: Display Menus
DISPLAY menus Play Option Setting DISPLAY Disc Repeat Play Repeat Play [On] [Off] This function is only available when the elapsed playtime is displayed. Play During the playback of playback list RAM -R -RW V +R -RW VR DVD-V Picture Sound PL (PLAYLISTS) Title... -
Page 88: Before Requesting Service
Before requesting service FUNCTION Check the power supply connection. No function possible. The unit is switched on but cannot be used. There is a malfunction. The numbers following the letter «H» indicate the condition of the unit. Switch the unit to standby /I. If the unit does not switch to standby mode, press and hold /I for approx. - Page 89 Before requesting service STROM DISPLAY The display lighting Change the [FL Display] in the Display SETUP menu. is weak. " 0:00" blinks on the unit display. No time. Set the time in the Others, [Clock] SETUP menu. REMOTE CONTROL If the unit is in standby mode ( on the unit) end this with TIMER No functions A wrong remote control code was selected.
-
Page 90: Before Requesting Service
Before requesting service RECORDING Cannot record Check whether the inserted disc is suitable for recording. The disc is not formatted. Format the di sc (RAM/DVD-RW). The write-protection device on t he Cartridge is set to "PROTECT". De activate the write protection. -
Page 91: Country Codes
Country codes Abkhazian 6566 Fiji 7074 Lingala 7678 Singhalese 8373 Afar 6565 Finnish 7073 Lithunian 7684 Slovac 8375 Afrikaans 6570 French 7082 Macedonian 7775 Slovenian 8376 Albanian 8381 Frisian 7089 Malagasy 7771 Somali 8379 Ameharic 6577 Galician 7176 Malay 7783 Spanish 6983 Arabic... -
Page 92: 21-Pin Scart Socket
21-pin Scart Socket The 21-pin Scart socket transmits both input and output signals for picture and sound. TVs equipped with the same type of socket can be connected here. This type of socket is also called Peritel, Euro Connector and Euro AV. AV1 Scart Socket (NORMAL) AV2 Scart Socket 21-pin Scart Socket... -
Page 93: Informations
Informations This DVD Recorder is a precision unit. Handle it carefully and do not expose it to vibrations during recording. Otherwise there may be breaks or noises in the recordings. The manufacturer accepts no responsibility and offers no compensation for loss of recorded or edited material nor for consequential damages attributed to a defect in the unit or the disc. -
Page 94: Specifications
Specifications Dimensions: ca. 430 mm (W) x 89 mm (H) x 352 mm (D) Power supply: AC 220V-240 V 50 Hz Weight: ca. 5.6 kg Operating temperature: 5°C - 40°C Power consumption: 36 W Operating humidity: 35% - 80% RH (no condensation) Recording format Recording format DVD-RAM: DVD-Video recording format DVD-R:DVD-Video format... - Page 95 Specifications Audio interface Audio interface Input Input The input impedance of each input socket is more than 10 kOhm. The input impedance of each input socket is more than 10 kOhm. AV1 SCART -6 dBV Standard: 0.5 Vrms, Full conduction: 2 Vrms at 1 kHz AV2 SCART -6 dBV Standard: 0.5 Vrms, Full conduction: 2 Vrms at 1 kHz...
-
Page 96: Index
Index Page Page Page Finalize Ratings Audio channel 33,86 FL Display Recording mode Angle Folder 35,37 Recording time AV1 Output Format Disc Recording time in EP mode AV2 Input Regional codes AV2 Settings Grey Background Repeat Play 76,77 Bilingual Audio Selection 52,75 Interlace Bitstream...