Panasonic KX WP1050 Operating Instructions Manual
Panasonic wi-fi phone operating instructions
Hide thumbs
Also See for KX WP1050:
- Quick start manual (9 pages) ,
- Operating instructions manual (168 pages)
Table of Contents
Advertisement
Quick Links
Charge the handset battery for 6 hours before initial use.
Please read these Operating Instructions before using the unit and save for
future reference.
This product is designed for use in the following countries:
USA, Canada, Japan, UK, Germany, France (indoor use)
For assistance, please visit http://www.panasonic.com/help
Operating Instructions
Wi-Fi Phone for Skype
Executive Travel Set
Model No.
KX-WP1050
TM
Advertisement
Table of Contents
Troubleshooting

Related Manuals for Panasonic KX WP1050


Summary of Contents for Panasonic KX WP1050
-
Page 1: Operating Instructions
Please read these Operating Instructions before using the unit and save for future reference. This product is designed for use in the following countries: USA, Canada, Japan, UK, Germany, France (indoor use) For assistance, please visit http://www.panasonic.com/help Operating Instructions Wi-Fi Phone for Skype Executive Travel Set KX-WP1050 Model No. -
Page 2: Table Of Contents
Useful features during a call..........88 For assistance, please visit http://www.panasonic.com/help... - Page 3 Mode selector............200 For assistance, please visit http://www.panasonic.com/help...
- Page 4 Index............. . . 234 For assistance, please visit http://www.panasonic.com/help...
-
Page 5: Feature Highlights
Feature highlights Thank you for purchasing a Panasonic Wi-Fi Phone for Skype Travel Set. Wi-Fi Phone for Use with Skype L Free yourself from a computer while enjoying Skype L Don’t miss incoming calls because you’re away from the computer... - Page 6 Skype is a little piece of software that lets you call people you know, all over the world, for free. With this product you have the added convenience of using Skype without being tied to your computer. For assistance, please visit http://www.panasonic.com/help Optional Services - SkypeIn calls - SkypeOut calls...
- Page 7 L Mozilla and Firefox are registered trademarks of the Mozilla Foundation. L All other trademarks identified herein are the property of their respective owners. For assistance, please visit http://www.panasonic.com/help SkypeOut allows you to make calls to landline and mobile phones.
-
Page 8: Important Safety Instructions
13. Do not touch the units, AC adaptor cord, AC cord, or charge cable during lightning storms. 14. Do not use the product to report a gas leak, when in the vicinity of the leak. For assistance, please visit http://www.panasonic.com/help... - Page 9 L Unplug the product from power outlets if it emits smoke, an abnormal smell, or makes an unusual noise. These conditions can cause fire or electric shock. Confirm that smoke has stopped emitting and contact the Panasonic Call Center at 1-800-211-PANA (1-800- 211-7262).
- Page 10 Introduction If you have any problems: Please visit: http://www.panasonic.com/help No responsibility will be taken by our company with respect to consequences resulting from the inappropriate use, damage or both of the unit. For assistance, please visit http://www.panasonic.com/help...
-
Page 11: Security Cautions
L When sending this product to be repaired with a company not related to Panasonic, make a back-up file of the base unit settings, if necessary, and reset this product to factory default. -
Page 12: Countries Permitted To Use This Product
MOZILLA PUBLIC LICENSE (MPL). You can get the MPL source code. Please note that this software is not under warranty. For inquiries regarding the contents above, see http://panasonic.co.jp/pcc/cs/en/telecom/wi-fi-hs.htm. Enter the necessary firmware information on the Inquiry form and submit it. For assistance, please visit http://www.panasonic.com/help... -
Page 13: For Best Performance
For best performance Base unit location/avoiding noise: The base unit and other compatible Panasonic units use radio waves to communicate with each other. For maximum distance and noise-free operation, we recommend the following: L Placing the product away from electrical appliances. - Page 14 L A wall with an insulation material that contains aluminum foil L A wall made of tin L A wall made of concrete, stone or brick L Fireproof glass L Several walls separated by open space L A steel shelf For assistance, please visit http://www.panasonic.com/help...
-
Page 15: Accessory Information
(Cord length: approx. 0.5 m (1.6 feet)) Order No. PQJA10185Z Wireless LAN sticker ... 1 pc. For assistance, please visit http://www.panasonic.com/help AC cord ... 1 pc. (Cord length: approx. 1.7 m (5.6 feet)) Order No. PQJA10188Z Handset stand... 1 pc. - Page 16 L All the accessory items except the CD-ROM and Wireless LAN sticker are included in the carrying case. Packing the accessories Quick Start Guide Note: L Do not include the CD-ROM when packing the accessories in the carrying case. For assistance, please visit http://www.panasonic.com/help Ethernet cable Charge cable AC cord AC adaptor Base unit...
- Page 17 Order No. PSJA1106Z Sales and support information L To order additional/replacement accessories, call 1-800-332-5368. L TTY users (hearing or speech impaired users) can call 1-866-605-1277. For assistance, please visit http://www.panasonic.com/help Order number PSJA1106Z (for UK) PFJA02A006Z (for Germany and France)
-
Page 18: Controls
B WIRELESS indicator C LAN (Ethernet) indicator D WAN (Internet) indicator E LOCATOR button F CHARGE port For assistance, please visit http://www.panasonic.com/help Mode selector G Power port H WAN (Internet) port I LAN (Ethernet) port J Mode selector (page 200) - Page 19 F CHARGE port G Microphone H Charge/Ringer indicator I Receiver For assistance, please visit http://www.panasonic.com/help J Display K Left soft key L Navigator key ({^} {V} {<} {>}) M Middle soft key: Press the center of the navigator key.
-
Page 20: Key Functions
Key Name {{} (SEND) {s} (SP-PHONE) {*} / {A→a} Left soft key For assistance, please visit http://www.panasonic.com/help ” icon is displayed on the handset display. Figure No. Function L Locate the handset (page 132) or register the handset (page 133). - Page 21 Navigator key {<} Navigator key {>} Middle soft key {}} (END)/Power MUTE/CLEAR For assistance, please visit http://www.panasonic.com/help Function L Activate the functions indicated at the bottom right corner on the display. L While in the Idle mode, press to sign in or connect to a network.
- Page 22 Introduction Key Name CONTACTS Alphanumeric keypad For assistance, please visit http://www.panasonic.com/help Figure No. Function L While in the Idle mode or in the Main menu, press to access the contact list (page 73). – L Enter numbers, characters, or symbols when entering characters.
-
Page 23: Base Unit Status Indicators
LOCATOR Green WIRELESS Green Green Green For assistance, please visit http://www.panasonic.com/help Status indicators Indicator Status pattern The base unit is locating the handset. Flashing The base unit is registering the handset. The wireless LAN of the base unit is available. - Page 24 Introduction Indicator Indicator type color Green/ Amber Amber For assistance, please visit http://www.panasonic.com/help Indicator Status pattern A short An Internet connection has been blinking in established using the Temporary LAN side Amber and network settings. a long L During this time, Port Forwarding, DMZ,...
-
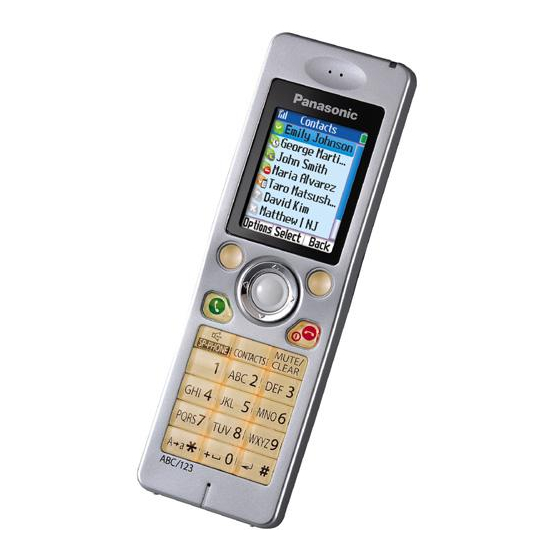
Page 25: Symbols And Screen Shots Used In These Operating Instructions
Press {^} or {V} to select “Contacts”, then press {Select} (middle soft key). Press {^} or {V} to select the desired contact, then press {Options} (Left soft key). For assistance, please visit http://www.panasonic.com/help Introduction Example – Buttons: {{}, {CONTACTS} – Soft keys: {Options}, {Menu} “Add contact”... - Page 26 L The screen shots in these instructions are from Microsoft ® Explorer 6.0 and are included for reference purposes only. L The screen shots in these instructions may differ slightly from what are shown on your computer screen. For assistance, please visit http://www.panasonic.com/help ® ® Windows XP using Internet...
-
Page 27: System Requirements
For Base unit Item Internet connection For Handset Item Internet connection For assistance, please visit http://www.panasonic.com/help Description Microsoft Windows XP Microsoft Windows 2000 Ethernet network device installed or IEEE 802.11b/g wireless network device installed. Microsoft Internet Explorer 6.0 or later for Windows ®... -
Page 28: Getting Started
– Router mode Setting up the base unit for the first time (Initialization Setup) Setting up the handset Turning on the handset (Signing in to Skype) For assistance, please visit http://www.panasonic.com/help page 29 page 30 page 32 page 33 page 34... -
Page 29: Installing The Base Unit
See “Using your computer on a wireless LAN” on page 209 for details. L Use only the included Panasonic AC adaptor PQWEWP1050 and AC cord PQJA10188Z. In UK, Germany and France, you need to use the appropriate AC cord(s) designed for use in your destination countries. -
Page 30: While You Are In A Hotel Room
Make sure the base unit is left unplugged. Connect the included Ethernet cable to the “WAN” port on the base unit and the Ethernet port (RJ45 jack) in the hotel room. For assistance, please visit http://www.panasonic.com/help Mode selector To LAN port... - Page 31 L In step 2, if you cannot find the Ethernet port (RJ45 jack) in the hotel room, ask the hotel front desk. In some hotels, the wireless Internet connection service may be available by using a wireless Ethernet bridge prepared by the hotel. For assistance, please visit http://www.panasonic.com/help Getting Started...
-
Page 32: While You Are At Home
L If you have more than 1 computer connected to the Internet, then you have a router. L If you do not know what type of modem you have, ask your Internet service provider. For assistance, please visit http://www.panasonic.com/help... - Page 33 Make sure the base unit is left unplugged. Connect the included Ethernet cable to the “WAN” port on the base unit and an unused Ethernet (LAN) port on your existing router (or modem with a built-in router). For assistance, please visit http://www.panasonic.com/help Mode selector To LAN port...
- Page 34 WAN. For your connection mode, select [DHCP], [Static] or [PPPoE] in Initialization Setup (page 36). Base unit AC cord To AC outlet AC adaptor For assistance, please visit http://www.panasonic.com/help Mode selector To LAN port Ethernet cable (not included) To WAN port...
- Page 35 Connect the included AC adaptor cord to the power port on the base unit and an AC outlet. L When the base unit turns on (The WAN indicator lights in green or amber), the installation is complete. For assistance, please visit http://www.panasonic.com/help Getting Started...
-
Page 36: Setting Up The Base Unit For The First Time (Initialization Setup)
For example, a setting profile of AP (Bridge) connection mode for the HOME mode and an another setting profile of DHCP connection type for the HOTEL mode. You are going to set up those profiles for HOME and/or HOTEL mode settings through the initialization setup shown in the following pages. For assistance, please visit http://www.panasonic.com/help... - Page 37 Confirm the settings you have configured, and save it as new profile. Restarting the base unit and confirming the Internet access The base unit restarts with the Internet connection profile you have just saved. For assistance, please visit http://www.panasonic.com/help Getting Started Step 1 – 4 from page 38 Step 5 –...
- Page 38 DHCP server (page 203). L Sometimes it is necessary to set up your Web browser’s proxy server to access the base unit (page 207). For assistance, please visit http://www.panasonic.com/help . See “Setting UPnP to display the shortcut”...
- Page 39 Password] L The base unit begins restarting and a prompt screen with fields for your user name and password is displayed. For assistance, please visit http://www.panasonic.com/help Description L The user name and password can contain 6 to 15 alphanumeric characters.
- Page 40 Getting Started Enter the user name and password set in step 3. Then click [OK]. L Top Menu is displayed. For assistance, please visit http://www.panasonic.com/help...
- Page 41 L If you have no specific instructions for the Internet connection from the hotel, you can use [Default Profile] for an easy setup. Ask the hotel front desk for details. If you select [Default Profile], skip to step 10. For assistance, please visit http://www.panasonic.com/help Getting Started...
- Page 42 [DHCP] [Static] [PPPoE] [AP (Bridge)] For assistance, please visit http://www.panasonic.com/help Description L Allows the base unit to receive an IP address automatically from a DHCP server. This connection mode is usually required for use with cable modems. Select if you are instructed to specify DHCP, host name and/or MTU value by your Internet service provider.
- Page 43 L Allows the base unit to receive an IP address automatically [Static] L Allows the base unit to assign a specific IP address. [PPPoE] L Allows the base unit to receive an IP address from a PPPoE For assistance, please visit http://www.panasonic.com/help from a DHCP server. server. Getting Started...
- Page 44 Getting Started L A screen with fields for configuring the connection mode you select in this step is displayed. L For example: When you select [DHCP] in HOME mode For assistance, please visit http://www.panasonic.com/help...
- Page 45 L If your Internet service provider or the hotel you are staying in does not specify any of the settings, leave the data fields blank except for MTU entry. L The Save Settings page is displayed. For assistance, please visit http://www.panasonic.com/help...
- Page 46 WAN indicator After the Initialization Setup is complete, try to access a website in order to confirm the Internet connection setting. Enter http://www.panasonic.com in the address field of the browser and press the ENTER key. For assistance, please visit http://www.panasonic.com/help...
- Page 47 LIf the Panasonic website is displayed, you have successfully connected to the Internet. LIf you are in a hotel room, an authorization for the Internet access may be required. Ask the hotel front desk and follow their instructions. Note: L You can change the user name and password after logging in to the base unit (page 182).
- Page 48 DHCP server. Setting [DNS Server 1] [DNS Server 2] For assistance, please visit http://www.panasonic.com/help Description L If you have the DNS (Domain Name System) server address assigned by your Internet service provider or the hotel you are staying in, enter them in this data field. They usually have two addresses.
- Page 49 [Domain Name] [MTU] Static Configuration: Allows the base unit to assign a specific IP address. For assistance, please visit http://www.panasonic.com/help Description L If you have the host name assigned by your Internet service provider or the hotel you are staying in, enter host name (1 –...
- Page 50 [DNS Server 1] [DNS Server 2] [Domain Name] [MTU] For assistance, please visit http://www.panasonic.com/help Description L Enter the IP address and subnet mask assigned by your Internet service provider or the hotel you are staying in in each data field.
- Page 51 IP address from a PPPoE server. Setting [User Name] [Password] [Service Name] For assistance, please visit http://www.panasonic.com/help Description L Enter the user name (1 – 63 characters) assigned by your Internet service provider or the hotel you are staying in this data field.
- Page 52 AP Configuration: Allows the base unit to work as an access point when you have a router at home. (AP Configuration is not available in the HOTEL mode.) For assistance, please visit http://www.panasonic.com/help Description L If you have the DNS (Domain Name System) server address assigned by your Internet service provider or the hotel you are staying in, enter them in this data field.
- Page 53 [Connection Mode] [IP Address] [Subnet Mask] [Default Gateway] For assistance, please visit http://www.panasonic.com/help Description L Select [AP-DHCP] for Connection Mode if the DHCP server is operating in the router or modem with a built-in router you are using. Select [AP-Static] if you want to assign Static IP address.
-
Page 54: Troubleshooting For Installation
Getting Started Troubleshooting for installation If problems occur while installing the base unit, you can refer to the check list below. For up-to-date support information, visit http://www.panasonic.com/help. Please refer to it along with this guide for troubleshooting. Connection: Problem The modem is connected but the WAN indicator is off. - Page 55 3 times, the base unit does not respond. For assistance, please visit http://www.panasonic.com/help Solution L Dialog boxes may not be displayed immediately due to the state of the LAN. L Check that the LAN or WIRELESS indicator lights in green.
- Page 56 Getting Started Internet access: Problem I cannot connect to the Internet. For assistance, please visit http://www.panasonic.com/help Solution L Check the modem connection. Also check the connection between this product and the LAN. L Check the information received from Internet service provider or the hotel you are staying in regarding Internet connection.
-
Page 57: Setting Up The Handset
Insert the battery (A), and press it down until it snaps into position (B). Then close the handset cover (C, D). Important: L Use only the rechargeable Panasonic battery noted on page 17. Note: L The battery terminal indicated “... -
Page 58: Battery Charge
L If you want to use the handset immediately, charge the battery for at least 15 minutes. L You can use the handset while charging the battery. However, we recommend you wait for the handset to be charged to the full level before using the handset. For assistance, please visit http://www.panasonic.com/help CHARGE ports Charge cable... - Page 59 L The battery level may not be displayed correctly after you replace the battery. In this case, let the battery charge for 6 hours. L You can charge the battery at the temperature range between 5 °C and 40 °C (41 °F and 104 °F). For assistance, please visit http://www.panasonic.com/help Battery level Full Medium...
-
Page 60: Text Entry
2 Remaining number 1 Cursor: 2 Remaining number: 3 Character entry mode: For assistance, please visit http://www.panasonic.com/help It is a pointer that indicates a position to insert or erase the character(s). It indicates the number of remaining character(s) you can enter. -
Page 61: Basic Operation
– Press and hold {CLEAR} to erase the character on the cursor and all characters to the right of the cursor if the cursor is in the middle of the text. For assistance, please visit http://www.panasonic.com/help Getting Started... -
Page 62: Character Table
Space Change character entry mode *1 Valid depending on the text entry screen. Symbol table Note: L The available symbols differ depending on the text entry screen. For assistance, please visit http://www.panasonic.com/help Text entry Screen Uppercase Numeric (ABC) (123) + (Press and... -
Page 63: Turning On The Handset (Signing In To Skype)
L In step 2, you can also connect to open networks. When connecting to open networks, a display prompt appears to confirm whether you want to connect or not. See “Auto- connect to open networks list” on page 116. L For text entry, see page 60 for details. For assistance, please visit http://www.panasonic.com/help Getting Started... - Page 64 Enter your password. i {OK} Press {Yes} or {No} to decide whether to sign in automatically from the next time on. L The Idle screen appears (page 66). Note: L For text entry, see page 60 for details. For assistance, please visit http://www.panasonic.com/help...
-
Page 65: Creating A New Account
Password can be 4 – 20 characters. You can use any mix of uppercase and lowercase characters, numbers, and punctuation marks. You cannot use spaces, start your name with a number or punctuation mark, or use your Skype name as a password. For assistance, please visit http://www.panasonic.com/help Getting Started... -
Page 66: Handset Displays
2 Skype credit balance: 3 Soft key functions: 4 Message field: For assistance, please visit http://www.panasonic.com/help 3 Soft key functions Current time represents currently set time on the handset. Set the correct date and time before you start using the handset (page 72). - Page 67 Your Skype credit is low, or a Skype service you receive is close to expiring. Silent mode Handset ringer is off. Keypad locked *1 These icons appear from the left in order of priority. For assistance, please visit http://www.panasonic.com/help Getting Started...
-
Page 68: Display Backlight
To turn on the display backlight: To use the handset when the display backlight is turned off, press any key to turn the display backlight on again. For assistance, please visit http://www.panasonic.com/help... -
Page 69: Main Menu
Sign out: Sign out of Skype. Add Skype and SkypeOut contacts to your contact list. Add contact Search for Skype contacts over the Internet. Search View Skype credit, SkypeIn and voicemail information. Services For assistance, please visit http://www.panasonic.com/help Getting Started Page... - Page 70 Advanced: Set the notification for a software update, and set network proxy. *1 Available only when you are signed in to Skype. For assistance, please visit http://www.panasonic.com/help : Set call forwarding, voicemail and : Restrict incoming calls to those you specify. 106...
-
Page 71: Idle Mode Option Screen
Network details *1 Either is displayed according to the current silent mode settings. *2 Available only when you are signed in to Skype. For assistance, please visit http://www.panasonic.com/help Description Set the silent mode to on/off. Change your Skype online status. -
Page 72: Setting The Time And Date
L When the time setting is reset to an initial condition by removing the battery or for some other reasons, the time is displayed as “12:00 AM” and it stops. For assistance, please visit http://www.panasonic.com/help Select the desired time zone. i {Select} Select “Standard”... -
Page 73: Managing Contacts
L To call the contact, press {{} or {s} (page 83). L To access options, press {Options} and select the desired option. i {Select} (page 80) Note: L In step 1, you can also press {Menu} (middle soft key). i “Contacts” i {Select} For assistance, please visit http://www.panasonic.com/help Managing Contacts... - Page 74 L Display names in the contact list are shown in order of the following priority. – Names renamed by the user – Names registered by the contacts – Skype names L If the message “Contact list full” is displayed, you need to reduce contacts on your computer (page 101). For assistance, please visit http://www.panasonic.com/help...
- Page 75 Offline voicemail: Indicates that the contact is not signed in to Skype but can receive voicemails. Blocked: The contact is blocked and cannot contact you. SkypeOut blocked: Indicates the SkypeOut contact is blocked and cannot contact you. For assistance, please visit http://www.panasonic.com/help Managing Contacts...
-
Page 76: Adding Contacts
L In step 6, the authorization request is sent to the newly added contact so that the person will allow you to see when the person is online. L For text entry, see page 60 for details. For assistance, please visit http://www.panasonic.com/help... - Page 77 – To correct a digit, press {CLEAR}. L In step 8, if the message “Edit your list of blocked users” is displayed, see “Unblocking contacts” (page 82). L For text entry, see page 60 for details. For assistance, please visit http://www.panasonic.com/help Managing Contacts...
-
Page 78: Searching For Skype Contacts
L In step 3, you can enter either the Skype name or the full name of the contact. You can also search for a contact by entering a part of the name. For assistance, please visit http://www.panasonic.com/help View the next 20 results. -
Page 79: Removing Contacts
Note: L In step 1, you can also press {Menu} (middle soft key) i “Contacts” i {Select} For assistance, please visit http://www.panasonic.com/help Remove the contact from your contact list and block this contact. The contacts that are removed and blocked are moved from your contact list to the blocked users list. -
Page 80: Contact List Options
In step 2, press {View} after finding the desired contact to view the contact profile. Then, press {Options} to access the options. For assistance, please visit http://www.panasonic.com/help Call the contact. Select the desired phone number or the display name of the desired contact to call. i {Select}/ {{}/{s} L Not available if the contact is a blocked user. -
Page 81: Viewing A Contact Profile
L The display name of the contact may not be properly displayed if the name was not entered using the Roman alphabet. In this case, press {Options}, and select “Rename” to change the name. For assistance, please visit http://www.panasonic.com/help Managing Contacts... -
Page 82: Blocking Contacts
Contacts that are removed and blocked from contact list go to the blocked users list. You can release the blocked contacts from the blocking status. {Menu} (middle soft key) “Settings” i {Select} “Blocked users” i {Select} Select the desired user. i {Unblock} For assistance, please visit http://www.panasonic.com/help... -
Page 83: Making/Answering Calls
You can make a call to home, office or mobile phone number using the contact’s profile. While in the Idle mode, press {CONTACTS}. Select the desired Skype contact. {Options} “Call” i {Select} Select the desired number. For assistance, please visit http://www.panasonic.com/help Making/Answering Calls... - Page 84 You can make a call to landline and mobile phone (SkypeOut call) directly while in the Idle mode. While in the Idle mode, enter the phone number in the following way (even for local calls): “country code” + “area code” + “local phone number” For assistance, please visit http://www.panasonic.com/help...
- Page 85 You can make a call to Skype user (Skype-to-Skype call) directly while in the Idle mode. While in the Idle mode, enter {*}. Enter the Skype name that you want to call. L To make a call using the speakerphone, press {s}. For assistance, please visit http://www.panasonic.com/help Making/Answering Calls...
-
Page 86: Answering Calls
Press {^} or {V} repeatedly to select the desired volume. i {OK} Rejecting the call While the handset is ringing, press {}}. Note: L Pressing {}} to reject a call is logged in the incoming calls list. For assistance, please visit http://www.panasonic.com/help... - Page 87 L You can join but can not initiate a conference call. If you want to initiate a conference call, you need to use other Skype product that can host a conference call. L To reject a conference call, press {}}. For assistance, please visit http://www.panasonic.com/help Making/Answering Calls...
-
Page 88: Useful Features During A Call
This feature allows you to receive calls while you are already talking on the phone. If you receive a call while on the phone, you will hear a call waiting tone and the 2nd caller’s information will be displayed. For assistance, please visit http://www.panasonic.com/help... - Page 89 To resume conversation with 1st caller while you talking with 2nd caller: Press {Switch} to switch 1st caller. L 2nd caller is automatically held. To resume conversation with 1st caller, press {Resume}. When you are finished talking with 1st caller, press {}}. For assistance, please visit http://www.panasonic.com/help Making/Answering Calls...
-
Page 90: Diverting Calls
Enter the Skype name or SkypeOut number. i {OK} Note: L In step 4, if the number is already set, select “Forwarding to”. i {Select}, then skip to step 6. L For text entry, see page 60 for details. For assistance, please visit http://www.panasonic.com/help... - Page 91 L In steps 2 to 4 you can also select “History” i {Select} i “Voicemails” i {Select} i {Options} i “My greeting” i {Select} L In step 5, you can also press {Options} i “Play” i {Select} For assistance, please visit http://www.panasonic.com/help Making/Answering Calls...
- Page 92 L In step 6, you can reset the welcome messages to default by selecting “Reset to default”. i Press {Select}, then skip to steps 7 and 8. L In step 7 even if you exit recording by pressing {}}, the message may have been already recorded. For assistance, please visit http://www.panasonic.com/help...
-
Page 93: Skype Voicemail
L In step 5, you can also press {Options}. i “Play” i {Select} L Received voicemails are listed in chronological order in the voicemails list. “ ” indicates a new voicemail that you have not played back in the voicemails list. For assistance, please visit http://www.panasonic.com/help Making/Answering Calls... - Page 94 “Incoming calls”/“Outgoing calls”/“Voicemails” i {Select} L In step 3, you can select the desired contact. i {View} i {Options} L In step 6, even if you exit recording by pressing {}}, the message may be recorded. For assistance, please visit http://www.panasonic.com/help...
-
Page 95: Managing History
Delete View profile Add to contacts Clear list For assistance, please visit http://www.panasonic.com/help Make a call. L Not available if this contact is a blocked user. Send a voicemail to the contact (page 94). L Not available if this contact is a blocked user. - Page 96 {Select} Play Details Delete Call Send voicemail For assistance, please visit http://www.panasonic.com/help Play the voicemail (page 93). View details of the log: contact’s name/number, date, time. Delete the log. Make a call. L Not available if this contact is a blocked user.
- Page 97 L Press {V} to search from the most recent log, or {^} from the oldest. L To call back, press {{} or {s}. {Select} For assistance, please visit http://www.panasonic.com/help View the profile of the contact (page 81). Block or unblock the contact.
- Page 98 Managing History Read the authorization request message. i {Options} Select “Accept” or “Decline” i {Select} Accept Decline For assistance, please visit http://www.panasonic.com/help Accept the authorization request from the contact. Decline the authorization request from the contact.
-
Page 99: Notifications
This notification appears when you missed a call. L To view the missed call log, press {View}. L If you view it later, press {Cancel}. Note: L For missed call logs, see page 95 for details. For assistance, please visit http://www.panasonic.com/help... - Page 100 This screen appears when someone requests to exchange contact details. L To view the request, press {View}. L If you view it later, press {Cancel}. Note: L For handling of request, see page 97 for details. For assistance, please visit http://www.panasonic.com/help...
- Page 101 L To clear this message, press {OK}. Note: L You can still use this handset as phone, and you can manage your contact list. However, the handset can not be synchronized with Skype servers, so any changes on your For assistance, please visit http://www.panasonic.com/help Notifications...
- Page 102 Keep the sum of your contact list and your blocked users list under 500. For deleting blocked contact in the blocked users list, press “Contacts” i “Advanced” i “Manage Blocked Users...” on computer Skype. For assistance, please visit http://www.panasonic.com/help...
-
Page 103: Personal Skype Online Status And Settings
Setting your profile You can enter your profile data in My profile. While in the Idle mode, press {Options}. “My profile” i {Select} Select the desired setting. i {Select} For assistance, please visit http://www.panasonic.com/help Personal Skype Online Status and Settings... - Page 104 Press {OK} when the confirmation message appears. Note: L In step 1, you can also press {Menu} (middle soft key). i “Status” i {Select} For assistance, please visit http://www.panasonic.com/help public. Entries are available for your Skype name, full name, country/region, gender, phone number, language and other information about yourself.
-
Page 105: Personal Skype Settings
Re-enter the new password. i {OK} Important: L Please keep your password secure. L We recommend that you change the password regularly. Note: L For text entry, see page 60 for details. For assistance, please visit http://www.panasonic.com/help Personal Skype Online Status and Settings... -
Page 106: Privacy Settings
Only my contacts Important: L When your Skype online status is in “Skype me”, the privacy settings are not valid. For assistance, please visit http://www.panasonic.com/help All Skype users Only Skype contacts listed in your contact list Only authorized Skype contacts listed in your contact... -
Page 107: Handset Wireless Network Connection And Settings
IP address Subnet mask Default gateway DNS server Base unit For assistance, please visit http://www.panasonic.com/help Show the network is connected or not. Show the network name (SSID) when network is connected. When connected the base unit, it is displayed as “Base unit”... - Page 108 You can connect to a wireless network that is found in range manually. While in the Idle mode, press {Options}. For assistance, please visit http://www.panasonic.com/help Connect to the selected network (page 108). View the network name, the wireless security type and the wireless channel of the selected network.
- Page 109 {OK}. i Select a network to be deleted. i {Select} i {Yes}. Then the new secure network is registered in your preferred networks list. L For text entry, see page 60 for details. For assistance, please visit http://www.panasonic.com/help...
- Page 110 L In step 5, after {OK}, “Saved” message is displayed. Press {OK} or leave the display for 3 seconds. L In step 6 to 9, you can set other settings, such as TCP IP and Advanced settings. For assistance, please visit http://www.panasonic.com/help...
- Page 111 Skype if you have not signed in yet. L If wireless networks in range are displayed, select the desired network. i {Connect} L If error message “Networks were not found” is displayed, press {Search} to search and attempt to connect again. For assistance, please visit http://www.panasonic.com/help...
-
Page 112: Wireless Network Settings
Select the desired network. i {Select} Network settings of the base unit: TCP IP(HOME)/ TCP IP(HOTEL) For assistance, please visit http://www.panasonic.com/help Select “TCP IP(HOME)” or “TCP IP(HOTEL)” i {Select} L View connection type (DHCP/Static IP) L View IP address, Subnet mask, Default gateway, DNS server 1 and DNS server 2 when connection type is Static IP. - Page 113 Select the desired network settings. i {Select} Network settings of the base unit: TCP IP(HOME)/ TCP IP(HOTEL) For assistance, please visit http://www.panasonic.com/help L View the network name (SSID) L View the network security type (Open/WEP/WPA- PSK(TKIP)/WPA2-PSK(AES)) L View the key index when security type is WEP (Key 1/ 2/3/4) Select “TCP IP”...
- Page 114 Handset Wireless Network Connection and Settings Network settings except for the base unit: Network name Network security TCP IP For assistance, please visit http://www.panasonic.com/help Enter the network name containing between 1 and 32 characters. i {OK} For Open network: “Open” i {Select} For WEP security network: “WEP”...
- Page 115 L In step 6, you can also select “Add current” i {Select} to add the currently connected network to your preferred networks. To delete networks from preferred networks list: {Menu} (middle soft key) For assistance, please visit http://www.panasonic.com/help SSID broadcast: “SSID broadcast” i {Select} i Select “Broadcast” or “No broadcast”. i {Select} L When the network does not broadcast the SSID, select “No broadcast”.
- Page 116 {Menu} (middle soft key) “Settings” i {Select} “Network” i {Select} For assistance, please visit http://www.panasonic.com/help Remove the selected network from the list. This option is not available for the base unit. Remove all the networks from the list. The base unit is not removed.
- Page 117 L When the handset connect to an undesired open network, please select the desired network manually See “To connect to a wireless network that is found in range” for details. (page 108). For assistance, please visit http://www.panasonic.com/help...
-
Page 118: Handset Settings
Select “Automatically sign in” or “Prompt for password”. i {Select} Updating software (Handset) This feature allows you to update the Skype application or Panasonic firmware in the handset. Important: L While you update software/firmware, do not unplug the charge cable. - Page 119 L When “An important update to Skype is available.” or “A new version of Skype is available.” is displayed, skip to step 5. To update the Panasonic firmware: We recommend you update the Panasonic firmware regularly. For information, visit: http://panasonic.co.jp/pcc/cs/en/telecom/wi-fi/us_wp1050.htm.
- Page 120 Handset Settings Read the entire Skype agreement. i {Yes} Computer: Start up the Web browser on the computer you connected to the LAN port on the base unit. For assistance, please visit http://www.panasonic.com/help...
- Page 121 Download the updated firmware to your computer from the firmware information URL. Computer: Enter the file name under the Update Firmware heading. LYou can also click [Browse...] to select the desired file name from the list. Computer: Click [Update]. For assistance, please visit http://www.panasonic.com/help Handset Settings...
- Page 122 L When “A new version of firmware is available.” is displayed, skip to step 5. L In step 5, the message “You already have the latest software installed.” is shown, but a new Panasonic firmware is available from Panasonic firmware site. i {Options} i “Update manually” i {Select} i {OK} L In step 9, for the safety, the user name and the password is temporarily available.
- Page 123 L If you select “Reset all” in step 5, you need to register the handset to the base unit again. See “Registering the handset” on page 133 for details. For assistance, please visit http://www.panasonic.com/help Resets all the handset settings except “Preferred networks”, “Auto-connect”...
-
Page 124: Tones
(Tone does not sound when ringer volume is off, silent mode is on and/or your Skype online status is “Do not disturb”.). For assistance, please visit http://www.panasonic.com/help Set the ringer type to “Ringing” or “Ring once”. L Set the desired ringer tone. -
Page 125: Phone Settings
See “Registering the handset” on page 133. Brightness This feature adjusts the brightness of the screen. {Menu} (middle soft key) “Settings” i {Select} “Phone settings” i {Select} “Brightness” i {Select} Press {<} or {>} to adjust the brightness. {OK} For assistance, please visit http://www.panasonic.com/help Handset Settings... -
Page 126: Handset Information
Handset Settings Handset Information This feature shows device information such as product ID, software/firmware version and MAC address. {Menu} (middle soft key) “Settings” i {Select} “Information” i {Select} For assistance, please visit http://www.panasonic.com/help... -
Page 127: Advanced Settings
Proxy type Host Port Authentication For assistance, please visit http://www.panasonic.com/help Select the proxy server type from “None”, “HTTP/ HTTPS” or “SOCKS5”. Enter the proxy server IP address or name (max.100 characters) in this data filed if it is specified by your... - Page 128 L For text entry, see page 60 for details. L The new settings will become effective after restarting the handset. For assistance, please visit http://www.panasonic.com/help Enter the user name for proxy host authentication (max.127 characters) in this data field if it is specified by your Internet service provider or the hotel you are staying in.
-
Page 129: Recovering The Handset
L If the networks list is displayed, enter the number to connect to the desired network. – To view more available networks in range list, press {^} or {V}. – To search for available networks, press {Search}. – To access options, press {Options}. For assistance, please visit http://www.panasonic.com/help Handset Settings... - Page 130 After a network connection is completed, follow the same step as software/firmware update. To update the Skype application: Skip to step 6 on page 118. To update the Panasonic firmware: Skip to step 6 on page 119. Note: Followings are the differences from normal usages: L You need to press {^} or {V} to scroll pages.
-
Page 131: Services
If you select “Voicemail”, view the information. If you subscribe to only 1 SkypeIn number, the number is displayed. i {Select} i View the expiration date of the SkypeIn number. For assistance, please visit http://www.panasonic.com/help View the remaining Skype credit available and the expiration date. -
Page 132: Handset Locator And Registration
To stop paging, press any key except {CONTACTS}, navigator key and middle soft key. Note: L The base unit only locates the registered handset. L When the wireless connection between the handset and the base unit is not established, locating the handset is not available. For assistance, please visit http://www.panasonic.com/help LOCATOR button... -
Page 133: Registering The Handset
L While the handset is being registered, the LOCATOR indicator on the base unit flashes. For assistance, please visit http://www.panasonic.com/help Handset Locator and Registration LOCATOR button... -
Page 134: Base Unit Settings
L A prompt screen with fields for your user name and password is displayed. L After failure to enter the user name and the password to a prompt screen asking for them for 3 times, the base unit does not respond. For assistance, please visit http://www.panasonic.com/help... - Page 135 L Network Connection: L Update Firmware: L Advanced Setup: L Handset Information: For assistance, please visit http://www.panasonic.com/help Indicate the current selected mode. The mode is determined by the position of the Mode selector switch (page 200). Provide an easy setup for Internet connection (page 136).
-
Page 136: Network Connection
L The current Internet connection settings and information of the wireless connection are displayed. L See the Network Status page for each of the setting (page 175). Click [New Profile] under the New Profile heading. For assistance, please visit http://www.panasonic.com/help... - Page 137 [PPPoE Disconnect] are available. You can connect PPPoE by clicking [PPPoE Connect] and disconnect PPPoE by clicking [PPPoE Disconnect]. Modifying the existing network connection profile Click [Network Connection] on the Top Menu. Click [Modify] under the Network Connection heading. For assistance, please visit http://www.panasonic.com/help Base Unit Settings...
- Page 138 Select the desired profile from pull-down menu, then click [Delete] in step 3. Click [OK] in the confirmation dialog box. Click [Restart]. – If you delete the profile you are currently using for HOTEL or HOME mode, the profile will be reset to the default setting (DHCP). For assistance, please visit http://www.panasonic.com/help...
- Page 139 Setting [Security Mode] WEP settings [Network Key] [Key Index] For assistance, please visit http://www.panasonic.com/help Description L Select your wireless network mode from the pull-down menu. L If you have both 802.11b and 802.11g wireless devices in your network, select [802.11b/g].
- Page 140 L If you click [View], the current network key is displayed. You may need this information when you set up your wireless devices. For assistance, please visit http://www.panasonic.com/help Description L Enter the network key (8 – 63 alphanumeric characters) in this data field.
-
Page 141: Updating The Firmware (Base Unit)
Enter the file name of the downloaded firmware in the File Name field. L You can also click [Browse...] to select the firmware file name from the list. Click [Update]. Click [OK]. L The base unit automatically restarts after the firmware is updated. For assistance, please visit http://www.panasonic.com/help Base Unit Settings... - Page 142 Base Unit Settings For assistance, please visit http://www.panasonic.com/help...
-
Page 143: Advanced Setup
L Basic: L Advanced: L Wireless: L Status: L Maintenance: L Support: For assistance, please visit http://www.panasonic.com/help 1 Tab 4 Sub menu 2 Display the setting pages for the Internet connection profile. Display the setting pages for the local network configuration, security, and routing. - Page 144 Internet Connection MAC Address Clone Advanced LAN/DHCP Server Port Forwarding UPnP Easy Security Packet Filtering Routing For assistance, please visit http://www.panasonic.com/help Sub menu1 Profiles Profile Selection DHCP Server Static DHCP Address Reservation) Port Forwarding Table Easy-To-Use Filtering Packet Filtering Table...
- Page 145 Network Status DHCP Lease Table DHCP Server UPnP Port Mapping Table Wireless Status Handset Status Version Information Save Status For assistance, please visit http://www.panasonic.com/help Base Unit Settings Sub menu1 Sub menu2 Wireless Mode SSID Security Mode WEP Settings WPA-PSK/ WPA2-PSK...
- Page 146 *2 While in AP (Bridge) mode, these menus are not available. *3 While in AP (Bridge) mode, these menus are displayed but these features are not available. *4 While in AP (Bridge) mode, this feature is available automatically. For assistance, please visit http://www.panasonic.com/help Sub menu1 Sub menu2 –...
-
Page 147: Basic Settings
Up to 4 profiles can be registered. Click [Advanced Setup] on the Top Menu. Click the [Basic] tab, then click [Internet Connection]. For assistance, please visit http://www.panasonic.com/help Base Unit Settings... - Page 148 Home Mode Hotel Mode Click [Restart]. L The base unit automatically restarts and the Top Menu is displayed. For assistance, please visit http://www.panasonic.com/help Description L Select a profile to use when Mode selector is at “HOME”. L Profile No.1 is used only for HOME Mode.
- Page 149 Click the desired entry number in step 3. Click [Delete]. Click [OK] in the confirmation dialog box. Click the pull-down menu and select the desired profile under the Profile Selection heading, then click [Save]. Click [Restart]. For assistance, please visit http://www.panasonic.com/help Base Unit Settings...
- Page 150 Internet connection. Click [Advanced Setup] on the Top Menu. Click the [Basic] tab, then click [MAC Address Clone]. Note: L This feature is not available in AP (Bridge) mode. For assistance, please visit http://www.panasonic.com/help...
- Page 151 [Original MAC Address] [Cloned MAC Address] Click [Restart]. L The base unit automatically restarts and the Top Menu is displayed. For assistance, please visit http://www.panasonic.com/help Description L Select whether to enable or disable the MAC address clone feature. L Base unit’s MAC address is displayed.
- Page 152 This feature allows you to configure the local network settings and DHCP server settings. Click [Advanced Setup] on the Top Menu. Click the [Advanced] tab, then click [LAN/DHCP Server]. Note: L This feature is not available in AP (Bridge) mode. For assistance, please visit http://www.panasonic.com/help...
- Page 153 L In step 4, if the LAN side setting is changed, you need to change your computer’s setting and click the link shown on the Restarting page. For assistance, please visit http://www.panasonic.com/help Description L Enter the IP address and subnet mask corresponding to your local network.
- Page 154 L When you click [Refresh], the network connection status is refreshed. Click [Add] under the Manual Setting heading. Click [Restart]. L The base unit automatically restarts and the Top Menu is displayed. For assistance, please visit http://www.panasonic.com/help Description L Enter the LAN card’s MAC address for the corresponding computer.
- Page 155 L When setting up the port forwarding feature, there is a possibility of illegal access to the forwarding port from the Internet. For safety reasons, set this feature only when required. Click [Advanced Setup] on the Top Menu. For assistance, please visit http://www.panasonic.com/help Base Unit Settings...
- Page 156 Base Unit Settings Click the [Advanced] tab, then click [Port Forwarding]. To add a new entry, click [Add] under the Port Forwarding Table heading. For assistance, please visit http://www.panasonic.com/help...
- Page 157 Click the desired entry number in step 3. Click [Delete] in the Port Forwarding Setting page. Click [OK] in the confirmation dialog box. Click [Restart]. For assistance, please visit http://www.panasonic.com/help Description L Select the desired entry number for the port forwarding setting.
- Page 158 L The base unit automatically restarts and the Top Menu is displayed. Note: L This feature is not available in AP (Bridge) mode. For assistance, please visit http://www.panasonic.com/help Description L Select whether to enable or disable the DMZ feature. L Enter the IP address of the computer to be exposed to the...
- Page 159 L The base unit automatically restarts and the Top Menu is displayed. Note: L This feature is enabled in AP (Bridge) mode automatically. For assistance, please visit http://www.panasonic.com/help Description L Select whether to enable or disable the UPnP feature. Base Unit Settings...
- Page 160 Base Unit Settings Easy Security: This feature allows you to easily set up packet filtering. Click [Advanced Setup] on the Top Menu. Click the [Advanced] tab, then click [Easy Security]. For assistance, please visit http://www.panasonic.com/help...
- Page 161 L The base unit automatically restarts and the Top Menu is displayed. Note: L This feature is not available in AP (Bridge) mode. For assistance, please visit http://www.panasonic.com/help Description L Select whether to deny or allow packets to be sent or...
- Page 162 This feature allows you to configure the packet filtering settings, and to control the packets to be received/transmitted between the Internet and the computers on your LAN. Up to 20 settings can be registered. Click [Advanced Setup] on the Top Menu. Click the [Advanced] tab, then click [Packet Filtering]. For assistance, please visit http://www.panasonic.com/help...
- Page 163 Base Unit Settings To add a new entry, click [Add] under the Packet Filtering Table heading. For assistance, please visit http://www.panasonic.com/help...
- Page 164 [Source IP Address] [Source Port] [Destination IP Address] For assistance, please visit http://www.panasonic.com/help Description L Select the desired entry number for the packet filtering setting. Entry number represents the priority. Entry number 1 has the highest priority. L Select whether to enable or disable the packet filtering feature.
- Page 165 – Easy security (Attack detection) – Packet filtering – Easy security (except for Attack detection) L This feature is not available in AP (Bridge) mode. For assistance, please visit http://www.panasonic.com/help Description L Enter the packet destination IP address/netmask to be filtered.
- Page 166 Use this feature when you have several local networks. Up to 4 settings can be registered. Click [Advanced Setup] on the Top Menu. Click the [Advanced] tab, then click [Routing]. To add a new entry, click [Add] under the Static Routing Table heading. For assistance, please visit http://www.panasonic.com/help...
- Page 167 Click [OK] in the confirmation dialog box. Click [Restart]. L This feature is not available in AP (Bridge) mode. For assistance, please visit http://www.panasonic.com/help Description L Select whether to enable or disable the routing setting. L Enter the network address/netmask for the destination IP address.
- Page 168 Base Unit Settings Wireless Wireless Basic: This feature allows you to set the wireless mode and network name (SSID: Service Set IDentifier). Click [Advanced Setup] on the Top Menu. Click the [Wireless] tab, then click [Wireless Basic]. For assistance, please visit http://www.panasonic.com/help...
- Page 169 L You need to register the handset to the base unit again when you change the network name (SSID). See “Registering the handset” on page 133. For assistance, please visit http://www.panasonic.com/help Description L Select your wireless network mode from the pull-down menu.
- Page 170 Base Unit Settings Wireless Security: This feature allows you to set security measures for connecting to wireless LAN. Click [Advanced Setup] on the Top Menu. Click the [Wireless] tab, then click [Wireless Security]. For assistance, please visit http://www.panasonic.com/help...
- Page 171 [Session-Key renewal interval] Click [Restart]. L The base unit automatically restarts and the Top Menu is displayed. For assistance, please visit http://www.panasonic.com/help Description L Select the desired security mode. L No Encryption (Open), WEP, WPA-PSK and WPA2-PSK are available for the wireless devices, including the handset.
- Page 172 MAC address filtering is available only for wireless devices. Up to 5 entries can be registered. The first entry is reserved for the handset. To enable or disable MAC address filtering feature: Click [Advanced Setup] on the Top Menu. Click the [Wireless] tab, then click [MAC Address Filtering]. For assistance, please visit http://www.panasonic.com/help...
- Page 173 Click the [Wireless] tab, and then click [MAC Address Filtering]. To add a new entry, click [Add] under the MAC Address Filtering Table heading. L MAC Address Filtering Setting page is displayed. For assistance, please visit http://www.panasonic.com/help Description L Select whether to enable or disable the MAC address filtering feature.
- Page 174 Click [OK] in the confirmation dialog box. Click [Restart]. L The registered handset is automatically listed in the MAC Address Filtering Table. For assistance, please visit http://www.panasonic.com/help Description L Enter the desired MAC address. L Set 12 hexadecimal characters, with separation by colon (:)
- Page 175 The information displayed on the pages are useful when contacting an authorized servicenter. Click [Advanced Setup] on the Top Menu. Click the [Status] tab, then click the desired item on the left. [Network Status] shows the WAN/LAN interface status and routing/ARP tables. For assistance, please visit http://www.panasonic.com/help Base Unit Settings...
- Page 176 Subnet Mask: Routing Table: Routing Table: ARP Table: ARP Table: For assistance, please visit http://www.panasonic.com/help Show the MAC address of the WAN port. Show the Internet connection mode. (DHCP/ PPPoE/AP/Static) Show whether the WAN port is connecting to the Internet or not.
- Page 177 Lease Time(s): Lease Address: DHCP Lease Table: DHCP Lease Table: For assistance, please visit http://www.panasonic.com/help Show whether the DHCP server feature is enabled or not. Show the IP address of the DNS server. Show the domain name of the local network.
- Page 178 UPnP Port Mapping Table: UPnP Status: UPnP Port Mapping Table: Show the list of UPnP client host’s IP address, For assistance, please visit http://www.panasonic.com/help Show whether UPnP feature is enabled or not. along with the protocol and port number set to be opened for a specified amount of time for communication with UPnP feature.
- Page 179 Channel: SSID Broadcast: BSSID: Security: MAC Address Filtering: Client MAC Address: For assistance, please visit http://www.panasonic.com/help Show 802.11b or 802.11b/g. Show the network name. Show wireless data channel. Show whether the SSID Broadcast feature is enabled or not. Show the base unit’s MAC address currently in use by the handset.
- Page 180 IP Address: Note: L It may take a while to display this screen in order to check if the handset is connected. For assistance, please visit http://www.panasonic.com/help Show the status of the handset registration and connection to the base unit.
- Page 181 L The file download confirmation message is displayed. Specify the location and enter the file name, then click [Save] in the Save As dialog box. For assistance, please visit http://www.panasonic.com/help Show the firmware version of the base unit. Show the configuration database version of the base unit.
- Page 182 L Make a note of the user name and password so that you will not forget them. L We recommend that you change the password regularly. Click [Advanced Setup] on the Top Menu. Click the [Maintenance] tab, then click [Password]. For assistance, please visit http://www.panasonic.com/help...
- Page 183 [Retype Password] Click [Restart]. L The base unit automatically restarts and the Top Menu is displayed. For assistance, please visit http://www.panasonic.com/help Description L The user name and password can contain 6 to 15 alphanumeric characters. L The following cannot be used: [ ˝ ], [ ´ ], [&], [<], [>], [ : ], [(space)] L User name and password must be different from each other.
- Page 184 If the version is updated, download the updated firmware to your computer. Enter the file name under the Update Firmware heading. L You can also click [Browse...] to select the desired file name from the list. Click [Update]. For assistance, please visit http://www.panasonic.com/help...
- Page 185 Base Unit Settings Click [OK] in the confirmation dialog box. L The base unit automatically restarts after the firmware is updated. For assistance, please visit http://www.panasonic.com/help...
- Page 186 You need to click to the link shown on the Restarting page to access to the Top Menu. L You need to register the handset to the base unit again when you reset the base unit to factory default. See “Registering the handset” on page 133. For assistance, please visit http://www.panasonic.com/help...
- Page 187 Click the [Maintenance] tab, then click [Save Settings]. Click [Save]. Specify the location and enter the file name, then click [Save] in the Save As dialog box. Note: L User name and password can not be saved. For assistance, please visit http://www.panasonic.com/help Base Unit Settings...
- Page 188 L You can also click [Browse...] to select the desired backup file name on the Choose file dialog box, and click [Open]. Click [Load]. Click [Restart]. L The base unit restarts and the Top Menu is displayed. For assistance, please visit http://www.panasonic.com/help...
- Page 189 Click the [Maintenance] tab, then click [Restart]. Click [Restart]. L The confirmation message is displayed. Click [OK] in the confirmation dialog box. L The base unit begins to restart and the Top Menu is displayed. For assistance, please visit http://www.panasonic.com/help Base Unit Settings...
- Page 190 L Packet filtering logs are displayed. Click [Save]. Specify the location and enter the file name, then click [Save] in the Save As dialog box. Note: L The log stores up to 200 most recent events. For assistance, please visit http://www.panasonic.com/help...
- Page 191 L UPnP port mapping logs are displayed. Click [Save]. Specify the location and enter the file name, then click [Save] in the Save As dialog box. Note: L The log stores up to 20 most recent events. For assistance, please visit http://www.panasonic.com/help Base Unit Settings...
- Page 192 L Connection logs are displayed. Click [Save]. Specify the location and enter the file name, then click [Save] in the Save As dialog box. Note: L The log stores up to 20 most recent events. For assistance, please visit http://www.panasonic.com/help...
- Page 193 Click the [Support] tab, then click [Help]. Click [View]. Click the desired item to view its help page. Note: L You can also view help by clicking [Help] on each setup page. For assistance, please visit http://www.panasonic.com/help Base Unit Settings...
- Page 194 Base Unit Settings Support Link: This feature allows you to get product and support information from the Internet. Click [Advanced Setup] on the Top Menu. Click the [Support] tab, then click [Support Link]. Click the URL. For assistance, please visit http://www.panasonic.com/help...
-
Page 195: Handset Information
Click [Handset Information] on the Top Menu. L The handset status is displayed when the wireless connection between the registered handset and the base unit is established. Note: L It may take a while to display the screen. For assistance, please visit http://www.panasonic.com/help Base Unit Settings... -
Page 196: Temporary Lan Side Network Setting When Networks On The Wan Side And The Lan Side Overlap
You can change the LAN side settings temporarily with the following steps: L WAN Indicator on the base unit alternately flashes between in Amber and Green in turn. This state represents that the connection to the WAN side of the base unit is terminated. For assistance, please visit http://www.panasonic.com/help... - Page 197 Click [Apply]. L The restarting page is displayed when the entered IP address, Subnet mask and Starting IP address (DHCP Server) are correct. For assistance, please visit http://www.panasonic.com/help Description L Enter the IP address and subnet mask corresponding to your temporary local network.
- Page 198 L If you want to change the LAN side settings permanently, click [Top Page] button on the right top of the Temporary LAN Side Network Setting page and change the LAN side settings from [Advanced Setup]. For assistance, please visit http://www.panasonic.com/help...
-
Page 199: Downloading The Version-Up Firmware To Your Computer For Recovering The Base Unit
L Do not interrupt the firmware updating process by cutting the power supply until the progress indicator reaches 100% and the base unit restarts itself. Confirm the WAN Indicator is not flashing in amber, then set your computer settings back to the previous conditions. For assistance, please visit http://www.panasonic.com/help Base Unit Settings... -
Page 200: Mode Selector
Internet in the connection mode that is pre- registered for either “HOME” or “HOTEL” mode. You need to switch the Mode selector before turning on the base unit. Mode selector For assistance, please visit http://www.panasonic.com/help... -
Page 201: Reset Button
See “Registering the handset” on page 133. Default settings Internet Connection Mode Connection Mode MTU size – PPPoE – DHCP – Static For assistance, please visit http://www.panasonic.com/help FACTORY DEFAULT RESET button DHCP 1492 bytes 1500 bytes 1500 bytes Base Unit Settings... - Page 202 Log Output – Stateful Packet Inspection Log Output – Attack Detection Log Output Routing – Static Routing For assistance, please visit http://www.panasonic.com/help 802.11b/g (Shown on the included Wireless LAN sticker) Enable (Shown on the included Wireless LAN sticker) Key 1 Disable 192.168.102.1...
-
Page 203: Setting Your Computer
Click [Start], then click [Control Panel]. Click [Network and Internet Connections], then click [Network Connections]. Right-click the Local Area Connection icon connected to the base unit, then select [Properties]. Select [Internet Protocol (TCP/IP)], then click [Properties]. For assistance, please visit http://www.panasonic.com/help Base Unit Settings... - Page 204 In this case, a static IP address needs to be set on your computer. Click [Start], then click [Control Panel]. Click [Network and Internet Connections], then click [Network Connections]. Right-click the Local Area Connection icon connected to the base unit, then select [Properties]. For assistance, please visit http://www.panasonic.com/help...
- Page 205 Select [Internet Protocol (TCP/IP)], then click [Properties]. Select [Use the following IP address:]. For assistance, please visit http://www.panasonic.com/help Base Unit Settings...
- Page 206 L The IP address must be within the range of 192.168.102.1 - 192.168.102.254 except for 192.168.102.1 (the default IP address of the base unit on the LAN side). For Subnet mask, enter 255.255.255.0. Click [OK]. Click [OK], then close the Network Connection window. For assistance, please visit http://www.panasonic.com/help...
- Page 207 Change the proxy server settings on your Web browser. Open your Web browser. (The below example is Internet Explorer 6.0.) Click [Tools], then select [Internet Options...]. Click [Connections] tab, then click [LAN Settings…]. For assistance, please visit http://www.panasonic.com/help Base Unit Settings...
- Page 208 N If not checked, click [Cancel] then close the Internet Options window. Proxy server settings are not required. Enter the base unit’s IP address into the “Do not use proxy server for addresses beginning with:” data field. 192.168.102.1 Click [OK]. Click [OK], then close the Internet Options window. For assistance, please visit http://www.panasonic.com/help...
- Page 209 To set your computer to be used on a wireless LAN, see the manual for the computer you use. Note: L To use your computer on a wireless LAN, a wireless LAN card needs to be installed on your computer. For assistance, please visit http://www.panasonic.com/help Base Unit Settings...
-
Page 210: Useful Information
L TTY users (hearing or speech impaired users) can call 1-866-605-1277. Headset (optional) Connecting a headset to the handset allows hands-free phone conversations. We recommend using the Panasonic headset shown below. L The headset model numbers compatible with the handset: KX-TCA88HA... -
Page 211: Error Messages
Sign in was not successful. For assistance, please visit http://www.panasonic.com/help Cause/solution L Move closer to the base unit or an access point. L Press {Search} to search for networks again. L Press {Options} i Select “Add manually” to add network manually. - Page 212 Then enter model no. KX-WP1050 For assistance, please visit http://www.panasonic.com/help Cause/solution L The Skype name you selected is already in use. L Press {OK} i Select another Skype name. Cause/solution L You need to sign in to Skype to use this feature.
- Page 213 <Skype name> is blocked. Edit your list of blocked users <name/number> Sorry call failed! For assistance, please visit http://www.panasonic.com/help Cause/solution L Battery or charger error occurred. L Unplug charge cable and press {OK} to restart the handset. L Battery error occurred.
- Page 214 The device must be updated before it can be used. This requires a network connection. Continue? For assistance, please visit http://www.panasonic.com/help Cause/solution L Enter the phone number including country code (page 84). Cause/solution L The settings you entered are not correct.
-
Page 215: Troubleshooting
Troubleshooting If problems occur while operating the handset and the base unit, you can refer to the check list below. For up-to-date support information, visit http://www.panasonic.com/help. Please refer to it along with this guide for troubleshooting. Base Unit: Top Menu:... - Page 216 For assistance, please visit http://www.panasonic.com/help Cause/Solution L The networks on the WAN side and the LAN side overlap (page 196). L In the case of AP-DHCP mode or LAN network are changed, Top Menu page is not displayed automatically.
- Page 217 After setting MAC Address Filtering, wireless communication does not work. For assistance, please visit http://www.panasonic.com/help Cause/Solution L Turn off all the devices. Turn on the base unit and then the computer’s and the handset. L Check that all the computers are set to Obtain an IP Address automatically.
- Page 218 The WAN Indicator is off. For assistance, please visit http://www.panasonic.com/help Cause/Solution L The base unit hardware may be defective. L Unplug the base unit’s AC adaptor. Reconnect the adaptor and try again.
- Page 219 Problem “Waiting to download contacts from the network” message remains displayed. For assistance, please visit http://www.panasonic.com/help Cause/Solution L Check that the base unit and the computer are connected properly. L Check that the computer is turned on. L Check that the LAN card and driver are installed on the computer.
- Page 220 – The sound is delayed. I cannot have a conversation using the headset. For assistance, please visit http://www.panasonic.com/help Cause/Solution L Make sure that you use the correct Skype name and password. If you have forgotten your password, please visit http://www.skype.com...
- Page 221 For assistance, please visit http://www.panasonic.com/help Cause/Solution L The ringer volume is turned off. Adjust the volume (page 86). L The silent mode is on. Change the silent mode to off (page 71).
- Page 222 For assistance, please visit http://www.panasonic.com/help Cause/Solution L The network connection between your computer and the handset is disconnected. L Turn off the handset. Try again to update the Panasonic firmware. Cause/Solution L The handset is out of range. L The handset connects other wireless device.
-
Page 223: Fcc And Other Information
20 cm (8 inches) or more between the base unit and all person’s body (excluding extremities of hands, wrists and feet). L This product may not be collocated or operated in conjunction with any other antenna or transmitter. For assistance, please visit http://www.panasonic.com/help Useful Information... - Page 224 L For body-worn operation, the handset must be used only with a non-metallic accessory. Use of other accessories may not ensure compliance with FCC RF exposure requirements. Responsible party: Panasonic Corporation of North America One Panasonic Way, Secaucus, New Jersey 07094 Phone number: 1-800-211-PANA (1-800-211-7262)
-
Page 225: Industry Canada (Ic) And Other Information
No responsibility will be taken by our company with respect to consequences resulting from the inappropriate use, damage or both of the unit. For assistance, please visit http://www.panasonic.com/help Useful Information... -
Page 226: Règles D'industrie Canada Et Autres Renseignements
Entretien de routine: Essuyer l’appareil avec un linge doux. Ne jamais utiliser de benzène, solvant ou toute poudre abrasive. S’il est prévu que l’appareil ne sera pas utilisé pendant une période prolongée, débrancher l’adaptateur secteur. For assistance, please visit http://www.panasonic.com/help... - Page 227 Toute modification non expressément approuvée par la partie responsable de la conformité de l’appareil pourrait entraîner la révocation du privilège d’utiliser l’appareil. Notre compagnie n’assume aucune responsabilité quant aux conséquences résultant de l’utilisation de l’appareil ou de tout dommage subi par l’appareil. For assistance, please visit http://www.panasonic.com/help Useful Information...
-
Page 228: For European Union (Eu)
Useful Information For European Union (EU) Declaration of Conformity: Panasonic Communications Co., Ltd. declares that this equipment is in compliance with the essential requirements and other relevant provisions of Radio & Telecommunications Terminal Equipment (R&TTE) Directive 1999/5/EC. Declarations of Conformity for the relevant Panasonic products described in this manual are available for download by visiting: http://www.doc.panasonic.de... - Page 229 Information on Disposal in other Countries outside the European Union: This symbol is only valid in the European Union. If you wish to discard this product, please contact your local authorities or dealer and ask for the correct method of disposal. For assistance, please visit http://www.panasonic.com/help Useful Information...
-
Page 230: Specifications
Useful Information Specifications Base unit: Router feature AP (Bridge) feature Network Interface feature For assistance, please visit http://www.panasonic.com/help WAN connection mode: DHCP server: DNS relay (DNS Proxy): Easy Security: IP packet filtering: UPnP: Address translation: Connection mode: UPnP: WAN: LAN:... - Page 231 Wireless feature Other feature *1 The figures shown are theoretical maximums and not the actual figures when using the product. For assistance, please visit http://www.panasonic.com/help Transmission speed Data transfer mode: Frequency range: Number of channels: Security: Indicators: Buttons: Dimension (HWD):...
- Page 232 Useful Information Handset: Skype feature Network feature Network Interface feature Wireless feature For assistance, please visit http://www.panasonic.com/help Calls: Skype Voicemail: Contact list: History: Connection mode: Preferred networks: Wireless: Transmission speed Data transfer mode: Frequency range: Number of channels: Security: Skype-to-Skype calls...
- Page 233 *2 The figures shown are theoretical maximums and not the actual figures when using the product. Note: L Design and specifications are subject to change without notice. L The illustrations in these instructions may vary slightly from the actual product. For assistance, please visit http://www.panasonic.com/help Indicators: Display: Dimension (HWD): Mass (Weight):...
-
Page 234: Index
Initialization Setup: 36, 38 Internet connection: 48, 147 IP Address: 50, 53 L LAN/DHCP Server: 152 Load Settings: 188 For assistance, please visit http://www.panasonic.com/help Connection: 192 Packet Filtering: 190 UPnP Port Mapping: 191 M MAC Address Clone: 150 MAC Address Filtering: 172... - Page 235 V Version Information: 181 Voicemail: 91, 93 Volume Receiver: 88 Ringer: 86 Speaker: 88 W Wireless: 168 Wireless Security: 170 Wireless Status: 179 For assistance, please visit http://www.panasonic.com/help Index...
- Page 236 L Send the unit to Panasonic Service and Technology Company Customer Servicenter, prepaid and adequately insured. L Do not send your unit to Panasonic Consumer Electronics Company listed below or to executive or regional sales offices. These locations do not repair consumer products.