Table of Contents
Advertisement
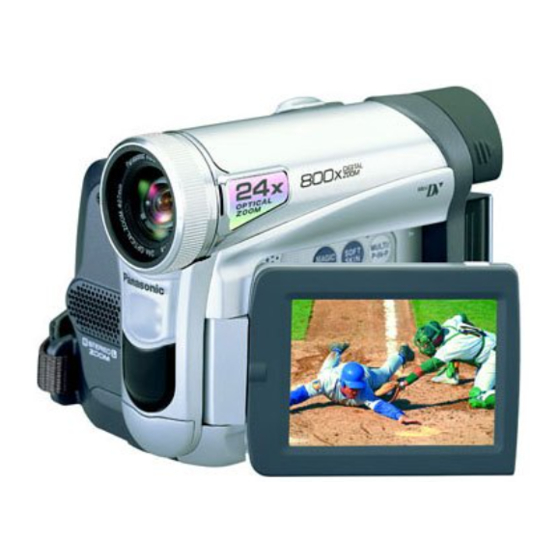
Digital Video Camcorder
Operating Instructions
PV-GS16
Model No.
Before attempting to connect, operate or adjust this product, please read these
instructions thoroughly.
Spanish Quick Use Guide is included.
Guía para rápida consulta en español está incluida.
For assistance, please call : 1-800-211-PANA(7262) or, contact us via the web at: http://www.panasonic.com/contactinfo
LSQT0885 A
Advertisement
Table of Contents

Related Manuals for Panasonic PV-GS16


Summary of Contents for Panasonic PV-GS16
-
Page 1: Operating Instructions
Before attempting to connect, operate or adjust this product, please read these instructions thoroughly. Spanish Quick Use Guide is included. Guía para rápida consulta en español está incluida. For assistance, please call : 1-800-211-PANA(7262) or, contact us via the web at: http://www.panasonic.com/contactinfo LSQT0885 A... -
Page 2: Things You Should Know
It is recommended that only cassette tapes that have been tested and inspected for use in VCR machines with the mark be used. The above markings are located on the appliance bottom cover. For assistance, please call : 1-800-211-PANA(7262) or, contact us via the web at: http://www.panasonic.com/contactinfo Date of Purchase Dealer Purchased From Dealer Address Dealer Phone No. - Page 3 Trade Name : Panasonic Model No. : PV-GS16 Responsibility Party : Panasonic Corporation of North America Address : One Panasonic Way Secaucus New Jersey 07094 Telephone Number : 1-800-211-PANA(7262) This device complies with Part 15 of the FCC Rules. Operation is subject to the following two conditions: (1) This device may not cause harmful interference, and (2) this device must accept any interference received, including interference that may cause undesired operation.
-
Page 4: Important Safeguards
For assistance, please call : 1-800-211-PANA(7262) or, contact us via the web at: http://www.panasonic.com/contactinfo 11. Grounding or Polarization — This video unit may be equipped with either a polarized 2-wire AC (Alternating... -
Page 5: Precautions
This action could permanently damage the internal parts of your Camcorder. Do not attempt to disassemble this unit. -
Page 6: Table Of Contents
Setting Date and Time ...21 Internal Lithium Battery Recharge ...21 LP Mode ...21 Audio Recording Mode ...21 For assistance, please call : 1-800-211-PANA(7262) or, contact us via the web at: http://www.panasonic.com/contactinfo Recording Mode About Recording ...22 Recording on a Tape ...22 Recording a Still Picture on a Card (Photoshot) ...23... - Page 7 (Problems and Solutions) ...62 Using the RESET button ...64 Explanation of Terms ...64 Specifications ...66 Camcorder Accessory System ...67 Camcorder Accessory Order Form ...68 Request for Service Notice ...69 Limited Warranty ...70 Customer Services Directory ...71 Spanish Quick Use Guide/ Guía Para Uso Rápido ...72...
-
Page 8: Quick Guide
Close the Cassette Holder by pressing the [PUSH] mark Close the Cassette Compartment Cover by pressing the mark For assistance, please call : 1-800-211-PANA(7262) or, contact us via the web at: http://www.panasonic.com/contactinfo Before Use Inserting a Card Place your Thumb on the [OPEN▼] Knob and pull the LCD Monitor direction of the arrow. - Page 9 Recording on a Tape Set the [OFF/ON] Switch • The [POWER] Lamp lights up. Set the Mode Dial to Tape Recording Mode. Press the Recording Start/Stop Button. • Recording starts. Press the Recording Start/Stop Button again to pause the recording. Recording a Still Picture on Card (Photoshot) Set the Mode Dial to Card Recording Mode.
-
Page 10: Standard Accessories
4) AV Cable (pp. 40, 42) 5) Shoulder Strap (p. 15) Controls and Components Camcorder LCD Monitor Open Knob [OPEN▼] (p. 16) For assistance, please call : 1-800-211-PANA(7262) or, contact us via the web at: http://www.panasonic.com/contactinfo Before Use K2CB2CB00014 LSJA0280 13 14 15 16 17 LCD Monitor (pp. - Page 11 Battery Holder Battery Eject Switch [BATTERY RELEASE] (p. 14) Tripod Receptacle • Used for mounting the Camcorder on an optional tripod. Remote Control (Optional) Remote Control is not supplied, If you would like to order, the parts number is LSSQ0411 as a replacement parts.
-
Page 12: The Remote Control (Optional)
Fast Forward/Cue Button [► ►] (p. 33) Playback Zoom Button [P.B. ZOOM] (p. 35) Enter Button [ENTER] (p. 17) For assistance, please call : 1-800-211-PANA(7262) or, contact us via the web at: http://www.panasonic.com/contactinfo Before Use The Remote Control (Optional) Remote Control is not supplied, If you would like to order, the parts number is LSSQ0411 as a replacement parts. -
Page 13: Power Supply
[POWER] Lamp is not lit. (p. 16) Using the Battery Before use, fully charge the Battery. • We recommend using a Panasonic Battery. • We cannot guarantee the quality of this Camcorder when batteries from other companies are used. Attach the Battery to the AC Adaptor and charge it. -
Page 14: Charging Time And Available Recording Time
LCD Monitor forward to record yourself or setting [EVF ON/ AUTO] to [ON]. For assistance, please call : 1-800-211-PANA(7262) or, contact us via the web at: http://www.panasonic.com/contactinfo Before Use Adjust the length of the Grip Belt to the size of your hand. -
Page 15: Attaching The Shoulder Strap
Card and then pull it straight out. • After removing the Card, close the Card Slot Cover. • The Camcorder may be damaged if the Card is forced out when the Card is fully inserted. to open the Card , insert it into the Card securely. -
Page 16: Turning On The Camcorder
Tape Playback Mode Use this mode when playing back the recorded scene on a tape. For assistance, please call : 1-800-211-PANA(7262) or, contact us via the web at: http://www.panasonic.com/contactinfo Before Use Before using the Viewfinder, adjust the field of view so that the displays inside the Viewfinder become clear and easy to read. -
Page 17: Using The Menu Screen
Press the [MENU] Button again. About the Menu Mode Setting The setting selected on the Menu will be retained even when the Camcorder is turned off. However, if the Battery or AC Adaptor is disconnected before turning off the Camcorder, the selected setup may not be retained. -
Page 18: List Of Menus
Digital Setup Sub-Menu [EFFECT1] Digital Effects 1 (pp. 30~31) [EFFECT2] Digital Effects 2 (p. 31) For assistance, please call : 1-800-211-PANA(7262) or, contact us via the web at: http://www.panasonic.com/contactinfo Before Use [MULTI MODE] Multi-Picture Mode (p. 31) [TITLE IN] Adding a Title (p. 38) - Page 19 • If no operation takes place for approximately 10 minutes after the AC Adaptor is connected to the Camcorder and the [OFF/ON] Switch is turned to [ON] without inserting a Cassette or a Card, the Camcorder is automatically set to Demonstration Mode for introducing its functions.
- Page 20 [DELETE] Deleting a File Sub-Menu [FILE BY SEL] Selecting and Deleting a File (p. 39) For assistance, please call : 1-800-211-PANA(7262) or, contact us via the web at: http://www.panasonic.com/contactinfo Before Use [ALL FILES] Deleting All Files (p. 40) [TITLE BY SEL] Selecting and Deleting a Title (p.
-
Page 21: Setting Date And Time
Setting Date and Time Since the internal clock of the Camcorder has a slight imprecision make sure to check the time before recording. 13 14 16 17 Set [INITIAL] >> [CLOCK SET] >> [YES]. Press the [ / ■ ] Button [YEAR], [MONTH], [DAY], [HOUR] or [MIN.]... -
Page 22: Recording Mode About Recording
• The [POWER] Lamp Set the Mode Dial Mode. For assistance, please call : 1-800-211-PANA(7262) or, contact us via the web at: http://www.panasonic.com/contactinfo Recording Mode Even if the Mode Dial is set to Tape Recording Mode and the recording to a tape is in progress, you can also record a still picture on a card by pressing the [PHOTO SHOT] Button. -
Page 23: Recording A Still Picture On A Card (Photoshot)
Progressive Photoshot Function is not activated. Recording a Still Picture on a Card (Photoshot) Still pictures can be recorded on the Memory Card from the Camcorder. Set the Mode Dial to Card Recording Mode. Press the [PHOTO SHOT] Button •... -
Page 24: Recording Yourself
• The Video Light turns off. • Pressing the [LIGHT] Button again returns to • For other notes concerning this item, see page 55. For assistance, please call : 1-800-211-PANA(7262) or, contact us via the web at: http://www.panasonic.com/contactinfo Recording Mode Quick Start... -
Page 25: Zoom In/Out Functions
To Take Close-up Shots of Small Subjects ( Macro Close-up Function) When the zoom magnification is 1×, the Camcorder can focus on a subject that is as close as approximately 0.8 inches (20 mm) from the Lens. Small subjects like insects can be recorded with this function. -
Page 26: Fade In/Out Functions
Release the [FADE] Button 3 seconds after recording starts. • The image reappears gradually. For assistance, please call : 1-800-211-PANA(7262) or, contact us via the web at: http://www.panasonic.com/contactinfo Recording Mode Fade Out to start Fade Out causes images and sounds to disappear gradually, leaving a black screen at the end of a scene. -
Page 27: Magicpix Function
MagicPix Function This function allows you to record color images brightly in a dark place without using the Video Flash. Press the [MAGICPIX] Button • The [MAGICPIX] Indication appears. To Cancel the MagicPix Function Press the [MAGICPIX] Button again. • For other notes concerning this item, see page 56. Soft-Skin Mode This enables you to record skin colors in a softer tone. -
Page 28: Recording In Natural Colors (White Balance)
Automatic White Balance Adjustment may not function properly. Please turn on the Camcorder after removing the Lens Cap. For assistance, please call : 1-800-211-PANA(7262) or, contact us via the web at: http://www.panasonic.com/contactinfo Recording Mode ], [ 1) Automatic White Balance Adjustment [AWB]... -
Page 29: Manual Shutter Speed Adjustment
14 15 17 • The [AWB] Indication appears. Press the [► ►] Button until the [ ] Indication is displayed. Point the Camcorder at a full-screen white subject. Keep pressing [ENTER] Button ] Indication stops fl ashing. To Resume Automatic Adjustment Press the [►... -
Page 30: Manual Iris Adjustment (F Number)
Set the [AUTO/MANUAL/FOCUS] Switch to [MANUAL]. • The [MNL] Indication appears. For assistance, please call : 1-800-211-PANA(7262) or, contact us via the web at: http://www.panasonic.com/contactinfo Recording Mode Slide the [AUTO/MANUAL/FOCUS] Switch • The [►MF] Indication (Manual Focus Mode) until the Iris Press the [►... - Page 31 1) Multi Mode [MULTI] 2) Picture-In-Picture Mode [P-IN-P] 3) Wipe Mode [WIPE] 4) Mix Mode [MIX] 5) Strobe Mode [STROBE] • Records images with a stroboscopic effect. 6) Trailing Effect Mode [TRAIL] • Records images with a trailing effect. 7) Mosaic Mode [MOSAIC] •...
- Page 32 While the moving image of a new scene fades in, the still image of the last recorded scene gradually fades out. For assistance, please call : 1-800-211-PANA(7262) or, contact us via the web at: http://www.panasonic.com/contactinfo Recording Mode Set [TAPE RECORDING MENU] >>...
-
Page 33: Playback Mode
Playback Mode Playing Back a Tape The recorded scene can be played back immediately after the recording. Set the [OFF/ON] Switch • The [POWER] Lamp lights up. Set the Mode Dial to Tape Playback Mode. Press the [◄ ◄] Button tape. -
Page 34: Slow Motion Playback (Optional Remote Control Only)
When the [Ι►] Button is pressed, Slow Motion Playback proceeds in the forward direction. For assistance, please call : 1-800-211-PANA(7262) or, contact us via the web at: http://www.panasonic.com/contactinfo Playback Mode Scenes recorded in the SP Mode are played back at approximately 1/5th of the normal speed. -
Page 35: Index Search Functions (Optional Remote Control Only)
[INDEX] Indication flashes for a few seconds.) • If the Camcorder is switched from the Tape Playback Mode to Tape Recording Mode or if the date and time is set before the start of recording, the index signal is not recorded. -
Page 36: Playback Digital Effect Functions
To Cancel the Digital Effect Press the [SELECT] Button the Remote Control and clear the digital effect indication. For assistance, please call : 1-800-211-PANA(7262) or, contact us via the web at: http://www.panasonic.com/contactinfo Playback Mode Wipe Mode and Mix Mode (Optional Remote Control Only) on the Remote This feature is only available with Remote Control. -
Page 37: Slide Show
Folder File Number Picture Size (pp. 53~54) File Number To Select a Desired File and Playing Back Set the Mode Dial to Picture Playback Mode. Press the [MULTI] Button • The files recorded on the Card are displayed in Multi-Picture Mode. Picture Size File Number Folder File Number... -
Page 38: Adding A Title
[ENTER] Button • The title is recorded on the Card. • For other notes concerning this item, see page 58. For assistance, please call : 1-800-211-PANA(7262) or, contact us via the web at: http://www.panasonic.com/contactinfo Playback Mode Adding a Title A title can be added to the picture. It is displayed in Tape/Card Recording Mode and Tape/Picture Playback Mode. -
Page 39: Writing Printing Data On A Card (Dpof Setting)
• For other notes concerning this item, see page 59. Deleting the Files Recorded on a Card Using the Camcorder, you can delete the files recorded on a Card. After the file is deleted, it cannot be restored. or [◄ ◄] Button To Select and Delete Files or Titles Set [PICTURE PLAYBACK MENU] >>... -
Page 40: Formatting A Card
• When the formatting is completed, the screen becomes white. For assistance, please call : 1-800-211-PANA(7262) or, contact us via the web at: http://www.panasonic.com/contactinfo Playback Mode • It may not be able to use the Card formatted by this Camcorder on another unit. -
Page 41: Editing Mode
Button To Cancel Audio Dubbing Press the [ ] Button The Camcorder is in the Still Playback Mode again. To Play Back the Sound Recorded by 12bit Audio Dubbing Set [TAPE PLAYBACK MENU] >> [PLAYBACK] >> [12bit AUDIO] >> [ST1], [ST2] or [MIX]. -
Page 42: Copying On A Vhs Cassette (Dubbing)
VCR. Camcorder: Press the [►] Button to start playback. For assistance, please call : 1-800-211-PANA(7262) or, contact us via the web at: http://www.panasonic.com/contactinfo Editing Mode VCR: Start recording. -
Page 43: Pc Connection With Dv Interface Cable
• Personal Computer must be equipped with an DV Terminal. • During Camcorder playback, do not disconnect the DV Interface Cable or turn the Camcorder off as this may cause a PC hang-up error. • 1394 (i.LINK) Interface must conform to OHCI (Open Host Controller Interface Specification). -
Page 44: With A Pc
RAM: 32 MB or more (64 MB or more recommended) Free hard disk space: At least 30 MB or more For assistance, please call : 1-800-211-PANA(7262) or, contact us via the web at: http://www.panasonic.com/contactinfo With a PC Ports: USB Jack •... -
Page 45: For Macintosh
Camcorder. For Using Built-in SD Drive By connecting the Camcorder and Personal Computer with the USB Cable, you can transfer still images saved on a Memory Card directly to your Personal Computer. -
Page 46: To Disconnect Usb Cable Safely
If you disconnect the USB Cable while the Card Access Lamp is on, it may damage the Card data. For assistance, please call : 1-800-211-PANA(7262) or, contact us via the web at: http://www.panasonic.com/contactinfo With a PC Removing the USB Cable safely for Macintosh icon in task tray. -
Page 47: Using As A Web Camera
Free hard disk space: At least 250 MB or more Ports: USB Jack To use the Camcorder as a Web Camera, the additional minimum requirements must be met. Graphic display: High Color (16 bit or more) Desktop resolution of 800 × 600 pixels or more Communication Speed: 56 kbps or faster is recommended. - Page 48 Device” is required. Click [Next] and proceed. • If you use Windows 98SE, the OS installation CD may be required. For assistance, please call : 1-800-211-PANA(7262) or, contact us via the web at: http://www.panasonic.com/contactinfo With a PC For Windows 98SE/Me Users:...
- Page 49 • When access is finished, close Windows Messenger, then turn off the Camcorder. Finally, disconnect the USB Cable. • If the Camcorder is used as Web Camera continuously for two hours, the communication is automatically shut OFF. In this case, restart Windows Messenger and set up the communication again.
-
Page 50: If You No Longer Need Software Or Driver (Uninstall)
Select [USB Audio Device] in the [Microphone] menu. Click [Web Camera Settings...] in the [Tools] menu. For assistance, please call : 1-800-211-PANA(7262) or, contact us via the web at: http://www.panasonic.com/contactinfo With a PC Confi rm the [Panasonic DVC Web Camera Device] is selected. - Page 51 Connection Kit. Data may be lost if the battery power is lost while transferring data. • If the Camcorder is used as a Web Camera while virus checking software is running, the Camcorder’s operation may stop midway through. In this case,...
- Page 52 Camcorder, Personal Computer or others. Capacity that can be used as conventional memory: 8 MB Card: about 6,800,000 bytes For assistance, please call : 1-800-211-PANA(7262) or, contact us via the web at: http://www.panasonic.com/contactinfo With a PC...
-
Page 53: Others Indications
DPOF Setting completed (set to 1 or more picture) (p. 39) [640 × 480] Image size • For images not recorded with this Camcorder, the size display is determined as follows according to the number of horizontal pixels. 640 or more, less than 800 (The size is... -
Page 54: Initializing The Modes
[COMPLETED] Indication appears with beeps. • Initializing will not erase a clock setting (p. 21) that has been adjusted. For assistance, please call : 1-800-211-PANA(7262) or, contact us via the web at: http://www.panasonic.com/contactinfo Others Warning/Alarm Indications If any one of the following indications lights up or flashes, please check the condition of the Camcorder. -
Page 55: Notes And Hints
USB cable to the Camcorder. Notes and Hints Concerning the Power Supply • When the Camcorder has been used for a long time, the Camera body becomes warm, but this is not a malfunction. • If the [CHARGE] Lamp does not light up although the Battery is attached to the AC Adaptor, detach the Battery and reattach it. -
Page 56: Image Stabilizer Function
• White balance cannot be set in the digital zoom range. For assistance, please call : 1-800-211-PANA(7262) or, contact us via the web at: http://www.panasonic.com/contactinfo Others Image Stabilizer Function • The Image Stabilizer Function does not operate in a dimly lit place. -
Page 57: Manual Shutter Speed Adjustment
• The Cinema Mode and the Title Creation cannot be used simultaneously. • Using the Cinema Mode deactivates [MULTI] and [P-IN-P] of [EFFECT1]. • Depending on the software in use, the imported Cinema picture may not be displayed correctly. Program AE •... -
Page 58: Playing Back A Card
Terminal (p. 11). • You cannot use the Wipe or Mix Function while playing back the non-recorded portion of tape. For assistance, please call : 1-800-211-PANA(7262) or, contact us via the web at: http://www.panasonic.com/contactinfo Others Playing Back a Card • If a blank (nothing recorded) Card is played, the screen becomes white. -
Page 59: Cautions For Use
Keep the Camcorder away from magnetized equipment (such as a microwave oven, TV, video game equipment, etc.). • If you use the Camcorder on or near a TV, images or sounds may be disturbed due to electromagnetic wave radiation. • Do not use near a cell phone because doing so may cause noise to adversely affect the picture and sound. - Page 60 • Keep the electrodes of the AC Adaptor and Battery always clean. For assistance, please call : 1-800-211-PANA(7262) or, contact us via the web at: http://www.panasonic.com/contactinfo Others Condensation If you turn the Camcorder on when condensation...
-
Page 61: Cautions For Storage
25 °C), Recommended Humidity: 40 % to 60 %) Camcorder • Wrap it with a soft cloth to prevent dust from getting into the Camera. • Do not leave the Camcorder in places that expose it to high temperature. Battery • Extremely high temperatures or low temperatures will shorten the life of the Battery. -
Page 62: Before Requesting Service (Problems And Solutions)
Battery (CGR-D16A/1B, CGP-D28A/1B: Optional) attached to it, it is not practical to look in the Viewfinder from behind the Battery. For assistance, please call : 1-800-211-PANA(7262) or, contact us via the web at: http://www.panasonic.com/contactinfo Others Extremely high precision technology is employed to produce the Viewfinder screen featuring a total of approximately 67,000 pixels. - Page 63 TV. In this case, set [AV JACK] on the [INITIAL] Sub-Menu to [OUT]. Playback picture is not clear. • Are the heads of the Camcorder dirty? If the heads are dirty, playback image cannot be clear. (pp. 60~61)
-
Page 64: Using The Reset Button
• To disconnect the USB cable safely, double-click the [ follow the instructions on the screen. (p. 46) For assistance, please call : 1-800-211-PANA(7262) or, contact us via the web at: http://www.panasonic.com/contactinfo Others In a digital video system, images and sounds are converted into digital signals and recorded on a tape. -
Page 65: Memory Stop Function
4) Recording a subject that is surrounded by objects with glossy surfaces or by highly reflective objects • Because the Camcorder focuses on the objects with glossy surfaces or on highly reflective objects, the subject may become blurry. 5) Recording a fast-moving subject •... -
Page 66: Specifications
(max. 12 Mbps) No copyright protection support Digital Interface: DV Input/Output Jack (IEEE1394, 4-pin) For assistance, please call : 1-800-211-PANA(7262) or, contact us via the web at: http://www.panasonic.com/contactinfo Others Dimensions: Approx. 87 (H) × 69 (W) × 112 (D) mm Approx. -
Page 67: Camcorder Accessory System
Camcorder Accessory System Accessory # Figure PV-DAC11-D LSJA0288 K2CB2C00014 CGR-D08A/1B CGR-D16A/1B CGP-D28A/1B CGR-D53A/1K PV-DDC9 LSSQ0411 RP-SDH01GU1A RP-SDH512U1A RP-SDH256U1A/W RP-SD128BU1A/W RP-SD064BPPA/W RP-SD032BPPA BN-SDCAPE/1B BN-SDABPE/1B K1HA05CD0005 PV-HB002 • Please refer to page 68, when placing an order. Others Description AC Adaptor DC Cable... -
Page 68: Camcorder Accessory Order Form
TO OBTAIN ANY OF OUR CAMCORDER ACCESSORIES YOU CAN DO ANY OF THE CALL PANASONIC’ S ACCESSORY ORDER LINE AT 1-800-332-5368 MAIL THIS ORDER TO: PANASONIC SERVICES COMPANY ACCESSORY ORDER OFFICE For assistance, please call : 1-800-211-PANA(7262) or, contact us via the web at: http://www.panasonic.com/contactinfo Others Description... -
Page 69: Request For Service Notice
(Failure to do so will delay your repair.) • To further speed your repair, please provide an explanation of what is wrong with the unit and any symptom it is exhibiting. Panasonic Services Company 1705 N. Randall Road Elgin, IL. 60123-7847 Attn: Camcorder Repair... -
Page 70: Limited Warranty
Carry-In, Mail-in or In-Home Service For Carry-In, Mail-In or In-Home Service (as applicable) in the United States call toll free contact number listed above or visit Panasonic Web Site: http://www.panasonic.com For assistance in Puerto Rico call Panasonic Sales Company (787)-750-4300 or fax (787)-768-2910. -
Page 71: Customer Services Directory
1-800-211-PANA (7262), Monday-Friday 9 am-9 pm; Saturday-Sunday 10 am-7 pm, EST. For hearing or speech impaired TTY users, TTY : 1-877-833-8855 Purchase Parts, Accessories and Instruction Books online for all Panasonic Products by visiting our Web Site at: http://www.pasc.panasonic.com or, send your request by E-mail to: npcparts@us.panasonic.com... -
Page 72: Spanish Quick Use Guide/Guía Para Uso Rápido
También, cualquier cambio sin autorización o modificaciones a este equipo anularían la autoridad del usuario para operarlo. For assistance, please call : 1-800-211-PANA(7262) or, contact us via the web at: http://www.panasonic.com/contactinfo Others Este símbolo tiene por finalidad alertar al usuario acerca de la presencia de tensión sin aislación... -
Page 73: Guía Rápida
• Cuando la lámpara [CHARGE] se apaga, se ha terminado la carga. Coloque la batería cargada en el Camcorder. Inserción de un cassette Deslice la palanca [OPEN/EJECT] el frente y tire hacia abajo para abrir la tapa del compartimiento del cassette. - Page 74 (Photoshot) Gire el dial de modo a modo de grabación de tarjeta. Presione el botón [PHOTO SHOT]. For assistance, please call : 1-800-211-PANA(7262) or, contact us via the web at: http://www.panasonic.com/contactinfo Others Reproducción de una cinta a [ON]. se enciende.
-
Page 75: Index
Auto Focus ... 64 Backlight ... 26 Black & White Mode ...31 Blank Search ... 22 Built-in LED Video Light ...24 Camcorder Accessory Order Form ... 68 Camcorder Accessory System ... 67 Charging the Battery ...13 Cinema Mode ... 27 Condensation ... - Page 76 Panasonic Consumer Electronics Company, Division of Panasonic Corporation of North America One Panasonic Way Secaucus, New Jersey 07094 Panasonic Sales Company (“PSC”), Division of Panasonic Puerto Rico, Inc. Ave. 65 de Infanteria, Km. 9.5 San Gabriel Industrial Park Carolina, Puerto Rico 00985...