Panasonic KX-TG9391 Operating Instructions Manual
Panasonic expandable digital corded/cordless answering system operating instructions
Hide thumbs
Also See for KX-TG9391:
- Quick manual (9 pages) ,
- Operating instructions manual (17 pages) ,
- Installation manual (17 pages)
Table of Contents
Advertisement
Operating Instructions
Expandable Digital Corded/Cordless
Answering System
KX-TG9391
Model No.
with 2 Handsets
KX-TG9392
Model No.
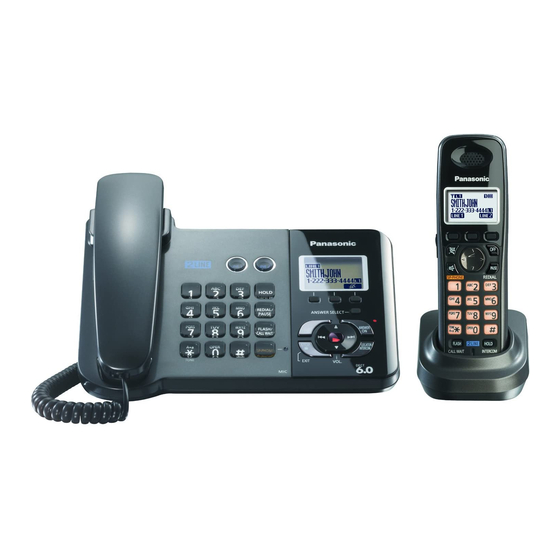
Model shown is KX-TG9391.
This unit is compatible with Caller ID. You must subscribe to the appropriate service offered
by your service provider/telephone company.
Charge the batteries for about 7 hours before initial use.
Please read these operating instructions before using the unit and save them for future
reference.
For assistance, visit our website:
http://www.panasonic.com/help for customers in the U.S.A. or Puerto Rico.
Advertisement
Table of Contents

Related Manuals for Panasonic KX-TG9391


Summary of Contents for Panasonic KX-TG9391
-
Page 1: Operating Instructions
Charge the batteries for about 7 hours before initial use. Please read these operating instructions before using the unit and save them for future reference. For assistance, visit our website: http://www.panasonic.com/help for customers in the U.S.A. or Puerto Rico. -
Page 2: Table Of Contents
Table of Contents Introduction Product information ..... . . 3 Accessory information..... 4 System capabilities . -
Page 3: Introduction
Product information Thank you for purchasing a Panasonic digital cordless phone. Notable differences between the models KX-TG9391 series Base unit Model No. Part No. KX-TG9391 KX-TG9391 KX-TG9392 KX-TG9391 *1 Feature differences: Intercom calls can be made between the handsets by purchasing and registering one or more optional handsets (page 5). -
Page 4: Accessory Information
L Replace batteries only with a nickel metal hydride (Ni-MH) type of battery. This model requires 2 AAA (R03) batteries for every handset. For best performance, we recommend using Panasonic rechargeable batteries (Order No. HHR-4DPA). To order, please call 1-800-332-5368 or visit http://www.panasonic.com/batterystore... -
Page 5: System Capabilities
L The maximum operating number may decrease, depending on the state of usage, for example, when the answering system is taking a call. For assistance, please visit http://www.panasonic.com/help Ex. Outside call on line 2 Ex. Outside call on line 2... -
Page 6: For Your Safety
These conditions can cause fire or electric shock. Confirm that smoke has stopped emitting and contact the Panasonic Call Center at 1-800-211-PANA (1-800-211-7262). L Never touch the plug with wet hands. Danger of electric shock exists. -
Page 7: Important Safety Instructions
SAVE THESE INSTRUCTIONS For best performance Base unit location/avoiding noise The base unit and other compatible Panasonic units use radio waves to communicate with each other. For assistance, please visit http://www.panasonic.com/help L For maximum coverage and noise-free communications, place your base unit: –... - Page 8 L This product can store your private/confidential information. To protect your privacy/confidentiality, we recommend that you erase the information such as phonebook or caller list entries from the memory before you dispose of, transfer, or return the product. For assistance, please visit http://www.panasonic.com/help...
-
Page 9: Preparation
SP-PHONE indicator N {6} (Play) Message indicator O {ERASE} P {■} (STOP) (EXIT) Q {ANSWER SELECT} R ANSWER ON indicator For assistance, please visit http://www.panasonic.com/help S {ANSWER ON} T {LOCATOR} {INTERCOM} U Navigator key ({^}/{V}/{7}/{8}) VOL. (Volume: {^}/{V}) Handset A Speaker... -
Page 10: Display/Indicators
Soft keys Each unit features 3 soft keys. By pressing a soft key, you can select the feature shown directly above it on the display. Base unit Handset For assistance, please visit http://www.panasonic.com/help Display/Indicators Base unit display items Item Handset PRIV. -
Page 11: Symbols Used In These Operating Instructions
The line is available. Light on The line is in use. Flashing A call is being received. rapidly For assistance, please visit http://www.panasonic.com/help Status Meaning Flashing A call is put on hold or the answering system is answering a call. -
Page 12: Connections
Connect the AC adaptor cord (A) by pushing the plug firmly (B). Connect the corded handset cord (C) to the corded handset and the base unit. Base unit L Use only the supplied Panasonic AC adaptor PQLV207 or PQLV219. Hook Charger L Use only the supplied Panasonic AC adaptor PQLV209 or PQLV219. -
Page 13: Connecting The Telephone Line Cord
(page 12). Change the line selection mode from “Auto” to “Line1” (page 17). “Transparent” plug Note: L “Check tel line 2” is displayed on the unit. To erase it, see page 47. For assistance, please visit http://www.panasonic.com/help 4-wire cord To 2-line telephone jack (RJ14C) 2-wire cord... - Page 14 – noise is heard during conversations. – Caller ID features do not function properly. To connect to a 2-line telephone jack For this connection, please purchase a Panasonic 2-line splitter (page 4). Example: DSL/ADSL line is line 2 To connect to 2 single-line telephone jacks Example: DSL/ADSL line is line 2 “Transparent”...
-
Page 15: Battery Installation And Replacement
– USE ONLY rechargeable Ni-MH batteries AAA (R03) size. – Do NOT use Alkaline/Manganese/Ni-Cd batteries. – We recommend using the Panasonic rechargeable batteries noted on page 4, 6. Press the notch on the handset cover firmly, and slide it in the direction of the arrow. -
Page 16: Setting Up The Unit Before Use
In this case, place the handset on the charger and let it charge for at least 7 hours. For assistance, please visit http://www.panasonic.com/help Setting up the unit before Display language You can select either “English” or “Español”... - Page 17 L The date and time may be incorrect after a power failure. In this case, set the date and time again. For assistance, please visit http://www.panasonic.com/help Line selection mode The line selection mode determines which line is selected when: –...
-
Page 18: Making/Answering Calls
17. L You can also select the line manually by pressing {LINE 1} or {LINE 2}. For assistance, please visit http://www.panasonic.com/help When you finish talking, press {OFF} or place the handset on the charger. -
Page 19: Answering Calls
Temporary base unit ringer off While the base unit is ringing for a call, you can turn the ringer off temporarily by pressing {~}. For assistance, please visit http://www.panasonic.com/help Making/Answering Calls Using the handset Y When a call is being received, the ringer indicator and c and/or d flashes rapidly. -
Page 20: Useful Features During A Call
{FLASH} allows you to use the special features of your host PBX such as transferring an extension call, or accessing optional telephone services. For assistance, please visit http://www.panasonic.com/help Note: L To change the flash time, see page 29. For call waiting or Call Waiting Caller... -
Page 21: Using The Other Line During A Call
Note for base unit and handset: L This feature will turn off after you hang up the call. For assistance, please visit http://www.panasonic.com/help Making/Answering Calls Using the other line during a call You can use the other line in the following ways: –... -
Page 22: Phonebook
{*}. Character Space – For assistance, please visit http://www.panasonic.com/help L To enter another character that is located on the same dial key: Base unit: Press {8} to move the cursor to the next space. - Page 23 L If there is no entry corresponding to the character you selected, the next entry is displayed. For assistance, please visit http://www.panasonic.com/help {V}/{^}: Scroll through the phonebook if necessary. Searching by group Proceed with the operation for your unit.
-
Page 24: Copying Phonebook Entries
Important: L Group ringer tones are not copied. L You cannot copy the phonebook entries between handsets. For assistance, please visit http://www.panasonic.com/help Copying an entry : Base unit {V}/{^}: Select the desired entry. i {MENU} {V}/{^}: “Copy” i {SELECT} {V}/{^}: Enter the handset number to copy to. -
Page 25: Programming
L To exit the operation, press {■}(EXIT) on the base unit or {OFF} on the handset. Note: L See page 28 for the default settings. Base unit Main menu View Caller ID Phonebook Set answering For assistance, please visit http://www.panasonic.com/help Sub-menu 1 – – Record greeting Play greeting Ring count Recording time... - Page 26 *1 If you program these settings using the base unit, you do not need to program the same item using a handset. Handset Main menu View Caller ID Phonebook Answering device For assistance, please visit http://www.panasonic.com/help Sub-menu 1 Ringer volume Ringer tone Interrupt tone Night mode Set date & time...
- Page 27 Initial settings Customer support *1 If you program these settings using one of the handsets, you do not need to program the same item using another unit. For assistance, please visit http://www.panasonic.com/help Sub-menu 1 Ringer volume Ringer tone Interrupt tone Night mode Set date &...
- Page 28 Date and time Deregistration Display language Erase all (Erasing all messages) HS registration (Handset registration) Interrupt tone Key tone Line select Night mode (On/Off) For assistance, please visit http://www.panasonic.com/help Feature Setting code <Off> {7}{2}{0} Once Daily {2}{0}{0} <Off> <On> {2}{1}{4} <On>...
- Page 29 *1 If “System setting” column is checked, you do not need to program the same item using another unit. *2 If you subscribe to Caller ID service and want to view the caller’s information after lifting up the handset to answer a call, turn off this feature. For assistance, please visit http://www.panasonic.com/help Feature Setting code <11:00 PM/06:00 AM>...
- Page 30 “A”. *10This feature allows the unit to automatically adjust the date and time setting when caller information is received. To use this feature, set the date and time first. For assistance, please visit http://www.panasonic.com/help...
-
Page 31: Special Instructions For Programmable Settings
Handset: {OFF} Note: L When the night mode is turned on, 3 is displayed. For assistance, please visit http://www.panasonic.com/help Alarm An alarm sounds at the set time for 3 minutes once or daily. Alarm can be set for each handset. -
Page 32: Registering A Unit
L When you purchase an additional handset, refer to the additional handset’s installation manual for registration. For assistance, please visit http://www.panasonic.com/help Deregistering a handset A handset can cancel its own registration (or the registration of another handset) that is stored in the base unit. -
Page 33: Caller Id Service
“No ringer ID” (default), the unit uses the ringer tone you selected for each line on page 29 when calls from this group are received. For assistance, please visit http://www.panasonic.com/help Caller ID Service : Base unit / Y Handset Proceed with the operation for your unit. -
Page 34: Caller Id Number Auto Edit Feature
555-321-5555 1 – Area code – Local phone number Example: 1-555-321-5555 For assistance, please visit http://www.panasonic.com/help Proceed with the operation for your unit. Base unit: Lift the corded handset. Handset: {C} L If the indicated line is already being used or... - Page 35 {SAVE} i Go to step 4. Press {SAVE} 2 times. If necessary, edit the party’s name (16 characters max.). i {OK} For assistance, please visit http://www.panasonic.com/help Caller ID Service If necessary, edit the party’s phone number (24 digits max.). i {OK} {V}/{^}: Select the desired group (page 22).
-
Page 36: Answering System
L The ANSWER ON indicator lights up. ■ To turn off: Press {ANSWER ON}. L The ANSWER ON indicator turns off. For assistance, please visit http://www.panasonic.com/help Call screening : Base unit / Y Handset While a caller is leaving a message, you can listen to the call through the base unit’s or handset’s... -
Page 37: Listening To Messages Using The Base Unit
{^} or {V} Adjust the speaker volume Repeat message (during playback) Skip message (during playback) For assistance, please visit http://www.panasonic.com/help {PAUSE} {■} (STOP) {ERASE} *1 If pressed within the first 5 seconds of a message, the previous message is played. -
Page 38: Listening To Messages Using The Handset
Play all messages Pause message {PAUSE} Stop playback Turn answering system off Erase currently playing {*}{4} message For assistance, please visit http://www.panasonic.com/help {*}{5} {#}{1} i {8} {#}{2} i {8} {#}{0} i {8} *1 If pressed within the first 5 seconds of a message, the previous message is played. -
Page 39: Remote Operation
Enter the desired 3-digit remote access code. i {SAVE} Proceed with the operation for your unit. Base unit: {■} (EXIT) Handset: {OFF} For assistance, please visit http://www.panasonic.com/help Answering System Using the answering system remotely Dial your phone number from a touch-tone phone. -
Page 40: Remote Commands
End remote operation (or {*}{#} hang up) For assistance, please visit http://www.panasonic.com/help *1 If pressed within the first 5 seconds of a message, the previous message is played. *2 For English voice guidance only: To resume operation, enter a remote command within 3 seconds, or the voice guidance starts. -
Page 41: Answering System Settings
– Set this unit’s “Ring count” setting so that this unit’s answering system answers calls before the voice mail service of your service For assistance, please visit http://www.panasonic.com/help Answering System provider/telephone company does. It is necessary to check the number of rings... -
Page 42: Voice Mail Service
For assistance, please visit http://www.panasonic.com/help Turn this feature off when: – You do not subscribe to voice mail service. – Your service provider/telephone company does not send voice mail tones. -
Page 43: Intercom/Locator
To page another handset, enter its extension number. L To stop paging, press {OFF}. When you finish talking, press {OFF}. For assistance, please visit http://www.panasonic.com/help Intercom/Locator Answering an intercom call : Base unit Lift the corded handset or press {INTERCOM} to answer the page. -
Page 44: Conference Calls
L To hang up only one line, press {LINE 1} or {LINE 2} for the party with which you want to continue talking. For assistance, please visit http://www.panasonic.com/help L To put both lines on hold, press {HOLD}. To talk with only one caller, press {LINE 1} or {LINE 2} for the party with which you want to continue talking. -
Page 45: Handset Locator
Press {LOCATOR}. Handset: Press {INTERCOM}, then press {OFF}. Note: L Even when the ringer volume for both lines is set to off (page 29), the handset still rings at a low level for paging. For assistance, please visit http://www.panasonic.com/help Intercom/Locator... -
Page 46: Useful Information
You can hang the handset on your belt or pocket using the supplied belt clip. To attach the belt clip To remove the belt clip Headset (optional) Connecting a headset to the handset allows for hands-free conversations. We recommend using the Panasonic headset noted on page 4. -
Page 47: Error Messages
Use rechargeable battery. You must first subscribe to Caller For assistance, please visit http://www.panasonic.com/help Cause/solution L The called handset or base unit is in use. L Other units are in use and the system is busy. Try again later. L Privacy mode is on for the call you tried to join (page 21). -
Page 48: Troubleshooting
While programming, the unit starts to ring. I cannot register a handset to a base unit. For assistance, please visit http://www.panasonic.com/help Cause/solution L Make sure the batteries are installed correctly (page 15). L Fully charge the batteries (page 15). L Check the connections (page 12). - Page 49 I cannot make long distance calls. Caller ID Problem Caller information is not displayed. For assistance, please visit http://www.panasonic.com/help Cause/solution L Battery charge is low. Fully charge the batteries (page 15). L Clean the charge contacts and charge again (page 16).
- Page 50 The unit does not record new messages. I cannot operate the answering system. L Someone is using the unit. Wait for the other user to finish. For assistance, please visit http://www.panasonic.com/help Cause/solution L Depending on your service provider/telephone company, the unit may display the caller’s information at 2nd ring or later.
- Page 51 Caution: L To avoid permanent damage, do not use a microwave oven to speed up the drying process. For assistance, please visit http://www.panasonic.com/help Cause/solution L You are entering the wrong remote access code. If you forgot the remote access code, store a new remote access code (page 39).
-
Page 52: Fcc And Other Information
Also, you will be advised of your right to file a complaint with the FCC if you believe it is necessary. For assistance, please visit http://www.panasonic.com/help The telephone company may make changes in its facilities, equipment, operations or procedures that could affect the operation of the equipment. - Page 53 TV or VCR. If interference is experienced, For assistance, please visit http://www.panasonic.com/help Useful Information move the cordless telephone further away from the TV or VCR. This will often reduce, or eliminate, interference.
- Page 54 Useful Information Notice ENERGY STAR ® As an NERGY Participant, Panasonic has determined that this product meets the NERGY TAR guidelines for energy efficiency. NERGY registered mark. For assistance, please visit http://www.panasonic.com/help TAR is a U.S.
-
Page 55: Specifications
Handset: Approx. 130 g (0.29 lb) Charger: Approx. 60 g (0.13 lb) Note: L Design and specifications are subject to change without notice. For assistance, please visit http://www.panasonic.com/help L The illustrations in these instructions may vary slightly from the actual product. inches) inches) -
Page 56: Customer Services
Monday - Friday 9 am to 9 pm; Saturday - Sunday 10 am to 7 pm, EST. TTY users (hearing or speech impaired users) can call 1-877-833-8855. Accessory Purchases Purchase Parts, Accessories and Instruction Books online for all Panasonic Products by visiting our Web Site at: http://www.pstc.panasonic.com or, send your request by E-mail to: npcparts@us.panasonic.com... -
Page 57: Warranty
Panasonic Telephone Products Limited Warranty Coverage If your product does not work properly because of a defect in materials or workmanship, Panasonic Consumer Electronics Company or Panasonic Puerto Rico, Inc. (collectively referred to as “the warrantor”) will, for the length of the period indicated on the chart below, which starts with the date of original purchase (“Limited Warranty period”), at its option either (a) repair your product with new... - Page 58 Service Center. If the problem is not handled to your satisfaction, then write to the warrantor’s Consumer Affairs Department at the addresses listed for the warrantor. PARTS AND SERVICE, WHICH ARE NOT COVERED BY THIS LIMITED WARRANTY, ARE YOUR RESPONSIBILITY. For assistance, please visit http://www.panasonic.com/help...
-
Page 59: Index
Index Additional handset: 32 Alarm: 31 Answering calls Base unit: 19 Handset: 19 Answering system Call screening: 36 Erasing messages: 37, 38, 40 Listening to messages: 37, 38, 39 Memory capacity: 36 Number of rings: 41 Recording time: 41 Remote access code: 39 Remote operation: 39 Ring count: 41 Toll saver: 41... - Page 60 Copyright: This material is copyrighted by Panasonic Communications Co., Ltd., and may be reproduced for internal use only. All other reproduction, in whole or in part, is prohibited without the written consent of Panasonic Communications Co., Ltd. © 2008 Panasonic Communications Co., Ltd. All Rights Reserved.