Table of Contents
Advertisement
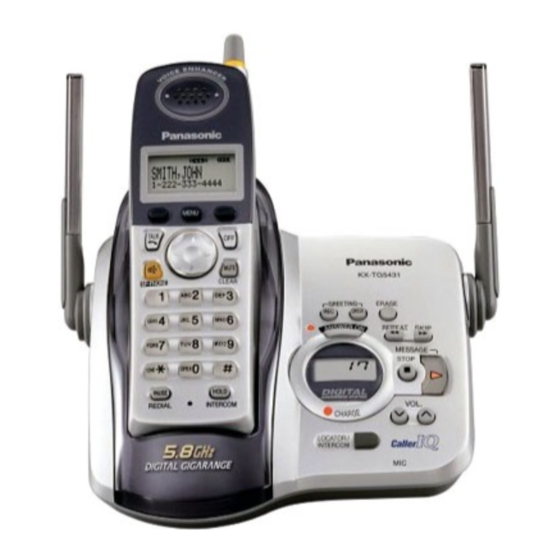
Model shown is KX-TG5451.
This unit is compatible with Caller ID. To use this feature, you must
subscribe to the appropriate service offered by your service provider.
Charge the battery for 6 hours before initial use.
Please read these Operating Instructions before using the unit and save
for future reference.
For assistance, visit our website: http://www.panasonic.com for
customers in the U.S.A. or Puerto Rico.
Operating Instructions
5.8 GHz Digital Cordless Answering System
Model No.
5.8 GHz Digital Cordless Answering System
Model No.
5.8 GHz Digital Cordless Answering System
Model No.
KX-TG5451
with Dual Handsets
KX-TG5452
with Three Handsets
KX-TG5453
Advertisement
Table of Contents

Related Manuals for Panasonic KX-TG5453


Summary of Contents for Panasonic KX-TG5453
-
Page 1: Operating Instructions
Charge the battery for 6 hours before initial use. Please read these Operating Instructions before using the unit and save for future reference. For assistance, visit our website: http://www.panasonic.com for customers in the U.S.A. or Puerto Rico. Operating Instructions 5.8 GHz Digital Cordless Answering System KX-TG5451 Model No. -
Page 2: Table Of Contents
Chain dial feature....24 Copying phonebook items (KX-TG5452 and KX-TG5453 only)....24 For KX-TG5452 users ... 24 For KX-TG5453 users . - Page 3 Programming via direct commands . . . 45 Direct commands chart ..45 Answering System Features Answering system ....47 Recording your greeting message .
-
Page 4: Your Phone
Introduction Thank you for purchasing a Panasonic cordless telephone. We recommend keeping a record of the following information for future reference. Serial No. Date of purchase (found on the bottom of the unit) Name and address of dealer Attach your purchase receipt here. -
Page 5: Accessory Information
AC adaptor Additional/replacement accessories Accessory items Rechargeable nickel metal hydride (Ni-MH) battery Headset Battery back-up power supply For assistance, please call 1-800-211-PANA (7262). Quantity Order number KX-TG5451 KX-TG5452 KX-TG5453 PQJA10075Z PQKL10068Z1 PQKL10068Z2 HHR-P104 PQYNTG5421SR PQYNTG5432MR PQKE10396Z1 PQKE10396Z2 PQLV30030ZM KX-TCA1-G Order number... -
Page 6: Important Safety Instructions
Introduction Important safety instructions When using this unit, basic safety precautions should always be followed to reduce the risk of fire, electric shock, or personal injury. 1. Read and understand all instructions. 2. Follow all warnings and instructions marked on this unit. 3. - Page 7 L Do not touch the plug with wet hands. L The AC adaptor is used as the main disconnect device. Ensure that the AC outlet is installed near the unit and is easily accessible. Battery To reduce the risk of fire or injury to persons, read and follow these instructions.
-
Page 8: For Best Performance
Introduction For best performance Base unit location/noise The base unit and handset use radio waves to communicate with each other. For maximum distance and noise-free operation, we recommend the following: L Placing the unit away from electrical appliances such as a TV, personal computer or another cordless phone. -
Page 9: Preparation
L The unit will not work during a power failure. We recommend connecting a standard telephone to the same telephone line or to the same telephone jack using the Panasonic KX-J66 T-adaptor. Emergency power can be supplied to the unit by connecting a Panasonic battery back-up power supply noted on page 5. -
Page 10: Battery Installation
Preparation If you subscribe to an xDSL service L Please attach a noise filter (contact your xDSL provider) to the telephone line between the base unit and the telephone line jack in the event of the following: – Noise is heard during conversations. –... -
Page 11: Battery Charge
Battery charge Place the handset on the base unit or charger for 6 hours before initial use. L The unit will beep once, the CHARGE indicator will light, and “Charging” will be displayed. L “Charge completed” is displayed when the battery has been fully charged. The CHARGE indicator will remain lit. -
Page 12: Battery Replacement
Preparation Battery performance After your Panasonic battery is fully charged, you can expect the following performance: Operation Operating time While in use Up to 5 hours (talking) While not in use Up to 11 days (standby) While using the Up to 3 hours... -
Page 13: Controls And Displays
Controls and displays Controls Base unit KX-TG5453 KX-TG5452 KX-TG5451 A {SELECT} B {CALL} C {LOCATOR/INTERCOM 1} D {LOCATOR/INTERCOM 2} E {LOCATOR/INTERCOM} F CHARGE indicator G Antenna H Speaker I Display J {ANSWER ON} ANSWER ON indicator For assistance, please call 1-800-211-PANA (7262). - Page 14 Preparation Handset A Speaker B Soft key C Headset jack D {C} (TALK) E Navigator key F {s} (SP-PHONE) G {*} (TONE) H {PAUSE} {REDIAL} I Ringer indicator Message indicator J Receiver K Display L {MENU} M {OFF} N {MUTE} {CLEAR} O {HOLD} {INTERCOM} P Microphone Q Charge contacts...
-
Page 15: Display
(caller messages will not be recorded). Handset number; displayed when paging or being paged. (example shown here: handset 1) *1 KX-TG5452 and KX-TG5453 only Handset display items Displayed Meaning item Voice enhancer is on. Battery strength For assistance, please call 1-800-211-PANA (7262). -
Page 16: Setting The Date And Time
Preparation Setting the date and time Set the date and time so that the unit will announce the day and time each message was recorded by the answering system (page 47) when you play back messages. Press {MENU}. Scroll to “Date and time” by pressing {V} or {^}, then press {>} or {Select}. -
Page 17: Making/Answering Calls
Note: L “Line in use” is displayed when someone is talking on another handset (KX-TG5452 and KX-TG5453 only) or another phone. To adjust the receiver volume 3 levels (high/medium/low) are available. While using the receiver, press {V} or {^} repeatedly. -
Page 18: Answering Calls
Making/Answering Calls To make a call using the redial list The last 5 phone numbers dialed are stored in the redial list. Press {REDIAL}. L The last number dialed will be displayed. Press {V} or {^} repeatedly to display the desired number. L To delete the displayed number, press {CLEAR}. -
Page 19: Useful Features During A Call
Press {HOLD} during an outside call. L “Hold” will be displayed. L To return to the call, press {C} or {s}. KX-TG5452 and KX-TG5453: Press {HOLD} during an outside call. L To transfer the call to another handset, see page 34, step 2. -
Page 20: Clarity Booster
L While this feature is turned on, battery operating time will be shortened (page 12). L KX-TG5453 only: The maximum number of extensions which can be used at a time may decrease when using this feature. -
Page 21: For Call Waiting Service Users
For Call Waiting service users To use Call Waiting, you must subscribe to your telephone company’s Call Waiting service. This feature allows you to receive calls while you are already talking on the phone. If you receive a call while on the phone, you will hear a Call Waiting tone. -
Page 22: Phonebook
Phonebook Using the phonebook The handset phonebook allows you to make calls without having to dial manually. You can add 50 names and phone numbers to the handset phonebook and search for phonebook entries by name. Adding items to the phonebook Press {Phonebook}. -
Page 23: Calling Someone In The Phonebook
Calling someone in the phonebook Phonebook items can be searched for alphabetically by scrolling through the phonebook items. Press {Phonebook}. L For quick search, you can skip to step Press {Search}. 0-9=Name search dB=Scroll list Press {V} or {^} repeatedly to display the desired item. -
Page 24: Chain Dial Feature
For assistance, please call 1-800-211-PANA (7262). Copying phonebook items (KX-TG5452 and KX-TG5453 only) You can copy one or all of the phonebook items from one handset to another. Important: L Make sure the destination handset is not in use. -
Page 25: For Kx-Tg5453 Users
L The destination handset display will show “Phonebook Receiving”, then “Phonebook Received”. Press {OFF}. For KX-TG5453 users L To confirm the destination handset number ([1], [2], or [3]), place that handset on the base unit or charger. Copying an item Press {MENU}. -
Page 26: Caller Id Service
Caller ID Service Using Caller ID service This unit is Caller ID compatible. To use Caller ID features, you must subscribe to your telephone company’s Caller ID service. Caller ID features When an outside call is being received, the calling party’s name or telephone number will be displayed. -
Page 27: Ringer Id And Light-Up Id
“Toll saver” is selected, and there is a new message, the unit will not announce the caller’s name. L KX-TG5452 and KX-TG5453 only: If an outside call is received while on an intercom call between the handset and base unit, the other handsets will ring, but the caller’s name will not be... -
Page 28: Caller List
(For example, you may have to delete “1” and the area code.) L KX-TG5452 and KX-TG5453 only: Each handset has its own caller list. If you viewed the caller list or answered a call on one handset, the same information in the other handsets will be displayed as “missed calls”. -
Page 29: Editing A Caller's Phone Number Before Calling Back
Editing a caller’s phone number before calling back You can edit a phone number in the caller list by removing its area code and/or the long distance code “1”. Press {V} or {^} to enter the caller list. Press {V} or {^} repeatedly to display the desired item. -
Page 30: Erasing Caller Information
Caller ID Service Erasing caller information Erasing a selected item Press {V} or {^} to enter the caller list. Press {V} or {^} repeatedly to display the desired item. Press {CLEAR}. L To erase other items, repeat from step 2. L To exit the caller list, press {OFF}. -
Page 31: Intercom Features
Intercom Intercom calls can be made between a handset and the base unit (and between 2 handsets, KX-TG5452 and KX-TG5453 only). Note: L If you have difficulty hearing the other party while using the speaker, decrease the speaker volume. L If you receive a phone call while talking on the intercom, you will hear 2 tones (page 39, 42). -
Page 32: For Kx-Tg5452 Users
Intercom Features For KX-TG5452 users Call the desired unit by selecting the extension number, shown in the upper right of each handset’s display. The base unit’s extension number is 0. L To confirm the handset’s extension number ([1] or [2]), place the handset on the base unit or charger. -
Page 33: For Kx-Tg5453 Users
For KX-TG5453 users Call the desired unit by selecting the extension number, shown in the upper right of each handset’s display. The base unit’s extension number is 0. L To confirm the handset’s extension number ([1], [2], or [3]), place the handset on the base unit or charger. -
Page 34: Transferring A Call
Intercom Features Transferring a call (KX- TG5452 and KX-TG5453 only) Outside calls can be transferred between 2 handsets. During an outside call, press {INTERCOM}. L The call will be put on hold. KX-TG5452 users: To page the other handset, press {handset[1]} or {handset[2]}. -
Page 35: Conference Calls
Conference calls (KX- TG5452 and KX-TG5453 only) A conference call allows 2 handsets to speak together with an outside party. During an outside call, press {INTERCOM}. L The call will be put on hold. KX-TG5452 users: To page the other handset, press {handset[1]} or {handset[2]}. -
Page 36: Programmable Settings
Programmable Settings Guide to handset programming For your reference, a chart of all programmable functions is printed below. Details for each item can be found on the corresponding pages. To program, press {MENU}, press {V} or {^} to scroll through the menu, and press {>} or {Select} when the desired menu item or setting is displayed. -
Page 37: Programmable Settings
CIQ on?” is displayed when Caller IQ is turned off. See the leaflet included with this unit for more information. *3 If you program these settings using one of the handsets, you will not need to program the same item using another handset (KX-TG5452 and KX-TG5453 only). *4 KX-TG5452 and KX-TG5453 only Note: L To exit programming, press {OFF} at any time. -
Page 38: Ringer Settings
Programmable Settings Ringer settings Handset ringer volume 4 levels (high/medium/low/off) are available. The default setting is HIGH. Press {MENU}. Scroll to “Ringer setting” by pressing {V} or {^}, then press {>}. Ringer setting Scroll to “Ringer volume” by pressing {V} or {^}, then press {>}. Ringer volume Press {V} or {^} repeatedly to select the desired volume. -
Page 39: Handset Interrupt Tone
Handset interrupt tone This tone lets you know when you receive a call while you are on an intercom call (page 31). “2” (default): The tone will sound 2 times. “On”: The tone will sound for as long as the line rings. -
Page 40: Caller Id Edit
Programmable Settings Caller ID edit You can turn the Caller ID number auto edit feature (page 29) on or off. The default setting is ON. Press {MENU}. Scroll to “Initial setting” by pressing {V} or {^}, then press {>}. Scroll to “Caller ID edit” by pressing {V} or {^}, then press {>}. -
Page 41: Telephone Settings
Telephone settings Dialing mode If you cannot make calls, change this setting depending on your telephone line service. “Tone” (default): For tone dial service. “Pulse”: For rotary pulse dial service. Press {MENU}. Scroll to “Initial setting” by pressing {V} or {^}, then press {>}. Scroll to “Set tel line”... -
Page 42: Base Unit Settings
Programmable Settings Base unit settings Base unit ringer volume 4 levels (high/medium/low/off) are available. The default setting is HIGH. Important: L Make sure the base unit is not being used. Press {<} or {>} repeatedly to select the desired volume. L To stop ringing, press {STOP}. -
Page 43: Base Unit Talking Caller Id
L Have the handset and base unit near each other when re-registering the handset. L KX-TG5452 and KX-TG5453 only: Confirm the extension number of the handset which has lost its link to the base unit by placing the handset on the base unit or charger. -
Page 44: Programmable Settings
INTERCOM 1} or {LOCATOR/ INTERCOM 2}) until the registering handset number (H1 or H2) is displayed. KX-TG5453 base unit: Press {SELECT} repeatedly until the desired extension number (H1, H2, or H3) is displayed on the base unit, then press and hold {CALL}. -
Page 45: Programming Via Direct Commands
Programming via direct commands You can also program most features using “direct commands”—special codes that take you directly to the feature you wish to program and allow you to select the desired setting. There is no need to scroll through the unit’s menus. Details of each feature can be found on the corresponding pages. - Page 46 Time adjustment {0} {9} Handset registration {0} {0} *1 KX-TG5452 only *2 KX-TG5453 only Note: L If you make a mistake or enter the wrong code, press {OFF} then start again by pressing {MENU}. For assistance, please call 1-800-211-PANA (7262).
-
Page 47: Answering System Features
Answering system The unit contains an answering system which can answer and record calls for you when you are unavailable to answer the phone. For details about memory capacity, see page 51. Important: L Only 1 person can access the answering system (listen to messages, record a greeting message, etc.) at a time. -
Page 48: Erasing Your Greeting Message
Answering System Features To play back the greeting message Press {GREETING CHECK}. Erasing your greeting message Press {GREETING CHECK}, and then press {ERASE} while your greeting message is playing. L If you do not re-record your greeting message, the unit will use a pre- recorded greeting message. -
Page 49: Listening To Messages
Listening to messages When new messages have been recorded: – The MESSAGE indicator on the base unit will flash. – The message indicator on the handset will flash slowly if the message alert feature is turned on (page 55). The base unit display will show the number of messages (old and new) recorded by the answering system. -
Page 50: Listening To Messages Using The Handset
Answering System Features Note: L Caller information for the erased messages will remain in the caller list. Listening to messages using the handset {MENU} {Select} {OFF} When new messages have been recorded, “New message” is displayed. Press {MENU}. Press {Select} at “Message play”. L The unit will announce the number of new messages, and will play back the new messages. -
Page 51: Memory Capacity
Calling back (Caller ID subscribers only) If Caller ID information was received for the call, you can call the caller back while listening to a message. Press {Call} during playback. Note: L To edit the number before calling back, press {Edit} repeatedly to select the desired format (page 29), then press {Call}, {C}, or {s}. -
Page 52: Remote Operation
Answering System Features Remote operation Using a touch tone phone, you can call your phone number from outside and access the unit to listen to messages. The unit’s voice guidance will prompt you to press certain dial keys to perform different operations. - Page 53 Remote commands You can press dial keys to access certain answering system functions without waiting for the voice guidance to prompt you. Remote command Repeat message (during playback) Skip message (during playback) Play new messages Play all messages Record a greeting message Stop (recording, playback) Turn answering system off Erase this message (during...
-
Page 54: Answering System Settings
Answering System Features Answering system settings Remote code A remote code must be entered when operating the answering system remotely. This code prevents unauthorized parties from listening to your messages remotely. Store any 2-digit number (00–99). The default setting is “11”. Press {MENU}. -
Page 55: Caller's Recording Time
Caller’s recording time You can change the maximum message recording time allotted to each caller. “1min”, “2min”, or “3min” (default): Caller messages are limited to 1 minute to 3 minutes. “Greeting only”: The unit plays the greeting message but does not record caller messages. -
Page 56: Useful Information
Useful Information Wall mounting Base unit The base unit can be mounted on a wall phone plate. Connect the AC adaptor. Tuck the telephone line cord inside the wall mounting adaptor (1). Connect the telephone line cord (2). Insert the hooks on the wall mounting adaptor into the holes (A) and (B) on the base unit. - Page 57 Adjust the adaptor to hold the base unit, then push it in the direction of the arrow until it clicks into place. Connect the telephone line cord. Mount the unit, then slide it down. L Raise the antennas. To remove the wall mounting adaptor While pushing down the release levers (1), remove the adaptor (2).
-
Page 58: Charger Unit
Useful Information Charger unit (KX-TG5452 and KX-TG5453 only) The charger can be wall mounted, as shown below. Connect the AC adaptor. Drive the screws (not included) into the wall using the wall mount template (see below). Mount the charger (1). -
Page 59: Belt Clip
For assistance, please call 1-800-211-PANA (7262). Headset (optional) Connecting an optional headset to the handset allows hands-free phone conversations. Please use only a Panasonic headset. See page 5 for compatible headsets and ordering information. To connect an optional headset to the handset L Model shown is KX-TCA86. -
Page 60: Error Messages
System is busy. Please try again later. *1 KX-TG5452 and KX-TG5453 only For assistance, please call 1-800-211-PANA (7262). Cause & solution L The called handset or base unit is in use. L The handset you tried to copy phonebook items to is in use. -
Page 61: Troubleshooting
Troubleshooting General use Problem The unit does not work. The display shows “No link to base. Move closer to base, try again.” and an alarm tone sounds. I cannot hear a dial tone. Programmable settings Problem I cannot program items. While programming, the handset starts to ring. -
Page 62: Making/Answering Calls, Intercom
Useful Information Making/answering calls, Intercom Problem Static is heard, sound cuts in and out. Interference from other electrical units. The handset and base unit do not ring. I cannot make a call. I cannot redial by pressing {REDIAL}. I cannot have a conversation using the headset. -
Page 63: Caller Id
Problem While storing an item in the phonebook, the handset starts to ring. Copying stopped with an item displayed. The display exits the phonebook while searching. Caller ID Problem The handset does not display the caller’s name and/or phone number. The handset or base unit does not announce the displayed caller names. -
Page 64: Answering System
Useful Information Problem The handset or base unit does not announce the displayed caller’s name correctly. The caller list/incoming phone numbers are not edited automatically. I cannot dial the phone number edited in the caller list. The display exits the caller list while searching. -
Page 65: Battery Charge
Problem When you play back messages or turn on the answering system, the base unit and handset announce the day and time incorrectly. Battery charge Problem “Recharge battery” is displayed, 7 flashes or the handset beeps intermittently. “Charge for 6h” and 8 are displayed and the handset does not work. -
Page 66: Important Information About Subscription
Useful Information Important information about subscription services In order to use Caller ID, Call Waiting, or Call Waiting Caller ID (CWID), you must first contact your telephone company and subscribe to the desired service. L For more information, contact your telephone company. If the Call Waiting Caller ID (CWID) feature does not function: L You may need to contact your telephone company to activate this specific service, even if you already subscribed to both Caller ID and Call Waiting with Caller ID services... -
Page 67: Fcc And Other Information
FCC and other information This equipment complies with Part 68 of the FCC rules and the requirements adopted by the ACTA. On the bottom of this equipment is a label that contains, among other information, a product identifier in the format US:ACJ----------. If requested, this number must be provided to the telephone company. - Page 68 Useful Information When you hold the phone to your ear, noise might be heard in your Hearing Aid. Some Hearing Aids are not adequately shielded from external RF (radio frequency) energy. If noise occurs, use an optional headset accessory or the speakerphone option (if applicable) when using this phone.
-
Page 69: Openlcr Service For The Caller Iq
L If you have any questions regarding the openLCR service, visit www.openLCR.com or call openLCR at 1-866-openLCR (1-866-673-6527). L NEITHER PANASONIC COMMUNICATIONS CO., LTD. NOR PANASONIC CORPORATION OF NORTH AMERICA IS IN ANY WAY AFFILIATED WITH, OR RESPONSIBLE FOR THE ACTS OR OMISSIONS OF, OPENLCR.COM, INC. -
Page 70: Technical Information
Ni-MH battery (3.6 V, 830 mAh) Security codes: 1,000,000 For assistance, please call 1-800-211-PANA (7262). Charger unit (KX-TG5452 and KX-TG5453 only) Operating environment: 5 °C – 40 °C (41 °F – 104 °F) Dimensions: Approx. height 71 mm x width 88 mm x... -
Page 71: Warranty
Panasonic Services Company Customer Servicenter 4900 George McVay Drive Suite B Door #12 McAllen, TX 78503 For assistance in Puerto Rico call Panasonic Puerto Rico, Inc. (787)-750-4300 or fax (787)-768-2910. For Limited Warranty service for headsets if a headset is included with this product please call Panasonic Call Center at 1-800-211-PANA (7262). - Page 72 Useful Information Limited Warranty Limits And Exclusions This Limited Warranty ONLY COVERS failures due to defects in materials or workmanship, and DOES NOT COVER normal wear and tear or cosmetic damage. The Limited Warranty ALSO DOES NOT COVER damages which occurred in shipment, or failures which are caused by products not supplied by the warrantor, or failures which result from accidents, misuse, abuse, neglect, mishandling, misapplication, alteration, faulty installation, set-up adjustments, misadjustment of...
-
Page 73: Customer Services
Monday-Friday 9 am-9 pm; Saturday-Sunday 10 am-7 pm, EST. TTY users (hearing or speech impaired users) can call 1-877-833-8855. Accessory Purchases Purchase Parts, Accessories and Instruction Books online for all Panasonic Products by visiting our Web Site at: http://www.pasc.panasonic.com or, send your request by E-mail to: npcparts@us.panasonic.com... -
Page 74: Index
Index Index A Accessories: 5 Answering calls: 18 Answering system: 47 Auto talk: 18, 39 B Backlit display: 15 Backlit handset keypad: 15 Base unit location: 8 Battery Charge: 11 Installation: 10 Performance: 12 Replacement: 12 Strength: 11 Belt clip: 59 C Caller ID edit: 40 Caller ID number auto edit: 29 Caller ID service: 26... - Page 75 R Recording time: 55 Redial: 17 Redial list: 18 Registration: 43 Remote code: 54 Remote operation: 52 Ring count: 54 Ringer ID: 27 Ringer off Base unit: 42 Handset: 18, 38 Ringer tone Base unit: 42 Handset: 38 Ringer volume Base unit: 42 Handset: 38 Rotary service, tone dialing: 21...
- Page 76 L Send the unit to Panasonic Services Company Customer Servicenter, prepaid and adequately insured. L Do not send your unit to Panasonic Consumer Electronics Company listed below or to executive or regional sales offices. These locations do not repair consumer products.