Palm Treo 700w User Manual
Palm treo 700w smartphone quick reference guide
Hide thumbs
Also See for Treo 700w:
- Using manual (290 pages) ,
- User manual (268 pages) ,
- Addendum (14 pages)
Table of Contents
Advertisement
Quick Links
C O N T E N T S
Learning the basics . . . . . . . . . . . . . . . . . . . . . . . . . . . 1
®
Treo™ 700w smartphone overview . . . . . . . . . . . . . . . . . . . . . 1
Turning your smartphone on/off . . . . . . . . . . . . . . . . . . . . . . . . . . . . . 3
Moving around the screen . . . . . . . . . . . . . . . . . . . . . . . . . . . . . . . . . 4
Using the keyboard . . . . . . . . . . . . . . . . . . . . . . . . . . . . . . . . . . . . . . 10
Opening and closing applications . . . . . . . . . . . . . . . . . . . . . . . . . . . 14
Using your Today screen . . . . . . . . . . . . . . . . . . . . . . . . . . . . . . . . . 15
Synchronizing contacts and other info . . . . . . . . . . . . . . . . . . . . . . . 16
Maximizing battery life . . . . . . . . . . . . . . . . . . . . . . . . . . . . . . . . . . . 17
Using your phone . . . . . . . . . . . . . . . . . . . . . . . . . . . . 19
Phone overview . . . . . . . . . . . . . . . . . . . . . . . . . . . . . . . . . . . . . . . . 19
Making calls . . . . . . . . . . . . . . . . . . . . . . . . . . . . . . . . . . . . . . . . . . . 22
Receiving calls . . . . . . . . . . . . . . . . . . . . . . . . . . . . . . . . . . . . . . . . . 26
Using voicemail . . . . . . . . . . . . . . . . . . . . . . . . . . . . . . . . . . . . . . . . 27
Managing active calls . . . . . . . . . . . . . . . . . . . . . . . . . . . . . . . . . . . . 28
Creating a speed dial button . . . . . . . . . . . . . . . . . . . . . . . . . . . . . . . 32
Using a phone headset . . . . . . . . . . . . . . . . . . . . . . . . . . . . . . . . . . . 34
Staying organized . . . . . . . . . . . . . . . . . . . . . . . . . . . 36
Contacts . . . . . . . . . . . . . . . . . . . . . . . . . . . . . . . . . . . . . . . . . . . . . . 36
Calendar . . . . . . . . . . . . . . . . . . . . . . . . . . . . . . . . . . . . . . . . . . . . . . 37
Staying in touch . . . . . . . . . . . . . . . . . . . . . . . . . . . . . 40
Messaging . . . . . . . . . . . . . . . . . . . . . . . . . . . . . . . . . . . . . . . . . . . . 40
Browsing the web . . . . . . . . . . . . . . . . . . . . . . . . . . . . . . . . . . . . . . . 54
®
connection . . . . . . . . . . . . . . . . . . . . . . . . . 56
i
Advertisement
Table of Contents

Related Manuals for Palm Treo 700w


Summary of Contents for Palm Treo 700w
-
Page 1: Table Of Contents
Palm Treo™ 700w smartphone overview ..... 1 Turning your smartphone on/off ......3 Moving around the screen . - Page 2 Playing media files ......60 Pictures & Videos ........60 Windows Media Player Mobile .
-
Page 3: Learning The Basics
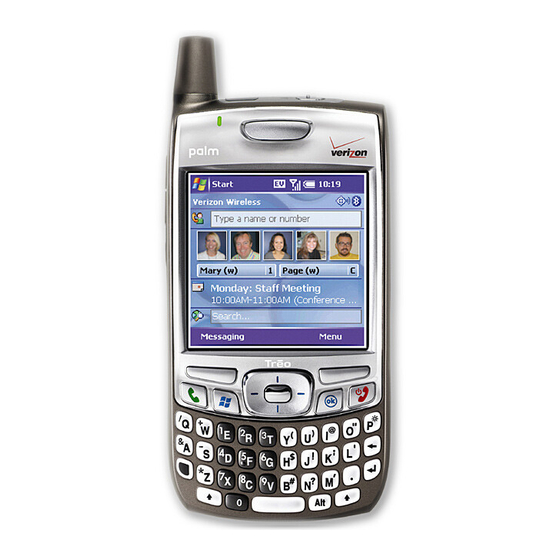
TREO™ 700W SMARTPHONE OVERVIEW The following illustrations show the locations and names of the physical features of your ® Palm Treo™ 700w smartphone. Refer to these illustrations while following this guide. Indicator light (phone and charge indicator) Volume button Side button... - Page 4 Antenna Stylus Expansion card slot Infrared (IR) port Ringer switch Self-portrait mirror Battery door release Camera lens (camera smart- phone only) Speaker...
-
Page 5: Turning Your Smartphone On/Off
TURNING YOUR SMARTPHONE ON/OFF You can use the organizer features of your Treo 700w smartphone independently of the wireless features and applications. In other words, the screen and phone are designed to be turned off and on separately. NOTE To conserve battery power, the screen turns off automatically after one minute. If you want the screen to stay on longer, you can adjust the shutoff setting. -
Page 6: Moving Around The Screen
MOVING AROUND THE SCREEN To move around the Treo 700w smartphone screen, you can use the 5-way navigator or you can tap items on the screen with the stylus. As you become familiar with your smartphone, you’ll find your own favorite way to scroll, highlight, and select items. - Page 7 There are several methods of scrolling: Press the 5-way on the front of your smartphone. Press Right , Left , Up ■ to move to the next field, button, or action in that direction. Press and hold Option while pressing Up ■...
- Page 8 Closing screens To accept the information you entered on a screen and to return to the previous screen, do one of the following: Press OK ■ Use the stylus to tap ■ Highlighting and selecting items On most screens, one item—a button, a list entry, or a check box—is highlighted by default. The highlight identifies which item is affected by your next action.
- Page 9 Using the action keys The action keys are designed to give you quick access to relevant tasks, so the action key items vary from application to application, and from screen to screen, and in some cases may not be available at all. Action keys activate the items that appear directly above them on the screen. In most cases the right action key specific command, such as New or Edit.
- Page 10 1. Press Menu to display an application’s menu. 2. Press Up or Down to highlight a menu item. 3. If an arrow appears next to a menu item, press Center or Right to display additional options for that item, and then press Up or Down to highlight a menu item.
- Page 11 Selecting options in a list Lists let you select from a range of options. You can identify whether a list is available when you select the field. If a rectangle appears around the field along with a downward-pointing arrow, a list is available.
-
Page 12: Using The Keyboard
USING THE KEYBOARD When using the keyboard, most people find it easiest to hold the smartphone with two hands and to use the tips of both thumbs to press the keys. Action key Phone/Send Start Option Shift Understanding the keyboard backlight Your smartphone includes a keyboard backlight for low light conditions. - Page 13 Entering lowercase and uppercase letters By default, the first letter of each sentence or field is capitalized and the remaining text you enter is lowercase. To enter other uppercase letters, do one of the following: Press Shift , and then enter a letter. You don’t need to press and hold Shift while entering ■...
- Page 14 Entering other symbols and accented characters You can enter symbols and accented characters that don't appear on the keys using the alternate characters list. The alternate characters are grouped according to their similarity to the corresponding key. For example, the alternate characters available for the e key are é, è, ë, and ê. If you press the wrong key, press Backspace to return to the full list of alternate characters.
- Page 15 Symbols and accented characters Press Alt to select... enter... á à ä â ã å æ Á À Ä Â Ã Å Æ b or B ß ç ¢ © Ç ¢ © é è ë ê É È Ë Ê í...
-
Page 16: Opening And Closing Applications
OPENING AND CLOSING APPLICATIONS Opening applications You can access all the applications on your smartphone through the Start menu: 1. Press Start to open the Start menu. 2. Use the 5-way navigator to highlight the application you want to use. To view additional applications, select Programs. -
Page 17: Using Your Today Screen
USING YOUR TODAY SCREEN Your Today screen is your home base where you can quickly look up contacts, dial numbers, see appointments and the number of unread email messages, and even display a web page. To access your Today screen, press Phone/Send NOTE Pressing Phone/Send while a phone number is highlighted dials the number. -
Page 18: Synchronizing Contacts And Other Info
NOTE We recommend installing a backup program to preserve your data and settings if your smartphone is ever lost or stolen. A backup and restore program also protects your data during a hard reset. To download a free backup and restore program, visit www.palm.com/mytreo700wVerizon. at the top of your... -
Page 19: Maximizing Battery Life
MAXIMIZING BATTERY LIFE Battery life depends on individual usage. When used as a smartphone, your smartphone battery provides up to 4.5 hours of talk time or up to 15 days of standby time. You can increase your smartphone’s battery life by following a few easy guidelines. Remember that battery life depends on how you use your smartphone. - Page 20 Turn down the screen brightness (see “Adjusting the brightness” on page 82). ■ Set your screen to turn off automatically after a shorter period of inactivity (see the User ■ Guide for details). Keep your battery away from direct sunlight and other sources of heat. Temperatures over ■...
-
Page 21: Using Your Phone
U S I N G Y O U R P H O N E PHONE OVERVIEW You can monitor the status of several items using icons at the top of your Today screen: You missed an incoming call. You have a voicemail message. You have a new email, text, or multimedia message. - Page 22 You can still make or receive calls. ® Your Palm Treo™ 700w smartphone is connected to a computer or network that is providing a data connection. A data connection is not available or your phone is off. Your smartphone’s battery is low.
- Page 23 Voice privacy is preventing over-the-air eavesdropping. Appears during a call when this option is turned on and is available on the Verizon Wireless network. Location privacy is off and your location is available to the Verizon Wireless network and other applications. ®...
-
Page 24: Making Calls
MAKING CALLS Your smartphone offers several ways to make phone calls. Try them all and you’ll discover which methods you prefer. NOTE Be sure you phone is on before you make calls using any of these methods (see “Turning your phone on and off” on page 3). - Page 25 Dialing by contact name You can look up contacts quickly by entering just a few letters of a contact’s name or phone number directly from your Today screen. Before you can dial a call by contact name, you must create some contacts (see “Adding a contact” on page 36) or import them by synchronizing (see “Synchronizing contacts and other info”...
- Page 26 Dialing with a speed dial button Before you can use a speed dial button, you must create some speed dial buttons. See “Creating a speed dial button” on page 32. You can dial your speed dial buttons by doing any of the following: Select a speed dial button with the 5-way, and then press Center.
- Page 27 Dialing from a web page or message Your smartphone recognizes most phone numbers that appear in web pages or in messages (text, email, or multimedia). 1. Use the 5-way to highlight the phone number you want to dial in the web page or message. 2.
-
Page 28: Receiving Calls
Dialing using the onscreen Dial Pad The onscreen Dial Pad is useful for dialing numbers that are expressed as letters, such as POPCORN to check the time, and when you need large numbers that you can tap with your finger or stylus. 1. -
Page 29: Using Voicemail
To ignore a call, do one of the following: ■ Press Power/End ■ Press Menu and select Ignore. ■ Press Menu and select Ignore with text message. ■ To silence the ringer while your smartphone is ringing: ■ Press the Volume button or any key on your smartphone except Phone/Send, Power/End, ■... -
Page 30: Managing Active Calls
Retrieving voicemail messages When you have unretrieved voicemail messages, a Voicemail icon screen and the left action key is labeled Voicemail. 1. Go to your Today screen. 2. Press and hold the 1 key (or tap Voicemail Wireless’s voicemail system. 3. - Page 31 Mute the microphone so you can’t be heard: ■ microphone back on, press Menu Switch to another application: ■ NOTE When a call lasts longer than one minute, the screen dims and then turns itself off. Press any key, except Power/End, to wake up the screen.
- Page 32 Returning to an active call from another application You can use many other applications on your smartphone while holding a phone conversation, including the organizer and SMS features. You cannot browse the web or send and receive email or MMS messages while on a voice call. From any application, press Phone/Send Saving phone numbers After you complete a call, you are prompted to add the number if it isn’t in your Contacts list.
- Page 33 Answering a second call (call waiting) When you’re on a call and you receive a second call, the call waiting notification appears. When the second call is incoming, you can swap between the two calls, but you can’t conference them. You can do any of the following: Place the current call on hold and answer the new call: ■...
-
Page 34: Creating A Speed Dial Button
1. Put the first call on hold, and then place a second call. 2. Press Conference ; this joins the two active calls in a conference. 3. When you’re done, press End Conference second call and returns you to the first call. If you’re ready to hang up both calls, press Power/End CREATING A SPEED DIAL BUTTON You can create up to 20 picture buttons and 50 text buttons. - Page 35 5. If this button is linked to a contact entry with a picture, select either Text Speed Dial or Picture Speed Dial to indicate which type of button you want to create. If this button is not linked to a contact or the contact doesn’t have a picture, the Picture Speed Dial option is not available.
-
Page 36: Using A Phone Headset
USING A PHONE HEADSET You can connect a phone headset for hands-free operation. If you need to use your smartphone while driving and this is permitted in your area, we recommend using a phone headset or a hands-free car kit (sold separately). The headset button is context sensitive and it performs different actions based on the situation. - Page 37 Your smartphone works with headsets that have a 2.5mm, 3-pin connector. When in doubt, ask the third-party headset manufacturer if the product is compatible with Treo 700w smartphones. If you hear a headset buzz or poor microphone performance, your headset may be incompatible with your smartphone.
-
Page 38: Staying Organized
S T A Y I N G O R G A N I Z E D This section introduces you to a few of the applications you can use to stay organized. To learn about the other applications that come with your smartphone, such as Tasks and Notes, see the User Guide. -
Page 39: Calendar
7. To assign a ringtone to the entry, select Ring tone and select a tone. 8. After you enter all the information, press OK Viewing or changing contact information 1. In the Contacts list (name view), begin entering one of the following for the contact you want to view or edit: First name ■... - Page 40 3. Select one of the following views: Shows your daily schedule in list format. Upcoming appointments are bold, past Agenda: ■ appointments are dimmed. Shows your daily schedule in day-planner format. Day: ■ Shows your schedule for an entire week. Week: ■...
- Page 41 5. Select Ends and select the ending date and time. 6. (Optional) Set an alarm: Select Reminder, and then select Remind Me. ■ Enter the number of minutes, hours, days, or weeks before ■ the event you want to receive the alarm. 7.
-
Page 42: Staying In Touch
NOTE If your email account requires a VPN connection to establish a secure connection, you must install a VPN application (sold separately) on your smartphone before you can access your email. Visit www.palm.com/mytreo700wVerizon to purchase a VPN application, and see the electronic User Guide for more info. - Page 43 Setting up an Exchange Server email account If you already set up your Exchange Server email settings when you installed the ActiveSync desktop software, you do not need to repeat this process. If you did not set up an Exchange Server email account, follow the steps in this section to set up an account now.
- Page 44 8. Press Next and check the boxes for the types of information you want to synchronize with Exchange Server. 9. (Optional) Highlight an item and select Settings to change the synchronization settings for that type of information. NOTE Settings are not available for all items. If you want to download more than the email message header, select E-mail and increase the KB setting.
- Page 45 3. Select Wireless Sync 4. Press Start and then wait a few minutes for the installation to complete. 5. When the following message appears on your smartphone screen: Have you created your Wireless Sync account yet?, select Yes. 6. Select Sync near the top of the screen. 7.
- Page 46 Work with your system administrator to gather the following info: Account type (POP3 or IMAP) ■ Mail server name for receiving mail ■ Mail server name for sending mail ■ Your username and password ■ Domain name ■ Any special security requirements ■...
- Page 47 9. Enter a name for this account, and then press Next email account, enter “Work” or your company’s name. 10. Enter the name of the incoming mail and outgoing mail servers and the domain. 11. (Optional) Select Options to set this account’s download options. 12.
- Page 48 1. Press Start and select Pocket MSN. 2. Select MSN Mobile Home. 3. Select Sign in. 4. Enter the email address and password for your Passport account or your Hotmail account. To create a Passport (IM) account, go to ■ To create a Hotmail account, go to ■...
- Page 49 5. Select Subject and enter a title for the message. 6. Enter your message, or press Menu phrase you want to insert. 7. (Optional) Do any of the following: Press Menu and select Insert. Select the type of item you want to attach, and then ■...
- Page 50 1. Go to your Today screen and press Messaging 2. Press Left to cycle through your Messaging accounts until you see the account you want to download in the title bar. 3. Press Menu and select Send/Receive to sync your smartphone with your email server. Receiving attachments 1.
- Page 51 3. On the Accounts tab, select the IMAP4 account name. 4. Press Next until you reach Server information, and then select Options. 5. Press Next twice, and then select Get full copy of messages and When getting full copy, get attachments.
- Page 52 6. (Optional) Press Menu 7. (Optional) Press Menu select OK. 8. Press Send Creating and sending a multimedia message Multimedia messages can include any of the following items presented as one or more slides: Ringtones ■ ■ MIDI ■ NOTE Even if your smartphone does not include a camera, you can still send, receive, and view pictures and videos. 1.
- Page 53 If the recipient’s name and mobile number or email address are not in your Contacts list, ■ enter the full mobile number or email address. If you want to upload a picture or video to your Verizon Wireless PIX Place account, press ■...
- Page 54 10. (Optional) Select Play to view the message as the recipient will see it. 11. When you’re done creating the message, press OK 12. Press Send Receiving text and multimedia messages When your phone is on and in a wireless coverage area, you automatically receive new text messages.
- Page 55 Viewing/playing a multimedia message 1. Go to your Today screen and press Messaging 2. Press Left until you see MMS in the title bar. 3. From the Inbox, select the message you want to view. 4. If you’re viewing the message for the first time, playback begins automatically.
-
Page 56: Browsing The Web
BROWSING THE WEB Internet Explorer Mobile provides quick and easy access to web pages. You can view most sites you use on your computer, including those with security and advanced features, such as JavaScript and frames. To browse the web, you must subscribe to data services from Verizon Wireless. - Page 57 To follow a link to another web page, press Up ■ then press Center to go to the selected page. You can also tap the link on the screen with your stylus. To adjust the size of the text on web pages, press Menu ■...
-
Page 58: Setting Up A Bluetooth ® Connection
If your computer is enabled with Bluetooth wireless technology, you can also synchronize wirelessly. [ ! ] IMPORTANT For a list of hands-free devices with Bluetooth wireless technology that are compatible with your smartphone, go to www.palm.com/mytreo700wVerizon. ® wireless technology, you can connect to a number of... - Page 59 After you set up a connection with a Bluetooth device, you can communicate with that device whenever it is within range (about 30 feet) and your smartphone’s Bluetooth feature is turned on. 1. If necessary, prepare the device you want to connect with to accept a new connection.
- Page 60 9. If you’re connecting to a headset or hands-free car kit, check the Hands Free box, and then press Finish 10. If you’re connecting to a GPS device, press Finish GPS device you selected in step 6, and then select New Outgoing Port. Press Finish 11.
- Page 61 Beaming a record 1. Highlight the entry or file you want to beam. 2. Press Menu and select Beam… (the menu item changes names based on the type of item you highlighted). 3. Do one of the following: When the name of the receiving device appears, tap the Tap to send link to Bluetooth: ■...
-
Page 62: Playing Media Files
P L A Y I N G M E D I A F I L E S PICTURES & VIDEOS Your smartphone comes with a built-in, 1.3-megapixel camera with 2x digital zoom (camera not included with all smartphones). You can use the camera to take, view, and send pictures and videos, and to add a personal touch to your smartphone, use your pictures as your Today screen background and as caller ID images, or use your videos to create video ringtones. - Page 63 5. Press Center to capture the picture. 6. Hold your smartphone still until the picture renders, and then do one of the following: Press Camera to take another picture. ■ Press OK to return to the Thumbnails View. ■ Recording a video Videos can be any length, provided you have ample storage space available.
- Page 64 7. When you’re done recording, press Stop stop recording. 8. (Optional) To review the video in Windows Media Player Mobile, press Thumbnails press Center. Press OK Pictures & Videos. Viewing a picture or video 1. Press Start and select Pictures & Videos. 2.
-
Page 65: Windows Media Player Mobile
WINDOWS MEDIA PLAYER MOBILE Windows Media Player Mobile can play music, audio, and video files that are stored on your smartphone or on an expansion card (sold separately) in any of the following file formats: WMA, WMV, MP3, and 3G2. Transferring media files to your smartphone Use the Sync feature in the desktop version of Windows Media Player 10 to transfer compatible media files from your computer to an expansion card or your smartphone. - Page 66 Playing media files on your smartphone You can listen to media files through the speaker on the back of your smartphone or through a stereo headphone (3.5mm stereo headphone adapter or 2.5mm stereo headphone required, sold separately). NOTE If you can’t find a media file on your expansion card, update the library (see “Working with libraries” on page 65). 1.
- Page 67 Turns the sound on or off. Displays a video using the full screen. Displays a website where you can find music and videos to play. Indicates the rating of the current file. Select the star to change the rating. 6. Press Menu and select any of the following during playback: Displays the Library screen so you can select a different song to play.
-
Page 68: Staying Productive
S T A Y I N G P R O D U C T I V E WORD MOBILE You can create and edit documents and templates and save them as DOC, RTF, TXT, and DOT ® ® files. You can also edit Microsoft Office Word documents and templates that you create on your computer. -
Page 69: Powerpoint Mobile
POWERPOINT MOBILE With PowerPoint Mobile, you can open and view slide show presentations created on your computer. Many presentation elements such as slide transitions, animations, and URL links are also supported. See your User Guide for details on supported and unsupported features. Playing a presentation 1. -
Page 70: Excel Mobile
EXCEL MOBILE With Excel Mobile you can create and edit workbooks and templates on your smartphone. You can also edit workbooks and templates that you create on your computer. However, keep in mind that you may lose some of the information and formatting when you save the workbook on your smartphone. - Page 71 Inserting a function 1. Open the workbook where you want to insert the function. 2. Press Menu and select Insert > Function. 3. Select the Category list, and then select the type of function you want to insert. 4. Select the Function list, and then select the specific function you want to insert.
-
Page 72: Managing Files And Applications
M A N A G I N G F I L E S A N D A P P L I C A T I O N S FINDING INFORMATION With the built-in search features on your smartphone, you can find information quickly: Helps you find and dial your contacts by name or phone number. - Page 73 M A N A G I N G F I L E S A N D A P P L I C A T I O N S Exploring files and folders File Explorer lets you browse the contents of folders on your smartphone. The root folder on your smartphone is named My Device.
-
Page 74: Installing Applications
Center to start the download process. 5. Press Start and select Programs. 6. Select File Explorer 7. Go to the My Documents folder in File Explorer. 8. Tap the file you downloaded to start the installation program. www.palm.com/mytreo700wVerizon... -
Page 75: Setting Synchronization Options
M A N A G I N G F I L E S A N D A P P L I C A T I O N S Installing applications from your computer 1. Open My Computer or Windows Explorer on your computer. 2. - Page 76 4. Do any of the following: Check the box next to any items you want to synchronize. If ■ you cannot check a box, you might have to uncheck a box for the same information type elsewhere in the list. Uncheck the box next to any items you want to stop ■...
- Page 77 M A N A G I N G F I L E S A N D A P P L I C A T I O N S Synchronizing with Exchange Server You can sync with Exchange Server using a connection to a wireless network or a computer. 1.
-
Page 78: Using Expansion Cards
SDIO cards—which let you add accessories, such as a Wi-Fi card, to your smartphone. Expansion cards are sold separately. NOTE See “Regulatory Information” in the User Guide for guidance in using a Wi-Fi card with your Treo 700w smartphone. Sets the frequency while you are roaming outside the Sets whether items are sent as soon as you select Send ®... - Page 79 M A N A G I N G F I L E S A N D A P P L I C A T I O N S Removing and inserting expansion cards Your smartphone comes with a dummy card inside the expansion card slot.
-
Page 80: Customizing Your Smartphone
C U S T O M I Z I N G Y O U R S M A R T P H O N E TODAY SCREEN SETTINGS Selecting your Today screen background 1. Press Start and select Settings. 2. On the Personal tab, select Today 3. -
Page 81: Sound Settings
C U S T O M I Z I N G Y O U R S M A R T P H O N E SOUND SETTINGS Setting ringtones You can set different tones for different types of incoming phone calls and notifications. 1. - Page 82 7. Check the Vibrate when… boxes to turn the vibrate feature on/off based on the ringer switch setting. 8. (Optional) Select Play to preview the sound. 9. Repeat steps 4–7 to select ringtones for other types of calls. 10. Press OK Setting the ringer switch In certain situations, such as meetings and theaters, you need to turn off all sounds on your smartphone.
- Page 83 C U S T O M I Z I N G Y O U R S M A R T P H O N E Selecting Sounds & Notifications 1. Press Start and select Settings. 2. On the Personal tab, select Sounds & Notifications 3.
-
Page 84: Display And Appearance Settings
Indicates whether the sound plays more than once, if turned on. Repeat: ■ Display message on screen: ■ for the selected event. Indicates whether your smartphone vibrates to notify you about the selected Vibrate: ■ event. 5. Press OK DISPLAY AND APPEARANCE SETTINGS Adjusting the brightness 1. -
Page 85: Application Settings
C U S T O M I Z I N G Y O U R S M A R T P H O N E APPLICATION SETTINGS Arranging the Start menu 1. Press Start and select Settings. 2. On the Personal tab, select Menus 3. -
Page 86: Locking Your Smartphone And Info
LOCKING YOUR SMARTPHONE AND INFO Your smartphone includes several features that help you protect your smartphone from inadvertent use and keep your information private. The built-in security software lets you use your smartphone for emergency calls, such as dialing 911, even if it is locked. Manually disables all buttons and the screen’s touch-sensitive feature to prevent Keyguard: ■... - Page 87 C U S T O M I Z I N G Y O U R S M A R T P H O N E Using Auto-Keyguard and touchscreen lockout Auto-Keyguard lets you automatically lock the keyboard after a period of inactivity. 1.
-
Page 88: System Settings
SYSTEM SETTINGS Turning Wireless Services On/Off 1. Press Start and select Settings. 2. Select the System tab, and then select Power 3. Select the Wireless tab and turn your smartphone’s wireless features on/off. 4. Select the wireless signals you want to control when you turn Flight Mode on and off. 5. -
Page 89: Getting Help
G E T T I N G H E L P PERFORMING A SOFT RESET A soft reset is similar to restarting a computer. If your smartphone is not responding or you have trouble synchronizing with your computer, a soft reset may help. 1. -
Page 90: Where To Learn More
A complete guide to your smartphone’s features with detailed step-by-step User Guide: ■ instructions, tips, and troubleshooting info. To access the User Guide on your desktop computer, click Start > All Programs > Palm > Treo 700w User Guide, or go to: www.palm.com/Treo700wVerizon-UserGuide Online support from Palm: ■... - Page 91 Consult online Treo™ smartphone user discussion groups to swap Online forums: ■ information and learn about topics you may find nowhere else. Visit www.palm.com/us/support/us/support/Treo700wVerizon Verizon Wireless Customer Care: ■ available on the network, contact Verizon Wireless Customer Care or visit www.verizonwireless.com...
-
Page 93: Regulatory Information
FCC RF Safety Statement In order to comply with FCC RF exposure safety guidelines, users MUST use one of the following types of bodyworn accessories. ® A Palm brand body-worn accessory that has been tested for SAR compliance and is intended for use with this product. - Page 94 SDIO card; however, the user must ensure that the SDIO Wi-Fi card has been approved by the FCC for use with the Treo 700w smartphone. For a list of SDIO Wi-Fi cards approved by the FCC for use with the Treo 700w smartphone, please go to www.palm.com/us/support/...
- Page 95 Your Treo 700w smartphone is compatible with select TTY devices. You can connect a TTY/TDD machine to your smartphone through the headset jack, but you cannot use your headset jack with a headset or hands-free kit while this mode is enabled.
-
Page 96: Disclaimer And Limitation Of Liability
Copyright © 2005 Palm, Inc. All rights reserved. Palm, Treo, and the Palm and Treo logos are among the trademarks or registered trademarks owned by or licensed to Palm, Inc. A portion of this software includes software modules developed by the Independent JPEG group. MPEG Layer-3 audio decoding technology is licensed from Fraunhofer IIS and Thomson.