Table of Contents
Advertisement
Quick Links
Advertisement
Table of Contents

Related Manuals for Yamaha YPT255


Summary of Contents for Yamaha YPT255
- Page 1 DIGITAL KEYBOARD Owner’s Manual...
-
Page 2: Special Message Section
This product should be used only with the components supplied or; a rectly. Mismatches or incorrect installation may result in overheating and cart, rack, or stand that is recommended by Yamaha. If a cart, etc., is battery case rupture. used, please observe all safety markings and instructions that accom- Warning: pany the accessory product. - Page 3 Yamaha Corporation of America or its subsidiaries. devices. Compliance with FCC regulations does not guarantee * This applies only to products distributed by YAMAHA CORPORATION OF AMERICA. (class B) PSR-E253/YPT-255 Owner’s Manual...
-
Page 4: Important Safety Instructions
(1) this device may not cause harmful interference, and (2) this device must accept any interference received, including interference that may cause undesired operation. CAN ICES-3 (B)/NMB-3(B) • This applies only to products distributed by Yamaha Canada Music Ltd. • Ceci ne s’applique qu’aux produits distribués par Yamaha Canada Musique Ltée. (can_b_01) -
Page 5: About The Manuals
• Music rest • Online Member Product Registration *1: May not be included depending on your particular locale. Check with your Yamaha dealer. *2: The PRODUCT ID on the sheet will be needed when you fill out the User Registration form. -
Page 6: Table Of Contents
Thank you for purchasing this Yamaha Digital Keyboard! We recommend that you read this manual carefully so that you can fully take advantage of the advanced and convenient functions of the instrument. We also recommend that you keep this manual in a safe and handy place for future reference. - Page 7 For AC adaptor WARNING CAUTION • This AC adaptor is designed for use with only Yamaha electronic • When setting up, make sure that the AC outlet is easily accessible. instruments. Do not use for any other purpose. If some trouble or malfunction occurs, immediately turn off the power switch of the instrument and disconnect the AC adaptor •...
- Page 8 - Do not attempt to recharge batteries that are not designed to be Then have the device inspected by Yamaha service personnel. charged. - The power cord or plug becomes frayed or damaged.
-
Page 9: About This Manual
Yamaha cannot be held responsible for damage caused by improper use or modifications to the instrument, or data that is lost or destroyed. Always turn the power off when the instrument is not in use. -
Page 10: Setting Up
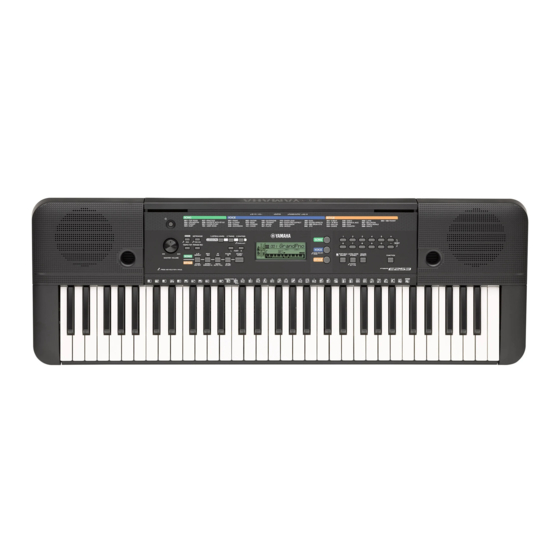
Panel Controls and Terminals Setting Up Front Panel Song List Voice List Display Style List (page 39) (page 34) (page 15) (page 40) PSR-E253/YPT-255 Owner’s Manual... -
Page 11: Rear Panel
Panel Controls and Terminals ] (Standby/On) switch ..... page 13 Rear Panel w [MASTER VOLUME] dial ...... page 14 e [DEMO] button........page 23 r [METRONOME] button......page 17 t [TEMPO/TAP] button......page 19 y [PHRASE REC] button ......page 29 u [1 LISTEN & LEARN] button....page 27 i [2 TIMING] button .........page 27 o [3 WAITING] button ......page 27 !0 LESSON PART... -
Page 12: Setting Up
Make sure that the power of the instrument is off. Although the instrument will run either from an AC Open the battery compartment cover located on adaptor or batteries, Yamaha recommends use of an the instrument’s bottom panel. AC adaptor whenever possible. An AC adaptor is more environmentally friendly than batteries and does not deplete resources. -
Page 13: Using The Music Rest
Setting Up Setting the battery type NOTICE • When the instrument’s sound is output to an external After installing new batteries and turning the power device, first turn on the power to the instrument, then to on, make sure to set the Battery Type appropriately the external device. -
Page 14: Auto Power Off Function
Setting Up Auto Power Off Function Selecting an EQ Setting for the Best Sound To prevent unnecessary power consumption, this instrument features an Auto Power Off function that Six different master equalizer (EQ) settings give you automatically turns the power off if the instrument is the best possible sound when listening through differ- not operated for a specified period of time. -
Page 15: Display Items And Basic Operations
Display Items and Basic Operations Display Items Notation Song/Voice/Style On/Off status Normally this indicates the notes you These indicate the operating Each indication is shown when the play. When the Song Lesson function condition of the instrument. corresponding function is turned on. is used, this indicates the current ... -
Page 16: Reference
Playing a Variety of Instrument Voices Reference In addition to piano, organ, and other “standard” keyboard instruments, this instru- ment has a large range of Voices that includes guitar, bass, strings, sax, trumpet, drums and percussion, and even sound effects—giving you a wide variety of musical sounds. -
Page 17: Using The Metronome
Playing a Variety of Instrument Voices Using the Metronome Press the [ULTRA-WIDE STEREO] but- ton again to turn it off. The instrument features a built-in metronome (a To select the Ultra-Wide Stereo type: device that keeps an accurate tempo), convenient for Press the [FUNCTION] button several times to call up practicing. -
Page 18: Playing Styles
Playing Styles This instrument includes the Auto Accompaniment feature that plays appropriate “Styles” (rhythm + bass + chord accompaniment). You can select from a huge variety of Styles covering a wide range of musical genres. Press the [STYLE] button, then use the Press the [SYNC START] button to turn number buttons [0]–[9], [+], [-] to select Synchro Start on. -
Page 19: Style Variations-Sections
Playing Styles After the Intro finishes, play the key- Style Variations—Sections board according to the progression of the Song you are playing. Each Style consists of “Sections” that allow you to vary the arrangement of the accompaniment to Play chords with your left hand while playing mel- match the song you are playing. -
Page 20: Chord Types For Style Playback
Playing Styles Chord Types for Style Playback For users who are new to chords, this chart conveniently shows how to play common chords in the Auto Accom- paniment range of the keyboard. Since there are many useful chords and many different ways to use them musi- cally, refer to commercially available chord books for further details. -
Page 21: Looking Up Chords Using The Chord Dictionary
Playing Styles Looking Up Chords Using the Dict. Chord Dictionary The Dictionary function is useful when you know the name of a certain chord and want to quickly learn how to play it. 2-2. Press the key labeled “M7” in the section between “CHORD TYPE ”... -
Page 22: Playing The Keyboard With Two Persons (Duo Mode)
Playing the keyboard with two persons (Duo mode) When the Duo mode is activated on this instrument, two different players can play the instrument simultaneously, with the same sound, over the same octave range—one per- son on the left and the other on the right. This is useful for learning applications, in which one person (a teacher, for example) plays a model performance and the other per- son watches and practices while sitting at the first person’s side. -
Page 23: Playing Songs
Playing Songs You can simply enjoy listening to the internal Songs, or use them with just about any of the functions, such as Lesson. Listening to a Demo Song BGM Playback Press the [DEMO] button to play the Demo With the default setting, pressing the [DEMO] button will play back only three internal Demo Songs repeat- Songs in sequence. -
Page 24: Song Fast Forward, Fast Reverse, And Pause
Playing Songs Song Fast Forward, Fast A-B Repeat Reverse, and Pause You can play back only a specific section of a Song repeatedly by setting the A point (start point) and B Like the transport controls on an audio player, this point (end point) in one-measure increments. -
Page 25: Turning Each Part On/Off
Playing Songs Turning Each Part On/Off As indicated above the panel buttons (shown below), a Song consists of two Parts, which can be turned on or off individually by pressing the corresponding but- ton, L or R. FurElise Lit: Track con- Unlit: Track is tains data muted or con-... -
Page 26: Hearing And Experiencing The Sound Of The Chords (Chord Study)
Hearing and Experiencing the Sound of the Chords (Chord Study) You can hear and experience the sound of the chords used in a typical performance by playing back Song numbers 091 to 102 (in the “Chord Study” category). Song numbers 091 to 097 are very simple songs consisting of a single chord (C, Dm, Em, F, G, Am, Bm;... -
Page 27: Using The Song Lesson Feature
Using the Song Lesson Feature You can use the selected Song for a left-hand, right-hand, or both-hands lesson. Try practicing with three Song Lesson types while referring to the music scores in the Song Book (page 5). Press any one of the [1 LISTEN & Listening, Timing and Waiting LEARN], [2 TIMING] or [3 WAITING] but- ... -
Page 28: Playing An External Audio Device With The Built-In Speakers
Playing an External Audio Device with the Built-in Speakers You can output the sound of an external audio device, such as a portable music player, with the built-in speakers of this instrument by connecting it via a cable. This lets you play the keyboard along with playback of your music player. -
Page 29: Recording Your Performance (Phrase Recording)
Recording Your Performance (Phrase Recording) You can record your performance as a User Song (Song number 103), which can then be played back on the instrument. NOTE • A total of approximately 300 notes can be recorded to the User Song. Select the desired Voice. -
Page 30: The Functions
The Functions The Functions settings provide access to a range of detailed instrument parameters such as Tuning, Split Point, Voices and Effects. Press the [FUNCTION] button several Set the value by using the number but- times until the desired item appears. tons [0]–[9], [+], [-]. - Page 31 The Functions Function Function name Display Range/Settings Default Value Descriptions Number Effects 1–3 (Hall 1–3) 4–5 (Room 1–2) Reverb Reverb Type 6–7 (Stage 1–2) Determines the Reverb type, including off (10). (page 41) 8–9 (Plate 1–2) 10 (Off) Reverb Level RevLevel 000–127 Determines how much of the Voice’s signal is sent to the Reverb effect.
-
Page 32: Backup And Initialization
Backup and Initialization Backup Parameters Initialization The following Backup parameters will be maintained You can initialize your original data via the following method. even if the power is turned off. Backup Clear Backup parameters This operation initializes the backup parameters. •... -
Page 33: Appendix
Troubleshooting Appendix Problem Possible Cause and Solution When the instrument is turned on or off, a popping This is normal and indicates that the instrument is receiving electrical power. sound is temporarily produced. When using a mobile phone, noise is produced. Using a mobile phone in close proximity to the instrument may produce inter- ference. -
Page 34: Voice List
Voice List Maximum Polyphony The instrument has 32-note maximum polyphony. This means that it can play a NOTE maximum of up to 32 notes at once, regardless of what functions are used. Auto • Some voices may sound continuously or have a long decay after the notes have accompaniment uses a number of the available notes, so when auto accompaniment been released while the sustain pedal... - Page 35 Voice List Voice Voice Voice Voice Name Voice Name Voice Name Shakuhachi PERCUSSION Octave Brass Whistle Vibraphone Orchestra Tutti Ocarina Soft Vibraphone Octave Choir SYNTH LEAD Marimba Jazz Section Square Lead 1 Soft Marimba Flute & Clarinet Square Lead 2 Sine Marimba SOUND EFFECTS LM Square...
-
Page 36: Drum Kit List
Drum Kit List • “ ” indicates that the drum sound is the same as “Standard Kit 1” . • Each percussion voice uses one note. Voice No. Keyboard Standard Kit 1 Standard Kit 2 Room Kit Rock Kit Electronic Kit Analog Kit Note# Note... - Page 37 Drum Kit List Voice No. Keyboard Standard Kit 1 Dance Kit Jazz Kit Brush Kit Symphony Kit Note# Note C# 0 Surdo Mute Surdo Open D# 0 Hi Q Whip Slap Scratch Push Scratch Pull Finger Snap G# 0 Click Noise Metronome Click A# 0 Metronome Bell...
- Page 38 Drum Kit List * Actual keyboard notes of the SFX Kit 1 and 2 are one octave lower than the ones described in the list. Voice No. Keyboard SFX Kit 1 * SFX Kit 2 * Sound Effect Kit Note# Note C# 0 D# 0...
-
Page 39: Song List
Song Name Song No. Song Name TOP PICKS “The Surprise”Symphony (F.J. Haydn) Demo 1 (Yamaha Original) To a Wild Rose (E.A. MacDowell) Demo 2 (Yamaha Original) Chanson du Toreador (G. Bizet) Demo 3 (Yamaha Original) O Mio Babbino Caro (G. Puccini) -
Page 40: Style List
Style List Style No. Style Name Style No. Style Name Style No. Style Name R&B Pianist 8Beat Soul Stride 8BeatModern DetroitPop PianoSwing 60sGtrPop 6/8Soul Arpeggio 8BeatAdria CrocoTwist Habanera 60s8Beat Rock&Roll SlowRock 8Beat ComboBoogie 8BeatPianoBallad OffBeat 6/8Blues 6/8PianoMarch 60sRock Country PianoWaltz HardRock CountryPop RockShuffle... -
Page 41: Effect Type List
Effect Type List Reverb Types Reverb Type Description 01–03 Hall 1–3 Concert hall reverb. 04–05 Room 1–2 Small room reverb. 06–07 Stage 1–2 Reverb for solo instruments. 08–09 Plate 1–2 Simulated steel plate reverb. No effect. Chorus Types Chorus Type Description 01–03 Chorus 1–3... -
Page 42: Specifications
• Footswitch: FC4A/FC5 * The contents of this manual apply to the latest specifications as of the printing date. Since Yamaha makes continuous improvements to the product, this manual may not apply to the specifications of your particular product. To obtain the latest manual, access the Yamaha website then download the manual file. -
Page 43: Index
Index A-B Repeat ........24 Keyboard Display ...... 15 Ultra-Wide Stereo ..... 17 AC Adaptor ........12 ACMP ........18 Lesson ........27 Voice ......... 16 Auto Accompaniment ....18 Voice List ........34 AUTO FILL ........19 Auto Power Off ....14 , 31 MAIN ......... - Page 44 OBSERVERA! Entsorgung leerer Batterien (nur innerhalb Deutschlands) Apparaten kopplas inte ur växelströmskällan (nätet) så länge som den ar ansluten till vägguttaget, även om själva apparaten har stängts av. Leisten Sie einen Beitrag zum Umweltschutz. Verbrauchte Batterien oder Akkumulatoren dürfen nicht in den Hausmüll. Sie können bei ADVARSEL: Netspændingen til dette apparat er IKKE afbrudt, einer Sammelstelle für Altbatterien bzw.
- Page 45 Warranty service will only be provided for defective products within the Warranted Area. Contact your local authorized Yamaha dealer who will advise you of the procedures to be followed. If this is not successful, contact Yamaha at the address, telephone number or website shown below. Yamaha may request that you send the defective product to a local authorized Yamaha Servicer or authorize return of the defective product to Yamaha for repair.
- Page 46 For the AC adaptor with a Removable Plug Für den Netzadapter mit abziehbarem Stecker Do not remove the plug from the AC adaptor. If Ziehen Sie den Stecker nicht vom Netzadapter the plug is removed accidentally, slide the plug ab. Sollte der Stecker unabsichtlich entfernt into place without touching the metallic parts, werden, schieben Sie den Stecker wieder and then push the plug in completely until it clicks.
- Page 47 PSR-E253/YPT-255 Owner’s Manual...
- Page 48 For details of products, please contact your nearest Yamaha representative or the authorized distributor listed below. MALTA NORTH AMERICA ASIA Olimpus Music Ltd. CANADA THE PEOPLE’S REPUBLIC OF CHINA The Emporium, Level 3, St. Louis Street Msida Yamaha Canada Music Ltd.