Table of Contents
Advertisement
Quick Links
DIGITAL KEYBOARD
Owner's Manual
How to use this manual
Before using the PSR-E223/YPT-220, be sure to read the "PRECAUTIONS" section on pages 4–5.
Follow the instructions described in "Setting Up," then try out the simple operations in "Quick Guide."
"Reference" provides detailed descriptions and procedures for getting the most out of the instrument.
After you've read the manual, keep it safe and handy for future reference.
Data List
The Data List contains MIDI related information. The Data List is available for downloading from the
Yamaha Manual Library at: http://www.yamaha.co.jp/manual/
EN
Advertisement
Table of Contents

Related Manuals for Yamaha PSR-E223


Summary of Contents for Yamaha PSR-E223
- Page 1 Owner’s Manual How to use this manual Before using the PSR-E223/YPT-220, be sure to read the “PRECAUTIONS” section on pages 4–5. Follow the instructions described in “Setting Up,” then try out the simple operations in “Quick Guide.” “Reference” provides detailed descriptions and procedures for getting the most out of the instrument.
-
Page 2: Special Message Section
Yamaha. This product should be used only with the components supplied or; a cart, rack, or stand that is recommended by Yamaha. If a cart, etc., is used, please observe all safety markings and instructions that accompany the accessory product. - Page 3 * This applies only to products distributed by YAMAHA CORPORATION OF AMERICA. other electronic devices. Compliance with FCC regula- tions does not guarantee that interference will not occur in all installations.
- Page 4 • Only use the voltage specified as correct for the instrument. The required voltage is printed on the name plate of the instrument. • Use the specified adaptor (PA-130 or an equivalent recommended by Yamaha) only. Using the wrong adaptor can result in damage to the instrument or overheating.
-
Page 5: Logos
AC outlet. Then have the instrument inspected by qualified Yamaha service personnel. Yamaha cannot be held responsible for damage caused by improper use or modifications to the instrument, or data that is lost or destroyed. Always turn the power off when the instrument is not in use. - Page 6 Listening Listening to the Songs The instrument contains a wide variety of 102 preset songs. PSR-E223/YPT-220 Owner’s Manual > pages 12, 13 > page 32 > page 18 >...
-
Page 7: Table Of Contents
What is MIDI? ... 45 Transferring Performance Data To and From Another Instrument... 45 Appendix Troubleshooting ...47 Voice List...48 Maximum Polyphony ... 48 Drum Kit List ...52 Style List...54 Song List ...55 Effect Type List ...56 Specifications ...57 Index ...58 PSR-E223/YPT-220 Owner’s Manual... -
Page 8: Setting Up
Be sure to do the following operations BEFORE turning on the power. Power Requirements Although the instrument will run either from an optional AC adaptor or batteries, Yamaha recommends use of an AC adaptor whenever possible. An AC adaptor is more environmentally friendly than batteries and does not deplete resources. -
Page 9: Connecting Headphones And External Audio Equipment
Connecting a footswitch The sustain function lets you produce a natural sustain as you play by pressing an optional footswitch. Plug the Yamaha FC4 or FC5 footswitch into the SUSTAIN jack and use it to switch sustain on and off. NOTE •... -
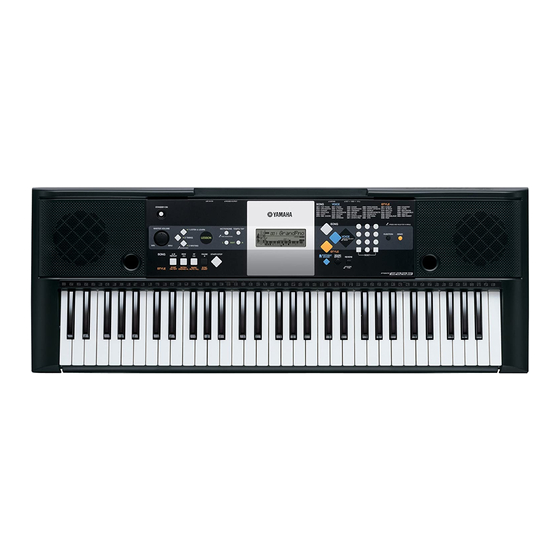
Page 10: Panel Controls And Terminals
@1 [SOUND EFFECT] button ...page 15 @2 [REVERB] button ...page 32 @3 Drum Kit...page 15 ■ Rear Panel @4 MIDI IN/OUT terminals ...page 45 @5 SUSTAIN jack...page 9 @6 PHONES/OUTPUT jack ...page 9 @7 DC IN 12V jack...page 8 PSR-E223/YPT-220 Owner’s Manual ■ Front Panel... - Page 11 Display (page 27) GrandPno ■ Rear Panel GrandPno Song List (page 55) Voice List (page 48) Panel Controls and Terminals Style List (page 54) PSR-E223/YPT-220 Owner’s Manual...
-
Page 12: Quick Guide
Try playing a variety of instrument Voices Press the [VOICE] button. The Voice number and name are displayed. PSR-E223/YPT-220 Owner’s Manual Grand Piano Voice Voice number Voice name GrandPno... -
Page 13: Playing The Grand Piano Voice
When you simply want to play a piano Voice, all you have to do is press one convenient button. Press the [PORTABLE GRAND] button. The Voice “Grand Piano1” will automatically be selected as the Main Voice. Changing the Voices The Voice shown here Flute becomes the Main Voice for the instrument. PSR-E223/YPT-220 Owner’s Manual... -
Page 14: Using The Metronome
TAP] button to call up the Tempo setting in the display, then press the [+] button to raise the tempo, or press the [-] button to lower it. You can also set the tempo using the number buttons on the front panel. PSR-E223/YPT-220 Owner’s Manual Metronome Fun Sounds Current Tempo value... -
Page 15: Playing The Drum Kit Voice
Try out each key and enjoy the sounds. Don’t forget the black keys! After trying out these sounds, press the [PORTABLE GRAND] button to reset the instrument Voice to the default setting of Voice “Grand Piano1.” Changing the Voices PSR-E223/YPT-220 Owner’s Manual... -
Page 16: Playing Songs
Listening to a Song. Select and Listen to a Specific Song Press the [SONG] button. The Song number and name are displayed. PSR-E223/YPT-220 Owner’s Manual Song number Song name Demo 1... -
Page 17: Select A Song
Playing Songs NOTE • Songs can be played at any tempo you desire—fast or slow (page 37). PSR-E223/YPT-220 Owner’s Manual... -
Page 18: Play With A Style
While you play, you can automatically add specially created intros and endings, as well as variations in the rhythm/chord patterns, for more dynamic, professional-sounding performances. Auto Accompani- Try playing chords with your left hand. PSR-E223/YPT-220 Owner’s Manual Split Point Play a melody with your right hand. ment range Before Performance Select the “Strings 1”... -
Page 19: Play Along With The Styles
NOTE • Since the Pianist category LoveSong LoveSong Flashes when Sync Start is on. PSR-E223/YPT-220 Owner’s Manual Play with a Style Styles (093–100) have no rhythm parts, no sound will be produced if you start rhythm-only playback. To use these Styles, turn on... - Page 20 24. Auto Accompani- ment range Stop playing. Playback will stop as soon as you press the [START/STOP] but- ton. PSR-E223/YPT-220 Owner’s Manual LoveSong Split Point (page 41) Split Point NOTE • If you press the [START/...
- Page 21 Play with a Style Practice — Aura Lee — Style: 018 LoveSong Voice: 034 Strings 1 Composer: G. Poulton PSR-E223/YPT-220 Owner’s Manual...
-
Page 22: Changing The Tempo Of The Style
Styles can be played at any tempo you desire—fast or slow. Press the [TEMPO/TAP] button to call up the Tempo setting in the display after selecting a Style. Set the Tempo by using the number buttons [0]–[9], [+], [-]. PSR-E223/YPT-220 Owner’s Manual Current Tempo value Tempo NOTE •... -
Page 23: Pattern Variation (Sections)
The main accompaniment pattern plays, and repeats indefi- nitely until another section’s button is pressed. Fill-in Adding a A Fill-in pattern is automatically added before changing to section A or B. PSR-E223/YPT-220 Owner’s Manual Play with a Style Ending This is the end of the Song. -
Page 24: Playing Chords Along With Score Of The Song
(including sharps or flats) at the left of the chord name shows root note. The chord name is determined by a root note and chord type like as major or minor, and so on. PSR-E223/YPT-220 Owner’s Manual Melody Root note... -
Page 25: Chords
• To play a minor seventh chord Press the root note together with the nearest white key to the left of it. PSR-E223/YPT-220 Owner’s Manual Play with a Style ★ indicates the root note. Major Seventh Press the root note together... -
Page 26: Reference
Hold down this button until the function calls up. PSR-E223/YPT-220 Owner’s Manual Select a basic function. Display (page 27) GrandPno ● Number buttons [0]–[9] The number buttons can be used to directly enter a Song, Style or Voice number or parameter value. -
Page 27: Display
Lit: Track contains data Unlit: Track is muted or contains no data Measure Indicates the current mea- sure during playback of a Song. Beat Display Indicates the beat of the cur- rent Style or Song with flash- ing arrows. PSR-E223/YPT-220 Owner’s Manual... -
Page 28: Song Lesson
Song Lesson Yamaha Education Suite 5 You can select any Song you like and use it for a left-hand, right-hand, or both-hands lesson. Song Lesson lets you learn how to play Songs in three easy steps. ■ Lesson Flow Select a Song Select the part you want for your lesson. -
Page 29: Start Lesson
You can stop the Lesson mode at any time by pressing the [START/ STOP] button. Right-hand lesson Right Both-hands lesson BothHand LISTEN PSR-E223/YPT-220 Owner’s Manual Song Lesson NOTE • Even after Lesson 1 has started and the Song is playing, you can still select the part. -
Page 30: Lesson 2 (Timing)
3, your performance will be evaluated in four levels: OK, Good, Very Good, or Excellent. Good Very0Good! Excellent! PSR-E223/YPT-220 Owner’s Manual TIMING NOTE • The Split Point is fixed and it can- not be changed. For the left-hand lesson, it is fixed at 59 or B2; for the left-hand chord lesson, it is fixed at 54 or F # 2. -
Page 31: Lesson 3 (Waiting)
• Regardless of how strongly you play the keys, the level of the sound does not change. As a result, your performance may not sound exactly like the model or example, depend- ing on the selected song. PSR-E223/YPT-220 Owner’s Manual... -
Page 32: Voice Settings
Select the desired Reverb Type by using the number buttons [0]–[9], [+], [-]. Refer to the Reverb Type list on page 56 for details. PSR-E223/YPT-220 Owner’s Manual You can adjust the Reverb depth in the Func- tion Settings (page 44). NOTE •... -
Page 33: Adding Panel Sustain
Set the Voice volume by using the number buttons [0]–[9], [+], [-]. NOTE • Press the [+] and [-] buttons simultaneously to instantly reset the value to its default setting. The default setting varies depending on the Voice. PSR-E223/YPT-220 Owner’s Manual Voice Settings... -
Page 34: Transpose
• Press the [+] and [-] buttons simultaneously to instantly reset the value to its default setting (00). PSR-E223/YPT-220 Owner’s Manual Tuning You can fine tune the pitch of the entire instru- ment. The overall tuning of the instrument can be shifted up or down by a maximum of 100 cents in 1-cent increments (100 cents = 1 semitone). -
Page 35: Octave
Voice number “000” by using the number buttons [0]–[9], [+], [-]. Appears when One Touch Setting is on. SprnoSax This turns the One Touch Setting feature on. One Touch Setting will be turned off if you select any other Voice number. PSR-E223/YPT-220 Owner’s Manual Voice Settings... -
Page 36: Setting The Metronome Time Signature
0 to 15 beats. NOTE • The time signature cannot be changed for Songs and Styles, because each has a fixed time signature. PSR-E223/YPT-220 Owner’s Manual Setting the Metronome Volume Press the [FUNCTION] button a number of times until “MetroVol” appears. -
Page 37: Song Settings
Song. Track 2 Track 1 Pressing one of the Track buttons [R] or [L] will mute the corre- sponding track during Song playback. Demo 1 Lit—track con- tains data. PSR-E223/YPT-220 Owner’s Manual Unlit—track is muted or con- tains no data. -
Page 38: Practice Makes Perfect
• If you want to set the start point “A” at the very beginning of the Song press the [A-B REPEAT] button before starting playback of the Song. PSR-E223/YPT-220 Owner’s Manual You can stop repeat playback at any time by pressing the [A-B REPEAT] button. -
Page 39: Tap Start
“SONG MELODY VOICE” appears in the display for a few seconds, indicating that the Voice selected in Step 2 has replaced the Song’s original melody Voice. Hold for longer than a second. PSR-E223/YPT-220 Owner’s Manual Song settings... -
Page 40: Style (Auto Accompaniment) Functions
• If you press the [SYNC START] button during Style playback, playback will stop immediately and the Sync Start standby mode will be engaged (beat arrows will flash). PSR-E223/YPT-220 Owner’s Manual ■ Tap Start You can supply a count-in at any tempo you like to start playback. -
Page 41: Setting The Split Point
“ROOT .” (The note doesn’t sound.) The root note you set is shown in the display. Style (Auto Accompaniment) Functions Hold for longer than a second. > Keys for chord type Keys for root dictionary dictionary Dict. PSR-E223/YPT-220 Owner’s Manual... - Page 42 Try playing a chord in the auto accompani- ment section of the keyboard, checking the indications in the display. When you’ve played the chord properly, a bell sound signals your success and the chord name in the display flashes. PSR-E223/YPT-220 Owner’s Manual...
-
Page 43: Function Settings
Function item Set the value by using the number buttons [0]–[9], [+], [-]. For on/off settings, use [+]/[-] buttons. NOTE • Press the [+] and [-] buttons simultaneously to instantly reset the numeric parameter to its default setting. PSR-E223/YPT-220 Owner’s Manual... - Page 44 Initial Setup Send InitSend Time Signature TimeSig Metronome Volume MetroVol Demo Cancel D-Cancel PSR-E223/YPT-220 Owner’s Manual Range/settings 000–127 Determines the volume of the Style. 000–127 Determines the volume of the Song. -12–00–12 Determines the pitch of the instrument by semitone incre- ments.
-
Page 45: About Midi
• Connect the PSR-E223/YPT-220 to external equipment only after turning off power for all devices. Then, turn on the power, first to the PSR-E223/YPT-220, then to the con- nected external equipment. Reverse this order when you turn the power off. -
Page 46: Midi Settings
Song, Style, and metronome functions will not start. PSR-E223/YPT-220 Panel Setting Trans- mission (Initial Send) Sends the PSR-E223/YPT-220 panel settings to an external MIDI device. When recording a PSR-E223/YPT-220 perfor- mance to an external sequencer or similar equip-... -
Page 47: Appendix
The polarity of the footswitch is reversed. Make sure that the footswitch plug is properly connected to the SUSTAIN jack before turning on the power. Always press the [STYLE] button first when you are going to use any style-related function. PSR-E223/YPT-220 Owner’s Manual... -
Page 48: Voice List
Acoustic Bass Finger Bass Pick Bass Fretless Bass Slap Bass 1 Slap Bass 2 Synth Bass 1 Synth Bass 2 PSR-E223/YPT-220 Owner’s Manual Bank Select Voice Voice Name (0–127) (0–127) NOTE • The Voice List includes MIDI program change numbers for each voice. Use these program change numbers when playing the instrument via MIDI from an external device. - Page 49 Harpsichord KSP Clavi KSP Vibraphone KSP Marimba KSP Stereo Strings Stereo Slow Strings Stereo Choir Mellow Synth Bass French Horn Solo Square Lead 2 Sawtooth Lead 2 Slow Violin Slow Tremolo Strings Slow Strings Legato Strings LM Square PSR-E223/YPT-220 Owner’s Manual...
- Page 50 Dulcimer 2 70's Drawbar Organ 1 Church Organ 2 12-string Guitar 60's Strings Orchestra Hit 2 Trumpet & Trombone Section Big Five Round Glockenspiel Sitar 2 PSR-E223/YPT-220 Owner’s Manual Bank Select Voice Voice Name (0–127) (0–127) MIDI Program Voice Name Change# (1–128)
- Page 51 Scratch Split Wind Chime Telephone Ring 2 Car Engine Ignition Car Tires Squeal Car Passing Car Crash Siren Train Jet Plane Starship Burst Roller Coaster Submarine Laugh Scream Punch Heartbeat Footsteps Machine Gun Laser Gun Explosion Firework PSR-E223/YPT-220 Owner’s Manual...
-
Page 52: Drum Kit List
G# 5 G# 4 A# 5 A# 4 C# 6 C# 5 D# 6 D# 5 F# 6 F# 5 PSR-E223/YPT-220 Owner’s Manual 127/0/1 127/0/2 127/0/9 Alternate Standard Kit 1 Standard Kit 2 Room Kit Group Surdo Mute Surdo Open... - Page 53 Car Engine Ignition Horse Neigh Car Tires Squeal Car Passing Lion Car Crash Scratch Siren Train Jet Plane Get up! Starship Whoow! Burst Roller Coaster Submarine Huuaah! Laugh Scream Punch Heartbeat Footsteps Uh!+Hit Machine Gun Laser Gun Explosion Firework PSR-E223/YPT-220 Owner’s Manual...
-
Page 54: Style List
Ibiza SwingHouse Clubdance ClubLatin Garage1 Garage2 TechnoParty UKPop HipHopGroove HipShuffle HipHopPop Disco 70’sDisco LatinDisco SaturdayNight DiscoHands PSR-E223/YPT-220 Owner’s Manual Style Style Name Swing & Jazz BigBandFast BigBandBallad JazzClub Swing1 Swing2 Five/Four Dixieland Ragtime R & B Soul DetroitPop 6/8Soul CrocoTwist Rock&Roll... -
Page 55: Song List
I’ve Been Working On The Railroad (Traditional) My Darling Clementine (Traditional) Auld Lang Syne (Traditional) Grandfather’s Clock (H.C. Work) Amazing Grace (Traditional) My Bonnie (H.J. Fulmer) Yankee Doodle (Traditional) Joy to the World (G.F. Händel) Ave Maria (F. Schubert) PSR-E223/YPT-220 Owner’s Manual... -
Page 56: Effect Type List
08–09 Plate 1–2 ● Chorus Types Chorus Type Chorus 1 Chorus 2 Flanger 1 Flanger 2 PSR-E223/YPT-220 Owner’s Manual Description Concert hall reverb. Small room reverb. Reverb for solo instruments. Simulated steel plate reverb. No effect. Description Conventional chorus program with rich, warm chorusing. -
Page 57: Specifications
Yamaha Corp. reserves the right to change or modify products or specifications at any time without prior notice. Since specifications, equipment or options may not be the same in every locale, please check with your Yamaha dealer. PSR-E223/YPT-220 Owner’s Manual... -
Page 58: Index
Function ... 43 Function Setting List ... 44 Grade ... 30 Initial Send ... 44, 46 Intro ... 23 PSR-E223/YPT-220 Owner’s Manual Keyboard Display ... 27 Left ... 29 Lesson ... 28 LISTEN & LEARN ... 28 Local ... 44, 46 Main/Auto fill ... - Page 59 Timing ... 30 Track ... 27, 37 Transpose ... 34 Tuning ... 34 Voice ... 12, 32 Voice List ... 48 Volume (Song) ... 38 Volume (Style) ... 40 Volume (Voice) ... 33 Waiting ... 31 XGlite ... 5 PSR-E223/YPT-220 Owner’s Manual...
- Page 60 PSR-E223/YPT-220 Owner’s Manual...
- Page 61 PSR-E223/YPT-220 Owner’s Manual...
-
Page 62: Limited Warranty
If during the first 90 days that immediately follows the purchase date, your new Yamaha product covered by this warranty is found to have a defect in material and/or workmanship, Yamaha and/or its authorized representative will repair such defect without charge for parts or labor. - Page 63 For details of products, please contact your nearest Yamaha representative or the authorized distributor listed below. Pour plus de détails sur les produits, veuillez-vous adresser à Yamaha ou au distributeur le plus proche de vous figurant dans la liste suivante.
- Page 64 Yamaha Home Keyboards Home Page http://music.yamaha.com/homekeyboard/ Yamaha Manual Library http://www.yamaha.co.jp/manual/ U.R.G., Pro Audio & Digital Musical Instrument Division, Yamaha Corporation © 2009 Yamaha Corporation WQ39460 XXXPOTYX.X-01A0 Printed in China...