Table of Contents
Advertisement
Quick Links
01GB00INE-W957A.book Page 1 Monday, April 21, 2014 7:49 PM
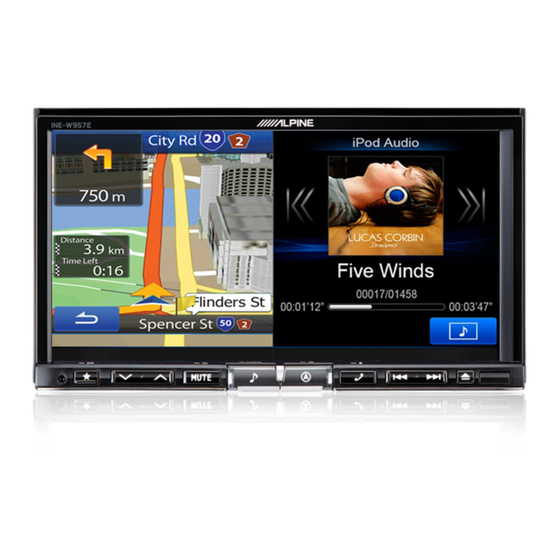
8-INCH ADVANCED NAVI STATION
X008AU/X008EU
7-INCH ADVANCED NAVI STATION
INE-W957A/INE-W957E
(X008AU/INE-W957A only)
ALPINE ELECTRONICS OF AMERICA, INC.
19145 Gramercy Place, Torrance,
California 90501, U.S.A.
Phone 1-800-ALPINE-1 (1-800-257-4631)
ALPINE ELECTRONICS MARKETING, INC.
1-7, Yukigaya-Otsukamachi, Ota-ku,
Tokyo 145-0067, JAPAN
Phone: 03-5499-4531
ALPINE ELECTRONICS FRANCE S.A.R.L.
(RCS PONTOISE B 338 101 280)
98, Rue de la Belle Etoile, Z.I. Paris Nord Il,
B.P. 50016, 95945 Roissy Charles de Gaulle
Cedex, France
Phone 01-48638989
01GB01INE-W957A.fm
AUDIO / VISUAL SECTION
• OWNER'S MANUAL
Please read before using this equipment.
ALPINE ELECTRONICS OF AUSTRALIA PTY. LTD.
161-165 Princes Highway, Hallam
Victoria 3803, Australia
Phone 03-8787-1200
ALPINE ELECTRONICS GmbH
Wilhelm-Wagenfeld-Str. 1-3, 80807 München, Germany
Phone 089-32 42 640
ALPINE ELECTRONICS OF U.K. LTD.
Alpine House
Fletchamstead Highway, Coventry CV4 9TW, U.K.
Phone 0870-33 33 763
R R
ALPINE ITALIA S.p.A.
Viale C. Colombo 8, 20090 Trezzano
Sul Naviglio (MI), Italy
Phone 02-484781
ALPINE ELECTRONICS DE ESPAÑA, S.A.
Portal de Gamarra 36, Pabellón, 32
01013 Vitoria (Alava)-APDO 133, Spain
Phone 945-283588
Designed by ALPINE Japan
68-24567Z47-A
ALPINE INE-W957A 68-24567Z47-A (EN)
EN
Advertisement
Chapters
Table of Contents

Related Manuals for Alpine INE-W957A


Summary of Contents for Alpine INE-W957A
- Page 1 INE-W957A/INE-W957E (X008AU/INE-W957A only) • OWNER’S MANUAL Please read before using this equipment. ALPINE ELECTRONICS OF AMERICA, INC. ALPINE ELECTRONICS OF AUSTRALIA PTY. LTD. ALPINE ITALIA S.p.A. 161-165 Princes Highway, Hallam Viale C. Colombo 8, 20090 Trezzano 19145 Gramercy Place, Torrance,...
- Page 2 01GB00INE-W957A.book Page 2 Monday, April 21, 2014 7:49 PM 01GB02INE-W957A.fm ALPINE INE-W957A 68-24567Z47-A (EN)
-
Page 3: Table Of Contents
Adjusting the Screen Viewing Angle ..... 20 Selecting Folders (Concerning Adjusting the Volume ........20 MP3/WMA/AAC) ........32 Lowering Volume Quickly ......20 Searching from CD Text .........32 File/Folder Name Search (Concerning MP3/ WMA/AAC) ..........32 About MP3/WMA/AAC .........33 01GB03INE-W957ATOC.fm ALPINE INE-W957A 68-24567Z47-A (EN) - Page 4 Backlighting ..........42 About Time Correction ........49 Adjusting the Minimum Level of About the Crossover ........50 Backlight ..........42 Adjusting the Dimmer of Button Lighting at Night ............42 Switching the Display Colour ..... 42 01GB03INE-W957ATOC.fm ALPINE INE-W957A 68-24567Z47-A (EN)
- Page 5 Answering a Call ..........62 ® Adjusting ringtone volume ......62 Setting the BLUETOOTH Pandora (X008AU/ INE-W957A only) ........55 Hanging up the Telephone ......62 TuneIt Setting ..........55 Calling ............62 Setting the Communication Mode with a Using Short Cut Dialing to Make a Call ..62 Smartphone ..........
- Page 6 ON/OFF setting and adjustment of Caution QuickMix ............84 display location ........73 Bookmarking a Desired Track or Artist ..85 Other Camera Operation ......... 74 About the adjustment of the Caution display location ............. 74 01GB03INE-W957ATOC.fm ALPINE INE-W957A 68-24567Z47-A (EN)
- Page 7 END USER LICENCE AGREEMENT (Microsoft) ..........95 END USER LICENCE AGREEMENT (NAVTEQ) ..........96 Installation and Connections Warning ..........98 Caution ........... 98 Precautions ..........98 Installation ............99 Connections ..........102 System Example ........... 104 NAVIGATION SECTION 01GB03INE-W957ATOC.fm ALPINE INE-W957A 68-24567Z47-A (EN)
-
Page 8: Operating Instructions
They contain instructions on how to use this • Glance at the screen only when necessary and safe to do so. If product in a safe and effective manner. Alpine cannot be prolonged viewing of the screen is necessary, stop in a safe and responsible for problems resulting from failure to observe the legal manner and location. -
Page 9: Caution
Failure to do so may cause personal injury or damage to the NAVIGATION SYSTEM INSTRUCTS YOU TO PERFORM AN product. Return it to your authorized Alpine dealer or the nearest Alpine Service Centre for repairing. UNSAFE OR ILLEGAL MANEUVER, OR PLACES YOU IN AN UNSAFE SITUATION OR AREA. -
Page 10: Notice
• High humidity and water • Excessive dust If you have problems, do not attempt to repair the unit yourself. • Excessive vibrations Return it to your Alpine dealer or the nearest Alpine Service Station for servicing. Correct Handling Never Attempt the Following Do not drop the disc while handling. -
Page 11: Discs Playable On This Unit
Using The discs listed below can be played on this unit. such accessories can cause operational problems. We recommend not using these accessories on discs played in Alpine DVD players. Mark (logo) Recorded Content... - Page 12 01GB00INE-W957A.book Page 12 Monday, April 21, 2014 7:49 PM Discs that cannot be played Tips for making your own discs DVD-ROMs, DVD-RAMs, CD-ROMs (excluding MP3/WMA/ The X008AU/X008EU/INE-W957A/INE-W957E plays DVD ® AAC files), photo CDs, etc. Video, DivX , Audio CD and has a built in MP3/WMA/AAC decoder.
- Page 13 • This unit is compatible with discs recorded in the standard DVD-Video format. Alpine accepts no responsibility for lost data, etc., even if data, etc., • Note that discs not finalised (processed to enable to play on is lost while using this product.
- Page 14 Bluetooth SIG, Inc. and any use of such marks by Alpine Electronics, Inc. is under licence. • The terms HDMI and HDMI High-Definition Multimedia Interface, and the HDMI Logo are trademarks or registered trademarks of HDMI Licensing LLC in the United States and other countries.
-
Page 15: Features
01GB00INE-W957A.book Page 15 Monday, April 21, 2014 7:49 PM Features Auto user setting change With the X008AU/X008EU/INE-W957A/INE-W957E, you can register up to two users. Each user can configure their own preferred settings. By registering their respective BLUETOOTH devices to the unit, each user can be identified automatically. -
Page 16: Easy Sound Setting By Car Type (I-Personalize)
Audio/Visual Full screen Touch Press the button. During video playback, [Dual Wide], [Dual Full] and [Full Screen] appear on the screen for selecting the screen size. For details, refer to “Switching the Dual Screen Display” (page 29). 01GB05INE-W957A.fm ALPINE INE-W957A 68-24567Z47-A (EN) -
Page 17: Dual Screen Display Position
To switch the screens, touch the middle of the Audio/Visual screen and drag it to the navigation screen. The screens will switch positions when you remove your finger. • Drag and drop the navigation screen will change to navigation full screen. 01GB05INE-W957A.fm ALPINE INE-W957A 68-24567Z47-A (EN) -
Page 18: Getting Started
Alpine dealer. purchased installation kit for each car type. Controllable with Remote Control This unit can be controlled with an optional Alpine remote control. Location of Controls For details, consult your Alpine dealer. Point the optional remote control transmitter at the remote control sensor. -
Page 19: Turning The System On
01GB00INE-W957A.book Page 19 Monday, April 21, 2014 7:49 PM Turning the System On Inserting/Ejecting a Disc With the Alpine system, when the ignition key is turned to ACC or ON, the opening screen will be automatically displayed. Inserting the Disc When the system is used for the first time, the Press c (Eject). -
Page 20: Adjusting The Screen Viewing Angle
(page 25) The audio level will decrease by about 20 dB. i-Personalize button: Use to configure the i-Personalize Pressing MUTE again will bring the audio back to its Setup (page 23) previous level. 01GB05INE-W957A.fm ALPINE INE-W957A 68-24567Z47-A (EN) -
Page 21: User Registration
Also, a cellular phone can be used as a hands-free phone. For details, see “BLUETOOTH Setting” (page 56). • Touching [Do not Link] exits user registration without registering a BLUETOOTH device. 01GB05INE-W957A.fm ALPINE INE-W957A 68-24567Z47-A (EN) -
Page 22: Setting My Favourites
• You can only select PHONE when a mobile phone is connected. Audio/Visual : Lets you switch directly to an audio source [Radio] : You can register presets No. 1-6 in FM1/FM2/AM. Select presets No. 1-6 from FM1 preset/FM2 preset/AM preset. 01GB05INE-W957A.fm ALPINE INE-W957A 68-24567Z47-A (EN) -
Page 23: Displaying The Camera Image
• The selected Vehicle type is reflected in the “i-Personalize” symbol on My Favourites screen. Touch the position of the driver’s seat. Touch the size of the front speaker. Select whether or not there is a tweeter. 01GB05INE-W957A.fm ALPINE INE-W957A 68-24567Z47-A (EN) -
Page 24: Easy Sound Setup Mode/Bass Engine Sq Mode
• Save the setting data in the root folder. With the BASS ENGINE SQ function on this unit, several parameters • For details about procedures of download, see ALPINE’s web site. affecting Bass performance are adjusted simultaneously. The Bass Level adjustment varies these parameters uniformly for optimum Bass effect Touch [Downloaded Sound Settings]. -
Page 25: Applying Tuneit
TuneIt, is downloadable from Apple’s App Store; the Android user can download it from Google Play. For details, consult your Alpine dealer. Before these operations, set TuneIt to USB (iPhone) or BT (Android) Display the current BASS ENGINE SQ parameter. - Page 26 • Depending on the status, some functions may not be available. switch to Facebook screen. • When there is no Notification, “No Notifications.” will be displayed. • The displayable amount of the Notification list depends on the Display example for Facebook screen connected Smartphone. 01GB05INE-W957A.fm ALPINE INE-W957A 68-24567Z47-A (EN)
-
Page 27: Settings When Switching Users
The display pattern can be set when a camera equipped with a switch function on the Camera screen is connected. Items whose settings are affected when switching registered users, are indicated by “ ” in this manual. Example: “Source Setup Operation” (page 51). 01GB05INE-W957A.fm ALPINE INE-W957A 68-24567Z47-A (EN) -
Page 28: Top Banner And Bottom Banner Fade Out Setting
• When the gear lever is shifted to the reverse (R) position while the rear camera is connected, the rear camera image is displayed. • When a call is received while a BLUETOOTH device is connected, the incoming call screen is displayed. 01GB05INE-W957A.fm ALPINE INE-W957A 68-24567Z47-A (EN) -
Page 29: Rear Entertainment Function
• When iPhone Pandora source is selected on X008AU/X008EU/ ]: Closes the window. INE-W957A/INE-W957E, you cannot select iPod Video or enjoy iPod Video on rear monitor. • Select iPod audio on X008AU/X008EU/INE-W957A/INE-W957E may impact the iPod video playing on the rear monitor. -
Page 30: About The Indicator Display
The initial setting is DX. Touch [ ], [ ] or [ ], [ ] to change the radio frequency up or down respectively. In manual mode, touch and hold to change the frequency continuously. 01GB05INE-W957A.fm ALPINE INE-W957A 68-24567Z47-A (EN) -
Page 31: Presetting Stations Manually
Touch and hold [ To pause playback, touch [ / ]. ] is displayed in the middle of the screen. Touch [ ] again or touch [ ] in the middle of the screen to start playback. 01GB05INE-W957A.fm ALPINE INE-W957A 68-24567Z47-A (EN) -
Page 32: Repeat Play
01GB00INE-W957A.book Page 32 Monday, April 21, 2014 7:49 PM • The X008AU/X008EU/INE-W957A/INE-W957E can play back MP3/ Selecting Folders (Concerning WMA/AAC files saved to CD or DVD. Use a format compliant with this unit. MP3/WMA/AAC) For further information about playing or storing MP3/WMA/AAC files, refer to pages 33 and 34 before using the unit. -
Page 33: About Mp3/Wma/Aac
Formats supported This device supports CD-ROM Mode1, CD-ROM XA Mode2(Form1&2), Mixed Mode CD and Multi-Session. This device cannot correctly play back discs recorded with Track At Once or packet writing. 01GB05INE-W957A.fm ALPINE INE-W957A 68-24567Z47-A (EN) -
Page 34: Dvd
The root folder contains all folders and files. It is created mode can be used. automatically for all burned discs. CD-R/CD-RW/DVD-R/DVD-RW/DVD+R/ DVD+RW discs that are recorded in the ® DivX mode can be used. 01GB05INE-W957A.fm ALPINE INE-W957A 68-24567Z47-A (EN) -
Page 35: Playing A Disc
Touch [Key]. emergency brake is applied. The menu operation mode will be displayed. If the X008AU/X008EU/INE-W957A/INE-W957E is not installed correctly, the driver will be able to watch the DVD/TV/Video while driving the vehicle and may be distracted from looking ahead causing an accident. -
Page 36: Numeric Keypad Input Operations
• Playback starts from the beginning when [ /ll] or [ ] in the middle of the screen is touched while playback is stopped. Touch [ ] to hide the keypad display. 01GB05INE-W957A.fm ALPINE INE-W957A 68-24567Z47-A (EN) -
Page 37: Fast-Forwarding/Fast-Reversing
• 1/2, 1/8 are approximate speeds. The actual speed differs from disc to • Some DVDs do not have chapters. disc. • You cannot execute reverse slow motion playback. Supplementary explanations “Chapters” are divisions of movies or musical selections on DVDs. 01GB05INE-W957A.fm ALPINE INE-W957A 68-24567Z47-A (EN) -
Page 38: Selecting Folders
See page 36 for operation of the numeric keypad. Touch [Enter] to confirm your selection. Playback will start from the selected chapter. Touch [ ]. • This function is not available for a disc on which chapters are not stored. 01GB05INE-W957A.fm ALPINE INE-W957A 68-24567Z47-A (EN) -
Page 39: Searching For A Desired Video File
• Depending on the disc, the angle may switch in one of two ways. - Seamless: The angle switches smoothly. - Non-seamless: When the angle is switched, a still picture is displayed first, after which the angle switches. 01GB05INE-W957A.fm ALPINE INE-W957A 68-24567Z47-A (EN) -
Page 40: About Divx
MPEG2 Layer3 (MP3) 8 to 160 kbps Touch [Setup] icon of Top banner. 32 to 448 kbps Dolby Digital The Setup main screen is displayed. Touch [General]. The General Setup screen appears. Select the desired item. 01GB05INE-W957A.fm ALPINE INE-W957A 68-24567Z47-A (EN) -
Page 41: Language Setting
Enter the password you have set, then touch [OK]. The password is cleared and the system returns to the previous screen. • Input numbers are displayed as “*”. • Touch [OK] to confirm the language and display the screen in the specified language. 01GB05INE-W957A.fm ALPINE INE-W957A 68-24567Z47-A (EN) -
Page 42: Setting Top Banner And Bottom Banner Display
You can adjust the brightness of the button lighting at night with the dimmer. • “Video” can be selected while a video is playing. Setting item: Key Illumination Level Setting level: -2 to +2 (Initial setting: 0) 01GB05INE-W957A.fm ALPINE INE-W957A 68-24567Z47-A (EN) -
Page 43: Switching Display Modes
This mode is good for displaying a cinema type picture at the 16:9 ratio. In NORMAL mode, the monitor displays a normal picture at the centre of the screen with a vertical black band at each side. 01GB05INE-W957A.fm ALPINE INE-W957A 68-24567Z47-A (EN) -
Page 44: Adjusting Image Contrast
Touch [Restore Factory Setting]. You can view the version information of this product. Make note of this After the confirmation message appears, touch information and refer to it whenever you contact Alpine Tech Support or [OK]. an Alpine-authorized dealer. The confirmation screen appears again. -
Page 45: Installation Setup
Item in a List” (page 29). • When BASS ENGINE SQ mode is selected or TuneIt is launched, some setting items are not adjustable. Refer to “BASS ENGINE SQ mode” (page 24)/“Applying TuneIt” (page 25). 01GB05INE-W957A.fm ALPINE INE-W957A 68-24567Z47-A (EN) -
Page 46: Setting The Balance/Fader/Subwoofer
This corrects information that was omitted at the time of Setting item: SubW. Phase compression. This reproduces a well-balanced sound close to Setting contents: 0° (Initial setting) / 180° the original. • If the Subwoofer setting is “Off”, the setting cannot be set. 01GB05INE-W957A.fm ALPINE INE-W957A 68-24567Z47-A (EN) -
Page 47: Equalizer Presets
• The Parametric EQ setting can be configured when Defeat is “Off”. Calling the Parametric EQ adjusted value Calling the pre-set Parametric EQ adjusted value. Touch [Preset1], [Preset2], or [Preset3] on the Parametric EQ screen. The setting stored in the Preset will be recalled. 01GB05INE-W957A.fm ALPINE INE-W957A 68-24567Z47-A (EN) -
Page 48: Adjusting The Time Correction (Time Correction)
Calling the pre-set time correction value. Repeat steps 1 to 2 to make adjustment to the other channels. Touch [Preset1], [Preset2], or [Preset3] on the time correction screen. The setting stored in the Preset will be recalled. 01GB05INE-W957A.fm ALPINE INE-W957A 68-24567Z47-A (EN) -
Page 49: Setting Defeat
Setting contents: -14 to +14 (Initial setting: 0) other speakers. • Settable source differ depending on the connected device and settings. * X008AU/INE-W957A only. 01GB05INE-W957A.fm ALPINE INE-W957A 68-24567Z47-A (EN) -
Page 50: About The Crossover
Depending on the speakers, a passive 13.6 187.0 73.7 network may not be necessary. If you are unsure about this point, please 17.0 190.4 75.0 consult your authorized Alpine dealer. 20.4 193.8 76.4 23.8 197.2 77.7 Cut-off frequency 27.2... -
Page 51: Source Setup
Adjusting to a frequency range Touch [Setup] icon of Top banner. outside that recommended may cause damage to the speakers. The Setup main screen is displayed. For the recommended crossover frequencies of Alpine speakers, refer to the respective Owner’s Manual. Touch [ (Source)]. -
Page 52: Setting The Easy Sound Setup Position
DVD menu or by using the operation described in the section “Switching the Audio Tracks” (page 39). • If the disc does not include the selected language, the disc’s default language is set. 01GB05INE-W957A.fm ALPINE INE-W957A 68-24567Z47-A (EN) -
Page 53: Setting The Rating Level (Parental Lock)
7 Touch [Parental Level] 8 Touch [ ] or [ ] to select the rating level (1 to 8). The smaller the number, the higher the restriction. 9 Touch [ ] to return to the previous screen. 01GB05INE-W957A.fm ALPINE INE-W957A 68-24567Z47-A (EN) -
Page 54: Aux Setting
If the Primary Name is USB Player, USB Player is not displayed as a Secondary Name option. • The selected source name is displayed instead of AUX mode name. Setting Direct Touch Operation (X008AU/INE-W957A only) If DVB-T is set as the Primary Name or Secondary Name, this setting is available. -
Page 55: Setting The Aux3
• For this function to work properly, specific applications must be installed on your Smartphone before connection. Consult your RSE Setting Alpine dealer or the Alpine website for details. • Only the iPhone and certain Android Smartphones support this function. -
Page 56: Bluetooth Setup
Touch [Delete] of the BLUETOOTH compatible • If the Bluetooth setting is “Off”, you cannot move to the device to delete from the Paired Device list. BLUETOOTH setting screen. Touch [OK]. • Touching [Cancel] will cancel the setting. 01GB05INE-W957A.fm ALPINE INE-W957A 68-24567Z47-A (EN) -
Page 57: Automatic Connection Setting
Unicode UTF-16BE Setting item: Delete Call History Touch [Delete Call History] Touch [OK]. The confirmation screen is displayed. • When there is no history, this option is not available. Touch [OK]. All the histories are deleted. 01GB05INE-W957A.fm ALPINE INE-W957A 68-24567Z47-A (EN) -
Page 58: Camera Setup
Front camera Rear: Rear camera If “Camera Select” is set to “Off”, this option is not available. If “Camera Select” in AUX Camera Setting is set to “Rear”, “Rear” cannot be set in Direct Camera Setting. 01GB05INE-W957A.fm ALPINE INE-W957A 68-24567Z47-A (EN) -
Page 59: Aux Camera Setting
Adjusted values will return to default settings. After the adjustment is completed, touch [Set]. Adjusting guides simultaneously (for Rear camera only) Touch [Link]. The 3 vertical guides of the currently-selected guide link together, allowing them to be adjusted simultaneously. 01GB05INE-W957A.fm ALPINE INE-W957A 68-24567Z47-A (EN) -
Page 60: Camera Interrupt Setting (Power Off Mode)
Setting contents: Off / On (Initial Setting) The playing music is muted when the gear lever is moved to the reverse (R) position. Off: Continue playing music even though the gear lever is moved to the reverse (R) position. 01GB05INE-W957A.fm ALPINE INE-W957A 68-24567Z47-A (EN) -
Page 61: Bluetooth Operation
About BLUETOOTH and then connect that BLUETOOTH compatible device to this unit. The device name of this unit is “ALPINE NAVI” and the initial BLUETOOTH is a wireless technology allowing communication number of the passcode is “0000”. Also refer to the Owner’s Manual between a mobile device or personal computer over short distances. -
Page 62: Changing The Connecting Bluetooth Device
The ringtone volume is adjustable on the incoming call message screen. Touch [ The phone call is started. Touch [ ] or [ ] for “ Vol.”. Hanging up the Telephone Touch [ The call finishes. 01GB06INE-W957A.fm ALPINE INE-W957A 68-24567Z47-A (EN) -
Page 63: Dialing A Number In The Phone Book
] or [ ] of Adjust the microphone volume. Stopping input to the microphone If the surrounding sound (road noise, etc.) is loud, you may wish to cut input to the microphone for 3 seconds. Touch [ 01GB06INE-W957A.fm ALPINE INE-W957A 68-24567Z47-A (EN) -
Page 64: Voice Dial Function
• You can transmit a Touch-Tone signal during a call. • Touching and holding “0” initiates “+” tone transmission. If the surrounding sound (road noise, etc.) is loud, you may wish to cut input to the microphone for 3 seconds. Touch [ 01GB06INE-W957A.fm ALPINE INE-W957A 68-24567Z47-A (EN) -
Page 65: Phone Book Function
• Touch [Cancel] to cancel the standby mode. The mobile phone accesses this unit and then transfers the phone book from the mobile phone to this unit. • Mobile phone connection is cancelled while the phone book is being transferred. 01GB06INE-W957A.fm ALPINE INE-W957A 68-24567Z47-A (EN) -
Page 66: Assigning As A Short Cut Dialing Number
Fast backward the current file: Touch and hold [ Advance to the beginning of the next file: Touch [ Fast forward the current file: Touch and hold [ To pause playback, touch [ / ]. 01GB06INE-W957A.fm ALPINE INE-W957A 68-24567Z47-A (EN) -
Page 67: Repeat Play
The M.I.X. mode switches every time [ ] is touched. brake is applied. If the X008AU/X008EU/INE-W957A/INE-W957E is not (GROUP) installed correctly, the driver will be able to watch TV/ video while driving the vehicle and may be distracted from looking ahead and cause an accident. -
Page 68: Operating An External Dvd Player
], [ Moves key panel location. Closes menu operation mode. Closes key panel. ], [ ], [ ], [ Moves menu cursor. [Enter] Touch [<<], [>>] Determines the selected item. [Return] Returns to the previous item/screen. 01GB06INE-W957A.fm ALPINE INE-W957A 68-24567Z47-A (EN) -
Page 69: Operating An External Dvd Changer
• If the setting for “Setting Direct Touch Operation (X008AU/INE- W957A only)” (page 54) is set to “On”, direct touch operation is possible. Directly touch operation switches displayed on the screen to operate. To display the operation screen, touch [Control]. 01GB06INE-W957A.fm ALPINE INE-W957A 68-24567Z47-A (EN) -
Page 70: Operating A Tv
• Never depend solely on the camera when backing up. Always turn and look and only use the camera for additional assistance. • This function is effective when the reverse wire is properly connected. 01GB06INE-W957A.fm ALPINE INE-W957A 68-24567Z47-A (EN) -
Page 71: Switching The Image Pattern For The Rear Camera
• Depending on the car, the guidance may deviate to the right or left. This is not a malfunction. • For each touch, the caution location moves to the top or bottom of the screen. 01GB06INE-W957A.fm ALPINE INE-W957A 68-24567Z47-A (EN) - Page 72 Also, an error may occur between the guidance and the actual path of the car on the road surface. 01GB06INE-W957A.fm ALPINE INE-W957A 68-24567Z47-A (EN)
-
Page 73: Front Camera Operation
As with the rear camera, the front camera guide display ON/OFF setting and Caution display location can be adjusted. Refer to “Guide Display ON/OFF Setting” (page 71) and “Adjusting the Caution Display Location” (page 71) for the operations. 01GB06INE-W957A.fm ALPINE INE-W957A 68-24567Z47-A (EN) -
Page 74: Other Camera Operation
Library creation starts when the USB Memory device is connected. The time it takes to create the library depends on the number of files in the USB Memory device, but it may take several minutes. 01GB06INE-W957A.fm ALPINE INE-W957A 68-24567Z47-A (EN) -
Page 75: Playback
USB device.” will be displayed. To • If you select a track by using the search mode, the M.I.X. play mode delete the message, remove the USB Memory devices. will be cancelled. 01GB06INE-W957A.fm ALPINE INE-W957A 68-24567Z47-A (EN) -
Page 76: Random Play (M.i.x. All)
The following example explains how an ARTISTS search is performed. Searching for a Desired Song Another search mode can be used for the same operation, although the hierarchy differs. X008AU/X008EU/INE-W957A/INE-W957E can carry out 2 kinds of Searching by artist name searches. Touch [ (Search)] of Bottom banner during playback. -
Page 77: Direct Up/Down Function
Touch [ ] or [ ] to select the desired Playlist/Artist/ When the X008AU/X008EU/INE-W957A/INE-W957E is connected by Album/Genre/Composer. the above cable, the controls on the iPod are disabled. • If an album is selected from an artist search, the album can be •... -
Page 78: Playback
Video unless the vehicle is stopped and the emergency brake is Playback applied. If the X008AU/X008EU/INE-W957A/INE-W957E is not installed correctly, the driver will be able to watch the Press the button. Video while driving the vehicle and may be distracted from looking ahead causing an accident. -
Page 79: Searching For A Music File
• Touching “ALL” will display the search list in the next hierarchy. • An alphabet skip function is available. Refer to “Alphabet Skip Function” (page 79). • For details on how to scroll through the list, refer to “Selecting an Item in a List” (page 29). 01GB06INE-W957A.fm ALPINE INE-W957A 68-24567Z47-A (EN) -
Page 80: Direct Up/Down Function
• To cancel, set the Shuffle mode to Off. Refer to “Random Play (Shuffle)” (page 80). Touch [ ]. (ex. [ Playlists]) The hierarchy level you selected last in the search mode is displayed. 01GB06INE-W957A.fm ALPINE INE-W957A 68-24567Z47-A (EN) -
Page 81: Hdmi Device (Optional)
• If the smartphone is locked, it cannot be operated from the unit. Press the button. • For details on compatible phones, refer to the Alpine website. Touch [HDMI] of top banner. When a smartphone with applications for MirrorLink is •... -
Page 82: Switching The Media Control Button Operation
Press: Zooms out the display screen to give a wider view. Press: Displays the Application screen. Press and hold: Switches the operation mode. Press: Zooms in the display screen to give a more detailed view. 01GB06INE-W957A.fm ALPINE INE-W957A 68-24567Z47-A (EN) -
Page 83: Pandora ® Internet Radio (Optional) (X008Au/Ine-W957A)
“No skips remaining” is ® The X008AU/INE-W957A enables you to interact with your Pandora displayed. • X008AU/INE-W957A remembers the source just before turning off account by connecting an iPhone and smartphone that has the latest ®... -
Page 84: Thumbs" Feedback
QuickMix. Touch the desired station. Pandora will play that station. • Currently playing station will be highlighted in Alphabet search list. • The shared station is marked with “ ” in search list. 01GB06INE-W957A.fm ALPINE INE-W957A 68-24567Z47-A (EN) -
Page 85: Bookmarking A Desired Track Or Artist
During playback, touch [Artwork display]. The type selection telop is displayed. This product use software that can be updated through a USB Memory device. Download the software from the Alpine website and update the product using the USB Memory device. Updating this product Check the Alpine website for details on updating. - Page 86 Operation differs from disc to disc. Story line selection screens including instructions appear during the movie. Just follow the instructions. * These functions differ from disc to disc. For details, refer to the disc’s instructions. 01GB06INE-W957A.fm ALPINE INE-W957A 68-24567Z47-A (EN)
-
Page 87: List Of Language Codes
Hindi 8076 P olish 8979 Y or uba Croatian 8083 P ashto , Pushto 9072 Chinese 7282 7285 Hungarian 8084 P or tuguese 9085 Zulu 7289 Ar menian 8185 Quechua 7365 Inter lingua 8277 Rhaeto-Romance 01GB06INE-W957A.fm ALPINE INE-W957A 68-24567Z47-A (EN) -
Page 88: List Of Country Codes
Nepal 7477 Jamaica 6789 Cyprus 7882 Nauru 7479 Jordan 6790 Czech Republic 7885 Niue 7480 Japan Germany 7890 New Zealand 6869 7569 Kenya 7977 Oman 6874 Djibouti 7571 Kyrgyzstan 8065 Panama 6875 Denmark 7572 Cambodia 01GB06INE-W957A.fm ALPINE INE-W957A 68-24567Z47-A (EN) - Page 89 8984 Mayotte 8368 Sudan 8479 Tonga 8985 Yugoslavia 8369 Sweden 8480 East Timor 9065 South Africa 8371 Singapore 8482 Turkey 9077 Zambia 8372 Saint Helena 8484 Trinidad and Tobago 9087 Zimbabwe 8373 Slovenia 8486 Tuvalu 01GB06INE-W957A.fm ALPINE INE-W957A 68-24567Z47-A (EN)
-
Page 90: In Case Of Difficulty
Otherwise, make sure the rest of your system is - Make sure the tuner is in DX mode. properly connected, or then consult your authorized Alpine dealer. • If the area you are in is a primary signal area, the antenna may not be grounded and connected properly. -
Page 91: If This Message Appears
• Disc is scratched. - Replaced with a non-scratched disc. Navigation The Navigation cannot work properly. • Reset Navigation system. - Reinsert the SD card and turn the ignition key off, and then set to ON again. 01GB06INE-W957A.fm ALPINE INE-W957A 68-24567Z47-A (EN) - Page 92 Please check BLUETOOTH audio device. Please check the Disc. • The BLUETOOTH audio device was not connected correctly. • Scratched disc, contaminated disc/poor recording/disc - Check the settings for X008AU/X008EU/INE-W957A/ incompatible with this unit. INE-W957E and the BLUETOOTH audio device and - Touch [ Disc] on the Open/Tilt screen.
-
Page 93: Specifications
95 dB (at 1 kHz) Channel Separation 85 dB (at 1 kHz) Horizontal resolution 500 lines or greater Video output level 1Vp-p (75 ohms) Video S/N ratio DVD: 60 dB Audio S/N ratio 100 dB 01GB06INE-W957A.fm ALPINE INE-W957A 68-24567Z47-A (EN) - Page 94 • The LCD panel is manufactured using an extremely high precision manufacturing technology. Its effective pixel ratio is over 99.99%. This means that there is a possibility that 0.01% of the pixels could be either always ON or OFF. 01GB06INE-W957A.fm ALPINE INE-W957A 68-24567Z47-A (EN)
-
Page 95: End User Licence Agreement (Microsoft)
INDEPENDENTLY DETERMINED HOW TO USE THE SOFTWARE terms are provided, then the terms of this EULA shall IN THE DEVICE, AND MS HAS RELIED UPON ALPINE TO apply, except that MS, Microsoft Corporation or affiliate CONDUCT SUFFICIENT TESTING TO DETERMINE THAT THE entity providing the Supplemental Component(s) shall be SOFTWARE IS SUITABLE FOR SUCH USE. -
Page 96: End User Licence Agreement (Navteq)
Should you have any questions concerning this EULA, or if you for your personal use or, if applicable, for use in your business’ desire to contact ALPINE for any other reason, please refer to internal operations. This licence does not include the right to the address provided in the documentation for the DEVICE. - Page 97 01GB06INE-W957A.fm ALPINE INE-W957A 68-24567Z47-A (EN)
-
Page 98: Installation And Connections
RCA connectors. You may need an adaptor to connect DO NOT INSTALL IN LOCATIONS WHICH MIGHT HINDER other units. If so, please contact your authorized Alpine dealer for assistance. VEHICLE OPERATION, SUCH AS THE STEERING WHEEL OR •... -
Page 99: Installation
Movable Display Angle of installation Install at an angle between horizontal and 30°. Note that installing at an angle outside of this range will result in a loss of performance and possibly damage. 0 - 30° 01GB07INE-W957A.fm ALPINE INE-W957A 68-24567Z47-A (EN) - Page 100 • driver’s view and operations are not obstructed. attached to the vehicle’s chassis. Connect all the • microphone is located where the driver’s voice can be easily leads of the INE-W957A/INE-W957E according to picked up (on the sun visor, etc.). details described in the CONNECTION section.
- Page 101 • Connect the ground lead securely to a bare metal spot (remove any paint, dirt or grease if necessary) of the car chassis. • If you add an optional noise suppressor, connect it as far away from the unit as possible. Your Alpine dealer carries various noise suppressors, contact them for further information.
-
Page 102: Connections
(Blue) To the parking brake PARKING BRAKE signal lead (Yellow/Blue) IGNITION (Red) Ignition key BATTERY (Yellow) (Black) Battery (Green) Rear Left (Green/Black) (White) Front Left (White/Black) Speakers (Grey/Black) Front Right (Grey) (Violet/Black) Rear Right (Violet) 01GB07INE-W957A.fm ALPINE INE-W957A 68-24567Z47-A (EN) - Page 103 Rear Output RCA Connectors Remote Control Input Lead (Brown) It can be used as Rear Output RCA Connectors. RED is Connect the external Alpine product to the remote control right and WHITE is left. output lead. Subwoofer RCA Connectors Speed Sensor Lead (Green/White) RED is right and WHITE is left.
-
Page 104: System Example
• To connect an iPod/iPhone, an optional connection kit KCU-461iV is required. • Do not leave a iPod/iPhone in a vehicle for a long time. Heat and humidity may damage the iPod/iPhone and you may not be able to play it again. 01GB07INE-W957A.fm ALPINE INE-W957A 68-24567Z47-A (EN) - Page 105 For details, refer to the owner’s manual of the compatible external audio processor. • You can change the name of an external device. Refer to “Setting the AUX Mode” (page 54). 01GB07INE-W957A.fm ALPINE INE-W957A 68-24567Z47-A (EN)
- Page 106 01GB00INE-W957A.book Page 106 Monday, April 21, 2014 7:49 PM Connection of a Mobile Digital TV Receiver USB Player (X008AU/INE-W957A only) and DVD Changer CAMERA/W.REMOTE Connector AUX/PRE OUT Connector To Video Output terminal To Video Input Terminal To Video Output terminal...
- Page 107 (Blue/White) 1 Front Output RCA Connectors 3 Subwoofer RCA Connector RED is right and WHITE is left. 4 RCA Extension Cable (sold separately) 2 Rear Output RCA Connectors RED is right and WHITE is left. 01GB07INE-W957A.fm ALPINE INE-W957A 68-24567Z47-A (EN)
- Page 108 • It’s better to connect the AUX Camera’s power cable to ACC. rearview camera) Otherwise the (AUX) camera’s image will not be displayed by touching (AUX) camera button on My Favourite screen. (page 20) 4 RCA Extension Cable (sold separately) 01GB07INE-W957A.fm ALPINE INE-W957A 68-24567Z47-A (EN)
- Page 109 • When the screen switches from the front view camera image to the Navigation screen, the location of your vehicle may not be displayed correctly. • It’s better to connect the AUX Camera’s power cable to ACC. Otherwise the (AUX) camera’s image will not be displayed by touching (AUX) camera button on My Favourite screen.(page 20) 01GB07INE-W957A.fm ALPINE INE-W957A 68-24567Z47-A (EN)
- Page 110 User Manual Alpine Navigation Navigation software for the Alpine X008/INE-W957 series UK English January 2014, ver. 1.0...
- Page 111 Thank you for choosing the Alpine X008/INE-W957 series as your navigator. Start using your device right away. This document is the detailed description of the navigation software. You can easily discover the software while you are using it; however, we still recommend that you...
- Page 112 Table of contents 1 Warnings and Safety information ............6 2 Getting started..................7 2.1 Buttons and other controls on the screen............8 2.1.1 Using keyboards ....................9 2.1.2 Beyond single screen tap ...................10 2.2 Map screen....................11 2.2.1 Navigating on the map ..................11 2.2.2 Position markers ....................13 2.2.2.1 Vehimarker and Lock-on-Road ................13 2.2.2.2 Selected map location (Cursor) and selected map object ........13...
- Page 113 3.1.3 Using the free form search .................43 3.1.4 Selecting a map location as the destination............44 3.1.5 Selecting the destination from your Address Book..........44 3.1.6 Selecting a recent destination from the History ..........45 3.1.7 Entering the coordinate of the destination ............46 3.1.8 Navigate to a location stored in a picture............47 3.1.9 Building a route from the list of destinations (Create Route) ......48 3.2 Viewing the entire route on the map .............49...
- Page 114 5.3.3 Traffic settings ....................72 5.3.4 Route settings.....................72 5.3.5 Map settings.......................75 5.3.6 Visual guidance settings ..................77 5.3.7 Regional settings....................78 5.3.8 Trip monitor settings..................79 5.4 Trip monitor ....................79 6 Glossary....................80 7 Copyright note..................82...
-
Page 115: Warnings And Safety Information
1 Warnings and Safety information The navigation system helps you find your way to your destination with a connected GPS receiver. The software does not transmit your GPS position; others cannot track you. It is important that you look at the display only when it is safe to do so. If you are the driver of the vehicle, we recommend that you operate your software before you start your journey. -
Page 116: Getting Started
2 Getting started When using the navigation software for the first time, an initial setup process starts automatically. Do as follows: Select the written language of the application interface. Later you can change it in Regional settings (page 78). Read the End User Licence Agreement. Tap to continue. -
Page 117: Buttons And Other Controls On The Screen
The initial setup is now complete. The Configuration wizard can be restarted later from the Settings menu (page 68). After the initial setup, the Map screen appears and you can start using the software. 2.1 Buttons and other controls on the screen When you are using the software, you usually tap buttons on the touch screen. -
Page 118: Using Keyboards
Radio When there are only a few Tap one of the buttons to button choices, radio buttons may select a new value. be used instead of lists. Only one value can be selected. Switch When there are only two Tap it to turn the switch choices, a checkmark on or off. -
Page 119: Beyond Single Screen Tap
Entering upper and lower When entering a text, the first character appears in upper case case letters while the rest of the text is in lower case. Tap to enter an upper case letter or tap twice to turn on Caps Lock. Tap again and lower case letters return. -
Page 120: Map Screen
The application starts with a full screen map. Tap to reduce the map size to half and allow information from your Alpine X008/INE-W957 series audio system to appear on the other half. You can decide which side of the map is the navigation. Simply tap the audio part and drag it to the other side of the screen. - Page 121 The data fields are different when you are navigating an active route and when you have no specified destination (the orange line is not displayed). Default data fields when cruising without a destination (tap any of the fields to change its value): Field Description...
-
Page 122: Position Markers
2.2.2 Position markers 2.2.2.1 Vehimarker and Lock-on-Road When your GPS position is available, the software marks your current position with the Vehimarker. By default, this marker is a blue arrow, but you can change this icon in Settings. When on-road navigation is selected, the Vehimarker may not show your exact GPS position and heading. - Page 123 There is a field in the top left corner that displays the next manoeuvre. Both the type of the event (turn, roundabout, exiting motorway, etc.) and its distance from the current position are displayed. Most of these icons are very intuitive. The following table lists some of the frequently shown route events.
-
Page 124: Lane Information And Signposts
Tap the Turn preview field and the voice guidance will repeat the latest instruction with updated distance information. Tap the Next street field to open the Itinerary. 2.2.3.3 Lane information and Signposts When navigating on multilane roads, it is important to take the appropriate lane in order to follow the recommended route. -
Page 125: Object Types
Tap this button to open a panel with the details of the next few exits or service stations. Tap any of them to display it on the map and add it as a waypoint to your route if needed. If you want to display other types of Places for the exits, you can change the icons in Visual Guidance settings (page 77). -
Page 126: Traffic Events
Current GPS position and Your current position displayed on the map. If Start point roads are near, it is aligned to the nearest road. Normally if GPS position is available, the route starts from the current position. If there is no valid GPS position, your software uses the last known position as the start point. -
Page 127: Manipulating The Map
Now tap any of the list items to see its details, and to display the affected road segment in its full length on the map: 2.2.4 Manipulating the map Tap the map anywhere to browse it during navigation. The map stops following the current position (the Vehimarker, a blue arrow by default, is not locked in a fix position on the screen any more) and control buttons appear to help you modify the map view. -
Page 128: Quick Menu
Tilting up and down Changes the vertical view angle of the map in 3D mode. Tap the button once to modify the view in large steps, or tap and hold the button to modify it continuously and smoothly. Rotating left and Changes the horizontal view angle of the map. - Page 129 There are more functions available than the number of buttons in the menu. In Settings, you can choose the function of each button (page 72). The following options are available: Button Description This function lets you search for a Place along your route or around your current location if there is no route calculated.
-
Page 130: Checking The Details Of The Current Position (Where Am I?)
This button lets you bypass parts of the recommended route. This button opens the Trip Monitor screen where you can manage your previously saved trip logs and track logs. This button opens the list of manoeuvres (the itinerary). With this function you can save the active route for later use. With this function you can replace the active route with a previously saved route. - Page 131 You can access this screen from the map in one of the following ways: If the current street is displayed below the Vehimarker (the current position on the map), tap it to open the Where Am I? screen. Open the Quick menu and tap the button.
-
Page 132: Navigation Menu
2.3 Navigation menu You can reach all parts of the software from the Navigation menu. When you open the menu, the destination search buttons appear on the screen. Tap any other menu button at the top and their feature buttons appear below. You have the following menus: to select your destination by entering an address or selecting a place of interest, a location on the map or one of your Address Book entries. -
Page 133: On-Road Navigation
You can add as many destinations to your route as you like. You can also use Alpine X008/INE-W957 series for off-road navigation. For details, see page 3.1 Selecting the destination of a route... -
Page 134: Entering An Address
3.1.1.1 Entering an address To enter an address as the destination, do as follows: In the Navigation menu, tap the following buttons: By default, the software proposes the country and city/town where you are. If needed, , enter the first few letters of the country name on the keyboard, and select one country from the list of results. - Page 135 If the desired name does not show up, the names that match the string appear in a list after entering a couple of characters (to open list results before appears automatically, ). Select the street from the list. Enter the house number: Enter the house number on the keyboard.
-
Page 136: Entering The Midpoint Of A Street As The Destination
Tip! If you know that you will use this destination frequently, before tapping to confirm the destination, put it in the Address Book first: then , give a name for the new entry, and tap to save the location. The map with the destination returns automatically. -
Page 137: Selecting An Intersection As The Destination
Instead of entering the house number, tap the input field above. The midpoint of the street is selected as the destination. After a short summary of the route parameters, the map appears showing the entire route. The route is automatically calculated. Tap to modify route parameters, or tap and start your journey. - Page 138 Instead of entering the house number, tap . The midpoint of the street is selected as the destination. After a short summary of the route parameters, the map appears showing the entire route. The route is automatically calculated. Tap to modify route parameters, or tap and start your journey.
-
Page 139: Selecting A City/Town Centre As The Destination
3.1.1.4 Selecting a city/town centre as the destination The city/town centre is not the geometric centre of the city/town but an arbitrary point the map creators have chosen. In towns and villages, it is usually the most important intersection; in larger cities, it is one of the important intersections. -
Page 140: Entering An Address With A Postal Code
3.1.1.5 Entering an address with a postal code All of the above address searching possibilities can be performed with entering the postal code instead of the city/town name. Find below an example with a full address: In the Navigation menu, tap the following buttons: If necessary, modify the country as described earlier (page 25). -
Page 141: Tips On Entering Addresses Quickly
results before it appears automatically, tap ). Select the street from the list. Enter the house number: Enter the house number on the keyboard. (To enter symbols, tap to finish entering the address. (If the entered house number cannot be found, the midpoint of the street is selected as the destination.) After a short summary of the route parameters, the map appears showing the entire route. -
Page 142: Selecting The Destination From The Places Of Interest
After entering a couple of letters, tap to list the items that contain the specified letters. You can speed up finding an intersection: Search first for the street with a less common or less usual name; fewer letters are enough to find it. If one of the streets is shorter, search for that one first. -
Page 143: Searching For A Place Of Interest Using Preset Categories
After entering a few letters, tap to open the list of Places with names containing the entered character sequence. (optional) The Places in the list are ordered by the length of the necessary detour (when navigating a route) or by their distance from the current position (when no destination is given). - Page 144 The preset search categories appear: If an active route exists, petrol stations are searched along the route. If there is no active route (destination is not selected), they are searched around the current position. If the current position is not available either (no GPS signal), they are searched around the last known position.
- Page 145 (optional) The Places in the list are ordered by their distance from the current or last known position, from the destination or by the length of the necessary detour. If you need to reorder the list, tap Browse the list if necessary and tap one of the list items. A full screen map appears with the selected point in the middle.
-
Page 146: Searching For A Place Of Interest By Category
3.1.2.3 Searching for a Place of Interest by category You can search for Places of Interest by their categories and subcategories. In the Navigation menu, tap the following buttons: Select the area around which the Place should be searched for: to search around the current position or if it is not available, around the last know position. - Page 147 Select one of the Place subcategories (e.g. Hotel or Motel) or tap to list all Places in the selected main category around the selected location or along the route. Sometimes the list of brands in the selected Place subcategory appears. Select one brand or tap to list all Places in the selected subcategory around the selected location or along the route.
-
Page 148: Searching For A Place Of Interest By Name
12. After a short summary of the route parameters, the map appears showing the entire route. The route is automatically calculated. Tap to modify route parameters, or tap and start your journey. 3.1.2.4 Searching for a Place of Interest by name You can search for Places of Interest by their names. - Page 149 (optional) If you have selected , select the city/town to search in. Select one of the main Place categories (e.g. Accommodation) to search in or tap to search among all Places. Select one of the Place subcategories (e.g. Hotel or Motel) to search in or tap to search in the selected Place category.
-
Page 150: Selecting Nearby Assistance From 'Where Am I
After entering a few letters, tap to open the list of Places with names containing the entered character sequence. 10. (optional) The Places in the list are ordered by their distance from the current or last known position, from the selected city/town, from the destination or by the length of the necessary detour. - Page 151 , and then Preset search categories appear, all for searching around the current position (or around the last known position if the current position is not available): : Car repair and roadside assistance services : Medical and emergency services : Police stations : Petrol stations Tap any of the quick search buttons to get an instant list of that type of Places.
-
Page 152: Using The Free Form Search
3.1.3 Using the free form search A quick way to search for an address, a Place, an Address Book entry or a History item is to use the free form search. Do as follows: In the Navigation menu, tap Open the menu and tap In the left field enter the name you are looking for. -
Page 153: Selecting A Map Location As The Destination
3.1.4 Selecting a map location as the destination In the Navigation menu, tap the following buttons: Locate your destination on the map: move and scale the map as needed. Tap the location that you want to select as your destination. The Cursor ( appears. -
Page 154: Selecting A Recent Destination From The History
If you are on the Map screen, tap and then tap If you are in the Navigation menu, tap and then tap The Address Book is displayed. Tap the entry that you want to set as your destination. If necessary, browse down to see more of the list or tap and enter a few letters from the name of the entry. -
Page 155: Entering The Coordinate Of The Destination
Select a destination from the list. After a short summary of the route parameters, the map appears showing the entire route. The route is automatically calculated. Tap to modify route parameters, or tap and start your journey. 3.1.7 Entering the coordinate of the destination You can also select a destination by entering its coordinate. -
Page 156: Navigate To A Location Stored In A Picture
When finished, tap After a short summary of the route parameters, the map appears showing the entire route. The route is automatically calculated. Tap to modify route parameters, or tap and start your journey. 3.1.8 Navigate to a location stored in a picture You can also set the location stored in a picture as your destination. -
Page 157: Building A Route From The List Of Destinations (Create Route)
Files must be located on an inserted microSD card, in a "pictures" folder. 3.1.9 Building a route from the list of destinations (Create Route) You can also build your route destination by destination from the Route menu. In the Navigation menu, tap There is only one line in the list of route points, the start point of the route, normally the current GPS position. -
Page 158: Viewing The Entire Route On The Map
3.2 Viewing the entire route on the map It is easy to get a map overview of the active route. Do as follows: In the Navigation menu, tap . The active route is displayed in its full length on the map together with additional information and controls. -
Page 159: Modifying The Route
to bypass a part of the route. to delete the active route. to open a list with more options like changing route parameters, simulating the route, saving the active route or loading a previously saved route. to return to the Navigation menu. 3.4 Modifying the route When navigation is already started, there are several ways to modify the active route. -
Page 160: Setting A New Starting Position For The Route
to append the newly selected destination at the end of the route. The other destinations of the route remain intact. The previous final destination is now the last waypoint. 3.4.2 Setting a new starting position for the route For normal navigation, all routes are planned from the current position. In order to check future routes, simulate them or see their length in time and distance, you can turn off the GPS receiver. -
Page 161: Editing The List Of Destinations (Edit Route)
When the new start point is set, tap The map returns with a transparent Vehimarker (showing that there is no GPS reception). If an active route already existed, it is now recalculated starting from the selected location. To return to normal navigation, tap 3.4.3 Editing the list of destinations (Edit Route) You can edit the route by modifying the list of destinations. -
Page 162: Cancelling The Active Route
to reorder the list. You can do it manually or you can let the application optimise the route for you. 3.4.4 Cancelling the active route To cancel the navigated route, do one of the following: If you are on the Map screen, tap and then tap . -
Page 163: Changing The Vehicle Used In Route Planning
Or if you cannot find a good alternative, tap and scroll down for routes with different routing methods. Select one of the route alternatives then tap to return to the Map screen. The software recalculates the route. The orange line now shows the new recommended route. -
Page 164: Changing The Road Types Used In Route Planning
3.4.7 Changing the road types used in route planning To recalculate the active route with different road type preferences, do as follows. These changes can also be made in Settings. On the Map screen, tap and then tap Tap any of the listed road types to modify the route. If needed, scroll the list for all road types. -
Page 165: Saving A Location As An Address Book Entry
3.5 Saving a location as an Address Book entry You can add any location to the Address Book, the list of frequently used destinations. Planning a route to one of these destinations was described earlier. Select a destination as described before. It can be an address, a Place, any location on the map, a previously used destination from History, a coordinate or a location where a photo was taken. -
Page 166: Saving A Location As An Alert Point
3.6 Saving a location as an alert point You can save any map location as an alert point (for example a speed camera or a railway crossing). Browse the map and select a location. The red Cursor appears there. Scroll down the list and tap On the newly opened screen, select the type of the alert point, the direction from which you expect the alert, and (if applicable) the speed limit for this alert point. -
Page 167: Editing An Alert Point
3.7 Editing an alert point You can edit a previously saved or uploaded alert point (for example a speed camera or a railway crossing). Browse the map and select the alert point to edit. The red circle appears around the alert point. -
Page 168: Watching The Simulation Of The Route
3.8 Watching the simulation of the route You can run a simulated navigation that demonstrates the active route. Do as follows: In the Navigation menu, tap . The simulation starts from the starting point of the route, and using a realistic speed, it leads you through the whole recommended route. (optional) You have the following controls during the simulation: : Jump to the next route event (manoeuvre). - Page 169 to stop the simulation.
-
Page 170: Off-Road Navigation
4 Off-road navigation When first started, Alpine X008/INE-W957 series calculates routes using the road network of the high quality vector maps provided with the product. You can switch the application to off-road mode in Navigation settings in one of the following... -
Page 171: Reference Guide
5 Reference Guide On the following pages you will find the description of the different concepts and menu screens of the software. 5.1 Concepts 5.1.1 Smart Zoom Smart Zoom provides much more than just a usual automatic zoom feature: While following a route: when approaching a turn, it will zoom in and raise the view angle to let you easily recognise your manoeuvre at the next junction. - Page 172 Roads are used only if access for cars is allowed. Private roads and resident-only roads are used only if they are inevitable to reach the destination. Walkways are excluded from routes. All manoeuvres are available in intersections. Directional constraints are taken into account the way that opposite direction is allowed with a low speed.
-
Page 173: Green Routing
5.1.3 Green routing Route calculation is not only about finding the quickest or shortest route. For some of the vehicle types, you can also check the fuel consumption and CO emission when planning a route, and you can create cost effective routes with less effect on the environment. In Route settings, you can edit the parameters of the selected vehicle. -
Page 174: Traffic Information In Route Planning
You can also choose to see the speed limit sign on the map all the time. 5.1.5 Traffic information in route planning The recommended route is not always the same between two points. Offline statistical traffic information (historical speed information or traffic patterns) can be taken into account in the route calculation based on the time of day and the day of week whenever suitable data exists. -
Page 175: Information Menu
to open the list of traffic even categories : In the first column you can see the number of traffic events on your route. The second column contains the full count of traffic events in the categories. Tap any of the even types to open the list of traffic events or tap the first line to show all events: Now tap any of the list items to see its details, and to display the affected road segment in its full length on the map:... - Page 176 Button Description Tap this button to get information about the current location and to find nearby help. Tap this button to open the GPS Information screen with satellite position and signal strength information. If you save your trip logs when you arrive at some of your destinations or let the application automatically save the trip logs for you, those logs are all listed here.
-
Page 177: Settings Menu
5.3 Settings menu You can configure the program settings, and modify the behaviour of the software. In the Navigation menu, tap The Settings menu has several options. Tap or scroll with your finger to see the full list. - Page 178 For details, see page 7. Delete all saved data and reset all settings to their factory defaults. Visit alpine.naviextras.com to get additional content, such as new maps or 3D landmarks and useful applications. The About section provides you with product information. Read the Software and Database End User License Agreement, or check the map and other contents of the application.
-
Page 179: Sound And Warnings
5.3.1 Sound and Warnings Adjust the sound volume, mute your device or change the voice guidance language. In addition, you can enable and set up different warnings and alerts. Button Description Tap this button to adjust the volume of the different sounds in the application. - Page 180 Maps may contain information about the speed limits of the road segments. The software is able to warn you if you exceed the current limit. This information may not be available for your region (ask your local dealer), or may not be fully correct for all roads in the map. This setting lets you decide whether you wish to receive visible and/or audible warnings.
-
Page 181: Customise Quick Menu
5.3.2 Customise Quick menu The content of the Quick menu is fully customisable. Tap the button you want to change, and select its new function from the list. 5.3.3 Traffic settings The recommended route is not always the same between two points. Whenever suitable data exists, traffic information can be taken into account in the route calculation. - Page 182 The route calculation can be optimised for different situations and vehicle types by changing the planning method. See below for details. To let the route fit your needs, you can also set which road types are to be considered for or to be excluded from the route if possible.
- Page 183 When creating a new vehicle profile, first you need to select the vehicle type. Then you need to set the following parameters. You can modify the same parameters when you edit an existing profile: Button Description Tap this button to rename the profile for something meaningful. Enter the average consumption of your vehicle when used in built-up areas.
-
Page 184: Map Settings
Private roads, resident-only roads and walkways are excluded from routes. Manoeuvre restrictions and directional constraints are taken into account when planning a route. Roads are used only if access for taxis is allowed. Private roads, resident-only roads and walkways are excluded from routes. Route Planning Method types: Button Description... - Page 185 Button Description Switch the map view between a 3D perspective view and two 2D top- down view modes. Adjust the basic zoom and tilt levels to your needs. Three preset levels are available. There is also a manual mode when you can set the zoom and tilt levels with the buttons on the left.
-
Page 186: Visual Guidance Settings
5.3.6 Visual guidance settings Adjust how the software helps you navigate with different kinds of route related information on the Map screen. The data fields in the corner of the Map screen can be customised. Tap this button and select the values you want to see. The values can be different when you navigate a route from when you are just cruising without a given destination. -
Page 187: Regional Settings
Similar to the above possibility, alternative routes can be suggested when driving on normal roads. The software will select a different turn in the upcoming intersection and offers you a different route for the next section of the route. Your options are the similar as above but you cannot modify the offered detour. -
Page 188: Trip Monitor Settings
5.3.8 Trip monitor settings Trip logs contain useful information about your trips. Trip logs can be saved manually when you reach your destination or you can turn on the automatic saving here. You can access these logs in the Trip monitor. Trip monitor is available from the More menu. This is not a button. -
Page 189: Glossary
6 Glossary 2D/3D GPS reception The GPS receiver uses satellite signals to calculate its (your) position and needs at least four signals to give a three-dimensional position, including elevation. Because the satellites are moving and because objects can block the signals, your GPS device might not receive four signals. - Page 190 Route A sequence of route events, i.e. manoeuvres (for example, turns and roundabouts) to reach the destination. The route contains one start point and one or more destinations. The start point is the current (or last known) position by default. If you need to see a future route, the start point can be replaced with any other given point.
-
Page 191: Copyright Note
This manual may not, in whole or in part, be reproduced or transmitted in any form either electronically or mechanically, including photocopying and recording, without the express written consent of Alpine Electronics, Inc. © 2014 – Alpine Electronics, Inc All rights reserved. © 2014 – NNG KFT All rights reserved. © 2013 HERE http://www.nng.com/partner-materials... - Page 192 01GB00INE-W957A.book Page 111 Monday, April 21, 2014 7:49 PM About the Rules of Bluetooth Electromagnetic Radiation Regulation Thailand This telecommunication equipment conforms to NTC technical requirement. OMAN 04WARRANTY.fm ALPINE INE-W957A 68-24567Z47-A (EN)