Table of Contents
Advertisement
AIR CONDITIONER (MULTI TYPE)
SERVICE MANUAL
This service manual provides relevant explanations about new indoor unit (4 series). Please refer to
the following service manuals for each indoor units.
Model name:
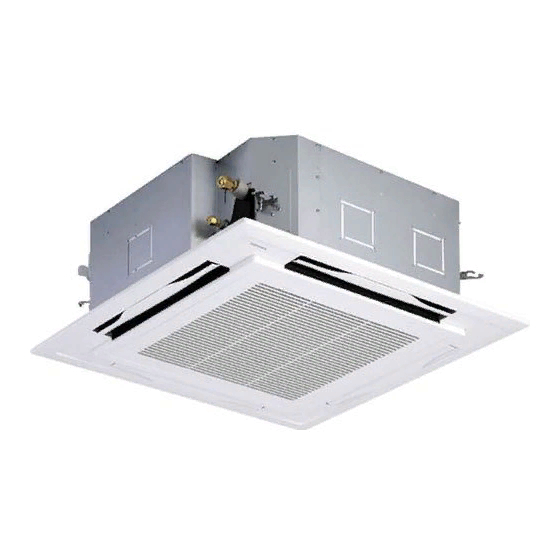
4-way Cassette Type (MMU-AP
2-way Cassette Type (2 series) (MMU-AP
∗
Ceiling type (MMC-AP
7HP
Concealed Duct Standard Type (MMD-AP
Concealed Duct High Static Pressure Type (MMD-AP
Slim duct (MMD-AP0244SPH, AP0274SPH)
High-wall Type (4 series) (MMK-AP
High-wall Type (3 series) (MMK-AP
Floor Standing Type (MMF-AP
Fresh Air Intake Indoor Unit Type (MMD-AP
∗
Console Type (MML-AP
4NH)
Air to Air Heat Exchanger with DX Coil Unit (MMD-VN
Indoor unit
<1-way Cassette Ty pe (YH, SH)>
MMU-AP0074YH-E(-TR)
MMU-AP0094YH-E(-TR)
MMU-AP0124YH-E(-TR)
MMU-AP0154SH-E(-TR)
MMU-AP0184SH-E(-TR)
MMU-AP0244SH-E(-TR)
<Comp act 4-way Cas sette Ty pe>
MMU-AP0056MH-E(-TR)
MMU-AP0054MH-E(-TR)
MMU-AP0074MH-E(-TR)
MMU-AP0094MH-E(-TR)
MMU-AP0124MH-E(-TR)
MMU-AP0154MH-E(-TR)
MMU-AP0184MH-E(-TR)
<Slim Du ct Ty pe>
MMD-AP0056SPH-E(-TR)
MMD-AP0054SPH-E(-TR)
MMD-AP0074SPH-E(-TR)
MMD-AP0094SPH-E(-TR)
MMD-AP0124SPH-E(-TR)
MMD-AP0154SPH-E(-TR)
MMD-AP0184SPH-E(-TR)
∗
∗
4HP
)
∗
2WH)
∗
)
∗
∗
6BHP
)
∗
∗
∗
4MH
)
∗
3H)
∗
∗
6H
)
∗
1HFE)
∗∗∗
<Concealed Duct High Static
Pressu re Ty pe>
MMD-AP0184H-E(-TR)
MMD-AP0244H-E(-TR)
MMD-AP0274H-E(-TR)
MMD-AP0364H-E(-TR)
MMD-AP0484H-E(-TR)
MMD-AP0724H-E(-TR)
MMD-AP0964H-E(-TR)
<Ceiling Typ e>
MMC-AP0154H-E(-TR)
MMC-AP0184H-E(-TR)
MMC-AP0244H-E(-TR)
MMC-AP0274H-E(-TR)
MMC-AP0364H-E(-TR)
MMC-AP0484H-E(-TR)
<Floor Stan di ng Typ e>
MMF-AP0154H-E(-TR)
MMF-AP0184H-E(-TR)
MMF-AP0244H-E(-TR)
MMF-AP0274H-E(-TR)
MMF-AP0364H-E(-TR)
MMF-AP0484H-E(-TR)
MMF-AP0564H-E(-TR)
SVM-13011
A10-007
SVM-13085
SVM-13087
∗
6HP
)
SVM-15032
A12-005
A10-034, SVM-14078
SVM-09059
A10-1420
A06-016
SVM-11012
∗
HEXE
)
A10-022
<Flo or Standi ng Con cealed Ty pe>
MML-AP0074BH-E(-TR)
MML-AP0094BH-E(-TR)
MML-AP0124BH-E(-TR)
MML-AP0154BH-E(-TR)
MML-AP0184BH-E(-TR)
MML-AP0244BH-E(-TR)
<Flo or Standi ng Cabinet Ty pe>
MML-AP0074H-E(-TR)
MML-AP0094H-E(-TR)
MML-AP0124H-E(-TR)
MML-AP0154H-E(-TR)
MML-AP0184H-E(-TR)
MML-AP0244H-E(-TR)
<Concealed Duc t Standar d Ty pe>
MMD-AP0074BH-E(-TR),
MMD-AP0094BH-E(-TR),
MMD-AP0124BH-E(-TR),
MMD-AP0154BH-E(-TR),
MMD-AP0184BH-E(-TR),
MMD-AP0244BH-E(-TR),
MMD-AP0274BH-E(-TR),
MMD-AP0304BH-E(-TR),
MMD-AP0364BH-E(-TR),
MMD-AP0484BH-E(-TR),
MMD-AP0564BH-E(-TR)
PRINTED IN JAPAN, Mar, 2012, ToMo
FILE No. A10-033
Revision 1 : Mar., 2012
Revision 2 : Jul., 2013
Revision 3 : Oct., 2014
Revision 4 : Aug., 2015
Advertisement
Table of Contents
Troubleshooting

Related Manuals for Toshiba MMU-AP0074YH-E(-TR)


Summary of Contents for Toshiba MMU-AP0074YH-E(-TR)
-
Page 1: Service Manual
FILE No. A10-033 Revision 1 : Mar., 2012 Revision 2 : Jul., 2013 AIR CONDITIONER (MULTI TYPE) Revision 3 : Oct., 2014 Revision 4 : Aug., 2015 SERVICE MANUAL This service manual provides relevant explanations about new indoor unit (4 series). Please refer to the following service manuals for each indoor units. -
Page 2: Table Of Contents
Contents Precautions for Safety ....................7 Specifications ......................13 1 Wiring Diagrams ....................15 1-1. Compact 4-way cassette type ..................15 1-2. 1-way cassette type (compact type YH) ................. 16 1-3. 1-way cassette type (SH) ....................17 1-4. Concealed duct standard type ..................18 1-5. - Page 3 7 P.C. Board Exchange Procedures ................ 95 7-1. Replacement of indoor P.C. boards ................95 8 Detachments ......................102 8-1. 1-way cassette (SH) ......................102 8-2. Compact 4-way cassette ....................111 8-3. Slim duct ......................... 121 8-4. Concealed duct standard ....................126 8-5.
- Page 4 Toshiba Carrier Corporation or, alternatively, he or she has been instructed in such matters by an individual or individuals who have been trained and is thus thoroughly acquainted with the knowledge related to this work.
- Page 5 Definition of Protective Gear When the air conditioner is to be transported, installed, maintained, repaired or removed, wear protective gloves and ‘safety’ work clothing. In addition to such normal protective gear, wear the protective gear described below when undertaking the special work detailed in the table below.
- Page 6 Warning Indications on the Air Conditioner Unit [Confirmation of warning label on the main unit] Confirm that labels are indicated on the specified positions If removing the label during parts replace, stick it as the original. WARNING ELECTRICAL SHOCK HAZARD Disconnect all remote electric power supplies before servicing.
-
Page 7: Precautions For Safety
Precautions for Safety The manufacturer shall not assume any liability for the damage caused by not observing the description of this manual. DANGER Before carrying out the installation, maintenance, repair or removal work, be sure to set the circuit breaker for both the indoor and outdoor units to the OFF position. - Page 8 WARNING Before starting to repair the air conditioner, read carefully through the Service Manual, and repair the air conditioner by following its instructions. Only qualified service person (*1) is allowed to repair the air conditioner. Repair of the air conditioner by unqualified person may give rise to a fire, electric shocks, injury, water leaks and / or other problems.
- Page 9 If, in the course of carrying out repairs, it becomes absolutely necessary to check out the electrical parts with the electrical parts box cover of one or more of the indoor units and the service panel of the outdoor unit removed in order to find out exactly where the trouble lies, put a sign in place so that no-one will approach the Do not bring a work location before proceeding with the work.
- Page 10 When the refrigerant gas leaks, find up the leaked position and repair it surely. If the leaked position cannot be found up and the repair work is interrupted, pump-down and tighten the service valve, otherwise the refrigerant gas may leak into the room. The poisonous gas generates when gas touches to fire such as fan heater, stove or cocking stove though the refrigerant gas itself is innocuous.
- Page 11 Only a qualified installer (*1) or qualified service person (*1) is allowed to install the air conditioner. If the air conditioner is installed by an unqualified individual, a fire, electric shocks, injury, water leakage, noise and / or vibration may result. Before starting to install the air conditioner, read carefully through the Installation Manual, and follow its instructions to install the air conditioner.
-
Page 12: Declaration Of Conformity
Toshiba Carrier Corporation 336 Tadehara, Fuji-shi, Shizuoka-ken 416-8521 JAPAN Authorized Representative / Nick Ball TCF holder: Toshiba EMEA Engineering Director Toshiba Carrier UK Ltd. Porsham Close, Belliver Industrial Estate, PLYMOUTH, Devon, PL6 7DB. United Kingdom Hereby declares that the machinery described below:... -
Page 13: Specifications
Specifications Sound power level (dBA) Weight (kg) Model Main unit (Ceiling panel) Cooling Heating ∗ ∗ MMU-AP0056MH-E 17 (3) ∗ ∗ MMU-AP0054MH-E 17 (3) ∗ ∗ MMU-AP0074MH-E 17 (3) ∗ ∗ MMU-AP0094MH-E 17 (3) ∗ ∗ MMU-AP0124MH-E 17 (3) ∗ ∗... - Page 14 Sound power level (dBA) Weight (kg) Model Main unit (Ceiling panel) Cooling Heating ∗ ∗ MMU-AP0056MH-TR 17 (3) ∗ ∗ MMU-AP0054MH-TR 17 (3) ∗ ∗ MMU-AP0074MH-TR 17 (3) ∗ ∗ MMU-AP0094MH-TR 17 (3) ∗ ∗ MMU-AP0124MH-TR 17 (3) ∗ ∗ MMU-AP0154MH-TR 17 (3) ∗...
-
Page 15: Wiring Diagrams
Wiring Diagrams 1-1. Compact 4-way cassette type Models: MMU-AP0056MH-E(TR), AP0054MH-E(TR), AP0074MH-E(TR), AP0094MH-E(TR), AP0124MH-E(TR),AP0154MH-E(TR), AP0184MH-E(TR) – 15 –... -
Page 16: 1-Way Cassette Type (Compact Type Yh)
1-2. 1-way cassette type (compact type YH) Models: MMU-AP0074YH-E(TR), AP0094YH-E(TR), AP0124YH-E(TR) – 16 –... -
Page 17: 1-Way Cassette Type (Sh)
1-3. 1-way cassette type (SH) Models: MMU-AP0154SH-E(TR), AP0184SH-E(TR), AP0244SH-E(TR) – 17 –... -
Page 18: Concealed Duct Standard Type
1-4. Concealed duct standard type Models: MMD-AP0074BH-E(TR), AP0094BH-E(TR), AP0124BH-E(TR), AP0154BH-E(TR), AP0184BH-E(TR), AP0244BH-E(TR), AP0274BH-E(TR), AP0304BH-E(TR), AP0364BH-E(TR), AP0484BH-E(TR), AP0564BH-E(TR) – 18 –... -
Page 19: Concealed Duct High Static Pressure Type
1-5. Concealed duct high static pressure type Models: MMD-AP0184H-E(TR), AP0244H-E(TR), AP0274H-E(TR), AP0364H-E(TR), AP0484H-E(TR) – 19 –... - Page 20 Models: MMD-AP0724H-E(TR), AP0964H-E(TR) – 20 –...
-
Page 21: Slim Duct Type
1-6. Slim duct type Models: MMD-AP0056SPH-E(TR), AP0054SPH-E(TR), AP0074SPH-E(TR), AP0094SPH-E(TR), AP0124SPH-E(TR), AP0154SPH-E(TR), AP0184SPH-E(TR) – 21 –... -
Page 22: Ceiling Type
1-7. Ceiling type Models: MMC-AP0154H-E(TR), AP0184H-E(TR), AP0244H-E(TR), AP0274H-E(TR), AP0364H-E(TR), AP0484H-E(TR) – 22 –... -
Page 23: Floor Standing Cabinet Type
1-8. Floor standing cabinet type Models: MML-AP0074H-E(TR), AP0094H-E(TR), AP0124H-E(TR), AP0154H-E(TR), AP0184H-E(TR), AP0244H-E(TR) – 23 –... -
Page 24: Floor Standing Concealed Type
1-9. Floor standing concealed type Models: MML-AP0074BH-E(TR), AP0094BH-E(TR), AP0124BH-E(TR), AP0154BH-E(TR), AP0184BH-E(TR), AP0244BH-E(TR) – 24 –... -
Page 25: Floor Standing Type
1-10.Floor standing type Models: MMF-AP0154H-E(TR), AP0184H-E(TR), AP0244H-E(TR), AP0274H-E(TR), AP0364H-E(TR), AP0484H-E(TR), AP0564H-E(TR) – 25 –... -
Page 26: Parts Rating
Parts Rating 2-1. Indoor unit Compact 4-way cassette type Model MMU-AP 0056MH 0054MH 0074MH 0094MH 0124MH 0154MH 0184MH e l l EDM-B25YGTF-3 EDM-B40YGTF-3 Ø Ø Ø c t i 1-way cassette type µ c t i Ø Ø e l l ength: 155 mm Vinyl tube Ø... - Page 27 Concealed duct standard type Model MMD-AP 0074BH 0094BH 0124BH 0154BH 0184BH c t i Ø Ø Ø Model MMD-AP 0244BH 0274BH 0304BH 0364BH 0484BH 0564BH c t i Ø Ø Ø Concealed duct high static pressure type Model MMD-AP 0184H 0244H 0274H 0364H...
- Page 28 Slim duct type Model MMD-AP 0056SPH 0054SPH 0074SPH 0094SPH 0124SPH 0154SPH 0184SPH EDM-B25YGTF EDM-B40YGTF c t i Ø h: 1200 mm Vinyl tube (Blue) Ø Ø Ceiling type Model MMC-AP 0154H 0184H 0244H 0274H 0364H 0484H e l l ength: 155 mm Vinyl tube Ø...
- Page 29 Floor standing type Model MMF-AP 0154H 0184H 0244H 0274H 0364H 0484H 0564H Running condenser for fan motor AC500 V, 3 µF AC500 V, 3.5 µF AC500 V, 4 µF c i t Ø Ø Ø – 29 –...
-
Page 30: Refrigerant Cycle Diagram
Refrigerant Cycle Diagram Indoor unit Liquid Gas side side Strainer Capillary tube Heat exchanger at indoor side Pulse Motor Valve (PMV) Sensor (TCJ) Sensor (TC2) Sensor (TC1) Sensor Fan motor (TA) CAUTION MMU-AP0074YH, AP0094YH, AP0124YH type air conditioners have no TC2 sensor. Explanation of functional parts in indoor unit Pulse Motor Valve (Connector CN082 (6P): Blue) -
Page 31: Control Outline
Control Outline Indoor unit Control specifications Upon power 1. Identification of outdoor unit supply reset When the power supply is reset, the outdoor unit is identified, and control is redirected according to the identification result. 2. Indoor fan speed and air flow direction control availability settings Settings such as indoor fan speed and air flow direction control availability are replaced on the basis of EEPROM data. - Page 32 Fan speed 1. The fan operates in one of the four speed modes of “HIGH (HH)”, “MED (H)”, HH > H+ > H > control “LOW (L)” and “AUTO” on the basis of a command issued via the remote L+ > L > UL controller.
- Page 33 Cold air 1. In heating operation, the upper limit of the fan tap is set according to the lower of TCJ: Indoor heat discharge whichever is the higher between TC2 sensor and TCJ sensor temperatures, on exchanger sensor prevention the one hand, and TC1 sensor temperature, on the other. temperature control •...
- Page 34 Cooling oil While the outdoor unit is recovering cooling oil (refrigerant), the indoor units perform • Recovery operation normally takes place (refrigerant) the following control tasks: roughly every 2 hours. recovery control [common for operational (cooling thermo ON / thermo OFF / FAN), as well as non- •...
- Page 35 Filter sign 1. The indoor fan’s cumulative hours of operation are counted, and when these “FILTER ” displayed display exceed the prescribed value (150H / 2500H), a filter replacement signal is sent to (not applicable the remote controller to display a filter sign on it. to wireless type) 2.
- Page 36 Selection of 1. The range of operations that can be performed via an indoor unit remote controller • In the case of a wired remote controller, central control can be determined through the setting of the central controller. “CENTRAL mode 2.
- Page 37 Power saving 1. Push the button on the remote controller The power saving mode operation cannot be 2. The " " segment lights up on the wired remote controller display. set by the wireless 3. The requirement capacity ratio is limited to approximately 75 %. remote controller or 4.
-
Page 38: Applied Control And Functions (Including Circuit Configuration)
Applied Control and Functions (Including Circuit Configuration) 5-1. Indoor controller block diagram 5-1-1. When main (sub) remote controller connected <Compact 4-way cassette type, 1-way cassette (SH) type, ceiling type, concealed duct standard type, slim duct type> – 38 –... - Page 39 <1-way cassette (YH) type, floor standing type, concealed duct high static pressure type, floor standing concealed type, floor standing cabinet type> – 39 –...
-
Page 40: When Wireless Remote Controller Kit Connected
5-1-2. When wireless remote controller kit connected <Compact 4-way cassette type, 1-way cassette (SH) type, ceiling type, concealed duct standard type, slim duct type> – 40 –... - Page 41 <1-way cassette (YH) type, floor standing type, concealed duct high static pressure type, floor standing concealed type, floor standing cabinet type> – 41 –...
-
Page 42: When Both Main (Sub) Remote Controller And Wireless Remote Controller Kit Connected
5-1-3. When both main (sub) remote controller and wireless remote controller kit connected <Compact 4-way cassette type, 1-way cassette (SH) type, ceiling type, concealed duct standard type, slim duct type> – 42 –... - Page 43 <1-way cassette (YH) type, floor standing type, concealed duct high static pressure type, floor standing concealed type, floor standing cabinet type> – 43 –...
-
Page 44: Indoor Printed Circuit Board
5-2. Indoor printed circuit board MCC-1402 <compact 4-way cassette type, 1-way cassette (SH) type, ceiling type, concealed duct standard type, slim duct type> – 44 –... - Page 45 MCC-1403 <1-way cassette (YH) type, floor standing type, concealed duct high static pressure type, floor standing concealed type, floor standing cabinet type> – 45 –...
-
Page 46: Optional Connector Specifications Of Indoor P.c. Board
5-3. Optional connector specifications of indoor P.C. board Function Conne Fan output DC12 V Factory default setting: ON when indoor unit in operation and OFF when indoor unit at rest Output CN32 * Fan can be operated on its own by pressing FAN button on remote controller (DN = 31) Start / stop input Start / stop input for HA (J01: In place / Removed =... -
Page 47: Test Operation Of Indoor Unit
5-4. Test operation of indoor unit Check function for operation of indoor unit (Functions at indoor unit side) This function is provided to check the operation of the indoor unit singly without communication with the remote controller or the outdoor unit. This function can be used regardless of operation or stop of the system. However, if using this function for a long time, a trouble of the equipment may be caused. -
Page 48: Method To Set Indoor Unit Function Dn Code
5-5. Method to set indoor unit function DN code (When performing this task, be sure to use a wired remote controller.) <Procedure> To be performed only when system at rest Push the buttons simultaneously and hold for at least 4 seconds. The unit No. - Page 49 Function CODE No. (DN Code) table (includes all functions needed to perform applied control on site) Filter display delay timer 0000: None 0001: 150H According to type 0002: 2500H 0003: 5000H 0004: 10000H Dirty state of filter 0000: Standard 0000: Standard 0001: High degree of dirt (Half of standard time) Central control address 0001: No.1 unit...
- Page 50 High-ceiling adjustment 1-way cassette (SH) 0000: Standard (Air flow selection) Value Type AP015, AP018 AP024 0000 Standard (factory default) 3.5 m or less 3.8 m or less 0001 High-ceiling (1) 4.0 m or less 4.0 m or less 0003 High-ceiling (3) 4.2 m or less 4.2 m or less Compact 4-way cassette...
- Page 51 Type DN code “10” ∗∗∗ ∗∗∗ 0001* ∗∗∗ ∗∗∗ 0003 1-way Cassette (Compact) MMU-AP ∗∗∗ 0004 Concealed Duct Standard MMD-AP ∗∗∗ SPH (SH) ∗∗∗ 0006 Concealed Duct High Static Pressure MMD-AP ∗∗∗ n i l ∗∗∗ l l a ∗∗∗ ∗∗∗...
-
Page 52: Applied Control Of Indoor Unit
5-6. Applied control of indoor unit Control system using remote controller interface (TCB-IFCB4E2) Wiring and setting • In the case of group control, the control system functions as long as it is connected to one of the indoor units (control P.C. board) in the group. If it is desired to access the operation and error statuses of other units, relevant signals must be brought to it from those units individually. - Page 53 Ventilating fan control from remote controller [Function] • The start / stop operation can be operated from the wired remote controller when air to air heat exchanger or ventilating fan is installed in the system. • The fan can be operated even if the indoor unit is not operating. •...
- Page 54 Leaving-ON prevention control [Function] • This function controls the indoor units individually. It is connected with cable to the control P.C. board of the indoor unit. • In a group control, it is connected with cable to the indoor unit (Control P.C. board), and the CODE No. 2E is set to the connected indoor unit.
- Page 55 Manual address setting using the remote controller Procedure when setting indoor units’ addresses first under the condition that indoor wiring has been completed and outdoor wiring has not been started (manual setting using the remote controller) Wiring example of 2 refrigerant lines Refrigerant line 1 Refrigerant line 2 Outdoor...
- Page 56 <Line (system) address> Push the TEMP. buttons repeatedly to set the CODE No. to Push the TIME buttons repeatedly to set a system address. (Match the address with the address on the interface P.C. board of the header outdoor unit in the same refrigerant line.) Push button.
- Page 57 Confirming the indoor unit addresses and the position of an indoor unit using the remote controller Confirming the numbers and positions of indoor units To see the indoor unit address of an indoor unit which you know the position of When the unit is individual (the indoor unit is paired with a wired remote controller one-to-one), or it is a group-controlled one.
- Page 58 To find an indoor unit’s position from its address When checking unit numbers controlled as a group Stop (Execute it while the units are stopped.) The indoor unit numbers in a group are indicated one after another. The fan and louvers of the indicated units are activated.
- Page 59 To check all the indoor unit addresses using an arbitrary wired remote controller. (When communication wirings of 2 or more refrigerant lines are interconnected for central control) (Execute it while the units are stopped.) You can check indoor unit addresses and positions of the indoor units in a single refrigerant line. When an outdoor unit is selected, the indoor unit numbers of the refrigerant line of the selected unit are indicated one after another and the fan and louvers of the indicated indoor units are activated.
- Page 60 Changing the indoor unit address using a remote controller To change an indoor unit address using a wired remote controller. The method to change the address of an individual indoor unit (the indoor unit is paired with a wired remote controller one-to-one), or an indoor unit in a group. (The method is available when the addresses have already been set automatically.) Finish (Execute it while the units are stopped.)
- Page 61 To change all the indoor unit addresses using an arbitrary wired remote controller. (The method is available when the addresses have already been set automatically.) (When communication wirings of 2 or more refrigerant lines are interconnected for central control) NOTE You can change the addresses of indoor units in each refrigerant line using an arbitrary wired remote controller.
- Page 62 Finish Press to finish setting. Push the TIME buttons repeatedly to change the value of the indoor unit address in SET DATA. Change the value in SET DATA to that of a new address. Push the button to confirm the new address on SET DATA. Push the button (left side of the button) repeatedly to select another address to change.
-
Page 63: Error Clearing Function
Error clearing function How to clear the error using the wired remote controller Clearing an error of the outdoor unit Clear the currently detected outdoor unit for each refrigerant line to which the indoor unit controlled by the remote controller is connected. (The indoor unit error is not cleared.) Use the service monitoring function of the remote controller. - Page 64 Monitoring function of wired remote controller The following monitoring function is available if the remote controller of RBC-ATM32E is used. Content Enter the service monitoring mode using the remote controller to check the sensor temperature or operation status of the remote controller, indoor unit, and outdoor unit. Push and hold the , and for 4 seconds or longer to enter the service monitoring mode.
- Page 65 Target outdoor unit (SMMS, SHRM, Mini-SMMS – Series 1 – 2) l l o Indoor unit Room temperature (in control) *1 ×1 °C data Room temperature (Remote controller) ×1 °C × ° [0024]=24 °C l i o × ° l i o ×...
- Page 66 Target outdoor unit (SMMS-i – Series 4) l l o Indoor unit Room temperature (in control) ×1 °C data *2 Room temperature (Remote controller) ×1 °C × ° l i o × ° [0024]=24 °C l i o × ° l i o ×...
- Page 67 CODE No. l l o U1 U2 U3 U4 Individual × data 2 of × [0642]=64.2 rps outdoor unit – × × Heat sink temperature of compressor 54 64 74 84 ×1 °C IPDU1 Heat sink temperature of compressor 55 65 75 85 ×1 °C IPDU2...
-
Page 68: Troubleshooting
Troubleshooting 6-1. Overview (1) Before engaging in troubleshooting (a) Applicable models All Super Module Multi (SMMS, SHRM, Mini-SMMS, SMMS-i) models. (Indoor units: MMO-APOOO, Outdoor units: MMY-MAPOOOO , MCY-MAPOOOHT ) (b) Tools and measuring devices required • Screwdrivers (Philips, flat head), spanners, long-nose pliers, nipper, pin to push reset switch, etc. •... -
Page 69: Troubleshooting Method
6-2. Troubleshooting method The remote controllers (main remote controller and central control remote controller) and the interface P.C. board of an outdoor unit are provided with an LCD display (remote controller) or a 7-segment display (outdoor interface P.C. board) to display operational status. Using this self-diagnosis feature, the fault site / faulty part may be identified in the event of a fault by following the method described below. - Page 70 (Error detected by main remote controller) Display of receiving unit Check code Outdoor 7-segment display Indicator light block Main remote Operation Timer Ready controller Sub-code Flash Signals cannot be received from indoor unit; master remote No master remote controller, ⎯ ⎯...
- Page 71 List of check codes (outdoor unit) IPDU: Intelligent Power Drive Unit (Inverter P.C. board) (Errors detected by SMMS outdoor interface - typical examples) : Flashing, : Goes off :Lighting, ALT.: Flashing is alternately when there are two flashing LED SIM: Simultaneous flashing when there are two flashing LED Check code Display of receiving unit Outdoor 7-segment display...
- Page 72 Check code Display of receiving unit TCC-LINK Outdoor 7-segment display Indicator light block Typical fault site Description of error central control or main remote Operation Timer Ready Sub-code Flash controller display Outdoor suction Outdoor suction temperature sensor (TS1) has – temperature sensor (TS1) been open / short-circuited.
- Page 73 Check code Display of receiving unit TCC-LINK Outdoor 7-segment display Indicator light block central control Typical fault site Description of error or main remote Operation Timer Ready Sub-code Flash controller display Address setting has not been performed for one or SIM Indoor group address not –...
- Page 74 (Errors detected by IPDU featuring in SMMS standard outdoor unit - typical examples) Check code Display of receiving unit TCC-LINK Outdoor 7-segment display Indicator light block central control Typical fault site Description of error or main remote Operation Timer Ready Flash Sub-code controller...
-
Page 75: Troubleshooting Based On Information Displayed On Remote Controller
6-3. Troubleshooting based on information displayed on remote controller Using main remote controller (RBC-AMT32E) (1) Checking and testing When a fault occurs to an air conditioner, a check code and indoor unit No. are displayed on the display window of the remote controller. Check codes are only displayed while the air conditioner is in operation. - Page 76 Using TCC-LINK central control remote controller (TCB-SC642TLE2) (1) Checking and testing When a fault occurs to an air conditioner, a Display of Unit No. Display of check code check code and indoor unit No. are displayed on the display window of the remote controller. Check codes are only displayed while the air Alternate blinking conditioner is in operation.
- Page 77 Using indoor unit indicators (receiving unit light block) (wireless type) To identify the check code, check the 7-segment display on the header unit. To check for check codes not displayed on the 7-segment display, consult the “List of Check Codes (Indoor Unit)” in “Troubleshooting method”. : Goes off : Lighting : Blinking (0.5 seconds)
- Page 78 Heat exchanger temperature sensor (TCJ) error Operation Timer Ready Heat exchanger temperature sensor (TC2) error Indoor unit temperature sensor Heat exchanger temperature sensor (TC1) error errors Ambient temperature sensor (TA) error Alternate blinking Discharge temperature sensor (TF) error Discharge temperature sensor (TD1) error Operation Timer Ready Discharge temperature sensor (TD2) error...
- Page 79 Operation Timer Ready Outdoor EEPROM error Synchronized blinking Other (indications not involving check code) Operation Timer Ready – Test run in progress Synchronized blinking Operation Timer Ready Setting incompatibility – (automatic cooling / heating setting for model incapable of it and heating setting for cooling-only model) Alternate blinking –...
-
Page 80: Check Codes Displayed On Remote Controller And Smms Outdoor Unit (7-Segment Display On I/F Board) And Locations To Be Checked
6-4. Check codes displayed on remote controller and SMMS outdoor unit (7-segment display on I/F board) and locations to be checked For other types of outdoor units, refer to their own service manuals. Check code Location Outdoor 7-segment display Error detection Main Description System status... - Page 81 Check code Location Outdoor 7-segment display Error detection Main Description System status Check items (locations) condition(s) remote detection Check controller Sub-code code Too many indoor All stop • Combined capacity of indoor • Check capacities of indoor units Overloading units connected units exceeds 135% of connected.
- Page 82 Check code Location Outdoor 7-segment display Error detection Main Description System status Check items (locations) condition(s) remote detection Check controller Sub-code code SMMS (Series 1) IPDU All stop Communication is disrupted • Check wiring and connectors 01: A3-IPDU1 communication between IPDUs (P.C. boards) involved in communication between error error...
- Page 83 Check code Location Outdoor 7-segment display Error detection Main Description System status Check items (locations) condition(s) remote detection Check controller Sub-code code TO sensor error All stop Sensor resistance is infinity • Check connection of TO sensor or zero (open / short circuit). connector.
- Page 84 Check code Location Outdoor 7-segment display Error detection Main Description System status Check items (locations) condition(s) remote detection Check controller Sub-code code 01: Compressor IPDU Compressor error All stop Overcurrent is detected • Check for defect in compressor. 1 side (lockup) MG-CTT several seconds after startup •...
- Page 85 Check code Location Outdoor 7-segment display Error detection Main Description System status Check items (locations) condition(s) remote detection Check controller Sub-code code 01: TK1 sensor Error in All stop Sensor resistance is infinity • Check connection of TK1 sensor error temperature or zero (open / short circuit).
- Page 86 Check code Location Outdoor 7-segment display Error detection Main Description System status Check items (locations) condition(s) remote detection Check controller Sub-code code SMMS Oil detection All stop The temperature change of • Check the TK1 sensor installation. (1 series) circuit error TK1 cannot be detected even •...
- Page 87 Check code Location Outdoor 7-segment display Error detection Main Description System status Check items (locations) condition(s) remote detection Check controller Sub-code code SMMS-i Oil level detection All stop No temperature change is • Check for disconnection of TK4 (4 series) circuit error detected by TK4 despite sensor.
- Page 88 Check code Location Outdoor 7-segment display Error detection Main Description System status Check items (locations) condition(s) remote detection Check controller Sub-code code Cool / heat switch Only the target The heating operation was • Check the remote controller setting. unit error unit stopped performed without the coolonly (DN=“0F”)
- Page 89 Check code Location Outdoor 7-segment display Error detection Main Description System status Check items (locations) condition(s) remote detection Check controller Sub-code code All stop Discharge temperature (TD1) • Check outdoor service valves (gas Discharge temperature TD1 exceeds 115 ˚C. side, liquid side) to confirm full error opening.
- Page 90 Check code Location Outdoor 7-segment display Error detection Main Description System status Check items (locations) condition(s) remote detection Check controller Sub-code code Indoor unit Indoor fan motor Stop of • Motor speed measurements • Check connection of fan connector error corresponding unit continuously deviate from and wiring.
- Page 91 Check code Location Outdoor 7-segment display Error detection Main Description System status Check items (locations) condition(s) remote detection Check controller Sub-code code Activation of All stop Pd sensor detects pressure • Check for defect in Pd pressure high-pressure equal to or greater than sensor.
- Page 92 Check code Location Outdoor 7-segment display Error detection Main Description System status Check items (locations) condition(s) remote detection Check controller Sub-code code ∗ SMMS-i IPDU Outdoor fan IPDU All stop (Sub code: 0 • Check fan motor. (Series 4) error Fan IPDU over current •...
- Page 93 Errors detected by TCC-LINK central control device Check code Location Outdoor 7-segment display Error detection Main Description System status Check items (locations) condition(s) remote detection Check controller Sub-code code TCC-LINK TCC-LINK central Continued Central control device is • Check for defect in central control control device operation unable to transmit signal.
-
Page 94: Sensor Characteristics
6-5. Sensor characteristics Indoor unit Temperature sensor characteristics Indoor TA sensor Temperature [°C] Resistance [k ] Resistance [k ] Temperature [°C] Temperature [°C] Resistance [k ] Indoor TC1 sensor Resistance [k ] Resistance [k ] (10 °C or below) (10 °C or above) Temperature [°C] Temperature [°C] Resistance [k ]... -
Page 95: C. Board Exchange Procedures
P.C. Board Exchange Procedures Indoor unit 7-1. Replacement of indoor P.C. boards MMU-AP 4MH series MMU-AP 4SH series 431-6V-437 MCC-1402 MMC-AP 4H series MMD-AP 4SPH series 431-6V-438 MMD-AP MMU-AP 4YH series MMD-AP 4H series 431-6V-444 MCC-1403 MMF-AP 4H series MML-AP 4BH series 431-6V-469 MML-AP Points to note when replacing indoor P.C. - Page 96 Method 2 If it is not possible to turn on the indoor unit or read the setting data from the P.C. board to be replaced via a wired remote controller or operate the remote controller due to the failure of its power supply circuit - Replacing EEPROM (IC10) (For the location of this component and the method to replace it, see the “...
- Page 97 Procedure 1: reading setting data from EEPROM (Read the setting data from EEPROM, including both the factory settings and any modifications made to them on site.) Push the buttons simultaneously and hold for at least 4 seconds. (This number corresponds to the same number shown on the Remote Controller Operation Diagram.) * In the case of group control, the unit No.
- Page 98 Procedure 2: replacing P.C. board Replace the faulty P.C. board with a service P.C. board. Be sure to replicate the old jumper setting (removal), switch setting (SW501), and connector short-circuit setting (e.g. CN34) on the service P.C. board. (See the diagram at below.) From left: CN112, 111 and 110 If a short-circuiting plug had been used on the replaced If a short-circuiting plug had been used on the replaced...
- Page 99 Procedure 3: writing setting data in EEPROM (The EEPROM of the service P.C. board has been set to the factory default values.) Push the buttons simultaneously and hold for at least 4 seconds. (This number corresponds to the same number shown on the Remote Controller Operation Diagram.) (Under UNIT No., ALL is displayed.) At the same time, the CODE No.
- Page 100 EEPROM location diagram The EEPROM (IC10) is mounted on an IC socket. Use a pair of tweezers, etc. to remove it. When installing it, adjust its orientation as shown in the diagram below. During EEPROM removal / installation, take care not to bend IC leads. P.C.
- Page 101 Type Code No. [10] Setup data Type Model abb. name ∗∗∗ ∗∗∗ ∗∗∗ ∗∗∗ 1-way Cassette MMU-AP 0003 (Compact type) ∗∗∗ 0004 Concealed Duct Standard MMD-AP ∗∗∗ 0005 ∗∗∗ MMD-AP ∗∗∗ 0006 Concealed Duct High Static Pressure MMD-AP ∗∗∗ n i l ∗∗∗...
-
Page 102: Detachments
Detachments 8-1. 1-way cassette (SH) MMU-AP0154SH , AP0184SH , AP0244SH Ceiling panel: RBC-US21PGE Air intake REQUIREMENT grille Be sure to put on gloves when working; otherwise an injury may be caused. Knob 1. Detachment 1) Stop operation of the air conditioner, and then turn off switch of the breaker. - Page 103 Electric parts 1. Detachment cover 1) Perform work of procedure 1. of 1. 2) Loosen fixing screws. (Ø4 ×8, 2 pcs) 3) Pull down the cover and shift it to the fan motor side to remove it. 2. Attachment 1) Insert the cover along edge of the electrical control box and match the projection inside of the fixing screw with hole of the cover.
- Page 104 1. Detachment Ceiling panel 1) Perform works of procedures 1. of 2 and 1. of 3. 2) Remove louver connector (CN33 White, 5P) connected to Remove louver connector. the control P.C. board, and then take off the lead wire from the clamp.
- Page 105 1. Detachment Electrical control box 1) Perform work of procedure 1. of 2. Fixing screw 2) Take off the fixing screws. (Ø4 × 8, 4 pcs) 3) Remove the cord clamp on the ceiling surface, pull the electrical control box downward, and then hook the hooking claw at the rear side to square hole of the panel.
- Page 106 Control P.C. 1. Detachment board Card edge spacer 1) Perform work of procedure 1. of 5. 2) Remove connectors connected from the control P.C. board to other parts. NOTE Be sure to unlock the lock of the housing before removing the connector.
- Page 107 Fan motor fan 1. Detachment 1) Perform work of procedure 1. of 2. 2) Remove clamps of the lead wires which are connected to the following connectors of the control P.C. board. Hooking claw NOTE Be sure to unlock the lock of the housing before removing the connector.
- Page 108 1. Detachment Drain pan 1) Perform work of procedure 1. of 4. 2) Remove the drain cap, and then drain the drain water accumulated in the drain pan. NOTE When removing the drain cap, be sure to catch drain water using bucket, etc.
- Page 109 Drain pump 1. Detachment 1) Perform work of procedure 1. of 8. CN68 2) Remove clamps of the lead wires connected to the following connectors of the control P.C. board. CN34 NOTE Be sure to unlock the lock of the housing before removing the connector.
- Page 110 PMV motor 1. Detachment Relay connector 1) Perform work of procedure 1. of 8. (In vinyl tube (Black)) Banding band 2) Remove the relay connector of PMV motor. (As the relay connectors are connected in the vinyl tube, cut off the banding band fixing the both ends of the tube and shift the tube to remove relay connector.) 3) Peel off the butyl rubber adhered to the pulse motor valve...
-
Page 111: Compact 4-Way Cassette
8-2. Compact 4-way cassette ∗ ∗ ∗ ∗ ∗ ∗ MMU-AP0056MH , 0054MH , 0074MH , AP0094MH , AP0124MH , AP0154MH ∗ AP0184MH Ceiling panel: RBC-UM11PG(W)E Preparing work: 1. Before work, be sure to stop the power supply of the air conditioner and turn off switch of the power supply breaker. - Page 112 Electric parts 1. Detachment Screw Temporary hanging hook cover 1) Perform work of procedure 1-1. 2) Take off screws (Ø4 × 10, 3 pcs.) fixing the electric parts cover. 3) Remove the electric parts cover from the temporary hanging hook of the electric parts cover, and then open the cover. 2.
- Page 113 1. Detachment Ceiling panel 1) Perform works of procedure 1-1-, 2-1, and 3-1. 2) Remove the louver connector (CN33, White, 5P) connected Hanging section of tentative to the control P.C. board and then take off the lead wire from hook of ceiling panel the clamp.
- Page 114 Control P.C. 1. Detachment board 1) Perform works of procedure 1-1- and 2-1. 2) Remove the connectors connected from the control P.C. board to other parts. CN33: Louver motor (5P, White) CN34: Float switch (3P, Red) CN41: Terminal block of remote controller (3P, Blue) CN40: Terminal block of crossover between inside and outside (2P, Blue) CN68:...
- Page 115 1. Detachment Electrical control box 1) Perform works of procedure 1-1- and 2-1. 2) Remove connectors of the lead wire connected to the following connectors of the control P.C. board. CN33: Louver motor (5P, White) CN34: Float switch (3P, Red) CN68: Drain pump (3P, Blue) CN100: TC1 sensor (3P, Brown)
- Page 116 Fan guard 1. Detachment Fan guard 1) Perform work of procedure 1-1. 2) Take off screws fixing the fan guard. (Ø4 × 10, [Screws for plastic molding] 4 pcs.) NOTE The specification of fixing screws for the fan guard differs from those of other fixing screws.
- Page 117 1. Detachment Fan motor 1) Perform work of procedure 9. Fixing nut for fan motor 2) Take off screws fixed with lead holding bracket of the fan motor. (Ø4 × 10, 2 pcs.) 3) Open wiring holding part of the fan motor lead holding bracket and then take off the fan motor lead wire from the bracket.
- Page 118 Drain pan 1. Detachment 2 screws 1) Perform works of procedure 4-1 and 8-1. 2) Remove the drain cap and extract drain water accumulated in the drain pan. NOTE Socket of drain pan When removing the drain cap, be sure to receive drain water with a bucket, etc.
- Page 119 PMV (Pulse 1. Detachment Motor Valve) 1) Perform work of procedure 11-1. 2) Take off screws (Ø4 × 10, 3 pcs.) fixing the piping cover to remove the piping cover. 3) Cut off binding band that binds the PMV lead wires. Piping cover 4) Peel butyl rubber of PMV a little and remove PMV motor with a spanner wrench.
- Page 120 Heat 1. Detachment exchanger 1) Recover refrigerant gas. 2) Remove the refrigerant pipe at indoor unit side. 3) Perform work of procedure 11-1. 4) Take off screws (Ø4 × 10, 3 pcs.) fixing the piping cover to remove the piping cover. 5) While holding the heat exchanger, remove fixing band and fixing screws (Ø4 ×...
-
Page 121: Slim Duct
8-3. Slim duct ∗ ∗ ∗ ∗ ∗ MMD-AP0056SPH , AP0054SPH , AP0074SPH , AP0094SPH , AP0124SPH ∗ ∗ AP0154SPH , AP0184SPH REQUIREMENT Be sure to put on gloves at working; otherwise an injury may be caused by parts, etc. Before replacement of the parts, be sure to stop operation of the air conditioner and turn off switch of the breaker. - Page 122 E-cover 1. Detachment 1) Perform work 1. of 2. 2) Take off screws fixing E-cover, and then remove hooks of the hooking part by lifting up. (Ø4 × 10, 2 pcs) 2. Attachment 1) Hang on E-cover to hooks of the hooking part so that it does not fall down.
- Page 123 1. Detachment P.C. board assembly 1) Perform works 1. of 2, 1. of 3, and 1. of 4. P.C. board assembly 2) Disconnect connectors which are connected from P.C. board assembly to other parts. NOTE Unlock the lock of the housing to disconnect the connectors. CN40: Indoor / Outdoor communication (3P: Blue) Communication terminal block: 2P...
- Page 124 Fan motor 1. Detachment 1) Perform works 1. of 2, 1. of 3, 1. of 6. 2) Remove lead wires which are connected to the following connectors of P.C. board assembly. NOTE Unlock locks of the housing, and then remove the connectors. CN333: Fan motor power supply (5P: White) CN334: Detection of fan motor (5P: White) Remove tie wrap which fixes lead wires.
- Page 125 Drain pump, Float 1. Detachment switch, Drain hose 1) Perform works in procedures 1. of 2, 1. of 3, 1. of 8. Drain hose 2) Disconnect lead wires which are connected to the following connectors of P.C. board assembly. Hose band Drain pump NOTE Unlock locks of the housing to remove the connectors.
-
Page 126: Concealed Duct Standard
8-4. Concealed duct standard MMD-AP0074BH , AP0094BH , AP0124BH , AP0154BH , AP0184BH , AP0244BH , AP0274BH , AP0304BH , AP0364BH , AP0484BH , AP0564BH Electrical control box 1. Remove the air filter. Electrical Screws (For fixing the electrical control box control box and cover) 2. - Page 127 Fan motor 1. Remove the fan. Fan motor attachment board Fan motor 2. Remove the hexagon screws of the fan motor attachment board. 3. Remove the fan motor attachment board. (2 positions) Fan motor attachment board fixing screw Drain pan 1.
- Page 128 Drain pump 1. Remove the float switch and Drain pump Drain pump holder drain pan. 2. Remove the screws of the main unit and drain pump fixing board. (3 positions) 3. Remove the three screws of the drain pump and its fixing board. Drain pump holder fixing board screws Screws for drain pump and fixing board Drain pump holder...
-
Page 129: Concealed Duct High Static Pressure
8-5. Concealed duct high static pressure MMD-AP0724H , AP0964H Replacing the fan motor Remove the electrical control cover. TC1 / TC2 / TCJ sensor leads (2 screws) PMV coil lead Remove the fan motor lead. (1) Remove the fan motor lead TA sensor connector. -
Page 130: Ceiling
8-6. Ceiling MMC-AP0154H , AP0184H , AP0244H , AP0274H , AP0364H , AP0484H Intake grille REQUIREMENT Sliding direction Wear gloves when working on it. Failure to observe this precaution may cause injury due to components, etc. 1. Removing 1) Turn off the air conditioner and the breaker switch. Knob 2) Slide the air intake grille fixing knobs (two positions) toward the arrow direction, and then... - Page 131 Electrical control 1. Removing 1) Perform Step 1 of 1 and Step 1 of 2. 2) Remove the screws of the electrical control box. (Ø4 X 10, 2) 3) Pull down the electrical control box, and hook the back. 2. Attaching 1) Insert the hook of the electrical control box into the hook part of the main unit.
- Page 132 Number of fans and attachment structure Shaft Fan case Model Attachment Bearing Attach both sides of the fan motor Coupling AP015 – AP018 directly. Fan case Use the shaft. Support one side of AP024 – AP027 the shaft with the bearing. Use the shaft.
- Page 133 2. Attaching Place the screw part on the Shaft right side against the lower 1) Attach the fan to the shaft. Bearing panel. Place the tightening screw on the right side of the Coupling fan against the lower panel. (See the picture on the right.) Fan case (Continued)
- Page 134 Fan motor 1. Removing 1) Perform Step 1 of 1, Step 1 of 2, and Step 1 of 5. 2) Remove the clamp of the lead wire connected to the following connectors of the control circuit board. NOTE Unlock the housing part before removing the connector. Fixing metal fittings CN333: Fan motor power (5P: White) CN334: Fan motor position detection (5P:...
- Page 135 Lower panel 1. Removing 1) Perform Step 1 of 1 and Step 1 of 7. 2) For AP024 – AP048, remove the strengthening Front: Screw end metal fittings. Back: Insert into (Ø4 X 12, 1) square hole Remove the screw on the front, and thread it through the square hole of the side.
- Page 136 1. Removing Drain pan Drain hose 1) Perform Step 1 of 1, Step 1 of 7, and Step 1 of 8. 2) Remove the drain cap, and then drain water from the drain pan. NOTE When removing the drain cap, put a bucket or the like for Hose band drain water.
- Page 137 Heat exchanger 1. Removing PMV motor 1) Collect the refrigerant gas. Pipe fixing 2) Remove the refrigerant pipe from the indoor unit. 3) Perform Step 1 of 1, Step 1 of 7, Step 1 of 8 and Step 1 of 9. Also remove the sensors.
-
Page 138: Floor Standing
8-7. Floor standing MMF-AP0154H , AP0184H , AP0244H , AP0274H , AP0364H , AP0484H , AP0564H 1. Electrical component assembly 1. Stop the air conditioner and turn off the main power. 2. Pull the upper part of the intake grille toward you. Remove the two strings connecting the intake grille and main unit, and then pull up the intake grille to remove it. -
Page 139: Heat Exchanger
2. Heat exchanger 1. Perform Step 1 and 2 of Electrical component assembly. 2. Remove the two screws fixing the upper cabinet, slide the cabinet upward by approximately 30 mm, and pull it out toward you. 3. Follow the procedure below to remove the heat exchanger assembly: AP015 –... - Page 140 3. Fan assembly 1. Perform Step 1 and 2 of Electrical component assembly. 2. Perform Step 2 of Heat exchanger. 3. Follow the procedure below to remove the fan: AP015 – AP027 1) Cut the banding band fixing the fan motor lead wires, and remove the relay connector in the electrical control box. 2) Remove the motor base fixing screws (5 positions).
-
Page 141: Floor Standing Cabinet
8-8. Floor standing cabinet MML-AP0074H , AP0094H , AP0124H , AP0154H , AP0184H , AP0244H 1. Removing the electrical control assembly CAUTION Wear the protective gloves when removing. Failure to observe this precaution may cause injury. 1) Stop the air conditioner and turn off the main power. 2) Remove the two intake grilles. - Page 142 2. Removing the heat exchanger 1) Follow "1. Removing the electrical control assembly" to remove the electrical control assembly. 2) Remove the connecting pipes. (Liquid and gas pipes) 3) Remove the strengthening board. (2 M4 screws) 4) Remove the upper panel. 5) Remove the vertical grille.
- Page 143 3. Removing the fan assembly 1) Follow "2. Removing the heat exchanger" to remove the heat exchanger. 2) Remove the nut in the deep right corner of the fan assembly. (M6 nut: 1 position) 3) Remove the two screws in the left of the fan assembly. (M4 screw) 4) Pull out the fan assembly toward you.
-
Page 144: Exploded Diagram / Service Parts List
Exploded Diagram / Service Parts List 9-1. 1-way cassette type (YH) MMU-AP0074YH , AP0094YH , AP0124YH – 144 –... - Page 145 – 145 –...
- Page 146 MMU- AP0074YH-E AP0094YH-E AP0124YH-E – 146 –...
- Page 147 MMU- AP0074YH-TR AP0094YH-TR AP0124YH-TR – 147 –...
- Page 148 E-Parts MMU- AP0074YH-E(TR) AP0094YH-E(TR) AP0124YH-E(TR) – 148 –...
-
Page 149: 1-Way Cassette Type (Sh)
9-2. 1-Way cassette type (SH) – 149 –... - Page 150 MMU- AP0154SH-E AP0184SH-E AP0244SH-E 43049776 SOCKET 43149352 NUT, FLARE, 5/8, IN 43149354 SOCKET 43047609 BONNET 43194029 BONNET 43149355 NUT, FLARE, 3/8, IN 431S8205 OWNER'S MANUAL, MMY-MAP0804HT8-E – 150 –...
- Page 151 MMU- AP0154SH-TR AP0184SH-TR AP0244SH-TR 43049776 SOCKET 43149352 NUT, FLARE, 5/8, IN 43149354 SOCKET 43047609 BONNET 43194029 BONNET 43149355 NUT, FLARE, 3/8, IN 431S8206 OWNER'S MANUAL, MMY-MAP0804HT8-TR – 151 –...
- Page 152 E-Parts MMU- Location No. Part No. Description AP0154SH-E(TR) AP0184SH-E(TR) AP0244SH-E(TR) – 152 –...
-
Page 153: Compact 4-Way Cassette Type
9-3. Compact 4-way cassette type ∗ ∗ ∗ ∗ ∗ ∗ MMU-AP0054MH , AP0074MH , AP0094MH , AP0124MH , AP0154MH , AP0184MH AP015, AP018 AP005, AP007, AP009, AP012 AP015, AP018 AP005, AP007, AP009, AP012 – 153 –... - Page 154 ∗∗∗ MMU-AP 4MH-E Location No. Part No. Description 43120225 FAN, ASSY TURBO 43122094 BELLMOUTH 43172185 PAN ASSY, DRAIN 43172216 PAN ASSY, DRAIN 43121738 MOTOR, FAN 4314N106 MOTOR, PMV 43146713 VALVE, PMV 43146714 VALVE, PMV 4314J263 REFRIGERATION CYCLE ASSY 4314J264 REFRIGERATION CYCLE ASSY 4314Q006 DISTRIBUTOR ASSY 4314Q007 DISTRIBUTOR ASSY 43F47685 NUT, FLARE, 1/4 IN...
- Page 155 ∗∗∗ MMU-AP 4MH-TR Location No. Part No. Description 43120225 FAN, ASSY TURBO 43122094 BELLMOUTH 43172185 PAN ASSY, DRAIN 43172216 PAN ASSY, DRAIN 43121738 MOTOR, FAN 4314N106 MOTOR, PMV 43146713 VALVE, PMV 43146714 VALVE, PMV 4314J263 REFRIGERATION CYCLE ASSY 4314J264 REFRIGERATION CYCLE ASSY 4314Q006 DISTRIBUTOR ASSY 4314Q007 DISTRIBUTOR ASSY...
- Page 156 MMU-AP0056MH ∗ ∗ ∗ ∗ ∗ – 156 –...
- Page 157 Location Q’ty/Set MMU- Part No. Description AP0056MH-E AP0056MH-TR 43120225 FAN, ASSY TURBO, TG321 43122094 BELLMOUTH 43172216 PAN ASSY, DRAIN 43121738 MOTOR, FAN, SWF-230-60-1R 4314N106 MOTOR, PMV, EFM-MD12TF-4 43146713 VALVE, PMV, EDM-B25YGTF-3 4314J534 REFRIGERATION CYCLE ASSY 4314Q120 DISTRIBUTOR ASSY 43F47685 NUT, FLARE, 1/4 IN 43049776 SOCKET, 3/8"...
- Page 158 E-Parts ∗∗∗∗ MMU-AP MH-E (TR) Location Part No. Description 0056, 0054 0074 0094 0124 0154 43050425 SENSOR ASSY, SERVICE, TC 43F50426 SENSOR, SERVICE, TA 43150320 SENSOR ASSY, SERVICE, TG 43160582 TERMINAL, 4P 43160575 TERMINAL BLOCK, 2P, 20A 4316V437 P.C. BOARD ASSY, MCC-1402 –...
-
Page 159: Slim Duct Type
9-4. Slim duct type ∗ ∗ ∗ ∗ ∗ ∗ MMD-AP0054SPH , AP0074SPH , AP0094SPH , AP0124SPH , AP0154SPH , AP0184SPH – 159 –... - Page 160 ∗∗∗ MMD-AP 4SPH-E Location No. Part No. Description 43121742 MOTOR, FAN 4314N106 MOTOR, PMV 43146713 VALVE, PMV 43120227 FAN, MULTI BLADE 43170244 HOSE, DRAIN 4314J426 EVAPORATOR ASSY 43122084 CASE, FAN, LOWER 43122085 CASE, FAN, UPPER 4314J432 EVAPORATOR ASSY 4314Q082 DISTRIBUTOR ASSY 4314Q083 DISTRIBUTOR ASSY 43100319 PLATE, INLET-B 43172183 PAN ASSY, DRAIN...
- Page 161 MMD-AP***4SPH-TR Location Part No. Description 43121742 MOTOR, FAN 4314N106 MOTOR, PMV 43146713 VALVE, PMV 43120227 FAN, MULTI BLADE 43170244 HOSE, DRAIN 4314J426 EVAPORATOR ASSY 43122084 CASE, FAN, LOWER 43122085 CASE, FAN, UPPER 4314J432 EVAPORATOR ASSY 4314Q082 DISTRIBUTOR ASSY 4314Q083 DISTRIBUTOR ASSY 43100319 PLATE, INLET-B 43172183 PAN ASSY, DRAIN 43149351 SOCKET...
- Page 162 MMD-AP0056MH ∗ ∗ ∗ ∗ ∗ – 162 –...
- Page 163 Location Q’ty/Set MMD- Part No. Description AP0056SPH-E AP0056SPH-TR 43121742 MOTOR, FAN, SWF-280-60-1R 4314N106 MOTOR, PMV, EFM-MD12TF-4 43146713 VALVE, PMV, EDM-B25YGTF-3 43120227 FAN, MULTI BLADE 43170244 HOSE, DRAIN, 25A 43122084 CASE, FAN, LOWER 43122085 CASE, FAN, UPPER 4314J535 EVAPORATOR ASSY 4314Q082 DISTRIBUTOR ASSY 43100319 PLATE, INLET-B...
- Page 164 E-Parts ∗∗∗∗ MMD-AP SPH-E (TR) Location No. Part No. Description 0056, 0054 0074 0094 0124 0154 0184 43050425 SENSOR ASSY, SERVICE, TC 43F50426 SENSOR, SERVICE, TA 43150320 SENSOR ASSY, SERVICE, TG 43160575 TERMINAL BLOCK, 2P, 4316V437 P.C. BOARD ASSY, MCC-1402 –...
-
Page 165: Concealed Duct Standard Type
9-5. Concealed duct standard type MMD-AP0074BH , AP0094BH , AP0124BH , AP0154BH , AP0184BH – 165 –... - Page 166 – 166 –...
- Page 167 MMD- Location No. Part No. Description AP0074BH-E AP0094BH-E AP0124BH-E AP0154BH-E AP0184BH-E 43120239 FAN, MULTI BLADE 43146714 VALVE, PMV 43180321 AIR FILTER 4314J422 EVAPORATOR ASSY 43047685 NUT, FLARE, 1/4 IN 43149353 SOCKET 43121747 PUMP ASSY, WIRING 43151294 SWITCH, FLOAT 43160553 LEAD, MOTOR, FAN 43100284 PLATE ASSY, A 43100291 FLANGE 43172169 PAN ASSY, DRAIN...
- Page 168 MMD- Location No. Part No. Description AP0074BH-TR AP0094BH-TR AP0124BH-TR AP0154BH-TR AP0184BH-TR 43120239 FAN, MULTI BLADE 4312C021 MOTOR, FAN 43096078 BUSHING 43196012 BUSHING 43146707 MOTOR, PMV 43146714 VALVE, PMV 43180321 AIR FILTER 4314J422 EVAPORATOR ASSY 43079249 BAND, HOSE 43047685 NUT, FLARE, 1/4 IN 43149351 SOCKET 43149353 SOCKET 43070146 HOSE, DRAIN...
- Page 169 MMD-AP0244BH , AP0274BH , AP0304BH , AP0364BH , AP0484BH – 169 –...
- Page 170 – 170 –...
- Page 171 MMD- Location Part No. Description AP0244BH-E AP0274BH-E AP0304BH-E AP0364BH-E AP0484BH-E 43120239 FAN, MULTI BLADE 4312C021 MOTOR, FAN 43146723 BODY, PMV 43180319 AIR FILTER 4314J424 EVAPORATOR ASSY 43125162 COUPLING 43149352 NUT, FLARE, 5/8, IN 43121747 PUMP ASSY, WIRING 43151294 SWITCH, FLOAT 43160553 LEAD, MOTOR, FAN 43100286 PLATE ASSY, A 43100287 PLATE ASSY, A...
- Page 172 MMD- Location Part No. Description AP0244BH-TR AP0274BH-TR AP0304BH-TR AP0364BH-TR AP0484BH-TR 43120239 FAN, MULTI BLADE 4312C021 MOTOR, FAN 43146723 BODY, PMV 43180319 AIR FILTER 4314J424 EVAPORATOR ASSY 43125162 COUPLING 43149352 NUT, FLARE, 5/8, IN 43121747 PUMP ASSY, WIRING 43151294 SWITCH, FLOAT 43160553 LEAD, MOTOR, FAN 43100286 PLATE ASSY, A 43100287 PLATE ASSY, A...
- Page 173 MMD-AP0564BH – 173 –...
- Page 174 – 174 –...
- Page 175 – 175 –...
- Page 176 431S8206 OWNER'S MANUAL, MMY-MAP0804HT8-TR – 176 –...
- Page 177 E-Parts – 177 –...
- Page 178 MMD- Location No. Part No. Description AP0074BH- AP0094BH- AP0124BH- AP0154BH- AP0184BH- E(TR) E(TR) E(TR) E(TR) E(TR) 43050425 SENSOR ASSY, SERVICE, TC 43050426 SENSOR, SERVICE, TA 43150320 SENSOR ASSY, SERVICE, TG 43158193 REACTOR, CH-43-2Z-T 43160575 TERMINAL BLOCK, 2P, 20A 4316V438 P.C. BOARD ASSY, MCC-1402 MMD- Location No.
-
Page 179: Concealed Duct High Static Pressure Type
9-6. Concealed duct high static pressure type MMD-AP0184H , AP0244H , AP0274H , AP0364H , AP0484H – 179 –... - Page 180 MMD- Location Part No. Description AP0184H-E AP0244H-E AP0274H-E AP0364H-E AP0484H-E 4312C016 MOTOR, FAN 4312C017 MOTOR, FAN 43146707 MOTOR, PMV 43146723 BODY, PMV 43020352 FAN 43020353 FAN 4314J416 EVAPORATOR ASSY 4314J418 EVAPORATOR ASSY 43147658 DISTRIBUTOR ASSY 43147661 DISTRIBUTOR ASSY 43047685 NUT, FLARE, 1/4 IN 43149355 NUT, FLARE, 3/8, IN 43049776 SOCKET 43047688 NUT, FLARE, 1/2, IN...
- Page 181 MMD- Location Part No. Description AP0184H-TR AP0244H-TR AP0274H-TR AP0364H-TR AP0484H-TR 4312C016 MOTOR, FAN 4312C017 MOTOR, FAN 43146707 MOTOR, PMV 43146723 BODY, PMV 43020352 FAN 43020353 FAN 4314J416 EVAPORATOR ASSY 4314J418 EVAPORATOR ASSY 43147658 DISTRIBUTOR ASSY 43147661 DISTRIBUTOR ASSY 43047685 NUT, FLARE, 1/4 IN 43149355 NUT, FLARE, 3/8, IN 43049776 SOCKET 43047688 NUT, FLARE, 1/2, IN...
- Page 182 E-Parts MMD- Location Part No. Description AP0184H-E(TR) AP0244H-E(TR) AP0274H-E(TR) AP0364H-E(TR) AP0484H-E(TR) 43050425 SENSOR ASSY, SERVICE 43050426 SENSOR, SERVICE 43060859 FUSE BLOCK, 30A, 250V 43150320 SENSOR ASSY, SERVICE 43154173 RELAY, LY2F-L, AC230V 43155206 CAPACITOR 43158204 TRANSFORMER 43160575 TERMINAL BLOCK, 2P, 43160576 TERMINAL BLOCK, 4P, 43160577 FUSE, 10A 43160582 TERMINAL, 4P 4316V444 P.C.
- Page 183 MMD-AP0724H , AP0964H – 183 –...
- Page 184 – 184 –...
- Page 185 – 185 –...
- Page 186 E-Parts – 186 –...
-
Page 187: Ceiling Type
9-7. Ceiling type MMC-AP0154H , AP0184H , AP0244H , AP0274H – 187 –... - Page 188 MMC- Location Part No. Description AP0154H-E AP0184H-E AP0244H-E AP0274H-E 43121743 MOTOR, FAN 43121746 DRIVER A'SSY HORIZONTAL LOUVER 43180315 AIR FILTER 43125162 COUPLING 43049776 SOCKET 43149354 SOCKET 43125164 SHAFT 43125159 BEARING 43160556 LEAD, LOUVER HORIZONTAL 43109409 GRILLE A'SSY, HORIZONTAL 43107252 SHAFT, HOLIZONTAL LOUVER 43107260 SUPPORT, GRILLE HORIZONTAL 43047609 BONNET 43194029 BONNET...
- Page 189 43107252 SHAFT, HOLIZONTAL LOUVER 43107260 SUPPORT, GRILLE HORIZONTAL 43122086 GRILLE A'SSY, VERTICAL 43179129 CAP DRAIN 43107254 H1NGE, GRILLE INLET 43107255 HOOK, GRILLE INLET 43108016 MARK TOSHIBA 43170234 HOSE, DRAIN 43102647 COVER, SIDE (RIGHT) 43102648 COVER, SIDE (LEFT) 43107215 HOLDER, SENSOR 43047609 BONNET...
- Page 190 MMC-AP0364H , AP0484H – 190 –...
- Page 191 – 191 –...
- Page 192 – 192 –...
- Page 193 E-Parts MMC- Location Part No. Description AP0154H-E(TR) AP0184H-E(TR) AP0244H-E(TR) AP0274H-E(TR) 43050425 SENSOR ASSY, SERVICE, TC 43050426 SENSOR, SERVICE, TA 43150320 SENSOR ASSY, SERVICE, TG 43160582 TERMINAL, 4P 43160575 TERMINAL BLOCK, 2P, 20A 4316V437 P.C. BOARD ASSY, MCC-1402 MMC- Location Part No. Description AP0364H-E(TR) AP0484H-E(TR)
-
Page 194: Floor Standing Type
9-8. Floor standing type MMF-AP0154H , AP0184H , AP0244H , AP0274H – 194 –... - Page 195 MMF-AP0154H , AP0184H , AP0244H , AP0274H – 195 –...
- Page 196 MMF- Location AP0154H-E AP0184H-E AP0244H-E AP0274H-E 4312C010 MOTOR, FAN 43049776 SOCKET 43149354 SOCKET 43047609 BONNET 43194029 BONNET 431S8205 OWNER'S MANUAL, MMY-MAP0804HT8-E 43155199 CAPACITOR – 196 –...
- Page 197 MMF- Location AP0154H-TR AP0184H-TR AP0244H-TR AP0274H-TR 4312C010 MOTOR, FAN 43049776 SOCKET 43149354 SOCKET 43047609 BONNET 43194029 BONNET 43155199 CAPACITOR 431S8206 OWNER'S MANUAL, MMY-MAP0804HT8-TR – 197 –...
- Page 198 MMF-AP0364H , AP0484H , AP0564H – 198 –...
- Page 199 MMF-AP0364H , AP0484H , AP0564H – 199 –...
- Page 200 MMF- AP0364H-E AP0484H-E AP0564H-E 431S8205 OWNER'S MANUAL, MMY-MAP0804HT8-E – 200 –...
- Page 201 MMF- AP0364H-TR AP0484H-TR AP0564H-TR 431S8206 OWNER'S MANUAL, MMY-MAP0804HT8-TR – 201 –...
- Page 202 E-Parts MMF- Location Part No. Description AP0154H-E(TR) AP0184H-E(TR) AP0244H-E(TR) AP0274H-E(TR) 43050425 SENSOR ASSY, SERVICE 43150320 SENSOR ASSY, SERVICE 43160575 TERMINAL BLOCK, 2P, 20A 4316V444 P.C. BOARD ASSY, MCC-1403 4316V345 P.C. BOARD ASSY, MCC-1520 MMF- Location Part No. Description AP0364H-E(TR) AP0484H-E(TR) AP0564H-E(TR) 43050425 SENSOR ASSY, SERVICE 43150320...
-
Page 203: Floor Standing Concealed Type
9-9. Floor standing concealed type MML-AP0074BH , AP0094BH , AP0124BH , AP0154BH , AP0184BH – 203 –... - Page 204 MML- Location Part No. Description AP0074BH-E AP0094BH-E AP0124BH-E AP0154BH-E AP0184BH-E 43126119 CASE, FAN, RIGHT 43155191 CAPACITOR 4312C008 MOTOR, FAN 43146726 BODY, PMV 43120232 FAN, MULTI BLADE 43180295 FILTER 4314J429 EVAPORATOR ASSY 4314Q035 DISTRIBUTOR ASSY 43047685 NUT, FLARE, 1/4 IN 43149355 NUT, FLARE, 3/8, IN 43149353 SOCKET 43107215 HOLDER, SENSOR 43147195 BONNET, 1/2 IN...
- Page 205 MML- Location Part No. Description AP0074BH-TR AP0094BH-TR AP0124BH-TR AP0154BH-TR AP0184BH-TR 43126119 CASE, FAN, RIGHT 43155191 CAPACITOR 4312C008 MOTOR, FAN 43146726 BODY, PMV 43120232 FAN, MULTI BLADE 43180295 FILTER 4314J429 EVAPORATOR ASSY 4314Q035 DISTRIBUTOR ASSY 43047685 NUT, FLARE, 1/4 IN 43149355 NUT, FLARE, 3/8, IN 43149353 SOCKET 43107215 HOLDER, SENSOR 43147195 BONNET, 1/2 IN...
- Page 206 MML-AP0244BH – 206 –...
- Page 207 – 207 –...
- Page 208 E-Parts MML- Location No. Part No. Description AP0074BH- AP0094BH- AP0124BH- AP0154BH- AP0184BH- E(TR) E(TR) E(TR) E(TR) E(TR) 43050425 SENSOR ASSY, SERVICE, TC 43050426 SENSOR, SERVICE, TA 43150320 SENSOR ASSY, SERVICE, TG 43158204 TRANSFORMER 43160575 TERMINAL BLOCK, 2P, 20A 43160582 TERMINAL, 4P 4316V444 P.C.
-
Page 209: Floor Standing Cabinet Type
9-10.Floor standing cabinet type MML-AP0074H , AP0094H , AP0124H , AP0154H , AP0184H – 209 –... - Page 210 MML-AP0074H , AP0094H , AP0124H , AP0154H , AP0184H – 210 –...
- Page 211 MML- Location Part No. Description AP0074H-E AP0094H-E AP0124H-E AP0154H-E AP0184H-E 43126119 CASE, FAN, RIGHT 43155171 CAPACITOR 4312C008 MOTOR, FAN 43120232 FAN, MULTI BLADE 43101347 COVER, CONTROL PANEL, WHITE 4314J420 EVAPORATOR ASSY 4314Q074 DISTRIBUTOR ASSY 43047688 NUT, FLARE, 1/2, IN 43149353 SOCKET 43100374 CABINET, UPPER, WHITE 43047692 BONNET 43166011 REMOTE CONTROLLER, SX-A4EE...
- Page 212 MML- Location Part No. Description AP0074H-TR AP0094H-TR AP0124H-TR AP0154H-TR AP0184H-TR 43126119 CASE, FAN, RIGHT 43155171 CAPACITOR 4312C008 MOTOR, FAN 43120232 FAN, MULTI BLADE 43101347 COVER, CONTROL PANEL, WHITE 4314J420 EVAPORATOR ASSY 4314Q074 DISTRIBUTOR ASSY 43047688 NUT, FLARE, 1/2, IN 43149353 SOCKET 43100374 CABINET, UPPER, WHITE 43047692 BONNET 43166011 REMOTE CONTROLLER, SX-A4EE...
- Page 213 MML-AP0244H – 213 –...
- Page 214 MML-AP0244H – 214 –...
- Page 215 – 215 –...
- Page 216 431S8206 OWNER'S MANUAL, MMY-MAP0804HT8-TR – 216 –...
- Page 217 E-Parts MML- Location No. Part No. Description AP0074H- AP0094H- AP0124H- AP0154H- AP0184H- E(TR) E(TR) E(TR) E(TR) E(TR) 43050425 SENSOR ASSY, SERVICE 43150320 SENSOR ASSY, SERVICE 43160575 TERMINAL BLOCK, 2P, 20A 4316V469 P.C. BOARD ASSY, MCC-1403 4316V345 P.C. BOARD ASSY, MCC-1520 MML- Location No.
-
Page 218: Fan Characteristics
10. FAN CHARACTERISTICS Conceald Duct Standard Type ∗ ∗ ∗ MMD-AP0074BH , AP0094BH MMD-AP0124BH Standard air volume: 480m³/h Standard air volume: 570m³/h Long life filter Long life filter Air volume (m³/h) Air volume (m³/h) ∗ ∗ MMD-AP0154BH MMD-AP0184BH Standard air volume: 650m³/h Standard air volume: 780m³/h Long life filter Long life filter... - Page 219 ∗ ∗ ∗ MMD-AP0244BH , AP0274BH MMD-AP0304BH Standard air volume: 1140m³/h Standard air volume: 1260m³/h Long life filter Long life filter 1200 Air volume (m³/h) Air volume (m³/h) ∗ ∗ ∗ MMD-AP0364BH MMD-AP0484BH , AP0564BH Standard air volume: 1620m³/h Standard air volume: 1980m³/h Long life filter Long life filter Air volume (m³/h)
- Page 220 Concealed Duct High Static Pressure type ∗ ∗ ∗ MMD-AP0184H MMD-AP0244H , AP0274H Standard air volume: 900 m³/h Standard air volume: 1,320 m³/h 50Hz 50Hz 60Hz 60Hz 1,320 1,000 1,100 1,000 1,100 1,200 1,300 1,400 1,500 1,600 Air volume (m³/h) Air volume (m³/h) ∗...
- Page 221 Slim Duct (Filter attached) ∗ MMD-AP0054SPH Standard air volume: 490 m High (50Pa) Upper limit of external static pressure(50Pa) High (35Pa) Low (50Pa) Lower limit of external Upper limit of static pressure (50Pa) external static pressure (35Pa) High (20Pa) Low (35Pa) Lower limit of external Upper limit of static pressure (35Pa)
- Page 222 ∗ MMD-AP0074SPH ∗ ∗ MMD-AP0094SPH MMD-AP0124SPH Standard air volume : 540m³/h Standard air volume : 600m³/h High (50Pa) Upper limit of external High (50Pa) Upper limit of external static pressure(50Pa) static pressure(50Pa) Lower limit of Lower limit of external static external static Upper limit of pressure (50Pa)
- Page 223 Slim Duct (No Filter) ∗ MMD-AP0054SPH Standard air volume: 490 m High (50Pa) Upper limit of external static pressure(50Pa) High (35Pa) Low (50Pa) Lower limit of external Upper limit of static pressure (50Pa) external static pressure (35Pa) High (20Pa) Low (35Pa) Lower limit of external Upper limit of static pressure (35Pa)
- Page 224 ∗ MMD-AP0074SPH ∗ ∗ MMD-AP0124SPH MMD-AP0094SPH Standard air volume : 540m³/h Standard air volume : 600m³/h High (50Pa) Upper limit of external High (50Pa) Upper limit of external static pressure(50Pa) static pressure(50Pa) Upper limit of external static pressure(35Pa) High High (35Pa) (35Pa) Upper limit of...
- Page 225 WARNINGS ON REFRIGERANT LEAKAGE Check of Concentration Limit Important The room in which the air conditioner is to be installed requires a design that in the event of refrigerant gas NOTE 2 : leaking out, its concentration will not exceed a set limit. The standards for minimum room volume are as follows.
- Page 226 TOSHIBA CARRIER CORPORATION 72-34 Horikawa-cho, Saiwai-ku, Kawasaki-shi, Kanagawa 212-8585, JAPAN Copyright © 2015 TOSHIBA CARRIER CORPORATION, ALL Rights Reserved. Revision record First issue — — Apr,, 2011 Revision 1 File volume down. — Mar., 2012 Cover, P12, P13, P14, P15, P21,...