Table of Contents
Advertisement
Quick Links
Advertisement
Table of Contents

Related Manuals for iOptron AllView Pro


Summary of Contents for iOptron AllView Pro
-
Page 1: Camera Mount
® iPano AllView Pro Camera Mount Instruction Manual Product #8600... - Page 2 This product is a precision instrument. Please read the included QSG before assembling the mount. Please read the entire Instruction Manual before operating the mount. If you have any questions please contact us at support@ioptron.com...
-
Page 3: Table Of Contents
Table of Content Table of Content ........................3 1. iPano AllView Pro Mount Overview ..................5 2. iPano AllView Pro Mount Assembly ................... 6 2.1. Parts List ......................... 6 2.2. Identification of Parts ....................... 7 2.3. iPano Mount Assembly ....................8 2.3.1. - Page 4 Camera Mount MENU ............. 38 Appendix C. Firmware Upgrade ....................40 Appendix D. Supported Camera ....................41 IOPTRON WARRANTY ......................44 Rev. 1.0 2016.07 iOptron reserves the rights to revise this instruction without notice. Actual color/contents/design may differ from those described in this instruction.
-
Page 5: Ipano Tm Allview Pro Mount Overview
A sturdy design with smooth and high precision pan/tilt movement make the job easy. The iPano mount is based on iOptron's astronomical equipment and electronics design. The mount is quite, precise, sturdy and easy to operation. The built-in WIFI adapter enables wireless and network operation of the mount. -
Page 6: Ipano Tm Allview Pro Mount Assembly
2. iPano AllView Pro Mount Assembly 2.1. Parts List The iPano mount includes: iPano AllView Pro mount 8.4V 2A battery charger RS232 serial cable (RS232-RJ9) Electronic trigger cables X7 (Canon N3, Canon E3, Nikon 10-pin, Nikon MC-DC1, Nikon MC-DC2, Olympus RU-UC1, SONY RM-S1AM) ... -
Page 7: Identification Of Parts
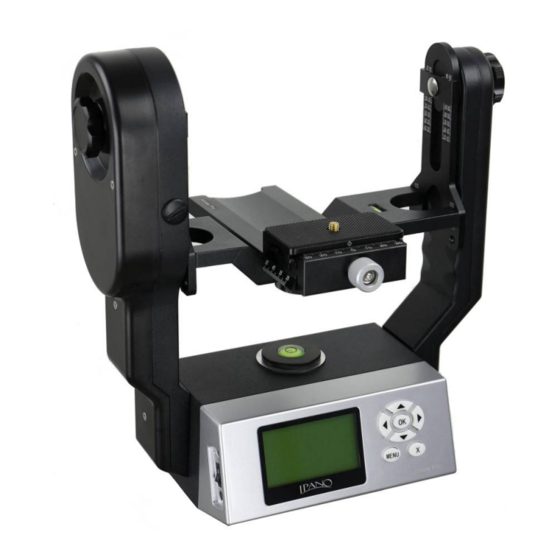
2.2. Identification of Parts Figure 2. iPano mount assembly 1. Height Lock 10. Trigger Cable Port 2. Primary Arm 11. Power Switch 3. Camera Mounting Platform 12. DC Input (7.4V to 8.4V) 4. Dovetail Mounting Module 13. REMOTE Trigger Port 5. -
Page 8: Ipano Mount Assembly
2.3. iPano Mount Assembly 2.3.1. Charge the battery The iPano AllView Pro Mount uses a lithium rechargeable battery to power the mount. Please using the included wall plug charger (8.4V/2A) to full charge the battery after receiving the mount. The LED indicator remains RED during the charging process and will turn to GREEN when charge is complete. -
Page 9: Install The Dovetail Mounting Module
Install the Dovetail Mounting Module 2.3.3. Release the Dovetail Saddle Locking Knob #16 under the Camera Mounting Platform #3. Retreat the tip of the Locking Knob #16 below the surface of the Platform. Slide the Dovetail Mounting Module #4 into the Camera Mounting Platform #3. Tighten the Locking Knob. Figure 5. -
Page 10: Level The Mount
Zero marks on Quick Release Plate and Dovetail Saddle Figure 7 Align the zero marks If the lens of a camera is off-centered from the tripod mounting hole by a distance C, as indicated in Figure 8, you need to shift the zero mark on the Quick Release Plate by C to the zero mark on the dovetail saddle. -
Page 11: Adjust The Camera
Figure 9 Level the mount Use arrow button ▼ or ▲ to adjust the level of Camera Mounting Platform #3 by reading the Camera Level Indicator #7, as shown in Figure 10. Use Shortcut Key to set the zero position (refer to 3.3.3). Figure 10 Level the camera on the mount 2.3.6. - Page 12 Figure 11 Adjust camera No-Parallax Point There are two positions for Camera Mounting Platform #3: 65mm and 80mm, as shown in Figure 12. If the distance from the base of the camera to the center of the lens is smaller than 65mm (see Figure 13), use the default setting on the Height Scale #6 (the inner scales).
- Page 13 Figure 13 Adjust camera height position Adjust Camera No-Parallax Point Where is the No-Parallax Point? The physical location of the optical center is unique for each lens. For prime lenses, the No-Parallax Point (with focus at infinity) is stationary. For zoom lenses, however, the No-Parallax Point typically shifts for each focal length.
- Page 14 Find two vertical objects; one near, one far. Position your equipment so that these objects line up in the viewfinder; Level the iPano and camera; Set the focal length of your camera; Start out by positioning the approximate center of your lens over the axis of rotation; ...
-
Page 15: Ipano Mount Operation
3.3. First Time Use and Shortcut Key First Time Use 3.3.1. If it is the first time operating the mount, the AllView Pro mount will ask you to set up the iPano camera. The system will ask: Enter setup now? Press OK. If you press NO to skip, you’ll be asked to set it up later;... -
Page 16: Test Electronic Shutter
Press OK button to test the shutter. You should hear camera shutter operation. The iPano mount comes with 7 trigger cables. If the one for your camera is not included, please contact iOptron for additional cable or cable information. Shortcut Key 3.3.3. -
Page 17: Turn Off The Mount
o Focus locked (no auto focus)? o Flash off? Select Start and press OK to start the test run using default setting parameters. 3.5. Turn Off the Mount Remember to turn the mount power off at the end of the session. Charge the mount for next time use. -
Page 18: Full Operation Menu
4. Full Operation Menu 4.1. Matrix Panorama The Matrix Panorama will provide a rectangular panorama photo. After setup the mount and camera, phase the camera to the middle of the scene. Press MENU => Matrix Panorama. The system will provide 8 moving paths to choose. Move the cursor by press the arrow button and press OK to choose one. -
Page 19: Circular Panorama
Focus locked? Flash off? [OK]=Continue [OK]=Continue Using a 3x4 Matrix Panorama as an example. The mount will take the photo with the following path, if the path 1 is chosen. Figure 15. Panorama moving path 1 The mount is set to a default 3:2 Aspect Ratio and 30% Overlap. 4.2. -
Page 20: Time-Lapse Photography
4.3. Time-lapse Photography This Time-lapse Photography allows you to create time-lapse images while the camera is moving. You can pan, tilt or move diagonally the camera while taking the time-lapse images. You can set the delay between each picture you are taking. To take a time-lapse panorama (panoramas over a period of time,) please refer to Global Settings =>Interval Timer. -
Page 21: Customer Settings Bank
4.4. Customer Settings Bank This function lets you store up to six (6) customized settings of parameters for a quick reload. Bank 4.4.1. The 6 banks, numbered from A to F, are available for storing customized parameters. These parameters are AutoFocus (AF), Exposure, Mirror Lockup (Mup), Shutter Length, Repeat, Pretrigger Delay and Camera Field of View (FOV). -
Page 22: Autofocus
Press OK to save the changes. Here is the flow to record parameters to a specific bank, for example Bank D. Use MENU => Custom Settings Bank => select Bank A (or the bank is currently in use) => OK => use arrow key to change it to [D] =>... -
Page 23: Period/Exposure
Mirror Lock-up Lock-up Time 0.50s Lock-up Time Period/Exposure 0.25s Shutter Length 0.50s Shutter Feedback 0.75s Pretrigger Delay 1.00s Period/Exposure 4.4.6. Set the total time between the start of the shutter triggering and the next mount movement. It can be set from 0.1s to 60s. -
Page 24: Pretrigger Delay
Pretrigger Delay 4.4.10. This delay is between the end of the mount movement and beginning of the trigger signal to your camera. It will allow the camera to settle after mount movement. The delay time can be set at 0.0s, 0.1s, 0.2s, 0.3s, 0.4s, 0.5s, 0.6s, 0.7s, 0.8s, 0.9s, 1.0s, 1.5s, 2.0s, 2.5s or 3 seconds. -
Page 25: Rotate Tall
Aspect Ratio Picture Overlap 30% Picture Overlap Rotate Tall Multi Picture Interval Timer Brackets Rotate Tall 4.5.3. Choose take the photo in landscape (normal) or portrait orientation. The default setting is Disable (landscape). If you enable this function, make sure that the camera is mounted in vertical with the vertical mounting dovetail plate. -
Page 26: Brackets
Brackets 4.5.6. Set exposure bracketing of 1, 3, 5, 7, or 9 photographs for HDR images by working with the camera AEB (automatic exposure bracketing) firmware. If the Bracket setting is more than 1, use the EV Step Size setting to set the separation of exposure values. The default bracket is 1. Interval Timer Brackets 1 Brackets... -
Page 27: Check List
Save the changes? 00:00:00 [X]=Back [OK]=Yes Check List 4.5.10. If Check List is selected, the mount will prompt you to check the camera based on your settings or which Custom Settings Bank is choosing before panorama capture begins. The default is On. Start Del/trig Check List On Check List... -
Page 28: Factory Reset
Language iPano+ V1.00 Firmware Information Main_Ver:150629 Factory Reset WiFi_Ver:V1.0.07 Wi-Fi Switch WiFi_Drv:141440,V9 Wi-Fi Options Set Beep Factory Reset 4.7.1. Reset the system to factory default value and all the data will be lost. Wi-Fi Switch 4.7.2. Turn ON/OFF built-in Wi-Fi module. When the Wi-Fi is turned on (default setting), the iPano mount will broadcast itself with a Wi-Fi SSID iPano_XXXXXX (can be customized). -
Page 29: Camera Parameter
4.8. Camera Parameter For storing your camera and lens’ basic parameters, such as Center Position, Camera Height, Entry Pupil Positions for the camera and lens. 4.9. Short Cut Key Hold the MENU button will bring up the Short cut Key menu. Last Project Camera Setup Goto Zero Position... -
Page 30: Ipano Allview Mount Remote Control
5. iPano AllView Mount Remote Control A PC computer may be used to setup and control an iPano AllView Pro mount via iPano Commander. The iPano mount can be connected to a PC via a serial cable or wirelessly. An iPano mount can also be controlled by an iOS version iPano Commander. -
Page 31: Connect The Mount To A Computer Via A Wi-Fi Connection
5.2. Connect the mount to a computer via a Wi-Fi connection The iPano mount has a built-in Wi-Fi connection. Open the Wi-Fi connection panel on your computer. Find a Wi-Fi SSID called “iPano_XXXXXX”, as shown below and connect it. Figure 20. Wi-Fi connection 5.3. - Page 32 Connect the iPad/iPhone to the iPano_XXXXXX wireless network. Tap iPano Commander on your iPad/iPhone. Now you make your iPad/iPhone a iPano remote controller. Watch the demo on YouTube iOS iPano Commander Demo Figure 22. iPad/iPhone Wi-Fi connection...
- Page 33 Figure 23. iOS iPano Commander interface...
-
Page 34: Image Processing
6. Image Processing The processing software, Panoweaver 9 Standard Edition by Easypano is included. It can be download from Easypano website (http://www.easypano.com/download-panorama-software.html). You may refer to the software website for more detailed information, including Video Tutorial and Online User Manual. You may also use other stitching programs you are already familiar with, such as PTGui and Autopano. -
Page 35: Wi-Fi Configuration
7. Wi-Fi Configuration The iPano Wi-Fi is shipped with no password protection. You can change the SSID and enable password protection so only you can make the connection. To change the Wi-Fi settings: Connect the computer/tablet/SmartPhone to iPano Wi-Fi; ... -
Page 36: Maintenance And Servicing
8. Maintenance and Servicing 8.1. Maintenance The iPano AllView Pro mount is designed to be maintenance free. Do not overload the mount. Do not drop the mount as this will damage the mount and / or permanently degrade performance. Use a wet cloth to clean the mount and hand controller. -
Page 37: Appendix A. Technical Specifications
Appendix A. Technical Specifications Mount iPano AllVtew Pro Camera Mount Operation Mode Panorama/Turntable Mount Structure U-shaped, double-arm, all enclosed Frame material Aluminum alloy Panorama – 5kg (11 lbs) Payload Turntable – 10kg (22 lbs) Weight 3.3kg (7.3 lbs, including battery) Size 20.3 X 28 X 13.3 cm (12 X 11 X 5.25 in.) Lens center to camera bottom <... -
Page 38: Appendix B. Ipano Allview Pro Camera Mount Menu
Appendix B. iPano AllView Pro Camera Mount MENU MENU Matrix Panorama Circular Panorama Time-lapse Photograpy Custom Settings Bank Bank Autof ocus Time/Focus Mirror Lock-up Lock-up Time Period/Exposure Shutter Length Shutter Feedback Shutter Retries Pretrigger Delay Camera Setup Global Settings Aspect Ratio... - Page 39 System Language Firmware Inf ormation Factory Reset Wi-Fi Switch Wi-Fi Option Set Beep LCD Contrast Camera Parameter...
-
Page 40: Appendix C. Firmware Upgrade
Appendix C. Firmware Upgrade The firmware in iPano AllView Pro can be upgraded by the customer. Please check iOptron’s website, http://www.iOptron.com, under Support > Firmware/Software for details. -
Page 41: Appendix D. Supported Camera
Appendix D. Supported Camera There are 7 camera shutter tripper cables are included in an iPano mount. An optional Sony S2 cable (#3610-08) is also available on www.ioptron.com. Canon E3 trigger cable Canon: (#3610-01) 60D, 70D, All 'Rebels' (100D, 300D, 350D, 400D, 450D, 500D,... - Page 42 Nikon DC-MC2 trigger cable Nikon: (#3610-04) D90, D3100, D3200, D3300, D5000, D5100, D5200, D5300, D5500, D7000, D7100, D7200, D600, D610, D750 Nikon 10-pin trigger cable Nikon: (#3610-05) D1, D1H, D1X, D2, D200, D2H, D2Hs, D2X, D2Xs, D3, D300, D300s, D3s, D3x, D4, D4s, D700, D800, D800e and D810 Fuji: S3 and S5 Kodak:...
- Page 43 Sony RM-S1AM trigger cable Sony: (#3610-07) Alpha DSLR-A100 A200 A300 A350 A450 A500 A550 A560 A580, A700 A900 Alpha SLT-A77, SLT-A65, SLT-A55, SLT-A35, SLT-A33, Minolta: Maxxum/Dynax/AF 7D, 5D, 9, 7, 5, 4, 3, 807si, 800si, 700si, 600si, 505si, 500si, 9000, 7000, 5000 DiMAGE 7Hi, 7i, 7, 5, A1, A2, A200 Optional Sony:...
-
Page 44: Ioptron Warranty
As a condition to the obligation of iOptron to repair or replace such product, the product must be returned to iOptron together with a proof-of-purchase satisfactory to iOptron.