
Related Manuals for Alcatel-Lucent 8232 DECT


Summary of Contents for Alcatel-Lucent 8232 DECT
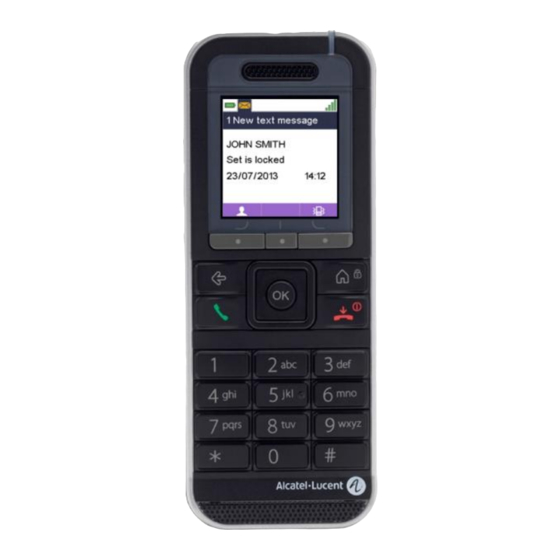
- Page 1 8232 DECT Handset OmniPCX Office Rich Communication Edition User Manual 8AL90861USACed01-1602...
-
Page 2: Table Of Contents
8232 DECT Handset 1GETTING TO KNOW YOUR TELEPHONE 1.1 P .............................. 5 HONE DESCRIPTION 1.2 S ................................. 7 TATUS ICONS 1.3 MENU ................................8 ICONS 1.4 C ................................9 ALL ICONS 1.5 A MENU ......................10 CCESSING THE AND NAVIGATING 2GETTING STARTED 2.1 I... - Page 3 8232 DECT Handset 7PROGRAMMING YOUR TELEPHONE 7.1 I ........................34 NITIALIZING YOUR VOICE MAILBOX 7.2 C ....................... 34 USTOMIZING YOUR VOICE GREETING 7.3 C ....................... 35 HANGE YOUR VOICE MAILBOX PASSWORD 7.4 A ........................36 DJUSTING THE AUDIO FUNCTIONS 7.5 A ..........................
- Page 4 You can charge the device by connecting it to a USB 2.0 port (type A). Use only the cable provided with the 8232 DECT Handset Desktop Charger (USB 'A' plug), or the 82x2 DECT Handset Dual Charger. To prevent possible hearing damage, do not listen at high volume levels for long periods.
-
Page 5: 1Getting To Know Your Telephone
8232 DECT Handset 1 Getting to know your telephone 1.1 Phone description Answer the call. Long press (feature depending on the system): redial last number or access the redial list. Switching between two calls (Broker call). ... - Page 6 8232 DECT Handset Long press (features depending on the system): access to personal speed dial / access the DTMF feature during a conversation. GAP mode: when you are on a call, you can initiate a second call. ...
-
Page 7: Status Icons
8232 DECT Handset 1.2 Status icons The status icons are displayed on the welcome screen and indicate the status of the telephone. Battery charge level. Received messages voice mail and callback request texts and unanswered calls. Appointment programmed. Call diversion activated. -
Page 8: Menu Icons
8232 DECT Handset 1.3 MENU icons The MENU is accessible from the welcome screen by pressing the OK key. It provides access to all the functions available on your system. All icons are described in their unselected state. When selected, the icons are displayed in a purple. -
Page 9: Call Icons
8232 DECT Handset 1.4 Call icons Making a call. Receiving a call. Call on hold. Accessing the directories. Transferring a call. Switching to DTMF signals. Sending text message if internal number is busy. Setting up a conference. Forwarding your calls to your voice message service. -
Page 10: Accessing The Menu And Navigating
8232 DECT Handset 1.5 Accessing the MENU and navigating Access the menu. Press the Access menu key. Select a function in the MENU. Use the navigator keys and press the OK key to select a function. Navigating within a function. -
Page 11: 2Getting Started
8232 DECT Handset 2 Getting started In order to have a fully operational 8232 DECT Handset, make sure that you have the following items: the battery, the AC/DC adapter, the power supply and the USB cable. 2.1 Installing the battery in the telephone 2.1.1 Installing the battery in the telephone... -
Page 12: Charging Your Telephone Battery
8232 DECT Handset Remove the battery from its compartment as shown in the drawing. 2.2 Charging your telephone battery 2.2.1 Charging the battery on a single charger Put your phone on its support. Plug the USB cable into the 5V socket of the desktop charger. Plug the other end of the USB cable into the AC/DC adaptor. -
Page 13: Switching On Your Telephone
8232 DECT Handset The battery charging time is less than 3 hours. The charging time is longer if charging through the USB plug from a device other than the AC/DC adapter. 2.2.4 Autonomy of your telephone On standby in the radio coverage zone. Up to 200 hours. -
Page 14: 3Using Your Telephone
8232 DECT Handset 3 Using your telephone 3.1 Making a call Dial. Send the call. You are in communication: Hang up. To make an external call, dial the outside line access code before dialing your contact number. -
Page 15: Calling Your Caller By Name (Company Directory)
8232 DECT Handset 3.3 Calling your caller by name (company directory) Quick access: Access MENU. Contacts Directory Enter the first letters of your contact's surname. Apply. Select the desired name. Send the call. -
Page 16: Redialing
8232 DECT Handset 3.5 Redialing 3.5.1 Call back one of the last numbers dialed Quick access: Access MENU. Long press Dialed Select the number in the list. Send the call. 3.6 Requesting automatic callback if internal number is busy ... -
Page 17: 4During A Conversation
8232 DECT Handset 4 During a conversation 4.1 Make a second call You are in conversation with one caller. Dial the number. Send the call. The first call is on hold. Recover the call on hold: ... -
Page 18: Switching Between Two Calls (Broker Call)
8232 DECT Handset 4.3 Switching between two calls (Broker call) During a call, to recover the caller on hold: Recover the call on hold. You can establish the identity of the waiting call without taking it by using the navigate-left-right key. -
Page 19: Three-Way Conference With Internal And/Or External Callers (Conference)
8232 DECT Handset 4.5 Three-way conference with internal and/or external callers (conference) During a conversation, a second call is on hold: Conference. You are in conference mode. Cancel conference and return to first caller. (If conference is active.): ... -
Page 20: Activate/Deactivate Voice Frequency
8232 DECT Handset 4.7 Activate/deactivate voice frequency This feature depends on the system configuration. If necessary, contact your administrator. During a call, you sometimes have to send DTMF signals, for example, for a voice message service, an automatic switchboard or when remotely consulting an answering machine: ... -
Page 21: 5Sharing
8232 DECT Handset 5 Sharing 5.1 Answering the general bell When the operator is absent, incoming external calls are diverted to a general bell. You can answer these calls: Access MENU. Pickup AnsGenBell Confirm. 5.2 Call pick-up You hear a telephone ringing in an office where no-one can answer. -
Page 22: Hunting Groups
8232 DECT Handset 5.3 Hunting groups Hunting group call: Some extensions can be associated to form a group. You can contact any one of them by dialling the group number. Belonging to a group does not affect the management of direct calls. A specific telephone within a group can always be called by using its own number. -
Page 23: Sending A Written Message To An Internal Contact
8232 DECT Handset 5.5 Sending a written message to an internal contact Access MENU. Messages Textmails Confirm. Sendamsg Confirm. Dial the destination number. Confirm. Select the message to be sent. ... -
Page 24: Send A Voice Message Copy
8232 DECT Handset If selected message has to be completed: Confirm access to the message to be completed. Complete the message. Apply. When editing a message to be completed you can use the delete key to delete any entered characters. The browser lets you move the cursor in an input field. -
Page 25: Sending A Recorded Message To A Number Or A Distribution List
8232 DECT Handset To record a comment Sendcopy Number or name of the recipient or list. Confirm. Reccomment Confirm. Confirm. Start recording. Recording in progress. Stop Confirm. While the message is being recorded, you can select other functions with the navigate-up-down key. - Page 26 8232 DECT Handset Distribution lists: 000: the message is sent to all voice mailboxes. 001 to 050: the message is sent to a group of voice mailboxes. To record the message. Reccomment Confirm. Confirm. Start recording.
-
Page 27: 6Keep In Touch
8232 DECT Handset 6 Keep in touch 6.1 Selecting calls to be forwarded Access MENU. Forward Allcalls Externcalls Localcalls Choose the type of calls to forward (all types of calls, internal or external calls). -
Page 28: Different Types Of Diversions / Example Of Diversion On Busy
8232 DECT Handset 6.3 Different types of diversions / Example of diversion on busy 6.3.1 Different types of diversions You can initiate different types of forwarding from the call forward list. Access MENU. Forward Select the 'List of diversions' icon. -
Page 29: Diverting Calls To Your Voice Mailbox
8232 DECT Handset 6.4 Diverting calls to your voice mailbox Access MENU. Forward FwdImmVMU Confirm. 6.5 Cancelling all forwards Access MENU. Forward Select the 'Diversion cancellation' icon. Confirm. 6.6 Consulting your voice mailbox When you have received a message, the Message icon is displayed on the welcome screen. - Page 30 8232 DECT Handset Voice Mail Confirm access to the voice mailbox. Enter your personal mailbox password. Confirm. Display number of new and old messages. Playnew To access voice mail functions. You can move horizontally along the various icons.
-
Page 31: Activating/Deactivating The Personal Assistant
8232 DECT Handset 6.7 Activating/deactivating the personal assistant As well as leaving a message in the voice mailbox, the personal assistant directs the caller to an extension number, an outside number, a mobile or the switchboard. Access MENU. ... - Page 32 8232 DECT Handset To select the type of forwarding. Menu InternalNb Enter the name of a colleague or your assistant or any other name. ExternalNb Key in an outside number. MobileNb Key in the number of your mobile.
-
Page 33: Consulting Text Messages
8232 DECT Handset 6.9 Consulting text messages When you have received a message, the Message icon is displayed on the welcome screen. The yellow LED on your telephone flashes to indicate there is a message. Select the message icon in the notification area. -
Page 34: 7Programming Your Telephone
8232 DECT Handset 7 Programming your telephone 7.1 Initializing your voice mailbox Before starting initialization, make sure the administrator has created a voice mailbox. You can use the Message icon on the welcome screen to initialize your voice mailbox. -
Page 35: Change Your Voice Mailbox Password
8232 DECT Handset To go back to the default message: Access MENU. Services Default ? Confirm default message. 7.3 Change your voice mailbox password Access MENU. Services Useroptions Password Enter the old password. -
Page 36: Adjusting The Audio Functions
8232 DECT Handset 7.4 Adjusting the audio functions You can select the ring tone for your telephone (6 choices) and adjust its volume (4 levels). Access MENU. Services Phoneset 7.4.1 Choose the tune Ext. Melody ... -
Page 37: Activating Headset Mode
8232 DECT Handset 7.5 Activating headset mode This mode allows you to answer calls automatically (without doing anything) and to direct the call to the external headset. Access MENU. Services Phoneset automatic answer Select active/inactive as you wish. -
Page 38: Selecting Language
8232 DECT Handset Vibrate/Ring You can adjust the buzzer/ringer mode according to your needs. Security To activate or deactivate a timeout to trigger the automatic keylock, change the keylock pin code or lock the function key. Silent charging Deactivate ringing and/or vibrate when the phone is on its charging holder. -
Page 39: Modifying A Record In The Personal Directory
8232 DECT Handset Press the # key to switch from lowercase letters mode to uppercase letters mode, and from uppercase letters mode to numbering mode. To delete a character, briefly press the delete key. To erase a field full of characters, hold down the erase key (long press). -
Page 40: Erase A Record From The Personal Directory
8232 DECT Handset 7.10 Erase a record from the personal directory Access MENU. Contacts PersSpDial Select the record to erase. Confirm (long press). Delete all characters. Apply. Delete all numbers. Apply. -
Page 41: Locking Your Telephone
8232 DECT Handset 7.12 Locking your telephone Locking features on your terminal (System lock) This service enables you to prohibit outside calls and any programming changes on your telephone: Access MENU. Lock Apply. Unlocking features on your terminal: ... -
Page 42: 8Registering The Telephone
8232 DECT Handset 8 Registering the telephone 8.1 Registering the telephone on a system for the first time For the mobile telephone to function, it must be registered on at least one ALE International or GAP system (registration operation).If when first switched on the display indicates: 'System 1 Auto install ?' your telephone has not been registered on any system ... -
Page 43: Registering The Telephone On Other Systems
8232 DECT Handset 8.2 Registering the telephone on other systems The telephone can be registered on several systems (maximum of 4). Note: the input is usually reserved for use with your main ALE International system. You can select the other inputs to register the telephone under another system (ALE International or other system). - Page 44 8232 DECT Handset 8.2.2 Selecting your telephone system Your telephone can be programmed to function on 5 different DECT systems (ALE International or GAP). Access MENU Install Select network Select the desired input (the chosen option is indicated by the radio button with a central dot).
-
Page 45: 9Using The Telephone In Gap Mode
8232 DECT Handset 9 Using the telephone in GAP mode Your telephone complies with the GAP standard and can be used in simplified mode on another DECT/GAP system (other PABX or indoor relay unit). Unless otherwise specified, the functions described below are available on your telephone in combination with the mandatory functions provided by your fixed GAP system. -
Page 46: Calling From Your Personal Directory
8232 DECT Handset 9.3 Calling from your personal directory Quick access: Access MENU. Contacts Select the name of the person you wish to call. Send the call. 9.4 Redialing the last number dialed (redial) Quick access: ... -
Page 47: Sending Dtmf Signals
8232 DECT Handset 9.5.1 Manage the call log Select an entry. Call Call the contact. View Display the log details. More View details Display the log details. o Save contact If the contact is not in your local directory, you can save them as a new local contact. -
Page 48: Programming Your Personal Directory
8232 DECT Handset 9.8 Programming your personal directory Your directory can contain up to 12 numbers. Quick access: Access MENU. Contacts 9.8.1 Add new contact More Add contact Apply. Name: Enter the name (10 characters maximum). -
Page 49: Customizing And Adjusting Your Telephone
8232 DECT Handset Modify the number. Apply. Save Return to idle. To delete a character, briefly press the delete key. To erase a field full of characters, hold down the erase key (long press). 9.8.3 Deleting a card ... - Page 50 8232 DECT Handset 9.9.2 Adjusting the ringer volume Access MENU. Ring Ring volume Apply. Increase / reduce the volume. Apply. Return to idle. 9.9.3 Selecting language: Access MENU. Settings Languages ...
- Page 51 8232 DECT Handset Access MENU. Settings. Economy mode Activate or deactivate the economy mode When the economy mode is activated, the set adjusts its radio emission power according to the distance between the set and the radio base. The closer the set is to the radio base the lower the radio emission from the phone.
-
Page 52: 10Accessories
8232 DECT Handset 10 Accessories 10.1 Phone package When you purchase your phone, it is equipped with a belt clip on the back. You can remove this belt clip and replace it with the cover provided in the box of your new phone. -
Page 53: Characteristics Of The Mains Power Adapter
8232 DECT Handset A desk support for docking your phone. 10.2.1 How to dock your phone on the desk support Put your phone on its support. Plug the USB cable into the 5V socket of the desktop charger. Plug the other end of the USB cable into the AC/DC adaptor. -
Page 54: Headphone / External Microphone
8232 DECT Handset 10.4.2 Initial charge: Place the telephone in the charging holder. Battery icon flashing. The battery is charged. Maximum battery performance is only reached after around 10 charge/discharge cycles. These batteries contain polluting substances: do not dispose of them in a dustbin - take them to a specialized collection point. -
Page 55: 11Declaration Of Compliance
8232 DECT Handset 11 Declaration of compliance Marking: This equipment uses the DECT harmonized frequency spectrum (1880Mhz-1900Mhz). This equipment is in compliance with the essential requirements of R&TTE Directive 1999/5/EC and with Directive 2011/65/UE (ROHS). 32, avenue Kléber - 92700 Colombes – France... - Page 56 8232 DECT Handset Directive 2003/10/EC specifying the risks inherent in noise at work The ring contributes towards overall daily noise. To reduce the level, the following is recommended: reduce the setting, program a progressive ring. Privacy: Privacy of communications may not be ensured when using the Bluetooth® handset or any additionnal Bluetooth®...
- Page 57 Phone description Green steady: the phone is on the charger and the battery is fully Answer the call. charged. Red steady: the phone is on the charger and the battery is charging. Long press (feature depending on the system): ...
- Page 58 Consulting external missed calls. Status icons Program a call-back time. Lock/unlock the set. Consulting internal missed calls. The status icons are displayed on the welcome screen and indicate the status of the telephone. Access the services configuration of the handset Consulting text messages.