LG LST-3410A Service Manual
Hd/sd presonal video recorder & receiver with gemstar
Hide thumbs
Also See for LST-3410A:
- Owner's manual (68 pages) ,
- Specifications (2 pages) ,
- Owner's manual (72 pages)
Table of Contents
Advertisement
Quick Links
Download this manual
See also:
Owner's Manual
Advertisement
Chapters
Table of Contents
Troubleshooting

Related Manuals for LG LST-3410A


Summary of Contents for LG LST-3410A
- Page 1 HD/SD PRESONAL VIDEO RECORDER & RECEIVER WITH GEMSTAR SERVICE MANUAL MODEL : LST-3410A CAUTION BEFORE SERVICING THE UNIT, READ THE “SAFETY PRECAUTIONS” IN THIS MANUAL. DECEMBER, 2003 P/NO : 3829RVN006Z Printed in Korea...
-
Page 2: Table Of Contents
SECTION 1 SUMMARY CONTENTS INTRODUCTION ......................1-2 PRODUCT SAFETY SERVICING GUIDELINES FOR VIDEO PRODUCTS....1-3 SERVICING PRECAUTIONS..................1-4 SPECIFICATIONS .....................1-5 LOCATION OF CUSTOMER CONTROLS ...............1-7... -
Page 3: Introduction
INTRODUCTION - Digital/Analog broadcasting recorder/receiver [HD/SD PRESONAL VIDEO RECORDER & RECEIVER] or PVR(Personal Video Recorder)-STB(Set-Top Box) receives the ground wave HD Digital broadcasting pro- gram /Analog NTSC or Cable broadcasting program and saves a video or audio signal at a HDD with a spe- cific form or offers related additional services. -
Page 4: Product Safety Servicing Guidelines For Video Products
PRODUCT SAFETY SERVICING GUIDELINES FOR VIDEO PRODUCTS IMPORTANT SAFETY NOTICE A.C. Voltmeter This manual was prepared for use only by properly trained audio-video service technicians. When servicing this product, under no circumstances should the original design be modified or altered without permission from Zenith Electronics Corporation. -
Page 5: Servicing Precautions
SERVICING PRECAUTIONS CAUTION: Before servicing the HD/SD PRESONAL VIDEO Electrostatically Sensitive (ES) Devices RECORDER & RECEIVER WITH GEMSTAR covered by Some semiconductor (solid state) devices can be damaged this service data and its supplements and addends, read and easily by static electricity. Such components commonly are follow the SAFETY PRECAUTIONS. -
Page 6: Specifications
SPECIFICATIONS System Specifications ♦ CPU [PPC405GP Rev E] ♦ TPN-II • PowerPC405GP, 32-bit, 200MHz RISC Processor • TP Processing for PVR • I Cache 16K, D Cache 8K • PCI I/F • SDRAM Controller(100MHz speed) • SDRAM I/F 16MB(K4S641632) • External Peripheral Bus(up to 8 device) •... - Page 7 In/out Connector Set-Top Box Size ♦ Input ♦ 430(W) x 69(H) x 297(D) [Unit: mm] • Antenna In : Terrestrial [F Connector] • Antenna In : Cable [F Connector] • CVBS Video/Audio-1 [RCA Jack, 3EA] • CVBS Video/Audio-1 [RCA Jack, 3EA] Remote Controller Size ♦...
-
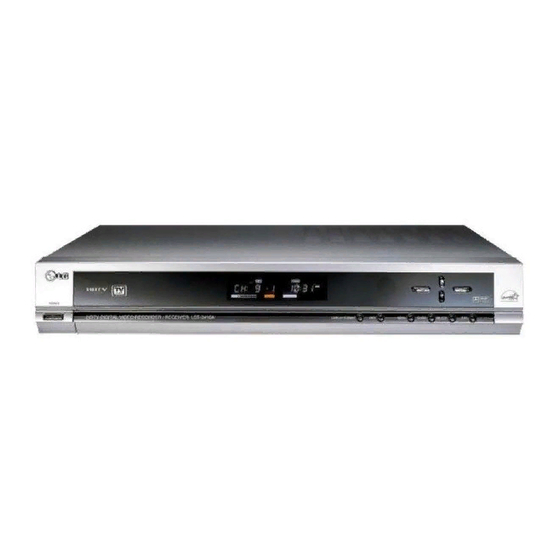
Page 8: Location Of Customer Controls
LOCATION OF CUSTOMER CONTROLS F R O N T Arrow Buttons Remote Control Sensor Power Display Window @ @ @ @ @ @ @ @ e ? @ @ @ @ @ @ @ @ e ? @ @ @ @ @ @ @ @ e ? @ @ @ @ @ @ @ @ ? e @ @ @ @ @ @ @ @ e ? @ @ @ @ @ @ @ @ ? e @ @ @ @ @ @ @ @ e ? @ @ @ @ @ @ @ @ ? e @ @ @ @ @ @ @ @ e ? @ @ @ @ @ @ @ @ ? e @ @ @ @ @ @ @ @ e ? @ @ @ @ @ @ @ @ ? e @ @ @ @ @ @ @ @ e ? @ @ @ @ @ @ @ @ ? e @ @ @ @ @ @ @ @ e ? @ @ @ @ @ @ @ @ ? e @ @ @ @ @ @ @ @ e ? @ @ @ @ @ @ @ @ ? e @ @ @ @ @ @ @ @ e ? @ @ @ @ @ @ @ @ ? e @ @ @ @ @ @ @ @ e ? @ @ @ @ @ @ @ @ ? e @ @ @ @ @ @ @ @ e ? @ @ @ @ @ @ @ @ ? e @ @ @ @ @ @ @ @ e ? @ @ @ @ @ @ @ @ ? e @ @ @ @ @ @ @ @ e ? @ @ @ @ @ @ @ @ ? e @ @ @ @ @ @ @ @ e ? @ @ @ @ @ @ @ @ ? e @ @ @ @ @ @ @ @ e ? @ @ @ @ @ @ @ @ ? e @ @ @ @ @ @ @ @ e ? @ @ @ @ @ @ @ @ ? e @ @ @ @ @ @ @ @ e ? @ @ @ @ @ @ @ @ ? e @ @ @ @ @ @ @ @ e ? @ @ @ @ @ @ @ @ ? e @ @ @ @ @ @ @ @ e ? @ @ @ @ @ @ @ @ ? e @ @ @ @ @ @ @ @ e ? @ @ @ @ @ @ @ @ ? e @ @ @ @ @ @ @ @ e ? @ @ @ @ @ @ @ @ ? e @ @ @ @ @ @ @ @ e ? @ @ @ @ @ @ @ @ ? e @ @ @ @ @ @ @ @ e ? @ @ @ @ @ @ @ @ ? e @ @ @ @ @ @ @ @ e ? @ @ @ @ @ @ @ @ ? e @ @ @ @ @ @ @ @ e ? @ @ @ @ @ @ @ @ ? e @ @ @ @ @ @ @ @ e ? @ @ @ @ @ @ @ @ ? e @ @ @ @ @ @ @ @ e ? @ @ @ @ @ @ @ @ ? e @ @ @ @ @ @ @ @ e ? @ @ @ @ @ @ @ @ ? e @ @ @ @ @ @ @ @ e ? @ @ @ @ @ @ @ @ ? e @ @ @ @ @ @ @ @ e ? @ @ @ @ @ @ @ @ ? e @ @ @ @ @ @ @ @ @ @ h ? - Page 9 R E M O T E C O N T R O L MODE INDICATOR POWER MODE TV/INPUT/SIGNAL /1394 RATIO/AUDIO/CC Numbers SELECT Dash (-) MUTE FLASHBK VCR Plus+ SURF CH (Channel) (+/–), PG UP/DN VOL (Volume) (+/-) TV GUIDE/BLUE, GREEN/INFO SYNOPSIS/REPEAT/MENU/EXIT Arrow Buttons, DRAG + / –, SKIP + / -/SELECT...
- Page 10 SECTION 2 CABINET & MAIN CHASSIS CONTENTS EXPLODED VIEWS ........................2-2 1. Cabinet and Main Frame Section ...................2-2 2. Packing Accessory Section ....................2-3...
-
Page 11: Cabinet And Main Frame Section
EXPLODED VIEWS 1. Cabinet and Main Frame Section NOTE) Refer to “SECTION 4 REPLACEMENT PARTS LIST” in order to look for the part number of each part. -
Page 12: Packing Accessory Section
2. Packing Accessory Section 825 DVI CABLE CABLE 808 BATTERY CABLE REMOCON CABLE INSTRUCTION ASSEMBLY CABLE PACKING (LF) PACKING (RF) BOX CARTON... - Page 13 SECTION 3 ELECTRICAL CONTENTS SYSTEM S/W UP-GRADE........3-2 4. SYSTEM MEMORY, FLASH, I2C COT 1. UP-GRADE CABLE CONFIGURATION ..3-2 CIRCUIT DIAGRAM........3-76 2. CPLD PROGRAM..........3-4 5. HD-II CIRCUIT DIAGRAM ......3-78 3. S/W UP-GRADE ..........3-9 6. HD2 MEMORY PLL CIRCUIT DIAGRAM 2 3-80 TEST S/W..............3-11 7.
-
Page 14: System S/W Up-Grade
SYSTEM S/W UP-GRADE 1. UP-GRADE CABLE CONFIGURATION - LST-3410A Side LST-3410A Service Port SERVICE 6: TDI 1: High 7: TMS 2: TX 8: TDO 3: RX 9: TCK 4: +3.3V Female Type 5: GND - PC Side LST-3410A Service Cable 4: +3.3V... - Page 15 - Up-grade Cable Connection Serial Port PC Print Port SERVICE RGB/HV - Up-grade Cable Configuration Male Type Female Type 2: TX 2: RX 3: RX 3: TX 4: +3.3V 5: GND 5: GND 6: TDI 7: TMS 4: +3.3V 8: TDO 9: TCK 9: TDI 5: TMS...
-
Page 16: Cpld Program
2. CPLD PROGRAM 1> Check that the ALTERA Programming hardware is installed. * Connect the Byte blaster to the parallel port (printer port) of the PC. PC printer port Programming tool 2> Run the ALTERA MAX2PLUS. - Page 17 3> Press ‘MAX+plusII’ at the main menu and select ‘programmer.’ --> If ‘programmer’ is selected, ‘programmer’ window is popped up.
- Page 18 4> Select ‘programming options’ of ‘Options’ menu. --> Blank-check before Programming --> Verify after Programming 5> Select ‘Hardware setup’ of ‘Options’ menu. --> programming hardware (ByteBlater)
- Page 19 6> Select ‘setup’ of ‘JTAG’ menu. --> Multi-Device JTAC chain setup (select the file to be programmed) --> Check that the file to be programmed is properly selected.
- Page 20 7> The connector of the Byte blaster can be connected to the connector that may be connected to the service port. PC Printer P ort Servi ce Port SERVICE Byte Bl aste r RGB/HV 9-Pi n D- Sub Mal e 8>...
-
Page 21: S/W Up-Grade
1> Connect the female type of the up-grade cable to the PC serial port and connect the 9-pin male type to the LST-3410A. Serial Port SERVICE RGB/HV 2> Run the Teraterm Program at the PC. 3> With the power of the LST-3410A on, press both ‘SELECT’ key and ‘Volume-up’ key of front keys. - Page 22 4> When the TeraTerm screen is displayed as shown at the below, select ‘send file’ from ‘File.’ --> Check that the file to be programmed is properly selected. 3-10...
-
Page 23: Test S/W
At the time of the power up, connect the serial cable to the service port, locate the cursor at the TeraTerm window, and turn on the power of the LST-3410A by pressing “shift”+”D” at the PC keyboard. Enter “svcLST3410” as the password. - Page 24 Screen shot during the test The test is proceeded by entering “T” and pressing ‘Enter’ key. ============================System Test============================== System SDRAM Test----------------------------->OK(32MB) Flash Memory Test Start ..........Flash Memory Test---------------------------------------->OK HD2 Test----------------------------------------------------->OK HD2 DMA Test---------------------------------------------->OK IIC EEPROM Test------------------------------------------>OK VSB Test ----------------------------------------------------->OK Tuner IIC Test----------------------------------------------->OK TPN-II &...
- Page 25 Final result display *************************System Test Result************************** 01.System SDRAM Test1>OK 02.Flash Memory Test------------------------------------>OK 03.HD2 Test1----------------------------------------------->OK 04.HD2 DMA Test------------------------------------------>OK 05.I2C EEPROM Test------------------------------------->OK 06.VSB Test------------------------------------------------->OK 07.I2C Tuner Test------------------------------------------>OK 08.TPN-II & MEMORY Test----------------------------->OK 09.IDE Device Test---------------------------------------->OK 10.KFIR MPEG ENCODER Device Test------------->OK 11.HDD Read/Write Test--------------------------------->OK 12.TI 1394 Device Test----------------------------------->OK 13.I2C GEMSTAR Test----------------------------------->OK 14.I2C MSP4450 Audio Test---------------------------->OK...
-
Page 26: Diagnostic S/W
2. Diagnostic S/W Diagnostic mode is the self test mode for testing the LST-3410A simply at the field by a service person. Diagnostic mode can be entered by pressing both ‘Volume down’ key and ‘SELECT’ key of the front panel. - Page 27 2) VFD Test < Fig 1 > VFD Test Menu 1) Whole VFD On/Off Test turns on/off the whole VFD of the front display. 1080i 720p 480p 480i 1394 Cable Record Play Time Shift Reserved Guide FULL < Fig 2 > Whole VFD On Turn on and off with one second of interval until this test is ended by pressing “0”...
- Page 28 3) Front Key Test 1) Pressing a key displays the related function at the VFD. Check that the related key displayed at the VFD is properly pressed by pressing all keys sequentially. < Fig4 > Front Key Test Menu Ex) Pressing ‘DISPLAY FORMAT’ key displays “DISPLAY FORMAT” at the VFD. Pressing ‘REC’...
- Page 29 4) Resolution Test The resolution is displayed as shown at the below, and when the initial menu is disappeared, you can change the resolution by selecting the resolution list. If you select ‘RGB,’ the menu can be displayed at the RGB monitor only, and ‘YPbPr’ at the TV supporting the YPbPr only.
- Page 30 3-18...
- Page 31 5) Audio Test The resolution is displayed as shown at the below, and when the initial menu is disappeared, you can change the resolution by selecting the resolution list. If you select ‘RGB,’ the menu can be displayed at the RGB monitor only, and ‘YPbPr’ at the TV supporting the YPbPr only.
- Page 32 7) 1394 Test < Fig9 > 1394 Test Menu Set the Jig STB to the DTV channel possible to be separated for the test. You can not perform this test with 1394 Device(D-VHS, MV Camcorder) connected. At this time, the test can be done only if each STB has its own 1394 ID(DTCP). Test STB JIG STB 1394 Cable...
- Page 33 8) Gemstar Test < Fig11 > Gemstar Test Menu Diagram for testing Moni to r for ch ecki ng te st mo de RF Out put Seri al port f or Syst em Debu g ( We re com m en d Gems tar Glink -to - PC NTSC Modulato r...
- Page 34 1. Set Factory Test to ‘ON’ and Duplex to ‘Full’ of the DIP switch on the Gemstar Glink-to-PC Board. 2. Connect the RF signal containing Gemstar UPG Data to ANT IN of LST-3410A or play the VCR containing the tape for loop and connect its RF output to ANT IN of LST-3410A.
- Page 35 5. With the above step 4 executed, enter into the Gemstar Factory Test Mode by one of the following two methods. Press the hot key (it will be supported later) of LST-3410A for entering into Gemstar Factory Test Mode. < Fig14 > Screen shot for testing Glink and IR...
- Page 36 < Fig15 > Screen shot for testing Glink and IR 6. Sometimes, even though the Gemstar board is normal, the test gets failed. So, if failed for 4 items (Flash Test, VBI Test, Glink Test, IR Test) to test, you may determine it normal when getting ‘pass’ by performing the test once more.
- Page 37 9) Factory Data Set/Erase < Fig16 > Factory Data Set/Erase Menu - Demo Stream Play It plays the demo stream stored at the HDD. - HDD Format It deletes all stored streams for the test and unnecessary files. Do not delete the demo stream at the time of the HDD format. - Test EEPROM set In order to reduce the test time, set channel map, favorite channel, and time information suitable for the test environment.
- Page 38 10) Factory Set/Init < Fig17 > Factory Set/init - This mode performs the factory setting for HDD, EEPROM, Gemstar Board, and so on at the time of the final shipment. - The final shipment setting is as follows: 1) Delete the HDD area, but not the demo data 2) Set the EEPROM to the following values.
-
Page 39: Gemstar Up-Grade
GEMSTAR UP-GRADE How to upgrade the Gemstar by G-Link * Note Upgrading the Gemstar by G-Link should have the boot ROM at the flash ROM of the Gemstar board. So, if there is no data at the flash ROM, this method is not possible, but possible for upgrading only. 1) Connect the G-Link cable to the G-Link connector of the Gemstar board. - Page 40 4) After the DOS window of the step 3 is popped up, the following window will be popped up. 5) After the window of the step 4, apply the power to the Gemstar board. Because the live power is applied at the SET state, if the Gemstar board is built in, disconnect the plug and plug it after 3 seconds, but if not, plug the Gemstar board to the set and connect the power plug.
- Page 41 7) The following message is displayed and upgrading continues. 8) When upgrading is completed, the following is displayed and all steps are finished. Upgrading takes about 6 minutes even it varies depending on the upgraded flash. 3-29...
-
Page 42: Electrical Troubleshooting Guide
ELECTRICAL TROUBLESHOOTING GUIDE 1. POWER ON VFD Power Icon Display Power Code Icon On Connection check Power Switch On Remocon battery Remocon Power on Front Power Front signal cable Signal Cable Icon off connect Connection ìHELLOî display Front Front power cable Power Cable connect Connection... -
Page 43: System Part
2. SYSTEM PART Power Switch On or Remocon Power on Power U100 (3-Pin) U100 (4-Pin) J114 Connector Icon off Clock out +3.3V Power Cable ìHELLOî Check display U100 change IC103 (7-Pin) IC103 (6-Pin) Main Clock Clock out +3.3V Check IC103 change R176 R178 soldering Soldering OK... -
Page 44: Video Part-1
3. VIDEO PART-1 No display J114 Connector IC114(3-pin) IC114(1-pin) Power Cable +1.8V out +3.3V input Check VX100 change VX100(3-pin) VX100(4-pin) 27MHz clock out +3.3V input VX100 change IC120(2-pin) IC120(6-pin) 27MHz clock out +3.3V input IC120 change IC161(7-pin) IC161(2,3,11-pin) clock out +3.3V input IC161 Soldering check... -
Page 45: Ypbpr Video Output Troubleshooting
4. YPbPr VIDEO OUTPUT TROUBLESHOOTING When YPbPr select No display YPbPr Cable connect Cable connection (RCA Jack Color matching) Video Part ñ1 System part check Check OK J114 Connector Power Cable R478,R480 Check IC156(5,10,12-pin) Re-soldering R479 soldering Video signal input Q117,Q118 Re-soldering Q119 soldering... -
Page 46: Rgb Video Output Troubleshooting
5. RGB VIDEO OUTPUT TROUBLESHOOTING When RGB select No display Video Part ñ1 System part check Check OK Cable connect Cable connection J114 Connector Power Cable Check Q117,Q118 IC156(5,10,12-pin) Re-soldering Q119 soldering Video signal input R478,R480 Re-soldering R479 soldering L119 Re-soldering soldering L120... -
Page 47: Cvbs Video Output Troubleshooting
6. CVBS VIDEO OUTPUT TROUBLESHOOTING When Video select No display Video Cable connect Cable connection Video Part ñ1 System part check Check OK J114 Connector Power Cable Check L127,L128 R788,R789,R790 Re-soldering L129 soldering soldering Q102,Q103 Re-soldering Q104 soldering R248,R245 Re-soldering R247soldering L125 IC157(1,2,3-pin) -
Page 48: Audio Troubleshooting
7. AUDIO TROUBLESHOOTING Audio output problem Video Part ñ1 System part check Check OK IC124 (55,54-pin) J114 Connector IC123 (3-pin) IC123 (1-pin) Power Cable 18.432MHz clock +8.0V out +9.0V In Check in/out OK Change IC123 IC122 (3-pin) High=î1î IC124(3,4,6-pin) IC153(2,6-pin) IC115 soldering Clock/Data/WS Clock/WS input... -
Page 49: Tuner Troubleshooting
8. TUNER TROUBLESHOOTING Tuner problem J114 Connector TU100(9-pin) Power Cable +30V Input OK Check TU100(1,8,12-pin) TU100(Tuner ) +5V Input OK Voltage check TU100(23-pin) +3.3V Input OK TU100(21-pin) IC137(3-pin) IC137(1-pin) +1.8V Input OK +1.8V output OK +3.3V input OK Change IC137 J114 Connector IC151(6,7-pin) IC151(8-pin) -
Page 50: Pvr Part Troubleshooting
9. PVR PART TROUBLESHOOTING Timeshift,Record problem Normal IC130 Check IC130 DTV Mode (3-pin) +2.5V output IC129(TPN-II ) check R177 IC103 Check U100 33.33MHz clock (5-pin)33.33MHz clock OK Check R177 Check IC129 IC131 Check IC129 (38-pin) clock Check IC131 B109 Check IC130 +2.5V input IC135(IDE Controller) check... -
Page 51: Gemster Troubleshooting
10. GEMSTER TROUBLESHOOTING No Guide On display Check AR300~AR305 soldering Check R203,R300,R301 soldering IC112(3-Pin) IC112 Check J101 1.8V OK (1-pin) +3.3V input Check IC112 X100 Check X100 Clock ouput 12MHz R113 Check IC102,IC103 soldering Clock 108MHz Check AR306~AR322 soldering IC110(2-Pin) Check R115 Soldering Clock in 108MHz IC110(4-Pin) - Page 52 Gemstar data gathering problem UPG ë Setupí UPG setup ë Change System Settingí -> Select Nation -> Select ZIP Code UPG Setu p ch eck Cable connection 1. No Cable Service setting -> RF Cable connect to ANT In 2. Cable Service, No Cable Box setting -> RF Cable connect to Cable In 3.
-
Page 54: Block Diagram
BLOCK DIAGRAM 1. WIRING DIAGRAM Liv e_+5V 3L_CS 3L_CLK 3L_DATA_W R 3L_DATA_RD IR _I N 3-67... -
Page 55: Total Block Diagram
2. TOTAL BLOCK DIAGRAM 3-68... -
Page 56: Signal Path Diagram
3. SIGNAL PATH DIAGRAM 3-69... -
Page 58: Voltage Measured Value
VOLTAGE MEASURED VALUE 1. ALUMINUM CAPACITOR-1 DTV Receive PVR Function Reference Capacity Reference Item Number Top/Bottom Top/Bottom 0.47uF C565 3.77 3.77 C550 5.72 1.86 5.72 1.86 C547 -3.49 -3.49 C548 -0.96 -0.96 C551 C552 8.25 8.25 C553 2.44 2.44 3.3uF C100 2.49 2.49... -
Page 59: Aluminum Capacitor-3
DTV Receive PVR Function Reference Capacity Reference Item Number Top/Bottom Top/Bottom C423 C437 C442 C444 3.27 3.27 C454 3.28 3.28 C460 C493 1.43 0.05 1.43 0.05 C542 9.12 9.12 C608 C615 C616 C627 9.13 9.13 C631 C634 3.21 3.21 C636 3.29 3.29 C639... - Page 60 DTV Receive PVR Function Reference Capacity Reference Item Number Top/Bottom Top/Bottom C317 C345 C347 4.97 4.97 C362 C369 4.96 4.96 C370 C461 3.28 3.28 C476 C478 C484 C480 32.3 32.3 C490 C495 C497 C499 3.32 3.32 C504 1.81 1.81 C535 C539 C556 C621...
-
Page 61: Aluminum Capacitor-4
4. ALUMINUM CAPACITOR-4 DTV Receive PVR Function Reference Capacity Reference Item Number Top/Bottom Top/Bottom 470uF C567 YPbPr C568 1.37 1.37 Varies according to C569 Video signal C570 5.04 5.04 C571 4.56 4.56 C572 5. DIODE DTV Receive PVR Function Reference Capacity Reference Item Number... - Page 62 DTV Receive PVR Function Reference Capacity Reference Item Number Anode Cathode Anode Cathode D145 0.12 0.12 D146 D147 0.12 0.12 D148 0.12 0.12 LED100 1.94 1.94 Green LED101 3.28 0~3.3 LED102 At receiving AT At receiving NT LED105 Circuit No. Reference Reference Part Name...
- Page 64 WAVEFORMS 1. SYSTEM PART-1 System Reset System Main Clock 33.333MHz 3-41 3-42...
- Page 65 2. DIGITAL SYSTEM [SYSTEM MEMORY] SECTION System Memory System Memory CAS Signal RAS Signal System Memory C Bus_A SDA Signal Clock Signal C Bus_A SCL Signal C Bus_A Controller Clock 3-43 3-44...
- Page 66 3. VIDEO PART-1 HD-2 Host I/F Clock HD-2 Chip Select Signal From CPU HD-2 Memory Clock HD-2 Memory CAS Signal HD-2 Memory RAS Signal 3-45 3-46...
- Page 67 4. VIDEO PART-2 HD-2 PWM Signal HD-2 NTSC Clock 27MHz VCXO Clock HD-2 VDP Clock 3-47 3-48...
- Page 68 5. AUDIO PART-1 S Clock I2S L/RClock I2S Data Out MSP4450 From MSP4450 Reset MSP4450 Clock Audio ADC Clock 3-49 3-50...
- Page 69 6. AUDIO PART-2 SPDIF Out Signal Variable Audio_L Out Variable Audio_R Out Fixed Audio_L Out Fixed Audio_R Out 3-51 3-52...
-
Page 70: Video In & Dvi Out
7. VIDEO IN & DVI OUT 656 Clock VPX3226F X-Tal Clock DVI Clock Digital Video H-Sync Out 3-53 3-54... - Page 71 8. PVR PART-1 SPDIF Out Signal Variable Audio_L Out 3-55 3-56...
- Page 72 9. PVR PART-2 BCM7040 Clock BCM7040 Memory Clock 3-57 3-58...
- Page 73 10. YPbPr, RGB OUT RGB V-Sync Out YPbPr Pr Out YPbPr Y Out YPbPr Pb Out Red Out Green Out Blue Out H-Sync Out 3-59 3-60...
- Page 74 11. CVBS OUT 656 Clock VPX3226F X-Tal Clock DVI Clock Digital Video H-Sync Out 3-61 3-62...
- Page 75 12. 1394 PART 1394 X-Tal Clock 1394 TP Out Clock 3-63 3-64...
- Page 76 13. GEMSTAR PART Gemstar X-Tal Clock Gemstar Memory Clock Gemstar Memory Clock to MiCOM 3-65 3-66...
- Page 78 CIRCUIT DIAGRAMS 1. POWER CIRCUIT DIAGRAM No power. 12VA no power. BD101, TH01 are defective. D125/D126 are defective. 3.3V no power. D123/D124 are defective. Switching Error. IC101 is defective. 5.4V, 5.0V/5.0VA no power. D121 is defective. No Power. F101 is defective. Switching Error.
- Page 79 2. CPU CIRCUIT DIAGRAM 1 PER_DATA SMEM_DATA PER_ADDR S_MEM-ADR CPU CLOCK 3-72 3-73...
-
Page 80: Boot Strapping, Clock, Cpld Circuit Diagram
3. BOOT STRAPPING, CLOCK, CPLD CIRCUIT DIAGRAM TO CPU P8, P9 PER-DATA PER-ADR 3-74 3-75... - Page 81 4. SYSTEM MEMORY, FLASH, I C COT CIRCUIT DIAGRAM S MEM DATA S MEM ADDR PER DATA PER ADDR CLOCK, P3 3-76 3-77...
-
Page 82: Hd-Ii Circuit Diagram
5. HD-II CIRCUIT DIAGRAM PER-ADDR PER-DATA CLOCK Valid TP DATA/CLK 3-78 3-79... -
Page 83: Hd2 Memory Pll Circuit Diagram 2
6. HD2 MEMORY PLL CIRCUIT DIAGRAM 2 PER-ADDR VSB/PDR TP DATA, CLK, VALID TP DATA, CLK, VALID 3-80 3-81... -
Page 84: Audio Processor, Spdif Out Circuit Diagram
7. AUDIO PROCESSOR, SPDIF OUT CIRCUIT DIAGRAM 3-82 3-83... -
Page 85: Ntsc Decoder, Dvi Output Circuit Diagram
8. NTSC DECODER, DVI OUTPUT CIRCUIT DIAGRAM 3-84 3-85... -
Page 86: Tpn-Ii, Memory Circuit Diagram
9. TPN-II, MEMORY CIRCUIT DIAGRAM 3-86 3-87... -
Page 87: Mpeg Encoder & Memory Circuit Diagram
10. MPEG ENCODER & MEMORY CIRCUIT DIAGRAM 3-88 3-89... -
Page 88: Pci2Ide Controller Circuit Diagram
11. PCI2IDE CONTROLLER CIRCUIT DIAGRAM 3-90 3-91... -
Page 89: Atsc/Qam/Ntsc Nim Tuner Circuit Diagram
12. ATSC/QAM/NTSC NIM TUNER CIRCUIT DIAGRAM 3-92 3-93... -
Page 90: Audio/Video Out Circuit Diagram
13. AUDIO/VIDEO OUT CIRCUIT DIAGRAM 3-94 3-95... -
Page 91: Circuit Diagram
14. 1394 CIRCUIT DIAGRAM 3-96 3-97... -
Page 92: Micom, Power I/F, Front I/F Circuit Diagram
15. MICOM, POWER I/F, FRONT I/F CIRCUIT DIAGRAM 3-98 3-99... -
Page 93: Front Circuit Diagram
16. FRONT CIRCUIT DIAGRAM 3-100 3-101... -
Page 94: Gemstar Controller Circuit Diagram
17. GEMSTAR CONTROLLER CIRCUIT DIAGRAM 3-102 3-103... -
Page 95: Gemstar Memory Circuit Diagram
18. GEMSTAR MEMORY CIRCUIT DIAGRAM 3-104 3-105... -
Page 96: Gemstar Micom, I/F Circuit Diagram
19. GEMSTAR MICOM, I/F CIRCUIT DIAGRAM 3-106 3-107... -
Page 97: Printed Circuit Diagrams
PRINTED CIRCUIT DIAGRAMS 1. DIGITAL MAIN PRINTED CIRCUIT DIAGRAMS(TOP) 3-108 3-109... -
Page 98: Digital Main Printed Circuit Diagrams(Bottom)
2. DIGITAL MAIN PRINTED CIRCUIT DIAGRAMS(BOTTOM) LOCATION GUIDE 3-110 3-111... -
Page 99: Smps(Power) Printed Circuit Diagram
3. SMPS(POWER) PRINTED CIRCUIT DIAGRAM LOCATION GUIDE 3-112 3-113... -
Page 100: Gemstar Printed Circuit Diagram(Top)
4. GEMSTAR PRINTED CIRCUIT DIAGRAM(TOP) 5. GEMSTAR PRINTED CIRCUIT DIAGRAM(BOTTOM) 3-114 3-115... -
Page 101: Key Printed Circuit Diagram
6. KEY PRINTED CIRCUIT DIAGRAM 7. TIMER PRINTED CIRCUIT DIAGRAM LOCATION GUIDE 3-116 3-117... - Page 102 NOTES) electricial shock. SECTION 4 REPLACEMENT PARTS LIST MODEL : LST-3410A AA1UZL(ZENITH) NSP : Not avallable as service parts. RUN DATE :25-NOV-03 S AL LOCA. NO. LG PART NO. DESCRIPTION SPECIFICATION REMARKS *** INDIVIDUAL PARTS *** 3110R-V016B CASE LST-3410A AA1UZL PRESS...
- Page 103 S AL LOCA. NO. LG PART NO. DESCRIPTION SPECIFICATION REMARKS C105 0CE2264K638 CAPACITOR,ELECTROLYTIC 22M SRA 50V M FM5 TP(5) C106 0CN1040K948 CAPACITOR,FIXED TUBULAR(High d 0.1UF D 50V 80%,-20% F(Y5V) TA C107 0CE4764F638 CAPACITOR,ELECTROLYTIC 47M SRA/SS 16V M FM5 TP(5) C108...
- Page 104 S AL LOCA. NO. LG PART NO. DESCRIPTION SPECIFICATION REMARKS C103 0CE277JR6A0 CAPACITOR,FIXED ELECTROLYTIC 270UF SMH,HC 250V 20% VNSN BUL C105 0CQ1031Y519 CAPACITOR,FIXED FILM 0.01UF D 630V 10% PE NI TP5 C106 624-087B CAPACITOR HIGH-VOL 100P/1KV SMPS SAMHWA C107 0CE1054K638 CAPACITOR,ELECTROLYTIC 1.0M SRA/SS50V M FM5 TP(5)
- Page 105 S AL LOCA. NO. LG PART NO. DESCRIPTION SPECIFICATION REMARKS L122 633-088D COIL,CHOKE CHOCK ,20UH KWANGSUNG LEAD CU L123 6140RCC009A COIL,RF BAR CHOKE COIL 2 PIN 10 UHCCAR L125 0LR1000K035 INDUCTOR RADIAL LEAD 100M K 6X6 L5 TP R100 0RD1504H632 RESISTOR,FIXED CARBON FILM 1.5M OHM 1/2 W 5.00% MF10...
- Page 106 S AL LOCA. NO. LG PART NO. DESCRIPTION SPECIFICATION REMARKS AR309 0RRZVTA001F RESISTOR,DRAWING 33 OHM 1 / 16 W 3216 5% R/TP 8 AR310 0RRZVTA001F RESISTOR,DRAWING 33 OHM 1 / 16 W 3216 5% R/TP 8 AR311 0RRZVTA001F RESISTOR,DRAWING 33 OHM 1 / 16 W 3216 5% R/TP 8...
- Page 107 S AL LOCA. NO. LG PART NO. DESCRIPTION SPECIFICATION REMARKS C156 0CH1104K512 CAPACITOR,FIXED CERAMIC(Temp.c 0.1UF 50V 10% B(5YP) 1608 R/TP C157 0CC102CK41A CAPACITOR,FIXED CERAMIC(TEMP.C 1000PF 1608 50V 5% R/TP NP0 C158 0CC102CK41A CAPACITOR,FIXED CERAMIC(TEMP.C 1000PF 1608 50V 5% R/TP NP0...
- Page 108 S AL LOCA. NO. LG PART NO. DESCRIPTION SPECIFICATION REMARKS R109 0RH1003C622 RESISTOR,METAL GLAZED(CHIP) 100K OHM 1 / 16 W 1608 5.00% D R110 0RH1003C622 RESISTOR,METAL GLAZED(CHIP) 100K OHM 1 / 16 W 1608 5.00% D R111 0RH1003C622 RESISTOR,METAL GLAZED(CHIP) 100K OHM 1 / 16 W 1608 5.00% D...
- Page 109 S AL LOCA. NO. LG PART NO. DESCRIPTION SPECIFICATION REMARKS AR108 0RRZVTA001S RESISTOR,DRAWING 3.3K OHM 1 / 16 W 3216 5% R/TP AR109 0RRZVTA001S RESISTOR,DRAWING 3.3K OHM 1 / 16 W 3216 5% R/TP AR110 0RRZVTA001J RESISTOR,DRAWING 4.7K OHM 1 / 16 W 3216 5% R/TP...
- Page 110 S AL LOCA. NO. LG PART NO. DESCRIPTION SPECIFICATION REMARKS C105 0CH1104K562 CAPACITOR,FIXED CERAMIC(TEMP.C 0.1UF 50V 10% X7R(X) 1608 R/TP C106 0CH1104K562 CAPACITOR,FIXED CERAMIC(TEMP.C 0.1UF 50V 10% X7R(X) 1608 R/TP C107 0CH1104K562 CAPACITOR,FIXED CERAMIC(TEMP.C 0.1UF 50V 10% X7R(X) 1608 R/TP...
- Page 111 S AL LOCA. NO. LG PART NO. DESCRIPTION SPECIFICATION REMARKS C158 0CH1104K562 CAPACITOR,FIXED CERAMIC(TEMP.C 0.1UF 50V 10% X7R(X) 1608 R/TP C159 0CH1104K562 CAPACITOR,FIXED CERAMIC(TEMP.C 0.1UF 50V 10% X7R(X) 1608 R/TP C160 0CH1104K562 CAPACITOR,FIXED CERAMIC(TEMP.C 0.1UF 50V 10% X7R(X) 1608 R/TP...
- Page 112 S AL LOCA. NO. LG PART NO. DESCRIPTION SPECIFICATION REMARKS C211 0CH1104K562 CAPACITOR,FIXED CERAMIC(TEMP.C 0.1UF 50V 10% X7R(X) 1608 R/TP C212 0CH1104K562 CAPACITOR,FIXED CERAMIC(TEMP.C 0.1UF 50V 10% X7R(X) 1608 R/TP C213 0CH1104K562 CAPACITOR,FIXED CERAMIC(TEMP.C 0.1UF 50V 10% X7R(X) 1608 R/TP...
- Page 113 S AL LOCA. NO. LG PART NO. DESCRIPTION SPECIFICATION REMARKS C264 0CH1104K562 CAPACITOR,FIXED CERAMIC(TEMP.C 0.1UF 50V 10% X7R(X) 1608 R/TP C265 0CH1104K562 CAPACITOR,FIXED CERAMIC(TEMP.C 0.1UF 50V 10% X7R(X) 1608 R/TP C266 0CH1104K562 CAPACITOR,FIXED CERAMIC(TEMP.C 0.1UF 50V 10% X7R(X) 1608 R/TP...
- Page 114 S AL LOCA. NO. LG PART NO. DESCRIPTION SPECIFICATION REMARKS C323 0CH4560K412 CAPA,CHIP CERAMIC M/L T.C F/S 56P 50V J COG 1.6X0.8 R/TP C324 0CC102CK41A CAPACITOR,FIXED CERAMIC(TEMP.C 1000PF 1608 50V 5% R/TP NP0 C325 0CH8106F611 CAPACITOR,CHIP[AL. ELECTROLYTI 10UF 16V M 85STD(CYL) R/TP...
- Page 115 S AL LOCA. NO. LG PART NO. DESCRIPTION SPECIFICATION REMARKS C381 0CH1104K562 CAPACITOR,FIXED CERAMIC(TEMP.C 0.1UF 50V 10% X7R(X) 1608 R/TP C382 0CH1104K562 CAPACITOR,FIXED CERAMIC(TEMP.C 0.1UF 50V 10% X7R(X) 1608 R/TP C383 0CH1104K562 CAPACITOR,FIXED CERAMIC(TEMP.C 0.1UF 50V 10% X7R(X) 1608 R/TP...
- Page 116 S AL LOCA. NO. LG PART NO. DESCRIPTION SPECIFICATION REMARKS C437 0CH8106F611 CAPACITOR,CHIP[AL. ELECTROLYTI 10UF 16V M 85STD(CYL) R/TP C438 0CH1104K562 CAPACITOR,FIXED CERAMIC(TEMP.C 0.1UF 50V 10% X7R(X) 1608 R/TP C439 0CH1104K562 CAPACITOR,FIXED CERAMIC(TEMP.C 0.1UF 50V 10% X7R(X) 1608 R/TP C440 0CH1104K562 CAPACITOR,FIXED CERAMIC(TEMP.C...
- Page 117 S AL LOCA. NO. LG PART NO. DESCRIPTION SPECIFICATION REMARKS C495 0CE226SF6DC CAPACITOR,FIXED ELECTROLYTIC 22UF MVG 16V 20% SMD R/TP C496 0CH1104K562 CAPACITOR,FIXED CERAMIC(TEMP.C 0.1UF 50V 10% X7R(X) 1608 R/TP C497 0CE226SF6DC CAPACITOR,FIXED ELECTROLYTIC 22UF MVG 16V 20% SMD R/TP...
- Page 118 S AL LOCA. NO. LG PART NO. DESCRIPTION SPECIFICATION REMARKS C586 0CH1104K562 CAPACITOR,FIXED CERAMIC(TEMP.C 0.1UF 50V 10% X7R(X) 1608 R/TP C587 0CH1104K562 CAPACITOR,FIXED CERAMIC(TEMP.C 0.1UF 50V 10% X7R(X) 1608 R/TP C588 0CH1104K562 CAPACITOR,FIXED CERAMIC(TEMP.C 0.1UF 50V 10% X7R(X) 1608 R/TP...
- Page 119 S AL LOCA. NO. LG PART NO. DESCRIPTION SPECIFICATION REMARKS C639 0CH8106F611 CAPACITOR,CHIP[AL. ELECTROLYTI 10UF 16V M 85STD(CYL) R/TP C640 0CH1104K562 CAPACITOR,FIXED CERAMIC(TEMP.C 0.1UF 50V 10% X7R(X) 1608 R/TP C641 0CH1104K562 CAPACITOR,FIXED CERAMIC(TEMP.C 0.1UF 50V 10% X7R(X) 1608 R/TP C642 0CH1104K562 CAPACITOR,FIXED CERAMIC(TEMP.C...
- Page 120 S AL LOCA. NO. LG PART NO. DESCRIPTION SPECIFICATION REMARKS C742 0CH4270K412 CAPACITOR,CHIP[CERAMIC M/L TC 27PF 50V J NP0 1608 R/TP C743 0CH4270K412 CAPACITOR,CHIP[CERAMIC M/L TC 27PF 50V J NP0 1608 R/TP C744 0CH4270K412 CAPACITOR,CHIP[CERAMIC M/L TC 27PF 50V J NP0 1608 R/TP...
- Page 121 S AL LOCA. NO. LG PART NO. DESCRIPTION SPECIFICATION REMARKS D129 0DTSE00018A DIODE,DETACTOR SRV05-4TC SEMTECH R/TP SOT23-6 D130 0DTSE00018A DIODE,DETACTOR SRV05-4TC SEMTECH R/TP SOT23-6 D131 0DR050008AA DIODE,RECTIFIERS SD05.TC R/TP SEMTECH SOD323 5V D132 0DR050008AA DIODE,RECTIFIERS SD05.TC R/TP SEMTECH SOD323 5V...
- Page 122 S AL LOCA. NO. LG PART NO. DESCRIPTION SPECIFICATION REMARKS F133 6200JB8011P FILTER(CIRC),EMC BMS400-EMI NIIGATA TP F134 6200JB8011P FILTER(CIRC),EMC BMS400-EMI NIIGATA TP F135 6200JB8011P FILTER(CIRC),EMC BMS400-EMI NIIGATA TP F136 6200JB8011P FILTER(CIRC),EMC BMS400-EMI NIIGATA TP F137 6200JB8011P FILTER(CIRC),EMC BMS400-EMI NIIGATA TP...
- Page 123 S AL LOCA. NO. LG PART NO. DESCRIPTION SPECIFICATION REMARKS IC137 0IPMGSJ014A IC,POWER MANAGEMENT SC15651ST-1.8 SEMTECH 3P SOT-2 IC140 0IPRPTI015A IC,PERIPHERALS MAX232DR TEXAS INSTRUMENT 16PI IC142 0IPRPTK001A IC,PERIPHERALS TK15420M TOKO 8 SOP R/TP VIDEO IC143 0IPRPAD005A IC,PERIPHERALS AD8013AR-14 ANALOG DEVICE 14 S...
- Page 124 S AL LOCA. NO. LG PART NO. DESCRIPTION SPECIFICATION REMARKS LED100 0DL210008GA SML-210MT R/TP ROHM GREEN 16 LED101 0DL210009LA SML-210VT TP ROHM RED . LED102 0DL210009LA SML-210VT TP ROHM RED . LED105 0DL210009LA SML-210VT TP ROHM RED . Q100 0TR830009BA...
- Page 125 S AL LOCA. NO. LG PART NO. DESCRIPTION SPECIFICATION REMARKS R121 0RH1001C622 RESISTOR,METAL GLAZED(CHIP) 1K OHM 1 / 16 W 1608 5.00% D R122 0RH2201C622 RESISTOR,METAL GLAZED(CHIP) 2.2K OHM 1 / 16 W 1608 5.00% D R125 0RH1001C622 RESISTOR,METAL GLAZED(CHIP) 1K OHM 1 / 16 W 1608 5.00% D...
- Page 126 S AL LOCA. NO. LG PART NO. DESCRIPTION SPECIFICATION REMARKS R205 0RH0000C622 RESISTOR,METAL GLAZED(CHIP) 0 OHM 1 / 16 W 1608 5.00% D R206 0RH0000C622 RESISTOR,METAL GLAZED(CHIP) 0 OHM 1 / 16 W 1608 5.00% D R208 0RH4701C622 RESISTOR,METAL GLAZED(CHIP) 4.7K OHM 1 / 16 W 1608 5.00% D...
- Page 127 S AL LOCA. NO. LG PART NO. DESCRIPTION SPECIFICATION REMARKS R273 0RH1001C622 RESISTOR,METAL GLAZED(CHIP) 1K OHM 1 / 16 W 1608 5.00% D R274 0RH0000C622 RESISTOR,METAL GLAZED(CHIP) 0 OHM 1 / 16 W 1608 5.00% D R275 0RH4702C622 RESISTOR,METAL GLAZED(CHIP) 47K OHM 1 / 16 W 1608 5.00% D...
- Page 128 S AL LOCA. NO. LG PART NO. DESCRIPTION SPECIFICATION REMARKS R353 0RH1002C622 RESISTOR,METAL GLAZED(CHIP) 10K OHM 1 / 16 W 1608 5.00% D R354 0RH1002C622 RESISTOR,METAL GLAZED(CHIP) 10K OHM 1 / 16 W 1608 5.00% D R356 0RH1002C622 RESISTOR,METAL GLAZED(CHIP) 10K OHM 1 / 16 W 1608 5.00% D...
- Page 129 S AL LOCA. NO. LG PART NO. DESCRIPTION SPECIFICATION REMARKS R422 0RH0222C622 RESISTOR,METAL GLAZED(CHIP) 22 OHM 1 / 16 W 1608 5.00% D R423 0RH0822C622 RESISTOR,METAL GLAZED(CHIP) 82 OHM 1 / 16 W 1608 5.00% D R424 0RH4701C622 RESISTOR,METAL GLAZED(CHIP) 4.7K OHM 1 / 16 W 1608 5.00% D...
- Page 130 S AL LOCA. NO. LG PART NO. DESCRIPTION SPECIFICATION REMARKS R515 0RH1001C622 RESISTOR,METAL GLAZED(CHIP) 1K OHM 1 / 16 W 1608 5.00% D R516 0RH1001C622 RESISTOR,METAL GLAZED(CHIP) 1K OHM 1 / 16 W 1608 5.00% D R517 0RH1201C622 RESISTOR,METAL GLAZED(CHIP) 1.2K OHM 1 / 16 W 1608 5.00% D...
- Page 131 S AL LOCA. NO. LG PART NO. DESCRIPTION SPECIFICATION REMARKS R581 0RJ1004C677 RESISTOR,METAL GLAZED(CHIP) 1M OHM 1/16 W 5% 1608 R/TP R582 0RH0000C622 RESISTOR,METAL GLAZED(CHIP) 0 OHM 1 / 16 W 1608 5.00% D R583 0RH0000C622 RESISTOR,METAL GLAZED(CHIP) 0 OHM 1 / 16 W 1608 5.00% D...
- Page 132 S AL LOCA. NO. LG PART NO. DESCRIPTION SPECIFICATION REMARKS R656 0RH0000C622 RESISTOR,METAL GLAZED(CHIP) 0 OHM 1 / 16 W 1608 5.00% D R657 0RH0000C622 RESISTOR,METAL GLAZED(CHIP) 0 OHM 1 / 16 W 1608 5.00% D R658 0RH0000C622 RESISTOR,METAL GLAZED(CHIP) 0 OHM 1 / 16 W 1608 5.00% D...
- Page 133 S AL LOCA. NO. LG PART NO. DESCRIPTION SPECIFICATION REMARKS R740 0RH8200C622 RESISTOR,METAL GLAZED(CHIP) 820 OHM 1 / 16 W 1608 5.00% D R741 0RH1500C622 RESISTOR,METAL GLAZED(CHIP) 150 OHM 1 / 16 W 1608 5.00% D R742 0RH8200C622 RESISTOR,METAL GLAZED(CHIP) 820 OHM 1 / 16 W 1608 5.00% D...
- Page 134 S AL LOCA. NO. LG PART NO. DESCRIPTION SPECIFICATION REMARKS R807 0RH5601C622 RESISTOR,METAL GLAZED(CHIP) 5.6K OHM 1 / 16 W 1608 5.00% D R808 0RH5601C622 RESISTOR,METAL GLAZED(CHIP) 5.6K OHM 1 / 16 W 1608 5.00% D R809 0RH1000C622 RESISTOR,METAL GLAZED(CHIP) 100 OHM 1 / 16 W 1608 5.00% D...