Panasonic DMR-EZ485V Operating Instructions Manual
Hide thumbs
Also See for DMR-EZ485V:
- Operating instructions manual (100 pages) ,
- Quick setup manual (2 pages) ,
- Operating instructions manual (100 pages)
Table of Contents
Advertisement
Quick Links
Dear customer
Thank you for purchasing this product.
For optimum performance and safety, please read these instructions carefully.
Before connecting, operating or adjusting this product, please read the instructions completely.
Please keep this manual for future reference.
Region number supported by this unit
Region numbers are allocated to DVD players and DVD-Video according to where they are sold.
The region number of this unit is "1".
The unit will play DVDs marked with labels containing "1" or "ALL".
If you have any questions contact
In the U.S.A.: 1-800-211-PANA(7262)
In Canada:
[For\U.S.A.]only]
The warranty can be found on page 94.
[For\Canada]only]
The warranty can be found on page 95.
La referencia rápida en español se encuentra en la página 96−99.
Downloaded From Disc-Player.com Panasonic Manuals
P
PC
1-800-561-5505
Operating Instructions
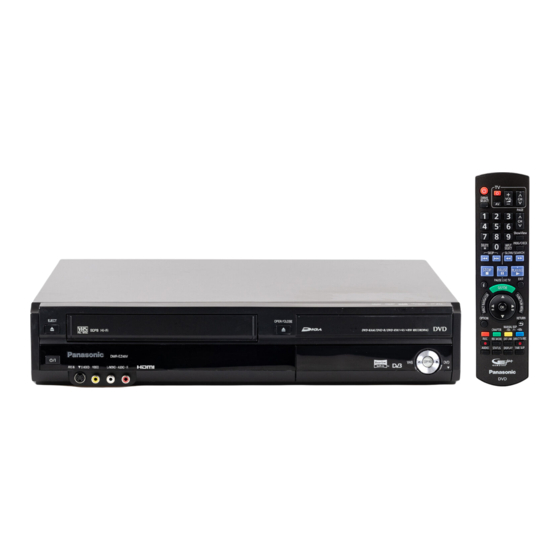
DVD Recorder
DMR-EZ485V
Model No.
DMR-EZ48V
Example:
1
1
2
ALL
4
RQT9056-P
Advertisement
Table of Contents

Related Manuals for Panasonic DMR-EZ485V


Summary of Contents for Panasonic DMR-EZ485V
-
Page 1: Operating Instructions
In the U.S.A.: 1-800-211-PANA(7262) In Canada: 1-800-561-5505 [For\U.S.A.]only] The warranty can be found on page 94. [For\Canada]only] The warranty can be found on page 95. La referencia rápida en español se encuentra en la página 96−99. Downloaded From Disc-Player.com Panasonic Manuals RQT9056-P... -
Page 2: Precautions
DMR-EZ48V The exclamation point within an equilateral triangle Responsible Party: is intended to alert the user to the presence of Panasonic Corporation of North America important operating and maintenance (servicing) One Panasonic Way instructions in the literature accompanying the ap- Secaucus, NJ 07094 pliance. -
Page 3: Important Safety Instructions
To save power, unplug the AC power supply cord from the household AC outlet. The unit consumes a small amount of power even when it is turned off. Standby power consumption Front Display ( Automatic Bright Approx. 17.6 W Approx. 17.6 W Quick Start ( Approx. 1.7 W Approx. 3.5 W Downloaded From Disc-Player.com Panasonic Manuals... -
Page 4: Table Of Contents
Playlist Properties ................ 32 View Chapters ................32 Other Settings Downloaded From Disc-Player.com Panasonic Manuals Other Settings ................. 68 Using the Unit’s Remote Control to Operate the TV and the Set Top Box (Cable Box, Satellite Receiver, etc.) ......68... -
Page 5: Accessories
(U.S.A. only) Product Registration Card Please complete and return the included product registration card, or register via the Internet at: http://www.prodreg.com/panasonic/ (Canada only) The enclosed Canadian French label sheet corresponds to the English display on the front and back sides of the unit. -
Page 6: Control Reference Guide
It does not fl ash if Quick Start is off. Progressive indicator Disc indicator This indicator lights up when you select “24p” in “Progressive/ This indicator lights up when a disc that is supported by this unit 24p” ( 51). is inserted. Downloaded From Disc-Player.com Panasonic Manuals... -
Page 7: Remote Control
HDMI AV OUT terminal ......( 11, 72) S VIDEO output terminal ........( AUDIO/VIDEO output terminals DIGITAL AUDIO OUT terminal .......( (DVD/VHS COMMON OUT) ..( 8–11, 70–72) COMPONENT VIDEO OUT terminals ...( Downloaded From Disc-Player.com Panasonic Manuals... -
Page 8: Basic Connection
TV programming is delivered using methods that differ from industry accepted practices. If you require assistance with connections, please contact Panasonic at 1-800-211-7262 (for U.S.A.) or 1-800-561-5505 (for Canada). Connecting to a Television with Direct Cable or Antenna (No Cable Box or Satellite Receiver) Note: The terminals on the rear of your TV may not appear as shown below. -
Page 9: Connecting To A Television And A Cable Box
Audio/video cable from the “AV OUT” on the cable box to the “IN1” on the unit. Downloaded From Disc-Player.com Panasonic Manuals AC power supply cord (included) from the “AC IN” on the unit to a household AC outlet. -
Page 10: Connecting To A Television And A Satellite Receiver
Audio/video cable (included) from the “DVD/VHS COMMON OUT” on the unit to the “AV IN” on the TV. Downloaded From Disc-Player.com Panasonic Manuals Audio/video cable from the “AV OUT” on the satellite receiver to the “IN1” on the unit. -
Page 11: Connecting To A Tv With An Hdmi (High Defi Nition Multimedia Interface) Cable
HDTV (High Defi nition Television), the output can be switched to 1080p, 1080i or 720p HD video. Regarding “HDAVI Control” function When connecting with a Panasonic TV (VIERA) or a receiver equipped with “HDAVI Control” function, linked operations are possible. [ 40, Linked Operations with the TV (VIERA Link “HDAVI Control... -
Page 12: Setting The Channels And Clock
DVD/VHS POWER “HELLO” appears on the unit’s display. When this unit is connected to a Panasonic TV (VIERA) INPUT SELECT supporting HDAVI Control 3 via an HDMI cable ( 11), it acquires the setting information from the TV. When the... - Page 13 Channel Month Hour Minute Conditions of the received channel may cause automatic channel/ Setup Disc clock setting to take extra time. Video Month Hour Minute Audio Display Reinitializes the TV Screen Restore Default settings. Downloaded From Disc-Player.com Panasonic Manuals...
-
Page 14: Acquiring The Setting Information From The Tv (Viera)
Acquiring the setting information from the TV (VIERA) Tips If this unit is connected to a Panasonic TV (VIERA) supporting HDAVI If you do not want to acquire the Control 3 via an HDMI cable, then the setting information on the TV is setting information from the VIERA acquired by this unit when the unit is turned on for the fi... -
Page 15: Media Handling
You can use video cassettes with the VHS and S-VHS unit or remove the SD card. marks, but the unit is unable to make full use of the Downloaded From Disc-Player.com Panasonic Manuals Such action may result in malfunction or loss of the characteristics of S-VHS video cassettes. -
Page 16: Watching Television
If you set “Surf Mode” to “Favorite” ( 56), then only the Favorite channels can be selected using [CH , ]. You can register channels in the Favorite list from Channel Setting list. ( 55, Setting favorite channels) Downloaded From Disc-Player.com Panasonic Manuals... -
Page 17: Playback
– Play starts automatically if you insert a cassette with the to format constraints. accidental erasure tab removed. PLAY Stopping Play Pausing Play Downloaded From Disc-Player.com Panasonic Manuals Press [ STOP]. Press [ PAUSE]. – Press again to restart play. -
Page 18: Recording Television Programs
You cannot change the channel or recording mode during recording. Pausing Recording Stopping Recording Simultaneous recording to both DVD Press [ PAUSE]. Press [ STOP]. and VHS is not possible. – Press again to restart recording. Downloaded From Disc-Player.com Panasonic Manuals... -
Page 19: Scheduled Recording
Depending on the Daylight Savings Time (DST) settings for this unit, Downloaded From Disc-Player.com Panasonic Manuals scheduled recordings may be affected when the seasons change. -
Page 20: Copying Recordings
When copying multilingual broadcast program [-R] [-R]DL] [-RW‹V›] [+R] [+R]DL] [+RW] Before starting copy, try playing the VHS and pressing [AUDIO], and then select audio track that you want to copy. Audio can also be switched during copy. Downloaded From Disc-Player.com Panasonic Manuals... -
Page 21: Copying Recordings (Dvd Vhs)
37, VHS Index Search System (VISS)]. To cancel copying in the middle Press [ STOP]. − You can also press and hold [RETURN] for about 3 or more seconds to cancel copying in the middle. Downloaded From Disc-Player.com Panasonic Manuals... -
Page 22: Deleting Recordings
[-RW‹V›] [+RW] Available disc space During playback increases when you delete the last recording (the recording space DELETE may increase slightly when other recordings are deleted). to select “Delete” then Downloaded From Disc-Player.com Panasonic Manuals... -
Page 23: Important Notes For Recording
54). [RAM] DVD-RAM can be played back on Panasonic DVD recorders and DVD-RAM compatible DVD players. DVD-R DL and +R DL discs have two layers of recording surface on one side. [-R]DL] Recordings are divided when recording changes from the fi rst layer to the second. Some images and audio Recording to may be lost at this point. -
Page 24: Advanced Recording
VCRs. It takes more time for automatic tracking to work when playing Downloaded From Disc-Player.com Panasonic Manuals tapes recorded with VP mode, and it may not work at all with some tapes. Do tracking manually if this is the case (... -
Page 25: When The Format Confi Rmation Screen Is Displayed
Sound (Digital)” in the Setup menu ( 61). 54) for more details about fi nalizing. It will take a few minutes to fi nalize the disc. (some discs may take up to a maximum of 60 minutes.) Downloaded From Disc-Player.com Panasonic Manuals... -
Page 26: Specifying The Recording Time
To exit the DIRECT NAVIGATOR screen Press [DIRECT NAVIGATOR]. DVD-RAM To stop recording Remaining time Rec. 0:59 After play stops Downloaded From Disc-Player.com Panasonic Manuals CH 20 1. Press [DIRECT NAVIGATOR] to exit the screen. Stereo 2. Press [ STOP]. -
Page 27: Advanced Scheduled Recording
Be sure to press [ DVD/VHS POWER] to return the unit to standby mode before the scheduled recording time. Scheduled recording will work only if “” is displayed. – You cannot delete programs that are currently recording. DVD/VHS POWER – “” lights on the unit’s display. Downloaded From Disc-Player.com Panasonic Manuals... -
Page 28: Recording From An External Device
– Rear Panel inputs are IN1. – Front Panel inputs are IN2. Tips If the external equipment only has a single audio output, Downloaded From Disc-Player.com Panasonic Manuals connect it to the L/MONO (white) IN2 terminal. -
Page 29: Recording From A Dv Camcorder
3. Press [, ] to select “Other Functions” then press [OK]. 4. Press [, ] to select “DV Camcorder Rec.” then press [OK]. You can proceed to step 4 ( right). to select “Record to DVD” then Downloaded From Disc-Player.com Panasonic Manuals... -
Page 30: Advanced Disc Playback
Album View screen is displayed, press RESET to switch to the Recordings screen. Tips Depending on the disc, some operations may not be possible. , , , to select the recording you want to watch, then Downloaded From Disc-Player.com Panasonic Manuals... -
Page 31: Quick View (Play 1.3)
( 72). – Each press of or advances the interval by 1 minute (press and hold for 10-minute Downloaded From Disc-Player.com Panasonic Manuals intervals). -
Page 32: Playing Playlists
Playlist Properties Perform steps 1−4 above , , , to select the playlist, then SUB MENU , to select “Properties”, then – Playlist information (e.g., length and date) is shown. Downloaded From Disc-Player.com Panasonic Manuals... -
Page 33: Playing Mp3S
You cannot operate the scroll bar that appears in the tree screen. Tips , to select a track, then To return to the track list to play. Press [RETURN]. – “ ” indicates the track currently playing. Downloaded From Disc-Player.com Panasonic Manuals... -
Page 34: Playing Still Pictures (Jpeg)
If you select “On”, then a screen will be displayed showing the operations for a slideshow with soundtrack when a slideshow is played. Downloaded From Disc-Player.com Panasonic Manuals Press [, ] to select “On” or “Off”, then press [OK]. -
Page 35: Rotate Pictures
Press [, ] to select the opposite rotation in step 2, then press [OK]. Rotation information will not be stored. –[-R] [-R]DL] [CD] –When disc or album is protected –When played on other equipment –When copying pictures Downloaded From Disc-Player.com Panasonic Manuals... -
Page 36: Playing Divx
DivX Menu Folder CD (DivX) F 1/11 VIDEO Image001 Image002 Image003 Image004 Image005 Image006 Image007 Image008 Image009 Image010 : Selected folder No./Total folder No. Downloaded From Disc-Player.com Panasonic Manuals including DivX recording : Selected folder... -
Page 37: Advanced Video Cassette Playback
If you overshoot in either direction, press the opposite button to correct. For correct operation, make recordings of at least 5 minutes Notes Downloaded From Disc-Player.com Panasonic Manuals to ensure that index signals are not spaced too closely Cue/review is automatically canceled after 10 minutes. together. -
Page 38: S-Vhs Quasi Playback (Sqpb)
– The function will not work with a cassette which has been (simultaneously). recorded from external equipment. Notes This function may not work with some tapes. You can also adjust vertical synchronization with [CH , ] on the main unit. Downloaded From Disc-Player.com Panasonic Manuals... -
Page 39: Status Messages
The displayed time is approximate. The displayed time will be incorrect if you set the wrong tape length in “Select Tape Length” in the Setup menu ( 66) and if the tape is of poor quality. Downloaded From Disc-Player.com Panasonic Manuals... -
Page 40: Linked Operations With The Tv (Viera Link Tm "Hdavi Control Tm ")
Depending on discs, the TV may not automatically turn on. Notes When this unit is connected to a Panasonic TV (VIERA) supporting HDAVI Control 3 and initially set up, it automatically acquires the TV setting information. These functions may not work normally depending on the equipment condition. -
Page 41: Easy Control Only With Viera Remote Control
When you want to leave the TV on and turn off only this unit Press [DVD/VHS POWER] on this unit’s remote control to turn off When not using “HDAVI Control” Set “VIERA Link” in the setup menu to “Off” ( 66). Downloaded From Disc-Player.com Panasonic Manuals... -
Page 42: Functions Window
DV Camcorder Rec. 29 DV automatic recording function Setup 55 You can change the unit’s settings using Setup menu. DVD and Card Management 52 You can manage discs through formatting, fi nalizing and other operations. Downloaded From Disc-Player.com Panasonic Manuals... -
Page 43: Recordings − Editing
You cannot edit during recording or copying. Continued on next page. [+R] [+R]DL] Management information is recorded in unused sections when you edit discs. The available space on these discs Downloaded From Disc-Player.com Panasonic Manuals decreases each time you edit their contents. - Page 44 A short amount of video and audio just before and after the division point gets cut out. , to select “Exit”, You cannot divide a recording when the resulting parts are too short or when the total number of recordings exceeds 99. then Downloaded From Disc-Player.com Panasonic Manuals...
-
Page 45: Chapters − Creating, Editing
Multiple editing Select with [, , , ], then press [PAUSE]. (Repeat.) – A checkmark appears. Press [PAUSE] again to cancel. to select “Combine” then – The selected chapter gets combined with the next chapter. Downloaded From Disc-Player.com Panasonic Manuals... -
Page 46: Still Pictures − Editing
– If you want to continue copying, select “Yes” Delete Picture Refer to “Album/Picture Set Protection and repeat steps 7–8. Cancel Protection Operations” ( right). Album View You can go back to the Album View screen. Downloaded From Disc-Player.com Panasonic Manuals... - Page 47 to select “Yes”, then –The lock symbol “ ” appears when the still picture or the album is protected. Notes Even if you set protection using this unit, the album may be deleted by other equipment. Downloaded From Disc-Player.com Panasonic Manuals...
-
Page 48: Copying Still Pictures
, to select “Start copying”, the same DVD-RAM. This unit saves the information on up to 4,000 still then pictures. If additional still pictures are imported, then the older information will be deleted. Copying starts. – Downloaded From Disc-Player.com Panasonic Manuals... -
Page 49: Deleting Still Pictures
Select with [, , , ], then press [ PAUSE]. (Repeat.) – A checkmark appears. Press [ PAUSE] again to cancel. Downloaded From Disc-Player.com Panasonic Manuals Deleting an item increases the available space by the amount of space taken by the item deleted. -
Page 50: Setting Dvd On-Screen Menus
Repeat play This function works only when the elapsed play time is displayed. Select the item for repeat play. Depending on the disc, the items that can be selected will differ. Downloaded From Disc-Player.com Panasonic Manuals Select “Off” to cancel. -
Page 51: Video Menu
[RAM] [-R] [-R]DL] [-RW‹V›] [+R] [+R]DL] [+RW] [DVD-V] [-RW‹VR›] and Greenlandic: 7576 Punjabi: 8065 Zulu: 9085 DivX Guarani: 7178 Quechua: 8185 When “On”, the volume of the center channel is raised to make Gujarati: 7185 Rhaeto- 8277 dialogue easier to listen. Romance: Downloaded From Disc-Player.com Panasonic Manuals... -
Page 52: Dvd And Card Management
Switch the write-protect switch to the “LOCK” position. [SD] The only menu available in “Card Management” is “Format memory card”. Tips To return to the previous screen Press [RETURN]. To exit the screen Press [RETURN] several times. Downloaded From Disc-Player.com Panasonic Manuals... - Page 53 [RAM[ [SD[ The disc or card cannot be formatted if the write- protect tab or switch ( 52) is switched to “PROTECT” or “LOCK”. Release the protection to continue. The message “Unable to format.” appears when trying to format discs the unit cannot use. Downloaded From Disc-Player.com Panasonic Manuals...
- Page 54 Notes Recording or editing on the disc may delete the Top menu. In that case, create the Top menu again. to complete. You cannot use the Top menu for playing on this unit. Downloaded From Disc-Player.com Panasonic Manuals...
-
Page 55: Setup Menus
[Set Channels via VIERA Link] You can – After selecting the “Channel” column with [, acquire the VIERA setting information ], repeat steps 6–9 to set other channels. [Set Channels without VIERA Link] to complete. Downloaded From Disc-Player.com Panasonic Manuals... -
Page 56: Surf Mode
to select the rating item, then . , to select the limitation. – The limitation options that appear depend on the rating you select in step 6. Select Downloaded From Disc-Player.com Panasonic Manuals “Viewable”, “--”, or “Off” to cancel. -
Page 57: Off Timer
Perform steps 1−3 of “Accessing the Setup Menu” ( 55). News Political – Public Service Announcements Religious Sports Weather , to select “Setup”, then , to select “Clock Settings”, then Downloaded From Disc-Player.com Panasonic Manuals... -
Page 58: Quick Start
, to select “Setup”, then , to select the item you want , to select “DivX to change. Registration”, then , to change the setting. – Repeat steps 7–8 to change other items. Downloaded From Disc-Player.com Panasonic Manuals... -
Page 59: Restore Default Settings
[0 Lock All] Prohibits play of all DVD-Video. available on the disc. Changing ratings (When level 0 to 7 is selected) [Unlock Recorder] [Change Password] [Change Level] Downloaded From Disc-Player.com Panasonic Manuals [Temporary Unlock]... -
Page 60: Settings For Recording
Select “Lighter” or “Darker” to adjust the black level control to , to select “On” or “Off”, then the desired setting for picture enhancement. Perform steps 1−3 of “Accessing the Setup Menu” ( 55). Downloaded From Disc-Player.com Panasonic Manuals... -
Page 61: Multi-Channel Tv Sound (Analog)
, to select “Audio”, then be harmful to your ears and speakers, and audio will not be recorded properly on media such as mini discs. , to select “Digital Audio Output”, then Downloaded From Disc-Player.com Panasonic Manuals... -
Page 62: Select Audio Channel For Dv Input
, to select “Black Background (Analog)”, then , to select “On” or “Off”, then Downloaded From Disc-Player.com Panasonic Manuals... -
Page 63: Front Display
, to select “Analog”, then , to select “CC reset”, then , to select the item, then – 4 Information related to pictures (Appears at bottom of screen) – Textual information (Appears over entire screen) Downloaded From Disc-Player.com Panasonic Manuals... -
Page 64: Tv Aspect
If the “TV Aspect” is set to “4:3” ( left), then “480i” or “480p” [Letterbox (Shrink to fi t)] can only be selected. Video recorded for a widescreen is played in the letterbox style. Downloaded From Disc-Player.com Panasonic Manuals... -
Page 65: Functions Of Hdmi
Automatically selects the output resolution best suited to the connected television (1080p, 1080i, 720p or 480p). [480i] [480p] [720p] [1080i] [1080p] When setting video output to “1080p”, we recommend using a Panasonic HIGH SPEED HDMI cable to prevent video distortion. Downloaded From Disc-Player.com Panasonic Manuals... -
Page 66: Select Tape Length
Depending on the equipment to connect, some items may be shaded in gray on the display and cannot be selected, or changing settings may be unavailable. Above items can be set when you set “HDMI Priority” to “On”. Downloaded From Disc-Player.com Panasonic Manuals... -
Page 67: Parental Rating List
Programming may not be suitable for children under the age of 16–Contains frequent scenes of violence or [16 ans] intense violence. Programming restricted to adults. Contains constant violence or scenes of extreme violence. [18 ans] Downloaded From Disc-Player.com Panasonic Manuals... -
Page 68: Other Settings
0039 / 0093 / 0153 / 0157 / 0165 / 0220 / 0281 / 0386 / 0398 / 0491 / 0688 / 0818 / 0851 Downloaded From Disc-Player.com Panasonic Manuals Sony 0000 / 0011 / 0080 / 0111 / 0273 / 0353 / 0810 /... - Page 69 Sony 0639 / 1640 0775 / 1775 Star Choice 0869 Goodmans 1246 TiVo 1142 / 1442 / 1443 / 1444 Hisense 1535 Hitachi 0819 / 1250 0775 / 1775 Downloaded From Disc-Player.com Panasonic Manuals Hughes 0749 / 1442 / 1749...
-
Page 70: Connection Options For Improved Playback Quality
Rear of this unit Red White Audio cable (not included) Notes Usually you can watch video from input 2 on TV. When you want to playback VHS while recording on DVD, switch to input 1 on TV. Downloaded From Disc-Player.com Panasonic Manuals... -
Page 71: Using Component Video Cables For Better Video (Component Video Cables Not Included)
1 on TV. If this unit confi gured as above is connected to an amplifi er, etc., then turn “HDMI Priority” in the Setup Menu to “Off” before connecting the HDMI cable. ( Downloaded From Disc-Player.com Panasonic Manuals... -
Page 72: Using An Audio Cable For Better Sound (Audio Cable Not Included)
Regarding “HDAVI Control” function ( Please use HIGH SPEED HDMI cables that have the AUDIO IN HDMI logo (as shown on the cover). It is recommended that you use Panasonic’s HDMI cable. Red White Recommended part number: RP-CDHG10 (1.0 m/3.3 ft.), RP-CDHG15 (1.5 m/4.9 ft.), RP-CDHG20 (2.0 m/6.6 ft.), RP-CDHG30 (3.0 m... -
Page 73: Sd Card And Usb Memory Information
SDHC Memory Cards used for recording with this unit can only be used with other SDHC Memory Card- compatible equipment. SDHC Memory Cards cannot be used with equipment that is only compatible with SD Downloaded From Disc-Player.com Panasonic Manuals Memory Cards. We recommend using a Panasonic SD card. -
Page 74: Disc Information
Finalization needed for playback on other equipment ( 54). Tips [RAM] can be played back on Panasonic DVD recorders and Visit Panasonic’s homepage for more information DVD-RAM compatible DVD players. [-R]DL] and [+R]DL] can be played back only on equipment about DVDs. -
Page 75: Play-Only Discs
Never use video cassettes on which juice has been spilled cared-for discs that were previously labeled or re-labeled) or those that are extremely damaged since this will not only cause the heads to become dirty, but will also make the unit malfunction. Downloaded From Disc-Player.com Panasonic Manuals... -
Page 76: Mp3S, Divx And Still Pictures (Jpeg)
– Multi channel: Dolby Digital is possible. MPEG multi is 2 ch conversion. GMC (Global Motion Compensation) is not supported. Total number of recognizable fi le including MP3, JPEG, Downloaded From Disc-Player.com Panasonic Manuals DivX and other type of fi les is 4000. -
Page 77: Frequently Asked Questions
HDMI IN terminal. The unit will take longer to start up when Which should I connect with? connected with the HDMI IN terminal. All Panasonic TVs that have 480p input terminals are compatible. Consult Is my TV progressive output −... -
Page 78: Recording
A USB memory cannot be formatted on this unit. − Connections of digital cameras or camcorders through USB are not − guaranteed. Some USB memories cannot be used with this unit. Downloaded From Disc-Player.com Panasonic Manuals... -
Page 79: Error Messages
The unit fails to operate properly. Press [/I POWER] on the main unit to switch the − unit to standby. Press [/I POWER] on the main unit again to turn the unit on. Continued on next page. Downloaded From Disc-Player.com Panasonic Manuals... -
Page 80: On The Tv
This disc is not formatted properly. You inserted an unformatted DVD-RAM, DVD-RW or +RW disc. Format the disc with the unit. The operation is prohibited by the unit, disc, or video cassette. − Downloaded From Disc-Player.com Panasonic Manuals... -
Page 81: Troubleshooting Guide
When you set the RF output channel to “CH 3” or “CH 4” Video from this unit can be viewed on channels 3 and 4 on the TV. Press [VCR/TV] to switch to VCR mode and output video from this unit ( 16). Downloaded From Disc-Player.com Panasonic Manuals... -
Page 82: General Issues: Power
Periodic interruptions to the reception due to satellite broadcasting breaks. Operations not working due to a poor-quality disc. (Try again using a Panasonic disc.) The unit freezing due to the activation of one of its safety devices ( 81, To restore the unit if it freezes). -
Page 83: General Issues: Operation
Enter your password to continue. Try again. If the time is still incorrect, set the clock manually. Time is incorrect after using Auto Clock Setting. Downloaded From Disc-Player.com Panasonic Manuals... -
Page 84: General Issues: Viera Link
The USB host function of this unit may not work with some USB memory − devices. USB memories with storage capacity of more than 32 GB may not work in − some instances. Some USB memories cannot be used with this unit. Downloaded From Disc-Player.com Panasonic Manuals... -
Page 85: Playback Issues: Picture
(3) Set “Component Output Signal” in the Setup menu to “480i” ( 64). The effect cannot be seen with certain types of video. There is no apparent change − in picture quality when making adjustments in the Video menu using the on-screen menus. Downloaded From Disc-Player.com Panasonic Manuals... -
Page 86: Playback Issues: Sound
You have used a digital connection. Set “Dolby Digital” to “PCM” or connect 61, 72 using an audio cable (analog connection). There are discs whose audio cannot be changed due to how the disc was − created. Downloaded From Disc-Player.com Panasonic Manuals... -
Page 87: Playback Issues: Operation
TV. Using [] or [], return to the beginning of the recording. Downloaded From Disc-Player.com Panasonic Manuals... -
Page 88: Playback Issues: Vhs
+R, +R DL, and +RW discs may be disabled. A DVD-R, DVD-R DL, DVD-RW (DVD-Video format), +R, +R DL, or +RW − disc recorded on the unit may not be recordable on other Panasonic DVD recorders. The broadcast you are trying to record is copy-protected. - Page 89 Recording may not be performed as desired if the time codes on the tape in − the DV equipment are not successive. Depending on the equipment, the DV Camcorder recording may not − operate properly. You can only record audio/video images on a DV tape. − Downloaded From Disc-Player.com Panasonic Manuals...
-
Page 90: Recording Issues: Vhs Recording
When there are a lot of folders and files, it may sometimes take a few hours. Copying, deleting, and setting − protection take a long time. When repeating copying or deleting, it may sometimes take a long time. Format the disc or card. Downloaded From Disc-Player.com Panasonic Manuals... -
Page 91: Glossary
A frame still shows 2 fi elds, so there may be some blurring between them, but picture quality is generally better. A fi eld still shows less picture information so it may be rougher, but there is no blurring. Downloaded From Disc-Player.com Panasonic Manuals... -
Page 92: Specifi Cations
Mass (Weight): Approx. 5.4 kg (11.90 lbs) From the power off state, recording on DVD-RAM starts Downloaded From Disc-Player.com Panasonic Manuals Specifi cations are subject to change without notice. about 1 second after fi rst pressing the Power button and then ... -
Page 93: Product Service
For product information or assistance with product operation: In the U.S.A., refer to “Customer Services Directory” on page 94. In Canada, contact the Panasonic Canada Inc. Customer Care Centre at 1-800-561-5505, or visit the website (www. panasonic.ca), or an authorized Servicentre closest to you. -
Page 94: Limited Warranty (Only For U.s.a.)
Monday-Friday 9 am-9 pm; Saturday-Sunday 10 am-7 pm, EST. For hearing or speech impaired TTY users, TTY : 1-877-833-8855 Accessory Purchases Purchase Parts, Accessories and Instruction Books online for all Panasonic Products by visiting our Web Site at: http://www.pstc.panasonic.com or, send your request by E-mail to: npcparts@us.panasonic.com... -
Page 95: Limited Warranty (Only For Canada)
Panasonic Canada Inc. PANASONIC PRODUCTLIMITED WARRANTY Panasonic Canada Inc. warrants this product to be free from defects in material and workmanship and agrees to remedy any such defect for a period as stated below from the date of original purchase. -
Page 96: Referencia Rápida En Español (Spanish Quick Reference)
TV no sean similares a – Cuando esta unidad esté conectada como se ilustran a continuación. Por favor a un televisor Panasonic (VIERA) que consulte las etiquetas de los terminales admita señales HDAVI Control 3 y con atención para asegurar conexiones esté... - Page 97 [RAM] [-R] [-R]DL] [-RW‹V›] [+R] [+R]DL] [+RW] [-RW‹VR›] Realice los pasos 1 a 3 de “Reproducción de discos o videocasetes” ( arriba). 1. Oprima [DIRECT NAVIGATOR]. 2. Oprima [, , , ] para seleccionar la grabación que desea ver, luego oprima [OK]. Downloaded From Disc-Player.com Panasonic Manuals...
- Page 98 Número SUB MENU − Repita los pasos 2 a 4 para programar otras grabaciones. DVD/VHS POWER cuando haya fi nalizado los cambios de programación. − El indicador “” se enciende en el visualizador del aparato. Downloaded From Disc-Player.com Panasonic Manuals...
- Page 99 En el aparato principal Oprima y mantenga COPYING COPYING oprimiendo por alrededor de 3 segundos. − La copia automáticamente se detiene cuando la reproducción del disco fi naliza o cuando la cinta llega al fi nal. Downloaded From Disc-Player.com Panasonic Manuals...
-
Page 100: Index
San Gabriel Industrial Park, Carolina, Mississauga, Ontario Corporation of North America Puerto Rico 00985 L4W 2T3 One Panasonic Way Secaucus, www.panasonic.ca New Jersey 07094 http://www.panasonic.com Downloaded From Disc-Player.com Panasonic Manuals 2007 Matsushita Electric Industrial Co., Ltd. RQT9056-P Printed in China F1207SN0...