Onkyo DV DV-BD507 Instruction Manual
Onkyo blu-ray disc player instruction manual
Hide thumbs
Also See for DV DV-BD507:
- Instruction manual (60 pages) ,
- Quick start manual (2 pages) ,
- Instruction manual (60 pages)
Table of Contents
Advertisement
Quick Links
Download this manual
See also:
Instruction Manual
BLU-RAY DISC PLAYER
DV-BD507
Instruction Manual
Thank you for purchasing an Onkyo BLU-RAY DISC
PLAYER. Please read this manual thoroughly before
making connections and plugging in the unit.
Following the instructions in this manual will enable
you to obtain optimum performance and listening
enjoyment from your new BLU-RAY DISC PLAYER.
Please retain this manual for future reference.
Contents
Introduction ............................................................ 2
Connections ............................................................ 13
Playback ..................................................................... 19
Function Setup ..................................................... 33
Others ........................................................................... 50
En
Advertisement
Table of Contents

Related Manuals for Onkyo DV DV-BD507


Summary of Contents for Onkyo DV DV-BD507
- Page 1 BLU-RAY DISC PLAYER DV-BD507 Instruction Manual Thank you for purchasing an Onkyo BLU-RAY DISC PLAYER. Please read this manual thoroughly before making connections and plugging in the unit. Following the instructions in this manual will enable you to obtain optimum performance and listening enjoyment from your new BLU-RAY DISC PLAYER.
-
Page 2: Important Safety Instructions
WARNING: TO REDUCE THE RISK OF FIRE OR ELECTRIC SHOCK, DO NOT EXPOSE THIS APPARATUS TO RAIN OR MOISTURE. CAUTION: TO REDUCE THE RISK OF ELECTRIC SHOCK, DO NOT REMOVE COVER (OR BACK). NO USER-SERVICEABLE PARTS INSIDE. REFER SERVICING TO QUALIFIED SERVICE PERSONNEL. -
Page 3: Precautions
To maintain the best picture quality, we recommend regular inspection and maintenance (cleaning or worn part replacement). Contact your Onkyo dealer. 11. Moisture Condensation Moisture condensation may damage this unit. - Page 4 • Do not use this unit when there’s the possibility of moisture condensation occurring. Doing so may damage your discs and certain parts inside this unit. If condensation does occur, remove all discs and leave this unit turned on for two to three hours. By this time, the unit will have warmed up and any condensation will have evaporated.
- Page 5 If this unit becomes inoperative, do not try to correct the problem by yourself. There are no user-serviceable parts inside. Turn the unit to the standby mode, unplug the power plug, and please contact your Onkyo dealer. Disc handling •...
- Page 6 Trademark Information HDMI, the HDMI logo and High-Definition Multimedia Interface are trademarks or registered trademarks of HDMI Licensing LLC. Manufactured under license from Dolby Laboratories. Dolby and the double-D symbol are trademarks of Dolby Laboratories. Manufactured under license under U.S. Patent #’s: 5,451,942;...
-
Page 7: Table Of Contents
Introduction PRECAUTIONS ........3 FEATURES ........8 Features . -
Page 8: Features
About HDMI CEC (consumer electronics control) This unit supports HDMI CEC, which allows integrated system control over HDMI and is part of the HDMI standard. Onkyo does not guarantee 100% interoperability with other brands of HDMI CEC compliant devices. PIP (Picture in Picture) (BONUSVIEW) setting... -
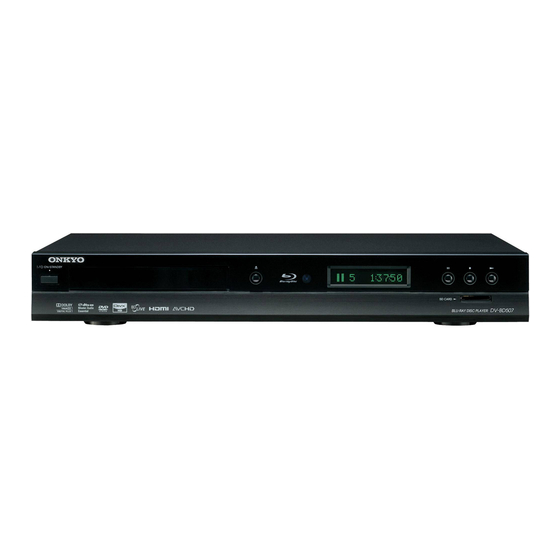
Page 9: Functional Overview
FUNCTIONAL OVERVIEW Front Panel The unit can also be turned on by pressing these buttons. 1. I /y y ON / STANDBY button • Press to turn on the unit, or to turn the unit into the standby mode. (To completely shut down the unit, you must unplug the AC power cord) 2. -
Page 10: Remote Control
Remote Control The unit can also be turned on by pressing these buttons. 1. DISPLAY button • Press to display the on-screen display menu. 2. ON/STANDBY I /y y button • Press to turn on the unit, or to turn the unit into the standby mode. -
Page 11: Insert Batteries
Installing the Batteries in the Remote Control Install the batteries (AAx2) matching the polarity indicated inside battery compartment of the remote control. Open the cover. Insert batteries. Make sure to match + and - on the batteries to the marks indicated in the battery compartment. Close the cover. -
Page 12: Front Panel Display
Front Panel Display • Brightness of the display can be adjusted. Refer to “Panel Display” in “FUNCTION SETUP” on page 43. 1. Displays playback status icon. Refer to the table below. 2. Displays various kinds of information such as title number, elapsed time, repeat mode, etc. Playback status icon Disc SD Memory Card... -
Page 13: Connections
Connection to the TV • Make one of the following connections, depending on the capabilities of your existing device. AUDIO CONNECTION standard audio AUDIO IN audio cable this unit AUDIO OUTPUT (ANALOG L/R) This unit is compatible with the progressive scan system. The feature provides you with the higher quality pictures than traditional output system does. - Page 14 HDMI Output Mode and Actual Output Signals Press [RESOLUTION] to change the resolution of the video signal being output from HDMI OUT jack. The video resolution changes as follows every time [RESOLUTION] is pressed. Front Panel HDMI Video Resolution Display 480 Progressive Press [RESOLUTION] 720 Progressive...
- Page 15 ■ Audio signals output from HDMI OUT jack “HDMI Audio Out” setting “BD Audio Mode” setting Media Audio Source Dolby Digital Dolby Digital Plus Dolby TrueHD BD-video DTS-HD LPCM Dolby Digital AVCHD LPCM Dolby Digital DVD- video LPCM Audio CD / MP3 DTS-CD Full decoded.
-
Page 16: Connection To An Audio System
Connection to an Audio System • When you change the connections, all devices should be turned off. • Refer to the manual accompanying external devices for more information. 2-Channel Analog Audio Connection audio RCA audio cable this unit Digital Audio Connection AV receiver / amplifier audio digital audio... - Page 17 ■ Audio signals output from AUDIO OUTPUT (DIGITAL OPTICAL / COAXIAL) jacks For the settings in the “Digital Out” to take effect, “HDMI Audio Out” should be set to “Audio Mute”. Otherwise, the settings made in the “HDMI Audio Out” will have a priority, and the same signal as being output from the HDMI OUT jack will be output from the AUDIO OUTPUT (DIGITAL OPTICAL / COAXIAL) jacks as well.
-
Page 18: Network Connection With Lan
Network Connection with LAN • You can use a disc which offers BD-Live function by connecting the unit to the Internet. (For BD-Live information, please refer to page 29) Telecommunications equipment (modem, etc.) Internet No supplied cables are used in this connection: Please purchase the necessary cables at your local store. -
Page 19: Information On Playback
INFORMATION ON PLAYBACK Before you start playing back a disc, read the following information. Playable Discs and Files This unit is compatible to play back the following discs / files. To play back a disc / file, make sure that it meets the requirements for region codes and color systems as described below. - Page 20 INFORMATION ON PLAYBACK Color Systems BD-video and DVD-video are recorded in different color systems throughout the world. The most common color system is NTSC (which is used primarily in the United States and Canada). This unit employs NTSC color system, so the disc you play back must be recorded in the NTSC system.
-
Page 21: Disc Information
INFORMATION ON PLAYBACK ■ Chapter information <Title / Chapter information for BD and AVCHD> 1 / 10 <Chapter information for DVD> CHAPTER 3 / 5 0 : 01 : 02 Current title number Current chapter number / Total number of chapters Current repeat setting (Only when repeat setting is active) -
Page 22: Basic Playback
Playing Back a BD, DVD or a Disc with AVCHD Files BD-V DVD-V AVCHD BASIC PLAYBACK Note • may appear at the top-right on the TV screen when the operation is prohibited by the disc or this unit. • During the playback of 2-layered disc, pictures may stop for a moment. -
Page 23: Operations Using Title Menu, Disc Menu, And Pop-Up Menu
Operations Using Title Menu, Disc Menu, and Pop-up Menu BD-V DVD-V AVCHD Many of BD-video and DVD-video disc contains title menu (BD-video / DVD-video / AVCHD), disc menu (DVD-video) or pop-up menu (BD-video) which guides you through the available functions in the disc. The contents of the menus may differ depending on the discs. -
Page 24: Playing Back An Audio Cd Or A Disc With Mp3 Files
Playing Back an Audio CD or a Disc with MP3 Files Insert an audio CD or a disc with MP3 files. • The file list will appear on the TV screen. To return to the first item: • Press [TOP MENU]. To return to the track/file played last: •... -
Page 25: Reading The Sd Memory Card
Reading the SD Memory Card AVCHD You can play back the AVCHD/MP3 files in an SD Memory Card. With the SD Memory Card, you can also enjoy the special additional contents for BD-ROM ver. 2 (Profile 2.0/ Profile 1.1) which can be downloaded from the Internet. You can store the contents on an SD Memory Card via computer and play them back with the BD-video. -
Page 26: Special Playback
SPECIAL PLAYBACK Fast Forward / Fast Reverse BD-V DVD-V AVCHD During playback, press [FWD D] repeatedly for fast forward. During playback, press [REV E] repeatedly for fast reverse. Every time you press [FWD D] or [REV E], the playback speed will change. Press [PLAY B] to return to normal playback. -
Page 27: A-B Repeat
A-B Repeat BD-V DVD-V AVCHD You can play back the specific part (between point A and point B) repeatedly. During playback, press [A-B] at the desired starting point A. During playback, press [A-B] at the desired ending point B. As soon as you set the point B, the part between point A and point B will start playback repeatedly. -
Page 28: Random Playback
Press [PLAY B ] to start program playback. • Program playback will start. To exit from the program playback mode: • Press [RETURN] in stop mode. Note During program playback, press [STOP C ] once to • set the resume point, and then press [PLAY B ] to resume program playback from where [STOP C ] was pressed (audio CD) or from beginning of the file where [STOP C ] was pressed (MP3). -
Page 29: Rapid Playback
Rapid Playback BD-V DVD-V AVCHD This function plays back approximately at 1.3 times the normal playback while keeping the sound output. This function is available only on discs recorded in the Dolby Digital format. During playback, press [MODE] repeatedly until the Rapid playback setting appears. -
Page 30: Search
Using [SKIP H / G ] During playback, press [SKIP G] to move to the next track. Press it repeatedly to skip to subsequent tracks. Press [SKIP H ] once to go back to the beginning of the current track. Press it repeatedly to go to the previous tracks. -
Page 31: Special Settings
SPECIAL SETTINGS You can select the format of audio and video as you prefer depending on the contents of the disc you are playing back. Switching Subtitles Some BD and DVD may have subtitles in 1 or more languages. For commercially available discs, the supported languages can be found on the disc case. -
Page 32: Setting The Bd Audio Mode
Setting the BD Audio Mode BD-V There are 2 ways to set “BD Audio Mode” setting; whether to output the secondary and interactive audio accompanied by the primary audio or only the primary audio. Depending on the setting of the mode, Dolby Digital, Dolby Digital Plus, Dolby TrueHD, DTS, or DTS-HD output changes between multi LPCM and bitstream. -
Page 33: Function Setup
FUNCTION SETUP Using the Setup Menu In the setup menu you can change the setting for audio, video, language, etc. You cannot change the setting during playback. Setting items displayed in gray indicates they are not available under the conditions at the time. Quick “Quick”... - Page 34 FUNCTION SETUP Custom “Custom” menu contains all the setting items. In stop mode, press [SETUP]. Use [K / L] to select [ENTER]. Use [K / L] to select your desired setting category, then press [ENTER]. : Language : Video : Audio : Parental : Others •...
- Page 35 ■ Language Language Audio Subtitle Disc Menu Player Menu • For how to select the setting items and options, refer to “Custom” on page 34. Setting items Audio Sets the language for audio. Subtitle Sets the language for subtitle. Disc Menu Sets the language for disc menu or pop-up menu.
- Page 36 ■ Video Video TV Aspect HDMI Video Resolution HDMI Deep Color Component Output Progressive Mode Still Mode • For how to select the setting items and options, refer to “Custom” on page 34. Setting items TV Aspect Sets the picture size according to aspect ratio of the connected TV.
- Page 37 Setting items Still Mode* Adjusts picture resolution and quality in still mode. *) Settings with (*) are the default. ) An individual picture on the TV screen is called “Frame”, which consists of two separate images called “Field”. Some pictures may be blurred at the auto setting in “Still Mode” setting due to their data characteristics. •...
- Page 38 ■ Audio Audio BD Audio Mode HDMI Audio Out Down Sampling • For how to select the setting items and options, refer to “Custom” on page 34. Setting items BD Audio Mode For BD, selects whether to output the secondary and interactive audio with primary audio if it is available or only the primary audio.
-
Page 39: Speaker Setting
■ Digital out setting When “Audio Mute” is selected in “HDMI Audio Out” setting, HDMI audio signal will be muted and the audio signals output from AUDIO OUTPUT (DIGITAL OPTICAL / COAXIAL) jacks change depending on “Digital Out” setting. Quick HDMI Audio Out Bitstream*: When playing back discs recorded in Dolby Digital, Dolby Digital Plus, Dolby TrueHD, DTS or DTS-HD,... - Page 40 How to navigate through “HDMI Multi(LPCM)”. Use [K / L] to select your desired menu item then press [ENTER]. Use [K / L] to select your setting items. • Press [RETURN] to go back to the previous screen. Use [s / B] to select desired options. (Except for “Test Tone”, “Default” and setting options in “Speaker Size”...
- Page 41 Menu Delay Time Distance This is a parameter for optimizing the timing at which the sound is output from the Front speakers according to their distance from the listening position. Center Surround Surround Back Default *) Settings with (*) are the default. •...
- Page 42 ■ Parental Ratings control allows you to set a limit, which prevents your children from viewing inappropriate materials. Playback will be stopped if the ratings exceed the levels you set, and it will require you to enter a password before playing back the disc.
- Page 43 ■ Others Others Angle Icon Auto Power Off Panel Display HDMI CEC Media Select Network Connection Software Upgrade • For how to select the setting items and options, refer to “Custom” on page 34. Setting items Angle Icon Auto Power Off Panel Display Sets the brightness of the front panel display.
- Page 44 *) Settings with (*) are the default. • HDMI CEC allows integrated system control over HDMI and is part of the HDMI standard. In addition to Onkyo AV components, it allows interoperability with CEC-compatible AV components and TVs made by other manufacturers.
-
Page 45: Network Connection
Network Connection Set up the network connection settings in order to use the BD-Live function with a BD-Live disc. Connection Test After you made IP address/DNS settings or when a LAN cable is connected, always perform the connection test to check if the connection is correctly made. In stop mode, press [SETUP]. - Page 46 If you select “Manual”, follow the following instruction to set the IP address and DNS. 3-a) Use [K / L] to select “IP Address”, “Subnet Mask” or “Default Gateway”, then press [ENTER]. IP address setting screen will appear. Enter IP address, subnet mask and default gateway with cursor buttons and number buttons.
- Page 47 3-a) Use [K / L] to select “Proxy Address”, then press [ENTER]. Proxy address setting screen will appear. Enter proxy address. • The keyboard screen will appear. Others Proxy Address Clear All Clear [K / L/ s / B] : Move the highlight. [the Number buttons] : Enter number.
-
Page 48: Software Upgrade
Website. www.onkyo.com Press [ENTER] or [RETURN] to exit. Note • Please visit www.onkyo.com to download the latest firmware version. Disc Upgrade You can upgrade the software by using disc. Follow steps 1 to 3 in “Connection Test”... - Page 49 FUNCTION SETUP Initialize Initialize the setting or SD Memory Card. In stop mode, press [SETUP]. Use [K / L] to select [ENTER]. Use [K / L] to select a desired option, then press [ENTER]. “Setup”: Resets the setup menu to the default. “Format SD Card”...
-
Page 50: Troubleshooting
TROUBLESHOOTING If the unit does not perform properly when operated as instructed in this manual, check the unit, consulting the following checklist. Problem No power No sound or picture Distorted picture Completely distorted picture or black / white picture with BD / DVD No sound or distorted sound Picture freezes momentarily during playback... - Page 51 Problem The password for rating level has been forgotten Cannot connect the network Cannot connect to the network while my PC is connected to the network Cannot use the BD-Live function - Use an SD card with enough space. The playback of BD-video or download of data does not perform properly.
-
Page 52: Glossary
Analog Audio An electrical signal that directly represents sound. Compare this to digital audio which can be an electrical signal, but is an indirect representation of sound. See also “Digital Audio”. Aspect Ratio The width of a TV screen relative to its height. conventional TVs are 4:3 (in other words, the TV screen is almost square);... - Page 53 GLOSSARY Region Code Regions associate discs and players with particular areas of the world. This unit will only play back discs that have compatible region codes. You can find the region code of your unit by looking on the rear panel. Some discs are compatible with more than one region (or all regions).
-
Page 54: Language Code
Language Code French [FRE] Abkhazian 4748 Frisian Afar 4747 Galician Afrikaans 4752 Georgian Albanian 6563 German [GER] Amharic 4759 Greek [GRE] Arabic 4764 Greenlandic Armenian 5471 Guarani Assamese 4765 Gujarati Aymara 4771 Hausa Azerbaijani 4772 Hebrew Bashkir 4847 Hindi Basque 5167 Hungarian [HUN] Bengali;Bangla... -
Page 55: Specifications
General Signal system Power requirements Power consumption Dimensions (width x height x depth) Weight Operating temperature Operating humidity Terminals Audio output (Analog) RCA jack x 2 Video output RCA jack x 1 Component video output RCA jack x 3 Audio output (Digital) RCA jack x 1 Optical jack x 1 HDMI output... - Page 56 Unit 1&12, 9/F, Ever Gain PlazaTower 1, 88, Container Port Road, Kwai Chung, N.T., HONG KONG Tel: 852-2429-3118 Fax: 852-2428-9039 http://www.ch.onkyo.com/ SN 29400130 (C) Copyright 2009 ONKYO CORPORATION Japan. All rights reserved. HOMEPAGE http://www.onkyo.com/ Printed in China * 2 9 3 4 4 8 8 8 *...