Table of Contents
Advertisement
> Before start
> Hookup
Basic
Manual
VSX-831
AV Receiver
> Setup
> Playback
> Part Names
Hookup
Step1: Connect the Speakers ..................................................3
Step2: Connect the TV ............................................................5
Step3: Connect the AV Components .......................................7
Step4: Connect Other Cables ................................................10
Setup
Step5: Power On & Initial Setup ............................................11
HDMI Setup ...........................................................................12
Basic Playback ......................................................................13
Network Functions .................................................................14
Others ....................................................................................16
Front Panel ............................................................................18
Rear Panel ............................................................................19
Remote Controller .................................................................20
Display ...................................................................................20
This manual includes information needed when starting up and also
instructions for frequently used operations. The "Advanced Manual" is
available on the internet with details about the playback features/
listening modes/settings details, specifications, and troubleshooting.
The Advanced Manual is created in a format that makes it easy to read
on a PC or Smartphone.
http://www.pioneer-audiovisual.com/manual/vsx831/adv/en.html
Advanced Manual found here
Advertisement
Table of Contents

Related Manuals for Pioneer VSX-831


Summary of Contents for Pioneer VSX-831
-
Page 1: Table Of Contents
Step2: Connect the TV ............5 Step3: Connect the AV Components ........7 Step4: Connect Other Cables ..........10 Setup Step5: Power On & Initial Setup ..........11 HDMI Setup ................12 Playback VSX-831 Basic Playback ..............13 Network Functions ..............14 Others ..................16 Part Names Front Panel ................18 AV Receiver Rear Panel ................19... -
Page 2: Main Features
> Before start > Hookup > Setup > Playback > Part Names What's in the box 1. Main unit 2. Remote controller (RC-914R) ×1, Batteries (AAA/R03) ×2 3. Indoor FM antenna ×1 4. AM loop antenna ×1 5. Speaker setup microphone ×1 Main features This unit is connected between your TV and your AV components. -
Page 3: Step1: Connect The Speakers
> Before start > Hookup > Setup > Playback > Part Names Step1: Connect the Speakers Speaker Layout for 5.1-Channel System Front speakers output front stereo sound and a center speaker outputs center sound such as dialogs and vocals. Surround speakers create back sound field. - Page 4 > Before start > Hookup > Setup > Playback > Part Names Connections for 5.1- Channel System Connect 123456 for a 5.1-channel system. Up to two powered subwoofers can be connected. The same signal is output from each of the SUBWOOFER jacks. Note that it is possible to connect just 12 and no other jacks.
-
Page 5: Step2: Connect The Tv
> Before start > Hookup > Setup > Playback > Part Names Step2: Connect the TV if you have: ARC TV This unit is connected between your TV and AV components. If you connect two or more AV components, you can select the video displayed on the TV and the audio output from this unit by changing the input selector. - Page 6 > Before start > Hookup > Setup > Playback > Part Names if you have: Non-ARC TV This unit is connected between your TV and AV components. If you connect two or more AV components, you can select the video displayed on the TV and the audio output from this unit by changing the input selector.
-
Page 7: Step3: Connect The Av Components
> Before start > Hookup > Setup > Playback > Part Names Step3: Connect the AV Components if you have: HDMI AV Components This is an example of connection with an AV component that has an HDMI jack. With connection to an AV component that conforms with the CEC (Consumer Electronics Control) standard, you can use features such as the HDMI CEC feature that links with the input selector,... - Page 8 > Before start > Hookup > Setup > Playback > Part Names if you have: Non-HDMI AV Components This is an example of connection with an AV component that does not have an HDMI jack. Make the connections to the AV component to match the jacks it has. When video input connection is to the CBL/SAT jack, the audio input connection should also be to the CBL/SAT jacks, and so on, so that you connect the video input jacks to the...
-
Page 9: Audio Components
> Before start > Hookup > Setup > Playback > Part Names if you have: Audio Components Example of a connection with an audio component. You can connect a turntable that has an MM-type cartridge to the PHONO jack. 0 If the turntable has a built-in audio equalizer, connect it to another AUDIO IN jack. -
Page 10: Step4: Connect Other Cables
> Before start > Hookup > Setup > Playback > Part Names Step4: Connect Other Cables Antenna Hookup Network Hookup Move the antenna around while playing the radio to find Connect this unit to the network using wired LAN or Wi-Fi the position with the best reception. -
Page 11: Step5: Power On & Initial Setup
> Before start > Hookup > Setup > Playback > Part Names Step5: Power On & Initial Setup Initial Setup starts automatically 1. Full Auto MCACC Once all connections are complete, change the TV's input to the input for this unit, inset batteries in the remote Place the supplied speaker setup microphone in the controller, and press Í... -
Page 12: Hdmi Setup
> Before start > Hookup > Setup > Playback > Part Names HDMI Setup 2. Source Connection To switch between upper and lower case, select "A/a" on HDMI CEC the screen and press ENTER. To select whether to mask Make this setting to enable the control feature for devices the password with "*"... -
Page 13: Basic Playback
> Before start > Hookup > Setup > Playback > Part Names Basic Playback AV Component Playback control features, so you can enjoy even better sound quality. The Pure Direct mode shuts down even more processes that affects sound 1. Switch the input on the TV to that assigned to quality, so you get a more faithful reproduction the unit. -
Page 14: Network Functions
> Before start > Hookup > Setup > Playback > Part Names Network Functions Network Services 1. Switch the input on the TV to that assigned to the unit. Play music files on a USB storage device. 2. Press NET to display the network service list screen. 0 Operation cannot be guaranteed for all USB storage devices. - Page 15 > Before start > Hookup > Setup > Playback > Part Names ® AirPlay BLUETOOTH Playback ® You can wirelessly enjoy the music files on an iPhone Pairing ® ® iPod touch , or iPad connected to the same access point 1.
-
Page 16: Others
> Before start > Hookup > Setup > Playback > Part Names Others Listening To the Radio AV Adjust 1. Press TUNER (a) on the remote controller repeatedly to select either By pressing the button on the remote controller during play, you can "AM"... -
Page 17: Home
> Before start > Hookup > Setup > Playback > Part Names Home When the unit is operating erratically (Resetting this unit) When you press on the remote controller, the Home is displayed and you can make settings in the various menus. Restarting the unit may help it operate more smoothly. -
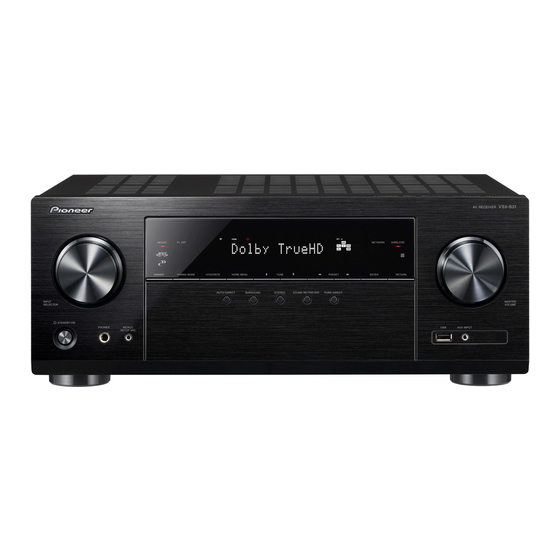
Page 18: Front Panel
> Before start > Hookup > Setup > Playback > Part Names Front Panel 12 13 1. INPUT SELECTOR dial: Switch the input to be played. 10.NETWORK indicator: When the power of the unit is on, 17. MCACC SETUP MIC jack: The supplied speaker setup 2. -
Page 19: Rear Panel
> Before start > Hookup > Setup > Playback > Part Names Rear Panel 90° 180° 1. DIGITAL IN OPTICAL/COAXIAL jacks: Input TV or AV angles according to the connection status. component digital audio signals with a digital optical 8. Power cord cable or digital coaxial cable. -
Page 20: Remote Controller
> Before start > Hookup > Setup > Playback > Part Names Remote Controller Display 1. Í button: Turns the unit on or into standby mode. 2. Input selector buttons: Select the input to be played. Use the buttons in 3 to select "STRM BOX", "AUX", or "PHONO". 3. -
Page 21: License And Trademark Information
License and Trademark Information owners. Onkyo Corporation does not guarantee BLUETOOTH compatibility between the AV receiver and all BLUETOOTH enabled devices. For compatibility between the AV receiver and another device with BLUETOOTH technology, consult the device’s documentation and dealer. In Google Cast and the Google Cast badge are trademarks of Google inc. - Page 22 DISCLAIMER Through this device you are able to link to other services or websites which are not under the control of any company which has designed, manufactured or distributed/have distributed this device, and its affiliates (collectively, “Company”). We have no control over the nature, content and availability of those services.
- Page 24 (Europe) © 2016 Onkyo & Pioneer Corporation. All rights reserved. © 2016 Onkyo & Pioneer Corporation. Tous droits de reproduction et de traduction réservés. F1601-0 “Pioneer” is a trademark of Pioneer Corporation, and is used under license. Printed in Malaysia / Imprimé en Malaisie / Напечатано в Малайзии...