Pioneer VSX-830-K Service Manual
Hide thumbs
Also See for VSX-830-K:
- Quick start manual (76 pages) ,
- Operating instructions manual (160 pages) ,
- Reference manual (27 pages)
Table of Contents
Advertisement
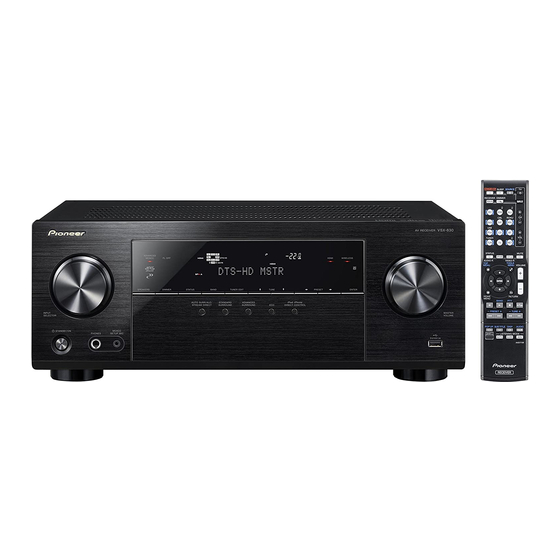
AV Receiver
VSX-830-K
VSX-45
VSX-830-S
THIS MANUAL IS APPLICABLE TO THE FOLLOWING MODEL(S) AND TYPE(S).
Model
Type
VSX-830-K
CUXESM
VSX-45
CUXE
VSX-830-K
SYXEV8
VSX-830-S
SYXEV8
THIS SERVICE MANUAL SHOULD BE USED TOGETHER WITH THE FOLLOWING MANUAL(S).
Model
VSX-830-K, VSX-45, VSX-830-S
PIONEER CORPORATION
PIONEER ELECTRONICS (USA) INC. P.O. Box 1760, Long Beach, CA 90801-1760, U.S.A.
PIONEER EUROPE NV Haven 1087, Keetberglaan 1, 9120 Melsele, Belgium
PIONEER ELECTRONICS ASIACENTRE PTE. LTD. 253 Alexandra Road, #04-01, Singapore 159936
PIONEER CORPORATION
Power Requirement
AC 120 V
AC 120 V
AC 220 V to 230 V
AC 220 V to 230 V
Order No.
RRV4595
SCHEMATIC DIAGRAM, PCB CONNECTION DIAGRAM, PCB PARTS LIST
1-1, Shin-ogura, Saiwai-ku, Kawasaki-shi, Kanagawa 212-0031, Japan
2015
VSX-830-K
Remarks
K-MZV MAR.
ORDER NO.
RRV4594
Remarks
2015 Printed in Japan
Advertisement
Table of Contents

Related Manuals for Pioneer VSX-830-K


Summary of Contents for Pioneer VSX-830-K
- Page 1 PIONEER CORPORATION 1-1, Shin-ogura, Saiwai-ku, Kawasaki-shi, Kanagawa 212-0031, Japan PIONEER ELECTRONICS (USA) INC. P.O. Box 1760, Long Beach, CA 90801-1760, U.S.A. PIONEER EUROPE NV Haven 1087, Keetberglaan 1, 9120 Melsele, Belgium PIONEER ELECTRONICS ASIACENTRE PTE. LTD. 253 Alexandra Road, #04-01, Singapore 159936...
-
Page 2: Safety Information
PIONEER Service Manual. A subscription to, or additional copies of, Also test with plug reversed Earth PIONEER Service Manual may be obtained at a nominal (Using AC adapter ground charge from PIONEER. plug as required) -
Page 3: Table Of Contents
8.1 ADJUSTMENT REQUIRED WHEN THE UNIT IS REPAIRED OR REPLACED ............46 8.2 USB BACKUP................................47 8.3 UPDATING OF THE FIRMWARE ..........................48 8.4 IDLE CURRENT ADJUSTMENT ..........................51 9. EXPLODED VIEWS AND PARTS LIST..........................52 9.1 PACKING SECTION ..............................52 9.2 EXTERIOR SECTION ..............................54 VSX-830-K... -
Page 4: Service Precautions
As the screw covers for the speaker terminals are subject to breakage, be careful when removing them. If a screw cover is broken during removal, replace it with a new one. Continuous use of a broken screw cover may cause short-circuiting of speaker terminals. VSX-830-K... -
Page 5: Specifications
(17 3/16 in. (W) x 6 5/8 in. (H) x 13 1/16 in. (D)) Frequency Range (AM) (VSX-830-K/CUXESM)..530 kHz to 1 700 kHz Weight (without package) ........8.7 kg (19 lb 3 oz) Frequency Range (AM) (VSX-830-K,S/SYXEV8) ..531 kHz to 1 602 kHz Antenna (AM) ...........Loop antenna (balanced) Video Section Signal level Composite Video ............ -
Page 6: Basic Items For Service
Diagnosis (DMAIN Assy ↔ CONCT Assy) Board to board extension jig cable (7P) GGD1891 Lubricants and Glues List Name Part No. Remarks Silicon grease GEM1057 Refer to "9.2 EXTERIOR SECTION". GYA1011 Silicon adhesive Refer to "9.2 EXTERIOR SECTION". (KE40RTV-W) VSX-830-K... -
Page 7: Pcb Locations
3.3 PCB LOCATIONS OPTCO ASSY DMAIN ASSY SP-B ASSY (VSX-45 only) NETWORK MODULE SMPS ASSY CPU ASSY MAIN ASSY CONCT ASSY NTC ASSY WG ASSY AMP5 ASSY G-L ASSY G-R ASSY REG ASSY HPMIC ASSY FUSB ASSY INSEL ASSY FRONT ASSY VSX-830-K... - Page 8 Parts marked by “NSP” are generally unavailable because they are not in our Master Spare Parts List. The > mark found on some component parts indicates the importance of the safety factor of the part. Therefore, when replacing, be sure to use parts of identical designation. LIST OF ASSEMBLIES VSX-830-K VSX-45 VSX-830-K VSX-830-S...
- Page 9 VSX-830-K...
-
Page 10: Block Diagram
OPTCO A (VSX-830-K AC IN SP-B ASSY (VSX-45/CU CP402 (7028077732010) (VSX-830-K CN403 CP2009 CN1805 (S1) CX100 AC-IN CX102 NTC ASSY (VSX-830-K/CUXESM: 7028077725050) CN9502 (VSX-45/CUXE: 7028077725010) (VSX-830-K,-S/SYXEV8: 7028077725040) MAIN TRANS (S2) (S3) (S4) CX101 Q103FR Q103 Q102FR Q102FR Q101FR Q101FR 2SD2390... - Page 11 CPU ASSY OPTCO ASSY (VSX-830-K/CUXESM: 7028077731050) (VSX-830-K/CUXESM: 7028077723050) (VSX-45/CUXE: 7028077731010) (VSX-45/CUXE: 7028077723010) (VSX-830-K,-S/SYXEV8: 7028077731040) (VSX-830-K,-S/SYXEV8: 7028077723040) CP2009 CN1805 When ordering service parts, be sure to refer to "EXPLODED VIEWS and PARTS LIST" or "PCB PARTS LIST". The > mark found on some component parts indicates the importance of the safety factor of the part.
-
Page 12: Audio Block Diagram
INPUT SELECTOR -6dB DMAIN ASSY HDMI OUT IC1602 MN864788A HDMI RECEIVER HDMI IN SAT/CBL HDMI3 IC9601 HDMI4 SII9587 HDMI SWITCHER HDMI5/MHL OPT(TV) DIGITAL IN COAX(CD) IC1801 AK4588 CODEC BLUETOOTH WIRELESS NETWORK MODULE ETHERNET AXX7293 IC9002 D808K013DPTP400 FUSB ASSY FRONT USB VSX-830-K... - Page 13 HPMIC ASSY HEADPHONE OUT AMP5 ASSY Q451 SPK OUT IC2704 NJM4580CG Q607,Q609 Q606,Q608 VSX-830-K...
-
Page 14: Dmain Block Diagram (Audio)
P1_SDTI/DSDC P1B_HFDT/DSDFL CH0ASD2 AXR1[0] AXR0[9]D1SDT P1_RDTI/DSDFR P1B_SDTI/DSD AXR1[1] CH0ASD3 P1B_CDTI/DSDLFE AXR1[2] P1B_BDTI/DSDSR AXR1[3] P1B_LRCK/DSDSL AXR1[4] P1B_RDTI/DSDFR D1B_BCK/P1_DSDSR AXR1[5] SEL (VHC126) CH1ABCLK IC1601 D1B_LRCK D1B_BCK D1BCK CH1ALRCLK D1B_FDT CH1ASD0 D1B_LRCK D1LRCK (P1_BDTI) D1FDT 27.0 MHz (P1_DSDSR) DSD_ON SEL (TC7SZ125) D1B_FDT VSX-830-K... - Page 15 AXR0[7]D1FDT D1CDT D1CDT AXR0[8]D1CDT AXR0[8]D1CDT D1SDT D1SDT D1SDT(SR) D1SDT(SR) AXR0[9]D1SDT AXR0[9]D1SDT : SPDIF : SPDIF : AMCLK : AMCLK : I2S : I2S : SYSCLK : SYSCLK : FLG : FLG : I2S BCK, LRCK : I2S BCK, LRCK VSX-830-K...
-
Page 16: Dmain Block Diagram (System)
4.4 DMAIN BLOCK DIAGRAM (SYSTEM) DMAIN ASSY : DMAIN ASSY : OTHER ASSY : TMDS : CEC : DIGITAL VIDEO : ANALOG VIDEO/AUDIO : SPDIF : DIGITAL AUDIO : CLOCK MAIN ASSY CPU ASSY "AXX7293" FRONT ASSY VSX-830-K... - Page 17 OPTCO ASSY MAIN ASSY "AXX7293" FUSB ASSY VSX-830-K...
-
Page 18: Power Supply Block Diagram
KIA7912PI REG ASSY S3(F_USB) USB_+12V S4(FLT) CPU ASSY SMPS ASSY IC305 NJM2888F33 CEC-IO AC IN CN901B L100 F100 LF4ZBE273H V+5_ST R120 4.7(1W) CN901W T101 EE2525V V+5R6_EV L102 10UH D119 R128 UF4007 C148 33/63 C113 R112 100N-K USB_+12V C115 1500P/250V VSX-830-K... - Page 19 IC9006 : TC7SH08FUS1 IC305 NJM2888F33 V+1R25_NW NETWORK MODULE IC303 V+2R5_NW V+5_ST V+5R6_EV AXX7293 NJM2888F05 V+3R3_NW V+1R8_NW IC612 : TC74VHCT08AFKS1, IC614 : TC74VHCT08AFKS1 V+5R6_EV V+5_EV IC608 : TC74VHCT08AFKS1, IC611 : 74VHCT126AFT USB+5.1V FUSB ASSY IC808 : TPS2065CDBVR USB+5.1V OPTCO ASSY VSX-830-K...
-
Page 20: Gnd Block Diagram
4.6 GND BLOCK DIAGRAM AC IN MAIN ASSY SMPS ASSY FL_FB FR_FB HP_L HP_R A+12V CEN_A FL_A FR_A C_FB FL_FB FR_FB POWER TRANS A+12V A+12V REG ASSY HPMIC ASSY INSEL ASSY VSX-830-K... - Page 21 DMAIN ASSY FL_FB FR_FB SL_A SR_A SL_FB SPB_R HP_L HP_R A+12V A+12V FBRL HP_RLY CEN_A CEN_A SL_A SR_A FR_A C_FB C_FB SL_FB SR_FB FR_FB A+12V A+12V GND_H SURL GND_H DC_PROTECTION A+12V A-12V -HIGHB +HIGHB1 AMP5 ASSY FRONT ASSY FUSB ASSY VSX-830-K...
-
Page 22: Diagnosis
Is the voltage +5.0 V? Check IC303 on CPU Assy (CPU Assy IC303 pin 4) or replace CPU Assy. Is the voltage +3.3 V? Check IC305 on CPU Assy (CPU Assy IC305 pin 4) or replace CPU Assy. Replace CPU Assy. VSX-830-K... - Page 23 Check L3001, IC3001 or (FRONT Assy C3032 - side) replace FRONT Assy. Is the voltage 5 V? Check Q3001, Q3009, R3112, (FRONT Assy C3096 + side) R3113 or replace FRONT Assy. Is damage in FLT3001? Replace FRONT Assy. Replace FLT3001. VSX-830-K...
- Page 24 Are the signal on AMP5 Assy CP401 pin 1, 9? Speaker out sound Check the problem analog signal line Check and repair FL or FR AMP between input connector and IC400 circuit or replace AMP5 Assy. (Input selector IC) on MAIN Assy or replace MAIN Assy. VSX-830-K...
- Page 25 3 (SR), 5 (C), 7 (SW). pin 9 (SR), 11 (SL),13 (C),15 (SW). Check the signal CN105 - CN113 Check and repair AMP circuit of problem Replace MAIN Assy or their or replace CONCT Assy. peripheral circuit. channels or replace AMP5 Assy. VSX-830-K...
- Page 26 Replace DMAIN Assy. HDMI in → Repair IC1801 (AK4588) and its peripheral circuit or replace DMAIN Assy. NETWORK in → Check Digital Audio Signal output. (DMAIN Assy CN9203 Replace Network module. pins 26, 28, 30, 32, 34) Replace DMAIN Assy. VSX-830-K...
- Page 27 No OSD circuit or replace DMAIN Assy. No GUI Repair IC1602 (MN864788A) and its • HOME MENU GUI What is not indicated • USB GUI peripheral circuit or replace DMAIN Assy. only in GUI? • NETWORK GUI Replace Network module. VSX-830-K...
-
Page 28: Confimation Of The Network Module
5 Select "OK" then press ENTER. "Setting change?" window is displayed, then select "YES" and press ENTER. 2 Select "Wireless Direct" from the Network Connection 6 Select the SSID shown on the screen of this receiver. menu. (e.g. WirelessDirectX: XXXXXX) VSX-830-K... - Page 29 1 Left-click on the wireless network icon on the system tray. 2 Check that the above-mentioned SSID (WirelessDirectX:XXXXXX) is displayed on the list that appears. 2 Select Wi-Fi. WirelessDirectX: XXXXXX 3 Check that the above-mentioned SSID (WirelessDirectX:XXXXXX) is displayed in the "Choose a Network" box. WirelessDirectX:XXXXXX VSX-830-K...
-
Page 30: Error Indications
After this error is detected, the system interrupts detection (VOL LEVEL) (Pin 11 of IC300) the "Temp Over" detection for 2 minutes. Detect "L" [How to Enter Release Mode] During Standby mode, simultaneously press and hold the "TUNE ↓" and "STATUS" keys for 5 seconds. VSX-830-K... - Page 31 MHL equipment is detecition port is set to "L". acknowledged after second power-on. XMHLPERR Circuit DMAIN ASSY V+5_MHL IC809 TPS2065CDBVR IC2021 5.1V D111 NM (RB051L-40) D112 NM (RB051L-40) UCOM R313 0-2012 V+3R3_PVCC IC101 R314 MHLPOW R 2 6 3 XMHLPERR VSX-830-K...
-
Page 32: Protection Circuit
• A+12V: Less than +8 V (at normal: +12 V) • -HIGH: More than -41 V (at normal: -55 V) • A-12V: More than -9 V (at normal: -12V) • +12V TRIGGER: Less than +8 V (at normal: +12 V)(VSX-45 only) VSX-830-K... - Page 33 [2] TEMP Protection Circuit VSX-830-K...
-
Page 34: Service Mode
H O L D R E S E T times error is detected. R E S E T C L E A R ? [ ↑ ] [ENTER] [↓] R E S E T R E S E T ↓ Continued VSX-830-K... - Page 35 CEC TEST : The function for making the HDMI output terminal to Change cyclically output 4 Hz square wave. If the square wave is output, the CEC line is considered to be normal. FAN TEST : The function for making the FAN to be forced to rotate. VSX-830-K...
-
Page 36: Default Settings
The display shows RESET? OK. 4 Press ENTER to confirm. OK appears in the display to indicate that the receiver has been reset to the factory default settings. • Note that all settings will be saved, even if the receiver is unplugged. VSX-830-K... -
Page 37: Disassembly
(3) Check that the voltage between the –30V terminal is less than 1 V, using a tester. ∗ Be sure to connect the GND terminal of the tester to the chassis. ∗ If the voltage is still 1 V or higher, repeat Step (2). CPU Assy CN314 VSX-830-K... - Page 38 (5) Release the 2 jumper wires. DMAIN Assy NTC Assy (6) Cut the 4 cable ties. CPU Assy FRONT Assy CN314 CN3004 CN305 INSEL Assy (7) Unhook the two hooks. Front panel section (8) Remove the front panel section. VSX-830-K...
- Page 39 (BBZ30P080FTC) • Bottom view (2) Remove the 2 screws. (BBZ30P080FTC) (3) Release the jumper wire. WG Assy (4) Disconnect the 4 connectors. Heatsink (CP401 to CP404) (5) Remove the heatsink section. CP401 CP404 CP402 CP403 DMAIN Assy AMP5 Assy VSX-830-K...
- Page 40 (6) Disconnect the 4 B to B connectors. (CN1, 610, 611, 1801) CONCT Assy Note: Some connections of the housing wires or connectors may be tight. When disconnecting those wires or connectors, be careful not to damage them. CN1801 ×2 ×2 CN610 ×2 CN611 DMAIN Assy VSX-830-K...
- Page 41 Insulation sheet (BBZ30P180FTC) (3) Remove the CONCT Assy by disconnecting the 2 BtoB connectors. (CN113, 114) DMAIN Assy CN1801 CONCT Assy CN105 CP115 CN113 CN114 Borad to board extension Borad to board extension jig cable (GGD1891) jig cable (GGD1876) VSX-830-K...
- Page 42 After having attached the network module to Network module DMAIN Assy, attach the antenna cables to the network module surely. Network module (3) Insert the tip of a large screwdriver into either part circled in red in the photo. • Rear view VSX-830-K...
- Page 43 Be sure to gradually widen the gap between the connectors from both sides of the module. After replacing the network module, updating is necessary. Refer to "UPDATA PANEL Mode (Version update)" on "8.3 UPDATING OF THE FIRMWARE". VSX-830-K...
- Page 44 REG Assy (2) Disconnect the 5 connectors. (CP1, 7, 401, 402, 403) (3) Unhook the jumper wires. (4) Remove the 3 screws. CP401 CP402 CP403 (BBZ30P080FTC) (5) Remove the 2 screws. (BBZ30P180FTC) (6) Remove the MAIN Assy. MAIN Assy VSX-830-K...
- Page 45 There is an acetate tape as a service jig. Part number: GYH1001 When dressing the antenna cable, Size: 16mm × 30M leave some slack in the cable (If similar acetate tape is readily available, it can be used to on the transformer side. the unit) VSX-830-K...
-
Page 46: Each Setting And Adjustment
After replacing Network module (AXX7293) or DMAIN Assy, the unit needs to update. Refer to "UPDATE PANEL Mode (Version update)" on "8.3 UPDATING OF THE FIRMWARE" Note 3: After replacing Network module (AXX7293) or DMAIN Assy, the unit needs to test Wi-Fi function. Refer to "5.2 CONFIMATION OF THE NETWORK MODULE" VSX-830-K... -
Page 47: Usb Backup
• Depending on the type of USB memory device, the setting file may not have properly been saved even though [COMPLETE] is displayed after a SAVE process. Before replacing the DMAIN Assy, perform a LOAD process and check that [COMPLETE] is displayed. VSX-830-K... -
Page 48: Updating Of The Firmware
3. Connect the USB Memory to the USB terminal (A type) of the front panel. [Procedure] 1. While holding down "TUNE↑" key on the front panel, press "STANDBY ON/OFF" key and moves to the UPDATE PANEL mode. 2. The updating process is as follows. VSX-830-K... - Page 49 [PRESET→] Update Confirmation U P D A T E [PRESET←] [←] [→] Update Confirmation U P D A T E Y E S [ENTER] File searching A c c e s s i n g UPDATE FILE searching completed VSX-830-K...
- Page 50 Update time is fluctuated by contents of the update. It will take about 26 minutes at the maximum. (Actual time is from 3 minutes to 26 minutes.) Time required for updating varies, because only the programs that require updating will be updated. [Confirmation] Enter UPDATE PANEL mode and check that the programs have been updated. VSX-830-K...
-
Page 51: Idle Current Adjustment
TP1SR pin 3 (–) • Adjustment points and measurement points..see fig. 1. AMP5 ASSY VR1FL TP1FL VR1SL TP1SL VR1C TP1C VR1SR TP1SR VR1FR TP1FR TP1FR VR1FL VR1SL VR1SR VR1FR VR1C TP1FL TP1C TP1SR TP1SL SIDE A Fig. 1 VSX-830-K... -
Page 52: Exploded Views And Parts List
For the applying amount of lubricants or glue, follow the instructions in this manual. (In the case of no amount instructions, apply as you think it appropriate.) 9.1 PACKING SECTION Poly bag packing style Tape (clear) Cord AC Safety Brochure AAA size IEC R03 dry cell batteries VSX-830-K, -S/SYXEV8 only VSX-830-K... - Page 53 9 Warranty Sheet See Contrast table (2) NSP 10 Label VRW1629 11 Power Cord See Contrast table (2) (2) CONTRAST TABLE VSX-830-K/CUXESM, VSX-45/CUXE, VSX-830-K/SYXEV8 and VSX-830-S/SYXEV8 are constructed the same except for the following: VSX-830-K VSX-45 VSX-830-K VSX-830-S Mark Symbol and Description...
-
Page 54: Exterior Section
9.2 EXTERIOR SECTION Cable tie Sheet cabinet PCB support HP plate Spring Clamp F-USB plate Spring VSX-830-K... - Page 55 VSX-830-K/CUXESM, VSX-45/CUXE only Cable tie Cable tie VSX-45/CUXE only VSX-830-K, -S Cable tie /SYXEV8 only ×20 PCB support Cable tie Cable tie Cable tie Cable tie Cable tie Clamp Silicon adhesive (GYA1011) Silicon grease (GEM1057) VSX-830-K...
- Page 56 39 Wi-Fi Antenna Bush 2410210171000S 40 Knob 5080212431000-IL 41 Heatsink See Contrast table (2) 42 Standby Button See Contrast table (2) 43 5 Key Button See Contrast table (2) 44 10 Key Button 5090214571000S 45 Pioneer Badge See Contrast table (2) VSX-830-K...
- Page 57 (2) CONTRAST TABLE VSX-830-K/CUXESM, VSX-45/CUXE, VSX-830-K/SYXEV8 and VSX-830-S/SYXEV8 are constructed the same except for the following: VSX-830-K VSX-45 VSX-830-K VSX-830-S Mark Symbol and Description /CUXESM /CUXE /SYXEV8 /SYXEV8 MAIN Assy 7028077711030 7028077711010 7028077711020 7028077711020 DMAIN Assy 7028077771030 7028077771010 7028077771020 7028077771020...