
Related Manuals for Diono Rainier


Summary of Contents for Diono Rainier
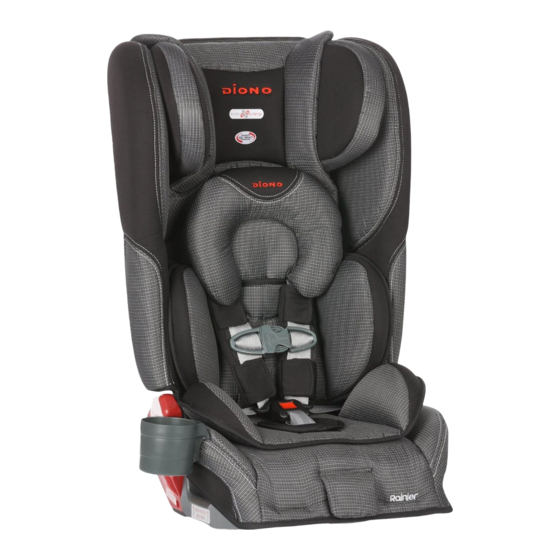
- Page 1 ® convertible + booster rainier Instruction Manual US Version Please read carefully Store manual behind cover...
-
Page 2: Table Of Contents
Rear-facing Installation ........30-37 Forward-facing Installation......38-47 Booster Installation ..........48-49 Unfolding and Folding the Car Seat ............7-9 LATCH vs. Seat Belt Installation .............10-11 Safety Get to Know the Parts and Features of your diono rainier ....12 ® 14-15 Warnings ....................... 16-17 Child Car Seat Safety Information ............ - Page 3 Forward-Facing Installation Safe Stop® Instructions ................... Forward-facing Adjustable Bottom ............40-42 Forward-facing SuperLATCH™ Installation ........43-44 Forward-facing Lap-Shoulder Belt Installation ......45-46 Forward-facing Lap Belt Installation ..........Forward-facing Top Tether Installation ............ Booster Mode Installation 48-49 Booster Mode Installation ..............Final Checklist Final Checklist for All Installations..............
-
Page 4: First Steps Summary
Register your car seat. • Mail in your registration card or go online to us.diono.com and register your car seat. REGISTER your car seat online at us.diono.com or PLEASE COMPLETE AND MAIL THE OWNER REGISTRATION CARD THAT CAME WITH YOUR SEAT WITHIN THIRTY (30) DAYS OF PURCHASE. -
Page 5: Seat Position
Get to Know Your Car Seat (cont.) Upon removing your car seat from the box, unfold your seat. (See pages 7-9) • Check to be sure the area is clear of debris. • Remove body support and infant head support cushions. -
Page 6: Forward-Facing Installation
First Steps Summary (cont.) Installation Properly secure your car seat in your car. (See pages 30-37 for rear-facing installation and pages 38-47 for forward-facing installation) • Double check your work. • Did you do a car seat stability check? Place your child in your installed car seat. (See pages 21-27) •... -
Page 7: Unfolding And Folding The Car Seat
Unfolding and Folding the Car Seat WARNING: • Do NOT carry the car seat by harness adjuster strap. This can damage the mechanism and the webbing. • Do NOT use the car seat if release levers or locking bolts bind or do not move freely. - Page 8 Unfolding and Folding the Car Seat (cont.) Pull harness adjusting strap until harness begins to tighten. If strap does not slide freely, fold car seat, remove harness adjusting strap from fold joint and repeat Step 3. Fasten both fabric side panels to center panel.
- Page 9 Raise head support to its top position. (See Page 23) Adjust both expandable sides to their inward position. Place car seat on its back, push either release lever downward to release locking bolts. Keep harness buckle lifted toward the top of the car seat while folding seat bottom up to avoid pinching the buckle within...
-
Page 10: Latch Vs. Seat Belt Installation
• Lap-shoulder belt over child with SuperLATCH® & top tether Got a Question? Please visit our website us.diono.com for tips and videos on installations, adjusting the harness and other frequently asked questions. Or, you can call our Customer Care Department. We have highly trained Customer Care Representatives who are also Certified Child Passenger Safety Technicians (CPST). -
Page 11: Expiration Date
LATCH stands for Lower Anchors and Tethers for Children. SuperLATCH™ is the same as LATCH, but only attaches to the lower anchors of your vehicle’s seats. Here are your choices for installation: Diono always recommends using the Top Tether strap if an appropriate anchor is available. Forward-Facing Capacity Booster Mode Child’s Weight: 20-90 lbs. -
Page 12: Get To Know The Parts And Features Of Your Diono Rainier
Get to Know the Parts and Features of your diono rainier ® SuperLATCH™ storage Rear-facing belt path SuperLATCH™ Booster mode shoulder attachment strap guide belt guide Forward-facing belt path Buckle pad Folding release levers Detachable rear-facing base Safe Stop® Rear-facing top tether... -
Page 14: Warnings
If you have any questions, us.diono.com 1-855-463-4666. visit or contact Diono at • Use only with children weighing between 5 lbs to 120 lbs (2.3 to 54 kg). • With any infant weighing less than 20 lbs (9.1 kg), use only rear-facing. -
Page 15: Warnings
13. • Register this car seat with the manufacturer by mailing your registration card in (See page 4) or registering online at: us.diono.com Child Seating Position Information WARNING: • Before installing car seat in a vehicle equipped with front passenger air bags, carefully read the vehicle owner’s manual... -
Page 16: Child Car Seat Safety Information
Fill out the included product registration card and mail it. You can register online at us.diono.com. You can also register by sending your name, address, the restraint’s model and... - Page 17 • This car seat is not a toy. Do not allow children to play with it. • Using any non-Diono product with this car seat, or any product not specifically approved by Diono for use with this car seat, is not allowed.
-
Page 18: Seat Belt Information
Seat Belt Information The information below applies only to installations using vehicle seat belts. Important: • This car seat can be installed securely in most vehicles using the seat belt. However, some seat belts have an anchoring position for the lap belt that may not allow a secure car seat installation. -
Page 19: Locking A Vehicle Lap-Shoulder Belt With A Locking Clip
Locking a Vehicle Lap-Shoulder Belt with a Locking Clip WARNING: • Failure to properly lock the seat belt will result in an unsafe installation that will greatly increase the potential for injury or death to the child in an accident. •... -
Page 20: Car Seat Stability Checklist
Car Seat Stability Checklist WARNING: • An unstable installation is NOT safe and will greatly increase the potential for injury or death to the child in an accident. Confirm stability of car seat after installation and before each use. Here’s how to check: Grasp car seat near belt path being used. -
Page 21: Position Of The Harness (Rear-Facing Or Forward-Facing)
Positioning of the Harness (Rear-facing or Forward-facing) WARNING: • Serious injury or death can result if child is not properly secured in car seat. Confirm harness is snug before each use and after making any car seat adjustments. A snug harness strap should not allow any slack. - Page 22 Positioning of the Harness (cont.) Confirm harness is not twisted and lays flat against child. Properly position harness chest clip so that it is level with child’s armpits. Fasten chest clip together. Do the Pinch Test Take the thumb and index finger and ‘glide’ your fingers along the harness at the collarbone, not necessarily trying to pinch excess.
-
Page 23: Side Impact Head Support Adjustment
Side Impact Head Support Adjustment This car seat features an aluminum reinforced head rest lined with EPS foam (energy absorbing foam) for advanced side impact safety and performance. Important: Head support is not recommended for newborns or smaller toddlers. When your child fits at the third harness slot, head support may be used at its lowest position. -
Page 24: Infant Head Pillow And Body Support
Infant Support Cushion Use Infant Head Pillow and Body Support This car seat features a full infant head and body support. Use of the support cushions is optional and does not affect the safety of the seat. Slide crotch buckle through the slot on the bottom cushion that matches the child’s buckle position. -
Page 25: Securing The Harness Straps, Harness Buckle, And Harness Pads
Harness Straps WARNING: • All harness slot positions can be used rear-facing, however, only use the top three shoulder harness positions for forward-facing. • When using uppermost harness position, the level of the child’s shoulders can be above the harness slot as long as the child is the proper height. -
Page 26: Changing Harness Position
Harness Straps (cont.) Changing Harness Position Loosen harness: lift silver lever Camlock and pull shoulder straps forward. From back of car seat, remove shoulder straps from metal hook. From front of car seat, pull shoulder straps out and re-thread them through the correct height harness slots. -
Page 27: Harness Buckle
Harness Buckle Proper Harness Buckle Position Confirm location of harness buckle is correct. To ensure proper harness fit: Place child in the car seat to determine proper harness buckle position. • For rear-facing, any 3 buckle positions are acceptable, as long as the harness is snug on the child’s shoulders. - Page 28 Harness Buckle (cont.) Hold metal D-ring and then rotate it slightly to slide it completely through desired slot in car seat bottom. Firmly pull buckle upward to confirm it is secured by car seat bottom. Confirm red release button faces toward front of car seat and buckle strap is not twisted.
-
Page 29: Expandable Sides
Harness Pads (cont.) Installing Harness Pads for Children 65 lbs. and Over Important: Before installing these harness pads, please remove the soft harness pads. Place pad under harness Fold sides of pad over strap with rubber side harness strap to fasten. facing child. -
Page 30: Rear-Facing Installation
Detachable Base (Rear-facing) WARNING: • Detachable base must be used only when the car seat is rear-facing. • Do NOT use detachable base when the car seat is forward-facing. • Do NOT use pool noodles or rolled towel in lieu of detachable base, or to adjust the rear-facing angle of the seat. -
Page 31: Rear-Facing Superlatch™ Installation
• Consult your pediatrician for the correct angle for newborns and children without head control. • You must remove SuperLATCH™ when child exceeds 35 lbs. Re-install Rainier using the vehicle seat belt (See pages 33-36). • Read vehicle manual regarding air bags, seating positions and warnings. -
Page 32: Rear-Facing Superlatch™ Installation
Important: It may be necessary to move front vehicle seat slightly forward to properly fit rear-facing car seat. The Diono Angle Adjuster may be purchased separately to adjust recline, if child can sit up unassisted and has full head control. Angle Adjuster is not appropriate for a newborn. -
Page 33: Rear-Facing Lap-Shoulder Belt Installation
• You must use car seat rear-facing if child is less than 1 year and weighs less than 20 lbs (minimum requirements). • Diono and the American Academy of Pediatrics recommend keeping children rear-facing to the maximum rear-facing weight or height capacities of this car seat (50 lbs. or head is less than 1.5”... -
Page 34: Rear-Facing Lap-Shoulder Belt Installation
Important: It may be necessary to move front vehicle seat slightly forward to properly fit rear-facing car seat. The Diono Angle Adjuster may be purchased separately to adjust recline, if child can sit up unassisted and has full head control. Angle Adjuster is not appropriate for a newborn. -
Page 35: Rear-Facing Lap Belt Installation
• You must use car seat rear-facing if child is less than 1 year and weighs less than 20 lbs (minimum requirements). • Diono and the American Academy of Pediatrics recommend keeping children rear-facing to the maximum rear-facing weight or height capacities of this car seat (50 lbs. -
Page 36: Rear-Facing Lap Belt Installation
Important: It may be necessary to move front vehicle seat slightly forward to properly fit rear-facing car seat. The Diono Angle Adjuster may be purchased separately to adjust recline, if child can sit up unassisted and has full head control. Angle Adjuster is not appropriate for a newborn. -
Page 37: Rear-Facing Top Tether Installation
Rear-facing Top Tether Installation WARNING: • Do NOT modify vehicle without approval from vehicle manufacturer or authorized vehicle dealer. • Do NOT attach rear-facing top tether connector strap to any movable mechanism of a vehicle seat. Consult vehicle manual for recommended rear-facing tether anchor locations. -
Page 38: Safe Stop® Instructions
Safe Stop® WARNING: • Always use Safe Stop with forward-facing child under 40 lbs. • Do NOT use with rear-facing child. • Do NOT use Safe Stop with any other installation configuration. Safe Stop is a load-limiting device designed to absorb energy and reduce impact to a smaller, forward-facing child. -
Page 39: Forward-Facing Adjustable Bottom
Forward-facing Adjustable Bottom WARNING: • Adjustable bottom MUST be lowered for children 25 lbs. and over in a forward-facing installation. • Do NOT adjust bottom for children under 25lbs. Important: Car seat must be locked in its unfolded position before operating adjustable bottom. For a step-by-step installation, watch our video here: www.youtube.com/DionoUSA Lowering adjustable bottom... -
Page 40: Forward-Facing Superlatch™ Installation
• Do NOT place infant in a forward-facing car seat until they are at least 1 year old and 20 lbs. • Diono and the American Academy of Pediatrics recommend keeping children rear-facing to the maximum rear-facing weight or height capacities of this car seat (50 lbs. or head is less than 1.5”... - Page 41 Unfasten fabric side panels and reach behind cover for easy access to belt path. Place car seat in forward-facing position with entire bottom flat on the vehicle seat and back of car seat flat against vehicle seat back. A gap is acceptable as long as the top of the car seat is firmly touching the vehicle head rest or seat back.
-
Page 42: Forward-Facing Superlatch™ Installation
Forward-facing SuperLATCH™ Installation (cont.) Push down on the car seat (where the child sits), while tightening the SuperLATCH™ strap. To check for a tight fit, grab the seat near the label that states “forward-facing belt path” with one hand and give it a moderate tug. -
Page 43: Forward-Facing Lap-Shoulder Belt Installation
• Do NOT place infant in a forward-facing car seat until they are at least 1 year old and 20 lbs. • Diono and the American Academy of Pediatrics recommend keeping children rear-facing to the maximum rear-facing weight or height capacities of this car seat (50 lbs. or head is less than 1.5”... -
Page 44: Forward-Facing Lap-Shoulder Belt Installation
Forward-facing Lap-Shoulder Belt Installation (cont.) Slide the seat belt through the forward-facing belt path behind the fabric and buckle it. Be sure belt is not twisted. Put seat belt in locking mode, if necessary. Pull shoulder portion of seat belt to remove slack so the lap portion is tightening down on the car seat. -
Page 45: Forward-Facing Lap Belt Installation
• Do NOT place infant in a forward-facing car seat until they are at least 1 year old and 20 lbs. • Diono and the American Academy of Pediatrics recommend keeping children rear-facing to the maximum rear-facing weight or height capacities of this car seat (50 lbs. or head is less than 1.5”... -
Page 46: Forward-Facing Lap Belt Installation
Forward-facing Lap Belt Installation (cont.) Slide the seat belt through the forward-facing belt path behind the fabric and buckle it. Be sure belt is not twisted. Put seat belt in locking mode, if necessary. Push down on the bottom of the car seat while pulling all the slack out of the belt. -
Page 47: Forward-Facing Top Tether Installation
Forward-facing Top Tether Installation WARNING: • In forward-facing installations, attach top tether to approved vehicle tether anchorage points ONLY, as labeled by vehicle manufacturer. • If vehicle does not have tether anchorage points, consult vehicle owner’s manual or contact vehicle manufacturer. Do NOT modify vehicle without approval from vehicle manufacturer or authorized vehicle dealer. -
Page 48: Booster Installation
Booster Mode Installation WARNING: • Unsecured objects can become flying hazards and can cause serious injury in an accident. While not required, it is recommended to secure the car seat using the SuperLATCH™ connectors and/or the top tether in vehicles equipped with LATCH anchors. - Page 49 Fasten Lap-Shoulder belt across child: lap portion of seat belt should rest within both lower belt guides and buckle located on the outside of the car seat. Place shoulder belt portion so that belt lays properly across child’s collarbone, interior to the shoulder.
-
Page 50: Final Checklist
Final Checklist For correct installation Be familiar with the parts of the car seat. (See pages 12-13) LATCH Installations Be sure SuperLATCH™ connectors are securely attached to correct anchors and strap is pulled tight (See pages 31-32 for rear-facing and pages 40-41 for forward-facing). -
Page 51: Carrying The Car Seat
• Do NOT carry the car seat by harness adjuster strap. This can damage the mechanism and the webbing. • Only the shoulder carry straps made by Diono are approved for use with this car seat. Periodically inspect release levers and locking bolts for cleanliness... -
Page 52: Cup Holder
Cup Holder Cup holders can be purchased as added accessories and attached to either side. Each side has one cup holder slot. Adjust side to its outward position, insert cup holder stem into receiving slot in top of arm rest and push down until it is securely engaged and twist to lock in place. -
Page 53: Car Seat Cover (Removing And Replacing)
Car Seat Cover Tip: It is not necessary to remove buckle tongues or chest clip from harness straps when removing and replacing car seat cover. If possible, take pictures while you are removing the cover in order to replace the cover easily. Removing car seat cover Remove the harness buckle. -
Page 54: Cleaning And Maintenance
Cleaning and Maintenance Cleaning and maintenance of release mechanism and locking bolts Periodically inspect release levers and locking bolts for cleanliness and proper functioning: When release levers are lifted, release levers and locking bolts should spring back immediately and completely. WARNING: •... -
Page 55: Cleaning The Cover
Cleaning the plastic shell Clean with damp cloth only. Wet cloth with warm water and mild soap. Wring cloth thoroughly so it is NOT dripping water. Towel dry. Confirm areas are free of debris and release mechanisms function properly. Important: Do NOT use solvents, bleach, or abrasive cleaners. Cleaning the cover Remove the memory foam, do NOT machine wash. -
Page 56: Cleaning And Maintenance
Cleaning and Maintenance (cont.) Cleaning harness straps Clean with damp cloth only. Wet cloth with warm water and mild soap. Wring cloth thoroughly so it is NOT dripping water. Towel dry. Important: Do NOT use solvents, bleach, or abrasive cleaners. Do NOT soak or submerge the harness webbing. -
Page 57: Replacing Harness Straps
Replacing Harness Straps Secure metal tongues into the buckle. Remove harness straps from the metal hook on the back of the seat. Pull the straps out from the back of the seat. Remove the harness pads and chest clip from each side. Slide the harness strap out of the metal tongues. -
Page 58: Aircraft Installation
This restraint is NOT certified for use in an aircraft as a belt- positioning booster. Call airline to confirm the car seat will fit your specific aircraft. Diono’s Angle Adjuster (sold separately) may be beneficial. Seat belt extender will be necessary for rear-facing installation. -
Page 59: Warranty Information
Proof of purchase is required. The exclusive remedy for this warranty is that Diono will upon return of the product to Diono and determination of any such defect, at its sole option replace, repair or provide replacement components for this product. - Page 60 + booster rainier ® product: convertible + booster 300000 model series: mfg. by: Diono LLC 14810 Puyallup Street Sumner, WA 98390 Customer Care Tel: 1 (855) 463-4666 us.diono.com @dionoUSA © 2016 Diono LLC. All rights reserved. rainier US Eng 03302016...