Olympus FE-47 Instruction Manual
Olympus digital camera user manual
Hide thumbs
Also See for FE-47:
- Manual de instrucciones (59 pages) ,
- Manual de instruções (59 pages) ,
- Manuel d'instructions (59 pages)
Table of Contents
Advertisement
DIGITAL CAMERA
FE-47/X-43
Instruction Manual
● Thank you for purchasing an Olympus digital camera. Before you start
to use your new camera, please read these instructions carefully to
enjoy optimum performance and a longer service life. Keep this manual
in a safe place for future reference.
● We recommend that you take test shots to get accustomed to your
camera before taking important photographs.
● In the interest of continually improving our products, Olympus reserves
the right to update or modify information contained in this manual.
● The screen and camera illustrations shown in this manual were
produced during the development stages and may differ from the actual
product.
Advertisement
Table of Contents

Related Manuals for Olympus FE-47


Summary of Contents for Olympus FE-47
-
Page 1: Digital Camera
DIGITAL CAMERA FE-47/X-43 Instruction Manual ● Thank you for purchasing an Olympus digital camera. Before you start to use your new camera, please read these instructions carefully to enjoy optimum performance and a longer service life. Keep this manual in a safe place for future reference. -
Page 2: Table Of Contents
Step Checking the contents of the box Digital camera Other accessories not shown: Instruction Manual (this manual), warranty card. Contents may vary depending on purchase location. Step Preparing the Camera “Preparing the Camera” (p. 10) Step How to Use the Camera “Camera Settings”... -
Page 3: Camera Settings
Camera Settings Using the Direct Buttons Using the Direct Buttons Frequently used functions can be accessed using the direct buttons. Arrow pad F (up) / INFO button (change information display) (p. 16, 19) H (left) G (down) / D button (erase) (p. 18) Shutter button (p. - Page 4 Using the Menu Using the Menu Use the menu to change camera settings such as the shooting mode. Press the m button to display the function menu. The function menu can be used to set frequently used shooting and playback functions such as shooting mode. Shooting PROGRAM AUTO PROGRAM AUTO...
-
Page 5: Menu Index
Menu Index Menus for Shooting Functions PROGRAM AUTO PROGRAM AUTO AUTO AUTO AUTO AUTO 1 Shooting mode P (PROGRAM AUTO) ...p. 14 M (iAUTO) ...p. 20 N (DIS MODE) ...p. 20 s (SCENE MODE) ...p. 20 P (MAGIC FILTER) ...p. 21 ~ (PANORAMA) ...p. -
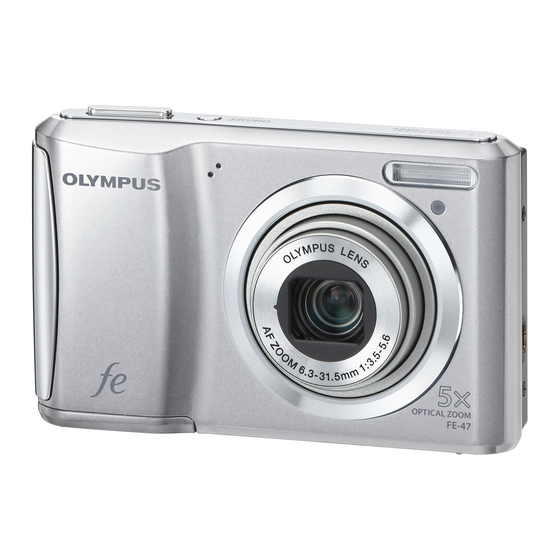
Page 6: Names Of Parts
Names of Parts Camera unit Strap eyelet Battery/card compartment cover ... p. 10 Battery/card compartment lock ... p. 10 Microphone ... p. 29, 31 Lens ... p. 46, 58 Attaching the camera strap Pull the strap tight so that it does not come loose. 6 EN Flash ... - Page 7 n button ... p. 12, 14 Monitor ... p. 14, 42 m button ... p. 4 E button (menu guide) ... p. 19 Shutter button ... p. 14 Zoom buttons ... p. 16 q button (switch between shooting and playback) ... p. 15 H button (OK) ...
- Page 8 Monitor Shooting mode display 1/100 1/100 Still image Battery check ... p. 10 Shooting mode ... p. 14, 20 Flash ... p. 23 Flash standby/fl ash charge ... p. 42 Macro ... p. 23 Self-timer ... p. 24 Exposure compensation ... p. 24 White balance ...
- Page 9 Playback mode display ● Normal display 10 10 4/30 4/30 ’10/02/26 12:30 ’10/02/26 12:30 Still image ● Detailed display 10 10 4/30 4/30 1/1000 F3.5 AUTO 100 0004 FILE ’10/02/26 12:30 Battery check ... p. 10 Print reservation/ number of prints ... p. 40/p. 39 Protect ...
-
Page 10: Preparing The Camera
Preparing the Camera Inserting the battery and the SD/SDHC memory card (sold separately) Always use SD/SDHC memory cards with this camera. Do not insert any other types of memory card. Insert the card straight until it clicks into place. Do not touch the contact area directly. 10 EN Battery/card compartment lock... -
Page 11: System Requirements
This camera allows the user to take pictures using the internal memory even when no SD/SDHC memory card (sold separately) is inserted. “Using an SD/SDHC memory card” (p. 47) “Number of storable pictures (still images)/ Continuous recording length (movies) in the internal memory and SD/SDHC memory cards”... -
Page 12: On Your Computer
Insert the supplied CD in a CD-ROM drive. ● A setup screen will appear on the computer monitor. If the setup window is not displayed, select “My Computer” (Windows XP) or “Computer” (Windows Vista/Windows 7) from the start menu. Double-click the icon for the CD-ROM drive to open the setup CD window and then double-click “CameraInitialSetup.exe”. - Page 13 Press I to save the setting for [Y]. TIME -- -- -- 2010 CANCEL MENU As in Steps 2 and 3, use FGHI and the H button to set [M] (month), [D] (day), [TIME] (hours and minutes), and [Y/M/D] (date order).
-
Page 14: Shooting, Viewing, And Erasing
Shooting, Viewing, and Erasing Shooting with the optimum aperture value and shutter speed [PROGRAM AUTO] In this mode, automatic shooting settings are activated while also allowing changes to a wide range of other shooting menu functions, such as exposure compensation, white balance, etc. as needed. - Page 15 To take the picture, gently press the shutter button all the way down while being careful not to shake the camera. Press fully 1/400 1/400 Image review screen To view images during shooting Pressing the q button enables playback of images.
-
Page 16: Using The Zoom
Using the zoom Pressing the zoom buttons adjusts the shooting range. Pressing the wide (W) button Zoom bar AUTO AUTO AUTO AUTO Optical zoom: 5x Digital zoom: 4x Select [DIS MODE] for the shooting mode (p. 20) when shooting with the telephoto zoom. - Page 17 Use HI to select an image. Displays previous image Hold I to fast forward and hold H to reverse. The display size of the images can be changed. “Index view and close-up view” (p. 18) To play sound recordings To play sound recorded with an image, select the image and press the H button.
- Page 18 Erasing images during playback (Single image erase) Display the image you want to erase and press G ( ERASE BACK Press FG to select [ERASE], and press the H button. [ALL ERASE] (p. 30) and [SEL. IMAGE] (p. 30) can be used to erase multiple images at the same time.
-
Page 19: Information Display
Changing the image information display Shooting information settings displayed on the screen can be changed. Press F (INFO). ● The displayed image information changes in the order shown below each time the button is pressed. Normal 10 10 4/30 4/30 No information ’10/02/26 12:30 ’10/02/26 12:30... -
Page 20: Using Shooting Modes
Using Shooting Modes The shooting mode can be selected from the function menu in the following order: P , M, N, s, P, ~, and A. “Using the Menu” (p. 4) Shooting with automatic settings [iAUTO] According to the scene, the camera automatically selects the optimal shooting mode from [PORTRAIT]/[LANDSCAPE]/ [NIGHT+PORTRAIT]/[SPORT]/[MACRO]. -
Page 21: Shooting With Special Effects
Use HI to select the best shooting mode for the scene, and press the H button. Icon indicating [SCENE MODE] that is set In [SCENE MODE], the optimum shooting settings are pre-programmed for specifi c shooting scenes. For this reason, some settings cannot be changed in some modes. -
Page 22: Creating Panoramic Images
Creating panoramic images [PANORAMA] Take pictures that can be joined to form a panorama using the ib computer software. The focus, exposure (p. 24), zoom position (p. 16), and white balance (p. 25) are locked at the fi rst frame. The fl... -
Page 23: Using Shooting Functions
Using Shooting Functions “Using the Menu” (p. 4) Using the fl ash The fl ash functions can be selected to best match the shooting conditions. Select the fl ash option in the shooting function menu. FLASH AUTO FLASH AUTO Use HI to select the setting option, and press the H button to set. -
Page 24: Adjusting The Brightness
Using the self-timer After the shutter button is pressed all the way down, the picture is taken after a short delay. Select the self-timer option in the shooting function menu. Use HI to select the setting option, and press the H button to set. -
Page 25: Selecting The Iso Sensitivity
Adjusting to a natural color scheme (White balance) For more natural coloring, choose a white balance option suited to the scene. Select the white balance option in the shooting function menu. WB AUTO Use HI to select the setting option, and press the H button to set. - Page 26 Selecting the size of still images Select the image size option in the shooting function menu. Use HI to select the setting option, and press the H button to set. Option 14M (4288×3216) 8M (3264×2448) 5M (2560×1920) 3M (2048×1536) 2M (1600×1200) 1M (1280×960) VGA (640×480) 16:9S (1920×1080)
-
Page 27: Menus For Shooting Functions
Menus for Shooting Functions The default settings of the function are highlighted in Selecting a compression mode for still images [COMPRESSION] (Shooting menu) COMPRESSION Submenu 2 FINE Shooting at high quality. NORMAL Shooting at normal quality. “Number of storable pictures (still images)/Continuous recording length (movies) in the internal memory and SD/SDHC memory cards”... - Page 28 Selecting the focusing area [AF MODE] (Shooting menu) Available shooting modes: P M N s Submenu 2 The camera focuses automatically. (If a face is detected, it is shown by a white frame shutter button is pressed halfway and the camera is able to focus, FACE/iESP the frame color is changed to green...
- Page 29 Recording sound when shooting still images [R] (Shooting menu) Available shooting modes: P M N s Submenu 2 Application No sound is recorded. The camera automatically starts recording sound for approx. 4 seconds after a picture is taken. This is useful for recording notes or comments about the picture.
-
Page 30: Menus For Playback, Editing, And Printing Functions
Menus for Playback, Editing, and Printing Functions Playing back pictures automatically [SLIDESHOW] SLIDESHOW To start a slideshow After pressing the H button, the slideshow starts. To stop the slideshow, press the H button or the m button. Single-frame advance/rewind: During a slideshow, press I to advance one frame or press H to rewind one frame. - Page 31 When erasing pictures in a internal memory, do not insert the card into the camera. When erasing pictures from the card, insert a card into the camera in advance. To erase all images [ALL ERASE] 1 Use FG to select [ALL ERASE], and press the H button.
-
Page 32: Menus For Other Camera Settings
Menus for Other Camera Settings Erasing data completely [MEMORY FORMAT]/[FORMAT] r (Settings 1) MEMORY FORMAT/ FORMAT Before formatting, check that no important data is left in the internal memory or card. Cards must be formatted with this camera before fi rst use or after being used with other cameras or computers. -
Page 33: Usb Connection
Selecting a method for connecting the camera to other devices [USB CONNECTION] r (Settings 1) USB CONNECTION Submenu 2 Application When the camera is connected AUTO to another device, the settings selection screen is displayed. Select when transferring images to a computer or when using STORAGE ib computer software with the camera connected to a computer. -
Page 34: Adjusting The Brightness Of The Monitor
Selecting the camera sound and its volume [SOUND SETTINGS] s (Settings 2) SOUND SETTINGS Submenu 2 SILENT MODE *1, 2 OFF/ON SOUND TYPE BEEP VOLUME SOUND TYPE SHUTTER SOUND VOLUME OFF (No Sound) or 2 levels of volume OFF (No Sound) or q VOLUME 5 levels of volume Even when [SILENT MODE] is [ON], FG can be used to adjust volume during playback. - Page 35 Switching between home and travel destination time zones [WORLD TIME] s (Settings 2) WORLD TIME You will not be able to select a time zone using [WORLD TIME] if the camera clock has not fi rst been set using [X]. Submenu 2 Submenu 3 HOME/ALTERNATE...
- Page 36 Saving battery power between shots [POWER SAVE] t (Settings 3) POWER SAVE Submenu 2 Cancels [POWER SAVE]. When the camera is not being used for approx. 10 seconds, the monitor automatically turns off to save battery power. To resume standby mode Press any button.
-
Page 37: Printing
Printing Direct printing (PictBridge By connecting the camera to a PictBridge- compatible printer, you can print images directly without using a computer. To fi nd out if your printer supports PictBridge, refer to the printer’s instruction manual. PictBridge is a standard for connecting digital cameras and printers of different makers and printing out pictures directly. - Page 38 Changing the printer’s settings for printing [CUSTOM PRINT] Follow Steps 1 and 2 in [EASY PRINT] (p. 37). Press the H button to start printing. Use FG to select the print mode, and press the H button. EXIT Submenu 2 This prints the image selected in PRINT Step 6.
- Page 39 Submenu Submenu Application This selects the number <× 0 to 10 of prints. Selecting [WITH] prints the images with the date. WITH/ DATE Selecting [WITHOUT] WITHOUT prints the images without the date. Selecting [WITH] prints the fi le name on the image. WITH/ FILE NAME Selecting [WITHOUT] does...
- Page 40 Press the m button. When the message [REMOVE USB CABLE] is displayed, disconnect the USB cable from the camera and printer. Print Reservations (DPOF In print reservations, the number of prints and date imprint option are saved in the image on the card.
-
Page 41: Resetting The Print Reservation Data For Selected Images
Reserving one print each of all images on the card [U] Follow Steps 1 and 2 in [<] (p. 40). Use FG to select [U], and press the H button. Follow Steps 5 and 6 in [<]. Resetting all print reservation data Follow Steps 1 and 2 in [<] (p. -
Page 42: Usage Tips
Usage Tips If the camera does not work as intended, or if an error message is displayed on the screen, and you are unsure of what to do, refer to the information below to fi x the problem(s). Troubleshooting Battery “The camera does not work even when batteries are installed”. -
Page 43: Error Message
Error message When one of the messages below is displayed on the monitor, check the corrective action. Error message Corrective action Card problem Insert a new card. CARD ERROR Card problem The card write-protect switch is set to the “LOCK” side. Release WRITE the switch. -
Page 44: Shooting Tips
Shooting tips When you are unsure of how to take a picture that you envision, refer to the information below. Focusing “Focusing on the subject” ● Taking a picture of a subject not in the center of the screen After focusing on an object at the same distance as the subject, compose the shot, and take the picture. -
Page 45: Color Hue
Color hue “Taking pictures with colors at the same shade as they appear” ● Taking pictures by selecting white balance (p. 25) Best results in most environments can normally be obtained with the [WB AUTO] setting, but for some subjects, you should try experimenting with different settings. -
Page 46: Appendix
The number of pictures that you can take may vary considerably depending on the battery manufacturer and shooting conditions. AA NiMH batteries (rechargeable batteries) Olympus NiMH batteries are rechargeable and economical. For details, refer to the instruction manual for your charger. Caution: Use only batteries approved for use in this product. - Page 47 Release the switch to enable writing. Cards compatible with this camera SD/SDHC memory cards (for more information, visit the Olympus website) Using a new card Cards must be formatted with this camera before fi rst use or after being used with other cameras or computers.
- Page 48 Number of storable pictures (still images)/Continuous recording length (movies) in the internal memory and SD/SDHC memory cards The fi gures for the number of storable still pictures and continuous recording length are approximate. The actual capacity varies with shooting conditions and the card used. Still images IMAGE SIZE 6 4288×3216...
-
Page 49: Safety Precautions
DO NOT OPEN CAUTION: TO REDUCE THE RISK OF ELECTRICAL SHOCK, DO NOT REMOVE COVER (OR BACK). NO USER-SERVICEABLE PARTS INSIDE. REFER SERVICING TO QUALIFIED OLYMPUS SERVICE PERSONNEL. An exclamation mark enclosed in a triangle alerts you to important operating and maintenance instructions in the documentation provided with the product. - Page 50 Follow these important guidelines to prevent batteries from leaking, overheating, burning, exploding, or causing electrical shocks or burns. DANGER • Use only the Olympus brand NiMH batteries and proper fi tting charger. • Never heat or incinerate batteries. • Take precautions when carrying or storing...
- Page 51 The following AA (R6) batteries cannot be used. Batteries whose bodies are only partially or not at all covered by an insulating sheet. Batteries whose - terminals are raised, but not covered by an insulating sheet. Batteries whose - terminals are fl at and not completely covered by an insulating sheet.
-
Page 52: Lcd Monitor
Battery Handling Precautions • Olympus NiMH batteries (included in some areas) are intended for use only with Olympus digital cameras. Never use these batteries with any other device. • Always charge NiMH batteries (included in some areas) before using them for the fi rst time, or if they have not been used for a long period. -
Page 53: Disclaimer Of Warranty
Olympus reserves the right to alter the features and contents of this publication or software without obligation or advance notice. - Page 54 Olympus’s own authorized service personnel unless repair by others is made with the written consent of Olympus; (c) defects or damage to the Products resulting from wear, tear, misuse, abuse, negligence,...
- Page 55 Representations and warranties made by any person, including but not limited to dealers, representatives, salespersons, or agents of Olympus, which are inconsistent or in confl ict with or in addition to the terms of this limited warranty, shall not be binding upon Olympus unless reduced to writing and approved by an expressly authorized offi...
- Page 56 Olympus distributor within the business area of Olympus Europa Holding GmbH as stipulated on the website: http://www.olympus. com this product will be repaired, or at Olympus’s option replaced, free of charge. To claim under this warranty the customer must take the product...
- Page 57 Notes regarding Guarantee maintenance 1 This Guarantee will only be valid if the Guarantee Certifi cate is duly completed by Olympus or an authorized dealer or other documents contain suffi cient proof. Therefore, please make sure that your name, the name of the dealer, the...
-
Page 58: Specifications
SDHC memory card : 13,800,000 pixels : 1/2.33” CCD (primary color fi lter), 14,500,000 pixels (gross) : Olympus lens 6.3 to 31.5 mm, f3.5 to 5.6 (equivalent to 36 to 180 mm on a 35 mm camera) : Digital ESP metering system : 4 to 1/2000 sec. - Page 59 VN705701...