Oki ML1120 User Manual
Oki printer user's guide
Hide thumbs
Also See for ML1120:
- Technical reference manual (254 pages) ,
- User manual (108 pages) ,
- Guide d'installation (58 pages)
Table of Contents
Advertisement
Quick Links
Advertisement
Table of Contents

Related Manuals for Oki ML1120


Summary of Contents for Oki ML1120
- Page 1 59389401_cvr.jpg...
-
Page 2: Copyright Information
The most up-to-date drivers and manuals are available from the web site: http://www.okiprintingsolutions.com Trademark Information __________________ Oki and Microline are registered trademarks of Oki Electric Industry Company Ltd. Microsoft, MS-DOS and Windows are either registered trademarks or trademarks of Microsoft Corporation in the United States and/or other countries. -
Page 3: Table Of Contents
Contents Parts of the Printer ....... . 5 Front View ........5 Back View . - Page 4 Printer Dimensions ....... 48 Printer Weight ........48 Environmental Requirements Electrical Requirements .
-
Page 5: Parts Of The Printer
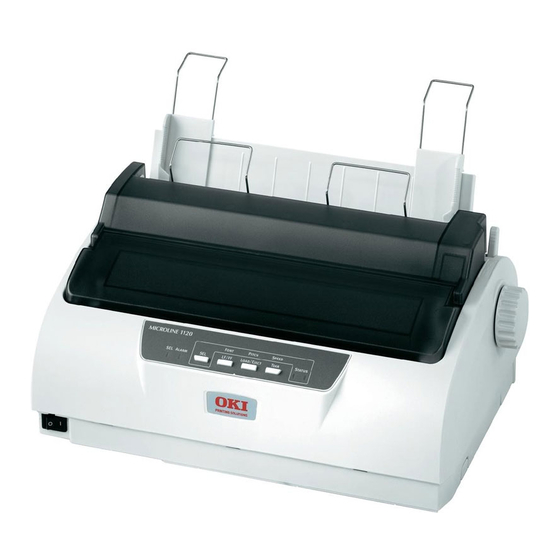
Parts of the Printer Front View F1_24_front.jpg 1. Sheet Guide 2. Paper Support 3. Paper Lever 4. Platen Knob (do not use) 5. Head Gap Lever 6. Printhead 7. Control Panel 8. On/Off Switch 9. Ribbon Cartridge 10. Cover, Top Assembly... -
Page 6: Back View
Back View F1_24_back.jpg 1. Tractors 2. Power Cord Connector Microline 1120 User’s Guide... -
Page 7: Bottom View
Bottom View F1_24_bottom.jpg 1. Parallel Port 2. USB Port 3. RS-232C Serial Port Microline 1120 User’s Guide... -
Page 8: Control Panel
Control Panel Buttons panel.jpg Button Print mode Toggles the printer on and off line LF/FF Advances the paper one line. Held down, advances paper to the next top of form or ejects single sheet from the printer LOAD/ No paper loaded: feeds paper. -
Page 9: Lights
Paper Tear setting Lights panel.jpg Light Status, Function On = Printer is on line Off = Printer is off line Flashing = Flashes with ALARM light to indicate a fault has been detected ALARM On, SEL light off = paper out... -
Page 10: Print Modes
Change Print Mode You can change print modes directly from the front panel. Hold down the SEL button and press the button indicated below. The printer will cycle through the choices as indicated by the two STATUS lights. When you release the buttons the selection is set. -
Page 11: Menus
The printer has an internal menu containing a number of default parameters which can be set to enable your printer to match the parameters required by your computer. Entering the Menu Mode To enter the Menu Mode, press SEL while turning on the printer. -
Page 12: Groups, Items, And Settings
Each Group includes multiple Items, each of which has selectable Settings. Group List of Menu Groups • Printer Control: see page 12 • Font: see page 13 • Symbol Sets: see page 14 • Rear Feed: see page 15 • Bottom Feed: see page 17 •... -
Page 13: Font
Nota The default setting is in Item Print Mode DRAFT Mode Pitch Proportional Spacing Style Size bold blue italic Settings Utility NLQ Courier NLQ Gothic DRAFT 10 CPI 12 CPI 15 CPI 17.1 CPI 20 CPI Normal Italics Single Double * * Selects double width and double height characters. -
Page 14: Symbol Sets
Nota The default setting is in Item Character Set Language Set Zero Character Code Page bold blue italic Settings Standard Line Graphics Block Graphics (ML emulation only) Set I (IBM emulation only) Set II (Epson emulation only) American French German British Danish 1 Swedish... -
Page 15: Rear Feed
Note: The Form Tear Off feature allows you to advance continuous forms to the stacker for tear off. When Form Tear-off is activated (on), the paper will advance to the tear bar position AFTER the printer has been idle for the selected interval (0.5, 1, or 2 seconds). - Page 16 Item TOF adjust (continuous) Continuous paper top of form Settings - 20 ~ - 1 + 1 ~ +20 2.12 mm (1/12”) 4.23 mm (2/12”) 6.35 mm (3/12”) 8.47 mm (4/12”) 10.58 mm (5/12”) 12.70 mm (6/12”) 14.82 mm (7/12”) 16.93 mm (8/12”) 19.05 mm (9/12”) 21.17 mm (10/12”)
-
Page 17: Bottom Feed
Nota The default setting is in Item Line Spacing Skip Over Perf. Page Length bold blue italic Settings 6 LPI 8 LPI 25.4 mm (1”) 279.4 mm (11") 296.3 mm (11.67") 304.8 mm (12") 355.6 mm (14") 431.8 mm (17") 127.0 mm (5”) 76.2 mm (3") 82.6 mm (3.25") -
Page 18: Top Feed
Nota The default setting is in Item Line Spacing Page Length Top Feed Wait Time Page Length Control Cut sheet auto eject position TOF adjust (cut sheet) bold blue italic Settings 6 LPI 8 LPI 279.4 mm (11") 296.3 mm (11.67") 304.8 mm (12") 355.6 mm (14") 431.8 mm (17") - Page 19 Item Cut Sheet top of form Cut Sheet LF adjust Settings 2.12 mm (1/12”) 4.23 mm (2/12”) 6.35 mm (3/12”) 8.47 mm (4/12”) 10.58 mm (5/12”) 12.70 mm (6/12”) 14.82 mm (7/12”) 16.93 mm (8/12”) 19.05 mm (9/12”) 21.17 mm (10/12”) 23.28 mm (11/12”) 25.40 mm (12/12”) 27.52 mm (13/12”)
-
Page 20: Set-Up
Nota The default setting is in Item Graphics 7 or 8 Bits Graphics (ML emulation only) Receive Buffer Size Paper Out Override Print Registration 1 Print Registration 2 Print Registration 3 7 or 8 Bits Data Word (ML emulation only) Operator Panel Function Reset Inhibit Print Suppress Effective... - Page 21 Item SI Select Pitch (10 CPI) SI Select Pitch (12 CPI) Time Out Print Auto Select Host Interface I/F Time Out ESC SI Pitch (IBM emulation only) Print Style Select Quiet Mode Reverse Feed Control Centering Position (Continuous) Centering Position (Cut Sheet) Settings 15 CPI 17.1 CPI...
-
Page 22: Parallel I/F
Item Power Saving Power Save Time Paper End Parallel I/F Nota The default setting is in Item I-Prime AUTO FEED XT (Epson emulation only) Bi-Direction Settings Enable Disable 5 min 10 min 15 min 30 min 60 min On-line Off-line bold blue italic Settings Invalid... -
Page 23: Serial I/F
Nota The default setting is in Item Parity Serial Data 7/8 Bits Protocol Diagnostic Test Baud Rate DTR Signal Busy Time bold blue italic Settings None Even Ignore 8 Bits 7 Bits X-ON/X-OFF DTR & X-ON/X-OFF 9600 BPS 4800 BPS 2400 BPS 1200 BPS 600 BPS... -
Page 24: Loading Paper
Loading Single Sheets 1. If continuous form paper is in the printer, press the LOAD/EJECT button to move it out of the paper path.If not, make sure the printer is on and on line (SEL light lit). 2. Move the paper lever—on the right side of the printer—toward the front of the printer to the single sheet symbol. - Page 25 5. Adjust the right sheet guide for the width of the paper. 6. Place a piece of paper on the paper separator. The printer will automatically feed it to the top of form position.
-
Page 26: Loading Continuous Forms, Rear Feed
Loading Continuous Forms, Rear Feed 1. Make sure the printer is turned off. 2. Move the paper lever—on the right side of the printer—toward the front of the printer to the continuous forms symbol. icon_forms.jpg 3. Place the stack of continuous forms paper behind the printer. - Page 27 7. Close the sprocket covers and push the levers back to lock the sprocket wheels in position. 8. Replace the paper separator. 9. Turn the printer on. 10. Press the Load/Eject button. The paper advances to the print position. Do not use the platen knob to adjust the paper.
-
Page 28: Loading Continuous Forms, Bottom Feed
Step 1: Move the tractor assembly from rear feed to bottom feed. Step 2: Load paper. Step 1: Move the Tractor Assembly 1. Begin with the front of the printer facing you. 1120_cover_shot.jpg 2. Make sure the printer is turned off. - Page 29 Caution The printhead may be HOT! 5. Move the printhead assembly to the left. 1120_bottomfeed_4.jpg 6. Hold the Pull Up Roller Unit as shown. Push from the back and release one side of the assembly. Then, release the other side and remove the assembly.
- Page 30 7. The wire guide may detach (1). If it does, replace it. Insert the three front tabs (2) into the front slots and make sure the rear guides (3) fit behind the rear support. 1120_bottomfeed_3.jpg 8. Remove the rear cover. Push in to release the collar (1) from the post (both sides) and rotate.
- Page 31 1120_bottomfeed_8.jpg 9. Turn the printer so the back of the printer is facing you. 10. Remove the tractor assembly. Squeeze the handles (1) to release the clamps [on both sides]. 1120_bottomfeed_11a.jpg Microline 1120 User’s Guide...
- Page 32 Keep squeezing and lift and rotate the assembly out of the printer. 1120_bottomfeed_12.jpg 11. Turn the printer so the front of the printer is facing you. 12. Position the tractor assembly as shown. The gear assembly is on the right.
- Page 33 13. Put the arms over the pivot points (1) . 1120_bottomfeed_19.jpg 14. Rotate the unit back until the clamps close over the back pins. 15. Turn the platen knob. If the tractor assembly is correctly installed, the gear (1) will turn. If the gear does not turn as you turn the platen knob, repeat steps 12 through 14.
- Page 34 1120_bottomfeed_7a.jpg 1120_bottomfeed_21.jpg Microline 1120 User’s Guide...
- Page 35 The cover must be DOWN to work with the tractor assembly. 1120_bottomfeed_24.jpg 1120_bottomfeed_23.jpg Microline 1120 User’s Guide...
- Page 36 (64 g/m 1. Make sure the printer is turned off. 2. Remove the top cover. 3. Move the paper lever—on the right side of the printer—toward the front of the printer to the continuous forms symbol. icon_forms.jpg 4. Place the stack of continuous forms paper below the printer. Bring the paper up through the slot on the bottom of the printer.
- Page 37 7. Close the sprocket covers and push the levers back to lock the sprocket wheels in position. 8. Replace the top cover. 9. Turn the printer on. 10. Press the Load/Eject button. The paper advances to the print position. Do not use the platen knob to adjust the paper.
-
Page 38: Set Top Of Form (Tof)
You can establish one custom TOF setting for each feed path (Top Cut Sheet and Rear Continuous Form) and store it in the printer’s memory. This selection will then automatically appear as the setting for TOF for the corresponding group in the Menu. -
Page 39: Temporary Tof
The next sheet or form feeds to the selected default TOF. 1. With paper loaded in the print path, press SEL to put the printer offline. 2. Change the location of the first line of printing:... -
Page 40: Form Tear Off
The Form Tear Off feature allows you to advance continuous forms to the stacker for tear off. The printer default for Forms Tear Off is Off. To use this feature, you must enter the printer menu and turn it on. -
Page 41: Printhead Gap
Printhead Gap Adjusting the Head Gap The head gap is the distance between the printhead and the platen roller. When you use envelopes or multipart forms, you need to have a larger gap than when using plain paper. Use the recommended head gap to ensure the best print quality and easy paper feed. -
Page 42: Troubleshooting
Troubleshooting Paper Jams, Individual Sheets If a paper jam is indicated by a blinking ALARM light use the following method to clear it. Caution! The printhead may be very hot after printing. Allow the printhead to cool before touching it. 1. -
Page 43: Part Numbers
Part Numbers Ribbon Black 43571801 Microline 1120 User’s Guide... -
Page 44: Specifications
Specifications Specifications subject to change without notice. Print Method • Impact dot matrix Printhead • 9 pin, 0.3 mm diameter • Thermal protection • Life: 400 million strokes / wire (200 million characters) Ribbon Life • 4 million characters (Utility) Emulations •... -
Page 45: Reliability
Recycled paper can be printed, but please note the following: • Recycled paper tends to leave behind more paper dust, requiring more frequent cleaning of the printer. • Recycled paper is easily affected by humidity and should not be used in humid environments. - Page 46 Recycled paper can be printed, but please note the following: • Recycled paper tends to leave behind more paper dust, requiring more frequent cleaning of the printer. • Recycled paper is easily affected by humidity and should not be used in humid environments.
- Page 47 Recycled paper can be printed, but please note the following: • Recycled paper tends to leave behind more paper dust, requiring more frequent cleaning of the printer. • Recycled paper is easily affected by humidity and should not be used in humid environments.
-
Page 48: Printer Dimensions
Printer Dimensions Width: 13.8 inches (349 mm) Depth: 9.1 inches (232 mm) Height: 5.9 inches (150 mm) Printer Weight Printer main body only, 9.3 lb. (4.2 kg) Environmental Requirements Parameter Temperature Operating Storage Humidity Operating Storage Electrical Requirements Voltage • 120 Volt Model 100 volts ac (±10%) -
Page 49: Utilities
Switch Setup Utility Accessing You may access the utilities via the CD shipped with the printer Here is a list of the utilities provided on the CD shipped with your printer. Dot Impact Printer Utilities (OKI DIPUS) Status Monitor Menu Setup Utility... -
Page 50: Descriptions Of Utilities
OKI DIPUS (Dot Impact Printer Utilities) This is a set of utilities that allow you to control the printer from your computer. These utilities support 32-bit or 64-bit Windows operating systems, including Vista, using parallel, USB, or network connections. See the help for details on using these utilities. -
Page 51: Installing The Utilities
Installing the Utilities Windows Utilities on the CD Load the utilities from the Menu Installer located on the CD supplied with your printer. Microline 1120 User’s Guide... -
Page 52: Oki Dipus (Dot Impact Printer Utilities)
Normally, the Status Monitor appears on the task bar as an icon, which changes color to show the printer's status. You can set it to pop up in a window when an alert or error condition occurs.