Table of Contents
Advertisement
Quick Links
Advertisement
Table of Contents

Related Manuals for Oki C5600


Summary of Contents for Oki C5600
- Page 1 C5600 / C5800 User’s Guide...
-
Page 2: Ontents Preface
While all reasonable efforts have been made to make this document as accurate and helpful as possible, we make no warranty of any kind, expressed or implied, as to the accuracy or completeness of the information contained herein. The most up-to-date drivers and manuals are available from the Oki Europe website: http://www.okiprintingsolutions.com Copyright ©... -
Page 3: Emergency First Aid
15 minutes keeping eyelids open. Seek medical attention. Spillages should be treated with cold water and soap to help reduce risk of staining skin or clothing. MPORTER TO THE Oki Europe Limited (trading as OKI Printing Solutions) Central House Balfour Road Hounslow TW3 1HY... -
Page 4: Table Of Contents
Introduction ......7 Printer overview......9 Changing the display language . - Page 5 Index ....... . . 114 Oki contact details ..... . . 116...
-
Page 6: Notes, Cautions And Warnings
OTES AUTIONS AND NOTE: A note appears in this manual like this. A note provides additional information to supplement the main text which may help you to use and understand the product. A caution appears in this manual like this. A caution provides additional information which, if ignored, may result in equipment malfunction or damage. -
Page 7: Introduction
Multi-level technology produces subtler tones and smoother gradations of colour to lend photographic quality to your documents; > Up to 20 (C5600) or 26 (C5800) pages per minute in full colour for fast printing of high impact colour presentations and other documents; >... - Page 8 > Internal hard disk drive (standard on “h” models, optional on others) for storage of overlays, macros and downloadable fonts, and automatic collation of multiple copies of multipage documents ; > Template Manager 2006 utility for Windows enables the design and print of Business cards, banners, labels with ease.
-
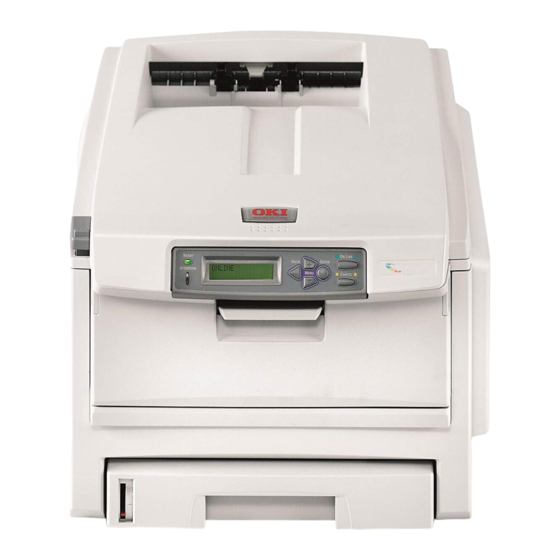
Page 9: Printer Overview
RINTER OVERVIEW RONT VIEW 1. Output stacker, face down. Standard printed copy delivery point. Holds up to 250 sheets at 80g/m². 2. Operator panel. Menu driven operator controls and LCD display panel. 3. Paper tray. Standard blank paper tray. Holds up to 300 sheets of 80g/m²... - Page 10 When the rear paper stacker is folded down paper exits the printer through the rear of the printer and is stacked here face up. This is mainly used for heavy print media. When used in conjunction with the multi purpose feed tray, the paper path through the printer is essentially straight.
-
Page 11: Changing The Display Language
HANGING THE DISPLAY LANGUAGE The default language used by your printer for display messages and for report printing is English. If required, this can be changed to:l German French Italian Spanish Swedish Russian Finnish Hungarian See the information enclosed with the printer on the procedure for changing the language setting. -
Page 12: Paper Recommendations
Window envelopes are not suitable. Transparencies should be of the type designed for use in copiers and laser printers. We strongly recommend Oki Printing Solutions transparencies (Order No. 01074101). In particular, avoid office transparencies designed for use by hand with marker pens. -
Page 13: Cassette Trays
Legal 14in. If you have identical paper stock loaded in another tray (2nd tray if you have one, or multi purpose tray) you can have the printer automatically switch to the other tray when the current tray runs out of paper. When printing from Windows applications, this function is enabled in the driver settings. -
Page 14: Face Down Stacker
ACE DOWN STACKER The face down stacker on the top of the printer can hold up to 250 sheets of 80g/m² standard paper, and can handle paper stocks up to 176g/m². Pages printed in reading order (page 1 first) will be sorted in reading order (last page on top, facing down). -
Page 15: Loading Paper
OADING PAPER ASSETTE TRAYS Remove the paper tray from the printer. Fan the paper to be loaded at the edges (1) and in the middle (2) to ensure that all sheets are properly separated, then tap the edges of the stack on a flat surface to make it flush again (3). - Page 16 Load letter headed paper face down and top edge towards the front of the printer, as shown. Adjust the rear stopper (1) and paper guides (2) to the size of paper being used. To prevent paper jams: • Do not leave space between the paper and the guides and rear stopper.
- Page 17 For face down printing, make sure the face up (rear) stacker (3) is closed (the paper exits from the top of the printer). Stacking capacity is approximately 250 sheets, depending on paper weight. For face up printing, make sure the face up (rear) stacker (3) is open and the paper support (4) is extended.
- Page 18 Load the paper and adjust the paper guides (4) to the size of paper being used. • For single-sided printing on headed paper load the paper into the multi purpose tray with pre-printed side up and top edge into the printer. Loading paper> 18...
- Page 19 • Envelopes should be loaded face up with top edge to the left and short edge into the printer. Do not select duplex printing on envelopes. • Do not exceed the paper capacity of about 50 sheets or 10 envelopes.
-
Page 20: Printer Settings In Windows
The Windows printer driver also contains settings for many of these items. Where items in the printer driver are the same as those in the operator panel menus, and you print documents from Windows, the settings in the Windows printer driver will override those items in the operator panel menus. - Page 21 Booklet printing requires the duplex unit to be installed in your printer. Poster printing will print large pages as tiles spread over multiple sheets.
- Page 22 The output resolution of the printed page can be set as follows. • The High Quality setting prints at 600 x 600dpi x 2 bit. This option requires the most printer memory and takes the longest to print. • The Fine/Detail setting prints at 1200 x 600dpi and is adequate for all but the most discerning applications.
- Page 23 OLOUR TAB Control over the colour output of your printer may be performed automatically, or for advanced control, by manual adjustment. The automatic setting will be appropriate in most cases. The other options in this window only become visible when you select a choice other than Auto.
-
Page 24: Setting From Windows Control Panel
Windows applications, and will be remembered from one Windows session to the next. ENERAL TAB This area lists some of the main features of your printer, including optional items, such as duplex (two-sided) printing. This button opens the same windows as described earlier for items which can be set from within application programs. - Page 25 DVANCED TAB You can specify which times of day your printer will be available. Indicates current priority, from 1 (lowest) to 99 (highest). Highest priority documents will print first. Specifies that documents should be spooled (stored in a special print file) before being printed. The document is then printed in the background, allowing your application program to become available more quickly.
- Page 26 If a mismatch is detected, the document is held in the print queue and does not print until the printer setup is changed and the document restarted from the print queue.
- Page 27 EVICE OPTIONS TAB In this window you can select which optional upgrades are installed on your printer. This is covered in more detail in the section in this guide about installing upgrades. Printer settings in Windows> 27...
-
Page 28: Printer Settings In Mac
OS 9 HOOSING RINTING Use the print dialog to choose your printer and select options for how you want your document to print. Open the document you want to print. If you wish to change the paper size or page orientation, choose File >... - Page 29 ETUP PTIONS Paper Choose the paper size that matches your document and the paper loaded in the printer. The paper margin is 1/6 inch (4.2 mm) at all edges. Orientation Selects either portrait (tall) or landscape (wide). If using landscape, you can flip the orientation 180 degrees.
- Page 30 Duplex If you have an optional duplex unit fitted to your printer, you can print on both sides of the paper. Long-Edge Binding prints pages that read like a normal book.
- Page 31 RINT PTIONS ENERAL Copies Enter the number of copies to print. If Collate is selected, all the pages of the document print before the next copy prints. Printer settings in Mac> 31 USTOM APER...
- Page 32 Photo Enhance Use Photo Enhance to significantly improve quality when printing images. The printer driver analyses any photographic images and processes them to improve the overall appearance. This setting cannot be used together with the "High Quality (Multilevel)" print quality setting.
- Page 33 If you are using the Windows Print Control Server software to manage printers, enter your assigned user name and ID. This information is sent along with your print job and is recorded by the printer. Printer settings in Mac> 33...
- Page 34 Grayscale - Converts all colors to grays. Color Matching Monitor (6500K) Perceptual Optimised for printing photos. Colors are printed with emphasis on saturation. Monitor (6500K) Vivid Optimised for printing photos, but with even more saturated colors. Printer settings in Mac> 34...
-
Page 35: Digital Camera
Results will vary depending on the subject and conditions the image was taken. sRGB The printer reproduces the sRGB color space. This might be useful if color matching from an sRGB input device such as a scanner or digital camera. - Page 36 Duplex If you have an optional duplex unit fitted to your printer, you can print on both sides of the paper. Long-Edge Binding prints pages that read like a normal book.
- Page 37 Labels or Transparency - this may cause toner smearing and paper jams. Auto Tray Switch If the printer runs out of paper in the current tray, Auto Tray Switch automatically changes to a tray that has the same paper type and continues printing.
- Page 38 Feed Manually from Multipurpose Tray Select this if you want the printer to wait until you press the ONLINE button when feeding from the Multipurpose Tray. This can be useful if printing on envelopes. Always Create 100% Black (K) Toner Select this if you want the printer to always use only black (K) toner when printing pure black (RGB = 0,0,0).
- Page 39 The default language for the printer LCD display is English. This feature allows you to change the LCD display to another language. NOTE: You will need to switch your printer off and back on again after changing the LCD display language. Printer settings in Mac> 39 ANEL...
- Page 40 This can be used to indicate that the document is "Draft" or perhaps "Confidential". You can create watermarks in the printer driver. Select a font and modify the watermark size, position, color, brightness and angle. Printer settings in Mac> 40...
- Page 41 RINT PTIONS NFORMATION Displays a summary of the current printer settings. The driver version is also displayed - this may be useful if you want to check the Oki website for a newer printer driver. Printer settings in Mac> 41...
-
Page 42: Mac Os X
ETTING RINTING You can choose your printer and select options for how you want your documents to print from the Print dialog box. To set your printer options: Open the document you want to print. - Page 43 Click the Print button. ETTING RINTING PTIONS You can save a set of printer driver options to use for future documents. Open the document you want to print. To change the paper size or page orientation, select File > Page Setup.
- Page 44 Select Save As Default from the Settings drop-down menu. To save the current printer driver settings as a preset, select Save As from the Preset menu. Enter a name for your preset and click OK. HANGING THE DEFAULT PRINTER AND PAPER SIZE The following steps describe how to change your default printer and the paper size options.
-
Page 45: Page Attributes
Paper size and Orientation. Paper Size Select a paper size to match your document and the paper loaded in the printer. The paper margin is 4.2mm at all edges. To specify your own paper sizes, select “Manage Custom Sizes...”... - Page 46 If you select Collate, all pages of the document will print before the next copy prints. Pages You can select whether to print all pages of a document or just a section of it. Printer settings in Mac> 46...
- Page 47 You can control the order in which the documents are tiled and also choose to surround each document page with a border. Two-sided You cannot use the two sided printing options in this panel. Use the options in the Duplex panel instead. Printer settings in Mac> 47...
- Page 48 This option lets you choose whether to print your document immediately, or defer printing until later. You can also assign a priority to a print job. These features are useful if you are printing large documents that take a long time to print. Printer settings in Mac> 48...
-
Page 49: Page Order
Destination paper size Scale documents to fit on the size of paper in your printer. For example, you can take a document formatted for A3 and print it on A4 paper using an A4 printer. -
Page 50: Color Conversion
Choose a Quartz filter if you wish to apply a special effect to your print job, such as Sepia or Blue Tone. This is only available on Mac OS X 10.3 (Panther) or later versions. Printer settings in Mac> 50... - Page 51 This is useful in a busy office with many people sharing the printer. Duplex If you have an optional duplex unit fitted to your printer, you can print on both sides of the paper. Long-Edge Binding prints pages that read like a normal book.
-
Page 52: Print Job
Paper source This option allows you to select the paper tray to use for your print job. Printer settings in Mac> 52... -
Page 53: Print Quality
Photo Enhance Use Photo Enhance to significantly improve quality when printing images. The printer driver analyses any photographic images and processes them to improve the overall appearance. This setting cannot be used together with the "High Quality (Multilevel)"... -
Page 54: Colour Mode
Colour Colour mode COLOUR MODE Advanced Colour Manual Grayscale Printer settings in Mac> 54 DESCRIPTION The driver selects the most appropriate color settings. Allows you to manually adjust colour and black and white settings or select. Convert all colors to shades of grey. -
Page 55: Color Matching
As a general rule, reduce saturation by the same amount as you increase brightness. For example, if you reduce saturation by 10, increase brightness by 10 to compensate. Printer settings in Mac> 55 DESCRIPTION Optimised for printing photos. Colors are printed with emphasis on saturation. -
Page 56: Media Weight
RINTER SETUP OPTIONS Printer options Media weight Select the thickness or type of paper in the printer. It is important to set this correctly as it affects the temperature at which the toner is fused to the paper. For example, if... - Page 57 Feed manually from Multipurpose Tray Select this option if you want the printer to wait until you press the ONLINE button when feeding from the Multipurpose Tray. This can be useful if printing on envelopes. Always create 100% black (K) toner Select this option if you want the printer to always use only black (K) toner when printing pure black (RGB = 0,0,0).
- Page 58 Summary This option displays a summary of all selected print options for the current job. Printer settings in Mac> 58...
-
Page 59: Colour Printing
ACTORS THAT AFFECT THE APPEARANCE OF PRINTS If you wish to manually adjust the colour settings in your printer driver, please be aware that colour reproduction is a complex topic, and there are many factors to take into consideration. - Page 60 Printer driver colour settings The driver settings for manual colour can change the appearance of a print. There are several options available to help match the printed colours with those displayed on screen.
-
Page 61: Tips For Printing In Colour
Use the Monitor (9300k) setting. This may help if you are having problems with specific colours from applications such as Microsoft Excel or Microsoft PowerPoint. RINTING SPECIFIC COLOURS There are 2 utilities on your printer driver CD-ROM that can help match specific colours: Colour Correct Utility Colour Swatch Utility... -
Page 62: Accessing The Colour Matching Options
CCESSING THE COLOUR MATCHING OPTIONS The colour matching options in the printer driver can be used to help match your printed colours to the ones displayed on your monitor or from some other source, such as a digital camera. To open colour matching options... - Page 63 Your results will vary depending on the subject and the conditions under which the photograph was taken. sRGB The printer will try to reproduce the sRGB colour space. This may be useful if colour matching from an sRGB input device such as a scanner or digital camera.
-
Page 64: Using The Colour Swatch Feature
The Colour Swatch function prints charts which contain a range of sample colours. Note that this is not the full range of colours that the printer can produce. Listed on each sample colour are the corresponding RGB (Red, Green, Blue) values. This can be used to pick specific colours in applications that allow you to choose your own RGB values. -
Page 65: Using The Colour Correct Utility
SING THE OLOUR The Oki Colour Correct Utility is provided on your printer driver CD-ROM. You must install it separately since it is not installed along with the printer driver. The Colour Correct utility has the following features: > Microsoft Office palette colours can be individually adjusted. -
Page 66: Menu Functions
It should be noted that many of these settings can be, and often are, overridden by settings in the Windows printer drivers. However, several of the driver settings can be left at “Printer Setting”, which will then default to the settings entered in these printer menus. -
Page 67: Print Jobs Menu
HUTDOWN MENU This menu only appears if the hard disk drive is installed. This item should always be selected before switching the printer off, to ensure that no hard disk data is lost. ETTINGS SHUTDOWN EXECUTE Performs controlled shutdown of the printer,... -
Page 68: Print Menu
If this function is not enabled, the printer will stop and request the correct size of paper to be loaded. Determines whether the printer... - Page 69 This setting is therefore most appropriate when the majority of print jobs are entirely black and white. The printer runs at 20 ppm (C5600), 26ppm (C5800)for all print jobs. This setting is most appropriate when the majority of print jobs are in colour.
-
Page 70: Media Menu
For CUSTOM setting see X-DIMENSION and Y-DIMENSION later in this table. Selects the type of media loaded in this tray. This will help the printer to adjust its internal operating parameters, such as engine speed and fusing temperature, to better accommodate the media to be fed. - Page 71 MEASURE INCH X-DIMENSION 100-210-216 MILLIMETRE XPLANATION Adjusts the printer for the weight of paper stock loaded in this tray (if installed). Selects the size of paper to be fed from the multi purpose tray. For CUSTOM setting see X-DIMENSION and Y-DIMENSION later in this table.
- Page 72 ETTINGS Y-DIMENSION 148-297-1200 MILLIMETRE XPLANATION Selects the length of paper defined by the “Custom” settings referred to in the foregoing PAPER SIZE settings. Note that media of up to 1200mm in length can be fed from the multi purpose tray for banner printing.
-
Page 73: Colour Menu
OLOUR MENU The printer automatically adjusts colour balance and density at appropriate intervals, optimising the printed output for bright white paper viewed in natural daylight conditions. The items on this menu provide a means of changing the default settings for special or particularly difficult print jobs. -
Page 74: System Configuration Menu
YSTEM CONFIGURATION MENU This menu adjusts general printer settings to suit the way you prefer to work. TEMS POW SAVE TIME 5 CLRABLE WARNING MANUAL TIMEOUT WAIT TIMEOUT 5~40~300 LOW TONER CONTINUE STOP JAM RECOVERY ERROR REPORT ON ETTINGS XPLANATION... -
Page 75: Usb Menu
MENU This menu controls the operation of the printer’s USB data interface. SOFT RESET ENABLE / DISABLE SERIAL NUMBER ENABLE / DISABLE SPEED 12 / 480 Mps ETWORK MENU This menu controls the operation of the printer’s 10Base-T/ 100Base-TX network interface. -
Page 76: Maintenance Menu
SMALL HUB LINK AUTO SETTING NEGOTIATE 100BASE-TX FULL 100BASE-TX HALF 10BASE-T FULL 10BASE-T HALF AINTENANCE MENU This menu provides access to various printer maintenance functions. ETTINGS MENU RESET EXECUTE SAVE MENU EXECUTE POWER SAVE ENABLE / DISABLE PAPER BLACK –2~0~+2... -
Page 77: Usage Menu
SAGE MENU This menu is for information only, and provides an indication of total usage of the printer and the expected life left in its consumable items. This is particularly useful if you do not have a full set of replacement consumables to hand and you need to know how soon you will need them. -
Page 78: Replacing Consumable Items
20% of printing is 1 page only, 30% is 3 page documents and 50% is print runs of 15 pages or more). > Transfer belt: Approximately 60,000 A4 pages. > Fuser: Approximately 60,000 A4 pages. 2.5% C5600 12,000 C5800 12,000 C5600 4,000 C5800 10,000... -
Page 79: Consumable Order Details
Average life: 20% pages at continuous print, 50% pages at 3 pages per job and 30% pages at 1 page per job. Only use genuine Oki Original consumables to ensure the best quality and performance from your hardware. Non Oki Original products may adversely affect your printer's performance and invalidate your warranty. -
Page 80: Toner Cartridge Replacement
To avoid toner wastage and possible toner sensor errors, do not change the toner cartridge(s) until “TONER EMPTY” is displayed. The toner used in this printer is a very fine dry powder. It is contained in four cartridges: one each for cyan, magenta, yellow and black. - Page 81 Note the positions of the four cartridges. 1. Cyan cartridge 3. Yellow cartridge Pull the coloured toner release lever (1) on the cartridge to be replaced fully towards the front of the printer. Replacing consumable items> 81 2. Magenta cartridge 4. Black cartridge...
- Page 82 Lift the right-hand end of the cartridge and then draw the cartridge to the right to release the left-hand end as shown, and withdraw the toner cartridge out of the printer. Put the cartridge down gently onto a piece of paper to prevent toner from marking your furniture.
- Page 83 Holding the cartridge by its top centre with the coloured lever to the right, lower it into the printer over the image drum unit from which the old cartridge was removed. Insert the left end of the cartridge into the top of the...
- Page 84 This will lock the cartridge into place and release toner into the image drum unit. Finally, close the top cover and press down firmly at both sides so that the cover latches closed. Replacing consumable items> 84...
-
Page 85: Image Drum Replacement
MAGE DRUM REPLACEMENT Switch off the printer and allow the fuser to cool for about 10 minutes before opening the cover. Static sensitive devices, handle with care. The printer contains four image drums: cyan, magenta, yellow and black. Press the cover release and open the printer’s top cover fully. - Page 86 Holding it by its top centre, lift the image drum, complete with its toner cartridge, up and out of the printer. Put the cartridge down gently onto a piece of paper to prevent toner from marking your furniture and to avoid damaging the green drum surface.
- Page 87 Lift the right-hand end of the cartridge and then draw the cartridge to the right to release the left-hand end as shown, and withdraw the toner cartridge out of the image drum cartridge. Place the cartridge on a piece of paper to avoid marking your furniture.
- Page 88 Holding the complete assembly by its top centre, lower it into place in the printer, locating the pegs at each end into their slots in the sides of the printer cavity. Finally, close the top cover and press down firmly at both sides so that the cover latches closed.
-
Page 89: Replacing The Belt Unit
The belt unit is located under the four image drums. This unit requires replacement approximately every 60,000 pages. Switch off the printer and allow the fuser to cool for about 10 minutes before opening the cover. Press the cover release and open the printer’s top cover fully. - Page 90 Lift each of the image drum units out of the printer and place them in a safe place away from direct sources of heat and light. The green image drum surface at the base of each cartridge is very delicate and light sensitive. Do not touch it and do not expose it to normal room light for more than 5 minutes.
- Page 91 Locate the drive gear into the gear inside the printer by the rear left corner of the unit, and lower the belt unit flat inside the printer. Turn the two fasteners (5) 90° to the right until they lock.
-
Page 92: Fuser Replacement
Holding the fuser by its handle (1), lift the fuser straight up and out of the printer. If the fuser is still warm, place it on a flat surface which will not be damaged by heat. - Page 93 The retaining levers (2) should be fully upright, and the two locating lugs (3) should be towards you. Lower the fuser into the printer, locating the two lugs (3) into their slots in the metal partition which separates the fuser area from the image drums.
-
Page 94: Cleaning The Led Head
Clean the LED head when printing does not come out clearly, has white lines or when text is blurred. Switch off the printer and open the top cover. Gently wipe the LED head surface with LED lens cleaner or soft tissue. -
Page 95: Installing Upgrades> 95
The duplex unit slides straight into the rear of the printer and requires no tools to install. Unpack the new unit and remove any transit material from Switch the printer off. - Page 96 Near the top of the page, between the two horizontal lines, you will see the current printer configuration. This list should indicate that the duplex unit is now installed. All that remains is to adjust the Windows printer driver to make full use of the new features. Installing upgrades> 96...
-
Page 97: Memory Upgrade
EMORY UPGRADE The basic printer model comes equipped with 64MB of main memory. This can be upgraded with an additional memory board of 64MB or 256MB, giving a maximum total memory capacity of 320MB. Installation takes a few minutes, and requires a medium size cross-head (philips type) screwdriver. - Page 98 Lift the edge of the side cover slightly at the two points shown, and pull the cover away from the printer at the top. Lift the cover slightly to detach it from the printer. Place it safely to one side.
- Page 99 Close the top of the side cover up to the printer and refit the securing screw removed in step 4. Close the front cover and close the top cover, pressing down firmly at each side to latch it closed.
-
Page 100: Additional Paper Tray
This should indicate the total memory now installed. DDITIONAL PAPER TRAY Switch the printer off and disconnect the AC power cable. Place additional paper tray on desired location. Observing safety rules for lifting and, using locating guides, place printer on top of the additional paper tray. -
Page 101: Adjusting Windows Printer Drivers
INDOWS PRINTER DRIVERS Once your new upgrade has been installed, you may need to update the Windows printer driver so that the additional features are available to your Windows applications. Remember that if your printer is shared between users on different computers, the driver must be adjusted on each user’s... -
Page 102: Clearing Paper Jams
Jams can occur due to paper misfeeding from a paper tray or at any point on the paper path through the printer. When a jam occurs, the printer immediately stops, and the Alert LED on the Status Panel (together with the Status Monitor) informs you of the event. - Page 103 Paper feed Paper path If a sheet is well advanced out of the top of the printer, simply grip it and pull gently to draw it fully out. If it does not remove easily, do not use excessive force. It can be removed from the rear later.
- Page 104 It will be necessary to remove the four image drums to gain access to the paper path. Holding it by its top centre, lift the cyan image drum, complete with its toner cartridge, up and out of the printer. 2. Magenta cartridge 4. Black cartridge Clearing paper jams> 104...
- Page 105 Repeat this removal procedure for each of the remaining image drum units. Look into the printer to check whether any sheets of paper are visible on any part of the belt unit. • To remove a sheet with its leading edge at the front of...
- Page 106 If the sheet is well advanced into the fuser (only a short length is still visible), do not attempt to pull it back. Follow the next step to remove it from the rear of the printer. Clearing paper jams> 106...
- Page 107 1. Cyan cartridge 3. Yellow cartridge • Holding the complete assembly by its top centre, lower it into place in the printer, locating the pegs at each end into their slots in the sides of the printer cavity. 2. Magenta cartridge 4.
- Page 108 Lower the top cover but do not press down to latch it closed yet. This will protect the drums from excessive exposure to room lighting while you check the remaining areas for jammed sheets. Open the rear exit tray (5) and check for a sheet of paper in the rear path area (6).
- Page 109 Lift the front cover release and pull open the front cover. Check inside the cover for sheets in this area and remove any that you find, then close the cover. Pull out the paper tray and ensure that all paper is stacked properly, is undamaged, and that the paper guides are properly positioned against the edges of the paper stack.
- Page 110 When the jam has been cleared, if Jam Recovery is set to ON in the System Configuration Menu, the printer will attempt to reprint any pages lost due to paper jams. Clearing paper jams> 110...
-
Page 111: Specifications
26Kg approx. (without Duplex unit) Print method LED exposed light source electronic photographic memory Print speeds C5600: 20 pages per minute colour / 32 pages per minute monochrome C5800: 26 pages per minute colour / 32 pages per minute monochrome Resolution... - Page 112 Black: C5600/C5800 - 6,000 pages at 5% coverage CMY: C5600 - 2,000 pages at 5% coverage C5800 - 5,000 pages at 5% coverage Image drum life 20,000 pages (25000 at continuous print, 18,000 at 3 pages per job and 9,000 pages at 1 page per...
- Page 113 ITEM SPECIFICATION Operating Operating 10 to 32 °C/20 to 80% RH environment (optimum 25 °C wet, 2 °C dry) Off: 0 to 43 °C/10 to 90% RH (optimum 26.8 °C wet, 2 °C dry) Print 30 to 73% RH @ 10 °C; 30 to 54% RH @ 32 °C environment 10 to 32 °C @ 30% RH;...
-
Page 114: Index
Print Options - Options Print Options - Print Control Print Options - Select Panel ...63 Language Print Options - Watermark Mac OS X Changing the default printer and ...64 paper size Print options Printer setup options Setting Printing Options Major printer components and ..14... - Page 115 ...17 face down stacker ...17 face up stacker Print quality ...74 adjusting Print settings how to save Printer default settings Windows defaults Printer overview Priority print queue priority ...75 Resolution setting in Windows Separator page separating print jobs on a...
-
Page 116: Oki Contact Details
Oki Data Corporation 4-11-22 Shibaura, Minato-ku, Tokyo 108-8551, Japan Tel: (81) 3 5445 6158 Fax: (81) 3 5445 6189 http://www.okidata.co.jp Oki Data (Singapore) Pte. Ltd. 78 Shenton Way, #09-01, Singapore 079120 Tel: (65) 221 3722 Fax: (65)421 1688 http://www.okidata.com.sg Oki Systems (Thailand) Ltd. - Page 117 OKI Europe Limited Central House Balfour Road, Hounslow TW3 1HY, United Kingdom Tel: +44 (0) 20 8219 2190 Fax: +44 (0) 20 8219 2199 www.okiprintingsolutions.com 07073101 iss.01...