Table of Contents
Advertisement
P r o v e n P e r f o r m a n c e
K - B A R I n d u s t r i e s , F a r i b a u l t , M N , 5 5 0 2 1
Installation, Operation, and Maintenance Manual
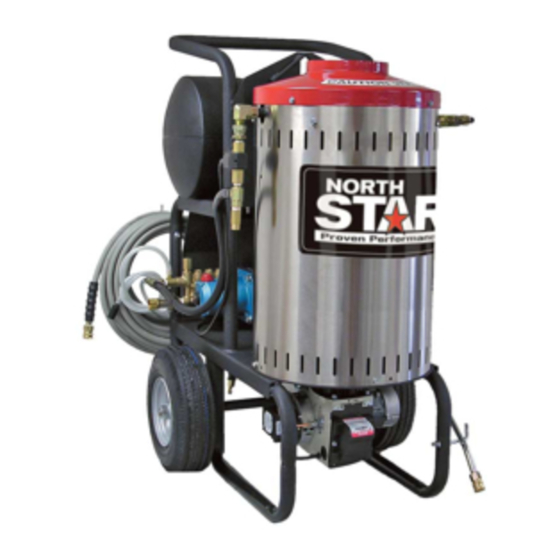
HOT WATER PRESSURE WASHER
To the Owner:
Thank you for purchasing a Northstar hot water pressure washer. Your machine is designed for long life,
dependability, and the top performance you demand! Take time now to read through this manual so you will
better understand the machine's operation, maintenance and safety precautions. Everyone who operates this
machine must read and understand this manual. The time you take now will prolong your machine's life and
prepare you for its safe operation. Enjoy the exceptional performance of your Northstar hot water pressure
washer, the industry leader! The manufacturer reserves the right to make improvements in design and/or
changes in specifications at any time without incurring any obligation to install them on units previously sold.
Pump Oil
Pump is shipped with oil. Change oil plug if and check pump oil level before starting.
Use UTTO for Comet and Cat Pump oil (item# 22158) for Cat oil changes.
Water
Make sure your water flow is 20% higher than the pressure washer's flow rate.
Make sure your water is clean and particle free.
Storage
Do not allow water to freeze in the pump, hose, coil, or spray gun.
Spraying
Use any North Star brand or equivalent pressure washer chemicals.
Chemicals
Maintenance
Pump Oil: change after first 50 hours, then every 3 months or 500 hours.
Schedule
Read and understand all manuals before operating.
Any Questions, Comments, Problems or Parts Orders
In the United States
Northstar Customer Service
Call 1-800-270-0810
Hours: Monday - Friday 7:00 AM to 5:30 PM
Saturday 7:30 AM-11:30 AM Central Time
M157305G
HP:______ Volts:______ Amp:______ Ph:_____
RPM:____ PSI:____ GPM:____ Nozzle Size:_____
Pump:___________ Hose:______ Lance:_______
Max. Discharge Temperature:_____________
:
Quick Facts
Northern Tool and Equipment Co. (UK) Ltd.
Portsmouth, Hants PO3 5QD, England
ITEM NUMBER: 157305,306,307,308
SERIAL NUMBER:
Cleans dirty surfaces with high-
pressure hot water.
In the United Kingdom
Call 02392639752
Unit 2, Keel Close,
Advertisement
Table of Contents

Related Manuals for North Star M157305G


Summary of Contents for North Star M157305G
-
Page 1: Quick Facts
HOT WATER PRESSURE WASHER To the Owner: Thank you for purchasing a Northstar hot water pressure washer. Your machine is designed for long life, dependability, and the top performance you demand! Take time now to read through this manual so you will better understand the machine’s operation, maintenance and safety precautions. -
Page 2: Table Of Contents
Important Safety Instructions Grounding Instructions Extension Cords Specifications Machine Component Identification Installation Instructions Operation Instructions WARNING -Risk of Injection or Injury to Persons - Do Not Direct Discharge Stream at Persons - Do not use a hose if exterior damage is evident. -Risk of explosion - Do not spray flammable liquids - Do not operate in a flammable environment. -
Page 3: Grounding Instructions
GROUND FAULT CIRCUIT INTERRUPTER PROTECTION This pressure washer is provided with a ground fault circuit interrupter (GFCI) built into the plug of the power supply cord. This device provides additional protection from the risk of electric shock. Should replacement of the plug or cord become necessary, use only identical replacement parts that include GFCI protection. -
Page 4: Specifications
157305 Pressure Rating 1700 psi Flow Output 1.5 gpm Pump Type Ceramic Triplex Plunger Water Supply Standard tap water @ 20-100psi Motor Horsepower 1.5 hp Maximum 250°F Temperature Approved Fuels #1 or 2 Diesel, Kerosene, Fuel Oil Fuel Capacity 8.25 gal. Discharge Hose 3/8”... -
Page 5: Machine Component Identification
157305, 157306, 157307, 157308 Ref # Description Exhaust Vent High Pressure Water Outlet Motor Burner Fuel Fill Cap Fuel Tank Control Box Elbow Swivel Fitting Machine Component Identification Ref # Description Flow Switch Safety Relief Valve Pump Gun Hooks Power Switch Thermostat Service Panel Nozzles... -
Page 6: Installation Instructions
Installation Instructions I.) Unpack Separate and identify all components. Use the assembly instructions in this manual for assembly. Spray Gun & Grip Qty-1 High Pressure Hose Qty-1 Fastener Bag Qty-1 Wheel Retainer Qty-2 Wheel Qty-2 Pressure Washer Nozzle Qty-1 Qty-6... - Page 7 II.) Assembly Instructions A. 1. Carefully raise the pressure washer off the floor by using blocks or ramps. Make sure the pressure washer is secure before proceeding. 2. Install the two wheels as shown with grease zerk away from frame.
- Page 8 III.) Pump Preparation *Comet Pumps Only A.) Replace shipping oil plug with vented plug. **Cat Pumps Only A.) Remove shipping tape from oil fill cap B.) Make sure the oil is 1/2 way up oil sight glass. Quantities Of Fluid Pump Type of Fluid...
- Page 9 IMPORTANT: Proper initial installation of equipment will assure more satisfactory performance, longer service life, and lower maintenance cost. Make sure the pressure washer is on a level surface and in a protected area where it is not readily influenced by outside...
-
Page 10: Operating Instructions
Follow these instructions every time you use the pressure washer. I.) Pre-Operation A.) Position the machine for easy access to all controls. B.) Position the machine on a solid surface, with less than a three degree slope, and so it is protected from external damage. - Page 11 White Yellow Black Your pressure washer is equipped with six nozzles. To install a nozzle simply pull back the collar towards the lance and push the nozzle into the coupler. Once the connection is made, pull on the nozzle to assure a tight connection.
- Page 12 11. Small parts should be washed in a basket so the pressure does not push them away. weight parts should be clamped down. 12. The pressure washer is set to the maximum rated pressure when it leaves the factory. To adjust the pressure, turn the unloader knob counter-clockwise.
-
Page 13: Safety Features
All mechanical equipment, no matter how well designed, will need repairs. A North Star pressure washer is no exception. At times, a North Star pressure washer may be inoperable because repairs are required. North Star Customer Service... - Page 14 WARNING: Do not use a finger or skin to check for leaks. Escaping fluid under pressure has sufficient force to penetrate the skin, causing serious injury. Do not operate the pressure washer if the hose is cracked, worn, or leaking. A.) Check all hoses for leaks B.) Check all hoses of worn areas...
- Page 15 5. Prime the pump by filling the hose with water, then place the end of the hose in the bucket. 00791 6. Run the pressure washer in cold mode for 1 to 3 hours recirculating the cleaning solution. Warning: Do not run the burner.
- Page 16 Electrodes On a yearly basis the electrodes should be inspected and any necessary adjustments made. 1. Tip the machine back until it rests on the frame. 4 Nuts 2. Remove the 4 nuts that attach the burner to the heating chamber. You do not have to disconnect the fuel lines or the electric cords.
-
Page 17: Moving And Handling Instructions
2.) Rotate the handle downward to a comfortable height. 3.) Push the pressure washer forward as you walk. Lift Here During cold weather, store the pressure washer indoors and move it outdoors before starting. Follow these instructions to prevent the pump from freezing during storage. Winter Storage: Items needed: 12”... -
Page 18: Troubleshooting Guide
Circuit Breaker Overloaded Pressure set too high Causes Partially clogged or damaged nozzle Low water flow Pressure Washer Surges Or Cycles While In Bypass Causes Leak between pump and gun Gun leaking internally Causes Air band not adjusted properly due to... -
Page 19: Parts Breakdowns
M157305G - 157305,157306,157307, 157308 Parts Breakdown... - Page 20 M157305G - 157305,157306,157307, 157308 ITEM PART # DESCRIPTION 38525 50’ PW Hose Assy 777914 Quick Couple, 3/8” FPT 777915 Quick Couple Nipple, 3/8” FPT 777904 Quick Coupler, 1/4” FPT 779166 Lance Assembly 313107 Quick Couple, 3/8” FPT 779168 Gun Trigger Assembly...
- Page 21 ITEM PART # DESCRIPTION 778153 Comet GXD 1617-E 778162 Comet GXD 2527-E 778154 Cat 2DX 38518 Cat 3DX 35918 Thermal Protector, 1/4” 777340 1/4” MPT x 1/4” Hose Barb 778236 22mm Thread-On Coupler 777410 3/8” Street Elbow 38584 3/8” NPT Easy Start Valve 777837 3/8 Plug 777411...