Zte MF910 User Manual
Telstra 4gx wi-fi plus
Hide thumbs
Also See for MF910:
- Quick start manual (30 pages) ,
- Getting started (2 pages) ,
- Quick start manual (84 pages)
Table of Contents
Advertisement
TELSTRA 4GX WI-FI PLUS (MF910)
USER
MANUAL
Copyright © 2015. All rights reserved.
No part of this publication may be excerpted, reproduced, translated or
utilized in any form or by any means, electronic or mechanical, including
photocopying and microfilm, without the prior written permission of ZTE
Corporation.
The manual is published by ZTE Corporation. We reserve the right to make
modifications on errors or update specifications without prior notice.
Version 3.0
October 2015
CHECK YOUR SYSTEM REQUIREMENTS
Your Pre-Paid 4GX Wi-Fi Plus will connect to any Wi-Fi enabled device that
supports Wi-Fi 802.11 b/g/n
A web browser is required to log in to your Wi-Fi hotspot if you wish to make any
configuration changes.
USB driverless connection is also supported for Windows (not RT), and MAC
operating systems:
•
Windows 10, 8 (not including RT) / 7 / XP / Vista
•
MAC OS X 10.7 and above
Using the USB connection requires administrator rights to install and run the
software.
We suggest you switch off your anti-virus software before connecting the hotspot
- In some cases protection software can prevent automatic installation.
It is possible to start the installation process manually by clicking the Autorun icon
when it appears.
Page 1 of 32
Advertisement
Table of Contents

Related Manuals for Zte MF910


Summary of Contents for Zte MF910
-
Page 1: User Manual
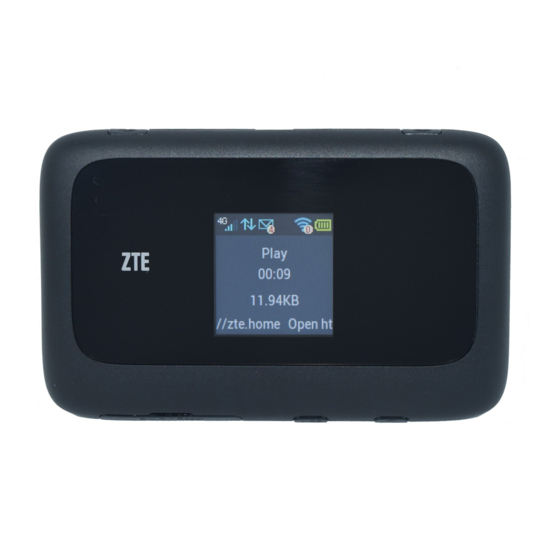
ZTE Corporation. The manual is published by ZTE Corporation. We reserve the right to make modifications on errors or update specifications without prior notice. Version 3.0... - Page 2 GET TO KNOW YOUR DEVICE NOTE: The MF910 is available in Black or White. Page 2 of 32...
- Page 3 INSERT YOUR STANDARD SIZED SIM CARD This device supports a Standard sized SIM card ONLY. Do not use a microSIM or SIM card adaptor which may damage your device. The SIM card is pre-installed and needs to be activated. You may need this information if you need to replace or check your SIM card.
- Page 4 factory default. Use the default Wi-Fi SSID and Password shown on the device sticker to log in via Wi-Fi. You can also connect directly to a computer using the USB lead provided, log into the web interface and access the Wi-Fi SSID and Password from the Wi-Fi Settings menu.
- Page 5 • Typical charging time is 3-4 hours using the standard charger. Charging from a USB source (ie laptop) will take longer. • During periods of high continuous activity with multiple users, high download rates or low network signal, charging by USB will not have sufficient current to charge the device.
- Page 6 DISPLAY LAYOUT AND ICONS During periods of inactivity it is normal for the display to go out to preserve battery life. Press the power key briefly to confirm the device status if required. CONNECT DEVICES BY WI-FI Your Wi-Fi hotspot can connect up to ten devices via Wi-Fi providing internet access for all your devices on the go.
- Page 7 QUICK REFERENCES Browser home page http://192.168.0.1 Administrator login password Default SSID TPW4G_xxxx This is displayed on the screen when the device is powered up. This can be switched off via the Settings > Wi-Fi menu Default Wi-Fi Key 10 characters which are case sensitive. This is displayed on the screen when the device is powered up.
- Page 8 WEB INTERFACE, MODEM HOMEPAGE • The default login password is ‘password’ • The home page shows a brief summary of the device status and your remaining data from Telstra. • Software update notifications (if applicable) will be shown on this page as per the example above.
- Page 9 STATUS ICONS – WEB INTERFACE NO NETWORK ACCESS • No Network Access can be any of the following conditions: • A missing, faulty or incorrectly inserted SIM. Check you have inserted your SIM card the right way and pushed it fully home until it clicks into place. •...
-
Page 10: Installation Notes
FAQ’s or call our hotline on 1300 789 475 (ZTE Support hotline is available during normal business hours, AEST 9am to 5pm) • If you can’t connect to the internet check your SIM card is inserted correctly, contact your service provider and check your account is active. -
Page 11: Home Tab
WEB INTERFACE GUIDE HOME TAB The home tab shows you how many users are connected and shows your network connection state and data usage summary. • The device will automatically connect to the network so it shows the Disconnect button status by default. •... - Page 12 SETTINGS > QUICK SETTINGS Step through the Quick Settings wizard to quickly review your current default settings. SETTINGS > NETWORK SETTINGS > WAN CONNECTION MODE: Page 12 of 32...
- Page 13 The default connection setting will automatically connect to the network. The setting is greyed out if you are connected. • Press the Disconnect button to change this setting and to enable International Roaming if required. • If you make any changes, press Apply to save the change •...
- Page 14 SETTINGS > APN: • Press Disconnect to disconnect from the Network • Press Add New to create a new APN • Add the Profile Name, eg Telstra WAP • Enter the correct APN details eg telstra.wap • Press Save to save your new APN •...
- Page 15 SETTINGS > WI-FI SETTINGS > BASIC SETTINGS: The SSID is the Wi-Fi Network Name for your device • By default the SSID and Password is shown on the front screen. Select Disable on “Display SSID and Password On Screen” to hide this information. •...
- Page 16 SETTINGS > WI-FI SETTINGS > ADVANCED SETTINGS • You can change the Wi-Fi settings to suit your personal choices or for specific requirements of your attached devices. • Press Apply to save your changes • Press the Help icon to get in context tips SETTINGS >...
- Page 17 supported devices. • Press WPS to enable, compatible devices can connect to your Wi-Fi network without authorisation, or you can set a PIN if required. • WPS is enabled for 2 minutes once pressed and the device LED’s will flash to indicate WPS mode.
- Page 18 SETTINGS > DEVICE SETTINGS > USIM PIN MANAGEMENT: • Enter your current PIN code to change or disable the PIN • If you make any changes, press Apply to save the change • If you enter the incorrect PIN code three times in succession you will lock your SIM card.
- Page 19 SETTINGS > DEVICE SETTINGS > POWER SAVE • If there is no Wi-Fi traffic detected then the device will switch off Wi-Fi as determined by the Wi-Fi sleep setting. • Set Wi-Fi sleep time to Never Sleep to keep the Wi-Fi always on. •...
- Page 20 • You need to be in the Connected state to download new versions. • Press the Update Now button to see if there are software updates for your device. • Roaming Settings control if the device will update when roaming. This is disabled to reduce high data charges when roaming.
- Page 21 SETTINGS > FIREWALL > PORT FORWARDING • Select Enable to turn on the port forwarding settings. • Port forwarding can be used to allow a specific external server or computer access to devices located on your LAN side or to translate a specific incoming port into a different destination port.
- Page 22 SETTINGS > FIREWALL > UPNP SETTINGS • Universal Plug and Play is a set of networking protocols that permits networked devices, such as personal computers, printers, Internet gateways, Wi-Fi access points and mobile devices to seamlessly discover each other's presence on the network and establish functional network services for data sharing, communications, and entertainment.
- Page 23 SETTINGS > FIREWALL > DMZ • Enable the DMZ Setting to open up all ports from the WAN side (mobile network) to the LAN side for this particular allocated IP address. • It is advisable to set a Static IP address for this device outside of the DHCP range eg 192.168.0.20 •...
- Page 24 SETTINGS > ROUTER SETTINGS • Control the IP Range for your network and enable or disable DHCP is required. • Press the Help icon to get in context tips SETTINGS > INTERNET WI-FI • Enable the Wi-Fi router to connect to another Hotspot to share that internet connection.
- Page 25 • Internet Wi-Fi or the WAN side on your hotspot refers to the radio network connection. • When the Internet Wi-Fi Switch option is enabled, it is not possible to disconnect the RF WAN side. The Disconnect button is greyed out. This is because the Wi-Fi Switch function over-rides the manual disconnect feature.
- Page 26 • Threaded messages (messages sent and received to the same Contact) are displayed in the main panel. • View SMS > SMS Settings to enable delivery reports and to check the SMS centre number (read from your SIM card) PHONEBOOK •...
- Page 27 INFORMATION • View the device IMEI number, Signal strength and other details. • Change the SSID EXTERNAL ANTENNA PORTS • Signal strength can be improved by adding external antennas. Page 27 of 32...
- Page 28 • The device supports dual TS9 connectors and dual antennas will provide better signal strength and higher data rates. • Only use the correct antenna with the TS9 termination suitable for ZTE data products. • Insert and remove the connections carefully. Do not pull on the cable to remove the connection.
-
Page 29: Troubleshooting
TROUBLESHOOTING If you have any problems with your connection or modem please consult the manual and check this section. If the problem still exists contact your service provider or check our website for more details at ztemobiles.com.au Problem Possible Causes Suggested Solution The user interface PC configuration is not... - Page 30 PRECAUTIONS AND SAFETY INFORMATION • Some electronic devices are susceptible to electromagnetic interference. The modem is a transmitting device and may cause interference to sensitive electronic equipment such as audio systems, vehicle systems and medical equipment. Please consult the manufacturer of the other device before using the modem.
- Page 31 when plugged in. • Physical damage to the antenna ports will render your device unusable and is not covered by the manufacturer’s warranty. • The internal battery is not replaceable by the end user. Return to your service centre for repair. •...
-
Page 32: Technical Specifications
TECHNICAL SPECIFICATIONS LTE 700, 900, 1800, 2100, 2600 MHz UMTS 850, 900, 2100 MHz Network compatibility GSM 850, 900, 1800, 1900 MHz Dimensions 100 x 62.8 x 13.5mm. Approx 120g LTE download speeds up to 150Mb/s LTE upload speeds up to 50Mb/s Data Rates* HSPA+ Downlink up to 42Mb/s HSDPA Mode up to 21.6Mb/s...