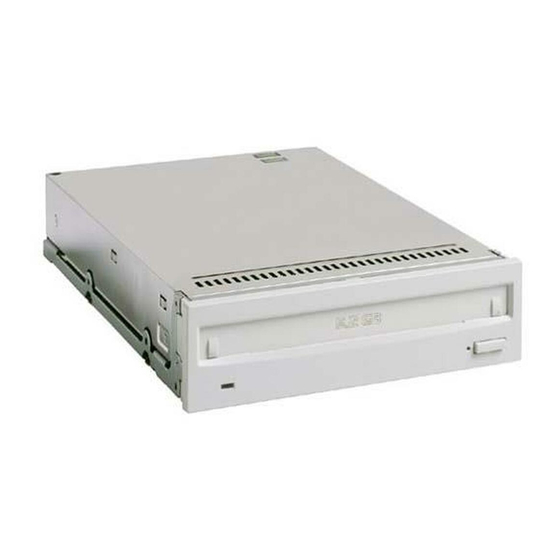
Sony SMO-F551 Installation Manual
Hide thumbs
Also See for SMO-F551:
- User manual (2 pages) ,
- Installation manual (19 pages) ,
- Technical manual (46 pages)
Table of Contents
Advertisement
Advertisement
Table of Contents

Related Manuals for Sony SMO-F551


Summary of Contents for Sony SMO-F551
- Page 1 SMO-F551 / RMO-S551 Magneto-Optical Disk Drive Installation Guide...
-
Page 2: Table Of Contents
April 23, 2003 Version 1.8 Note: SMO-F551 / RMO-S551 support many kind of MO media, but some operating system cannot support all kind of media. (See appendix; 1-3) Please select proper sector size of the media for each operating system. -
Page 3: Installation Procedure On Dos And Windows3.1
SMO-F551 / RMO-S551 Installation Guide Installation Procedure on DOS and Windows3.1 Requirements: 1. SCSI host adapter SCSI host adapter controls the command and data transfer between MO drive and host computer. (Ex. AHA-2940, AHA-3940 of Adaptec) 2. Device driver Device driver controls MO drive. Device driver is almost supplied with SCSI host adapter. - Page 4 SMO-F551 / RMO-S551 Installation Guide Note: - “Desk Drive Tune Up ” supports all kind of MO media (4.1GB, 4.8GB, 5.2GB), but some device driver does not support 4.8GB or 5.2GB media. Please confirm the proper media before using the device driver. If you have any questions, please contact your dealer of the device driver.
-
Page 5: Installation Procedure On Windows95/98
SMO-F551 / RMO-S551 Installation Guide Installation Procedure on Windows95/98 Requirement: 1. SCSI host adapter SCSI host adapter controls the command and data transfer between MO drive and host computer. (Ex. AHA-2940, AHA-3940 of Adaptec) Windows95/98 supports most of SCSI host adapters. - Page 6 SMO-F551 / RMO-S551 Installation Guide 3) Install the device driver 3)-1 Preparation - Turn on the MO drive and host computer. - Install the device driver on Windows95/98 and reboot the host computer. (Please refer to the user’s guide of the Device Driver) 3)-2 Format the media and partition - Format and make partition on the media by using format utility software, such as “Desk...
-
Page 7: Installation Procedure On Windows Nt
SMO-F551 / RMO-S551 Installation Guide Installation Procedure on Windows NT Requirement: 1. SCSI host adapter SCSI host adapter controls the command and data transfer between MO drive and host computer. (Ex. AHA-2940, AHA-3940) 2. Device driver Device driver controls MO drive. Windows NT includes a Device Driver. If you use RMO-S551, we recommend using the “Desk Drive Tune Up... - Page 8 SMO-F551 / RMO-S551 Installation Guide b) Click on Disk Administrator again - Highlight the partitioned drive icon. - Click on Tools, and then Format. Choose format type and volume label name. - Format the media. - Close Disk Administrator. 3) Install the device driver...
-
Page 9: Installation Procedure On Windows2000/Xp
SMO-F551 / RMO-S551 Installation Guide Installation Procedure on Windows2000/XP Requirement: 1. SCSI host adapter SCSI host adapter controls the command and data transfer between MO drive and host computer. (Ex. AHA-2940, AHA-3940) 2. Device driver Device driver controls MO drive. Windows2000/XP includes the Device Driver as a default setting. - Page 10 SMO-F551 / RMO-S551 Installation Guide 2)-3 Create partition on the media Windows2000/XP does not create partitions on removable media devices. If you want to create partitions, we recommend using the “Disk Drive Tune UP ”. 3) Install the device driver 3)-1 Preparation - Login Windows2000/XP as administrator.
-
Page 11: Installation Procedure On Sun System Ⅰ
4) Edit “format.dat” file - add following configuration to the “format.dat”. # This is a list of sample Sony 5.25 inch MO disk configurations. disk_type = "ISO 4X MO disk, 1150MB" ¥ : ctlr = SCSI : fmt_time = 2 ¥... - Page 12 : ncyl = 4004 : acyl = 2 : pcyl = 4006 : nhead = 32 : nsect = 31 ¥ : rpm = 3300 : bpt = 15872 # This is a list of sample partition tables for Sony 5.25 inch MO disk. partition = "ISO 4X MO disk, 1150MB" ¥...
-
Page 13: Installation Procedure On Sun System Ⅱ
SMO-F551 / RMO-S551 Installation Guide Installation Procedure on SUN System Ⅱ Test equipment: The following procedure was confirmed with the following system and drive combination: Host: SUN ULTRA SPARC 30 Solaris 8, 9 Target: SMO-F551 - Device type is set to 0 - 512 byte/sector media is used. -
Page 14: Functional Switch Connector Pin Assignments
SMO-F551 / RMO-S551 Installation Guide Functional Switch Connector Pin Assignments SCSI ID2 SCSI ID1 SCSI ID0 Disable SCSI Parity Disable Write Cache Reserved Disable Auto Spin-up Reserved Force Verify for Write command Reserved Disable Manual Eject Reserved Enable Ultra SCSI... -
Page 15: Automatically Configure The Mo Drive
SMO-F551 / RMO-S551 Installation Guide 2) Automatically Configure the MO Drive 1. Become superuser or equivalent role. 2. Create the /reconfigure file that will be read when the system is booted. # touch /reconfigure 3. Shut down the system. # shutdown -i0 -gn -y Brings the system down to init level 0, the power-down state. -
Page 16: Format And Allocate Slices On The Media
SMO-F551 / RMO-S551 Installation Guide 3) Format and allocate slices on the media 1.Stop Volume Management *1 (two methods A and B are available) A Stop volume management temporary. a. Become superuser. b. Enter the volmgt stop command. # /etc/init.d/volmgt stop Access MO drive, Jaz, and Zip drives without using volume management permanently. -
Page 17: Create The Appropriate Disk Slices
-------------------------------------------------------------------------------------------------------------------------- AVAILABLE DISK SELECTIONS: 0. c0t0d0 <SUN4.2G cyl 3880 alt 2 hd 16 sec 135> /pci@1f,4000/scsi@3/sd@0,0 1. c0t2d0 <SONY-SMO-F551-1.20 cyl 4004 alt 2 hd 32 sec 31> /pci@1f,4000/scsi@3/sd@2,0 Specify disk (enter its number): 1 AVAILABLE DRIVE TYPES: 0. Auto configure 1. -
Page 18: Label The Media And Exit The Format Menu
SMO-F551 / RMO-S551 Installation Guide e) Divide the media into slices. *4 Select the partition table you want to modify, and re-create slices. Because volume management’s format utility allocates 2 slices such as slice 0 *4 and slice 2 on the new removal media before format slice 0 as a default setting,... -
Page 19: Create A File System
SMO-F551 / RMO-S551 Installation Guide 4) Create a File System a) Create a UFS File System 1. If you are re-creating an existing UFS file system, unmount it. 2. Create the UFS file system. # newfs [-N] [-b size] [-i bytes] /dev/rdsk/device-name -b ---- size Specifies the block size for the file system, either 4096 or 8192 bytes per block. -
Page 20: Mount A File System
SMO-F551 / RMO-S551 Installation Guide b) Create a UDF File System 1. If you are re-creating an existing UFS file system, unmount it. 2. Create the UFS file system. # mkfs -F udfs device-name Example—Creating a UDF File System The following example shows how to create a UDF file system on /dev/rdsk/c0t2d0s0. - Page 21 SMO-F551 / RMO-S551 Installation Guide point is a directory to which the mounted file system is attached. 2. Mount the file system. # mount [-o mount-options] /dev/dsk/device-name /mount-point -o mount-options Specifies mount options that you can use to mount a UFS file system.
- Page 22 SMO-F551 / RMO-S551 Installation Guide Note; This means any attempt to access removable media with device names such as /dev/rdsk/cntndnsn or /dev/dsk/cntndnsn will be unsuccessful. 3. Eject Removable Media 1. Make sure the media is not being used. Remember, media is “being used” if a shell or an application is accessing any of its files or directories.
-
Page 23: Installation Procedure On Silicon Graphics Systems
SMO-F551 / RMO-S551 Installation Guide Installation Procedure Silicon Graphics Systems Test equipment: The following procedure was confirmed with the following system and drive combination: Host: SGI O2 R5000, R10000 IRIX6.3 Target: RMO-S551 Installation: 1) Connection - Attach the drive to the host using a proper SCSI cable. - Page 24 SMO-F551 / RMO-S551 Installation Guide ----- please choose one (? for help, .. to quit this menu)----- [exi]t [d]ebug/ [l]abel/ [a]uto [b]adblock/ [exe]rcise/ [r]epartition/ [f]ormat fx> f fx/format: drive parameter to usr in formatting = (current) [enter] *********WARNING********* about to destroy data on disk dksc(1,4)! Ok? Yes [enter] 4) Repartition the media Repartition the media from “root drive”...
- Page 25 SMO-F551 / RMO-S551 Installation Guide ----- partitions----- part type cyls blocks Megabytes (base+size) 7: xfs 6 + 7738 3072 + 3961856 1 + 1934 8: volhd 0 + 6 0 + 3072 0 + 1 10: volume 0 + 7761...
- Page 26 SMO-F551 / RMO-S551 Installation Guide ---- please choose one (? for help, .. to quit this menu)----- [para]meters [part]itions [b]ootinfo [a]ll [g]eometry [s]giinfo [d]irectory fx/label/show> .. [enter] ----- please choose one (? for help, .. to quit this menu)----- [sh]ow/...
-
Page 27: Installation Procedure On Hp Systems
SMO-F551 / RMO-S551 Installation Guide Installation Procedure on HP Systems Test equipment: The following procedure was confirmed with the following system and drive combination: UNIX Workstation: HP9000/712 HP-UX A.09.07 Target: SMO-F551 Installation: 1) Connection - Connect MO drive and UNIX Workstation using proper SCSI cable. - Page 28 SMO-F551 / RMO-S551 Installation Guide 3) Edit “disktab” file - Edit or add /etc/disktab file as following. ############################################### # Sony Magneto-Optical Media ############################################### SONY_MO_8X_2048:¥ :No swap or boot:ns#39:nt#16:nc#3997:¥ :s0#2494170:b0#8192:f0#2048:¥ :se#2048:rm#3300: SONY_MO_8X_1024:¥ :No swap or boot:ns#39:nt#16:nc#3671:¥ :s0#2290750:b0#8192:f0#1024:¥ :se#1024:rm#3300: SONY_MO_8X_512:¥ :No swap or boot:ns#39:nt#16:nc#3131:¥...
- Page 29 SMO-F551 / RMO-S551 Installation Guide 7) Confirm the result of mount command - Confirm the result of mount command using following command. # bdf /mo [Enter] (ex.4.1GB) Filesystem kbytes used avail capacity Mounted on /dev/dsk/c201d4s0 1900868 1710772 (ex.4.8GB) Filesystem kbytes used...
-
Page 30: Installation Procedure On Sco Systems
Note: Device type; Direct Memory Access Device Placing a jumper socket over the desired pair of pins A10/B10 turn "Direct Memory Access Device" function ON. (Please refer to Page 17-20 of Technical Guide for SMO-F551.) - Turn on the drive and insert the media. -
Page 31: Appendix
SMO-F551 / RMO-S551 Installation Guide Appendix: Table1. Windows support Win 95 Windows Windows Windows Win3.1/95 98/ME 2000/XP 2000/XP Format file system FAT16/ FAT16 FAT 16 / 32 FAT16 / 32 NTFS NTFS 4.1 GB media 512 Byte/sector 4.8 GB media 1024 Byte/sector 5.2GB media...