Table of Contents
Advertisement
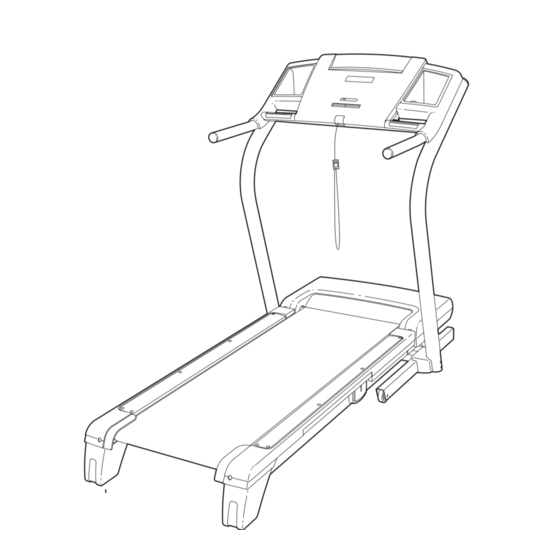
Model No. NTL07707.0
Serial No.
Write the serial number in the space
above for reference.
Serial
Number
Decal
QUESTIONS?
As a manufacturer, we are com-
mitted to providing complete cus-
tomer satisfaction. If you have
questions, or if parts are missing,
PLEASE DO NOT CONTACT
THE STORE; please contact
Customer Care.
IMPORTANT: You must note the
product model number and
serial number (see the drawing
above) before contacting us:
CALL TOLL-FREE:
1-888-825-2588
Mon.–Fri. 6 a.m.–6 p.m. MST
Sat. 8 a.m.–4 p.m. MST
ON THE WEB:
www.nordictrackservice.com
CAUTION
Read all precautions and instruc-
tions in this manual before using
this equipment. Save this manual
for future reference.
With Universal Dock for iPod
®
USER'S MANUAL
Visit our website at
www.nordictrack.com
new products, prizes,
fitness tips, and much more!
Advertisement
Table of Contents

Related Manuals for NordicTrack C2155 NTL07707.0


Summary of Contents for NordicTrack C2155 NTL07707.0
- Page 1 Read all precautions and instruc- tions in this manual before using this equipment. Save this manual for future reference. With Universal Dock for iPod USER'S MANUAL ® Visit our website at www.nordictrack.com new products, prizes, fitness tips, and much more!
-
Page 2: Table Of Contents
HOW TO FOLD AND MOVE THE TREADMILL ........ -
Page 3: Important Precautions
To reduce the risk of serious injury, read all important precautions and in- structions in this manual and all warnings on your treadmill before using your treadmill. ICON as- sumes no responsibility for personal injury or property damage sustained by or through the use of this product. - Page 4 (See the drawing on page 5 for the location of the circuit breaker.) 21. Do not attempt to raise, lower, or move the treadmill until it is properly assembled.
-
Page 5: Before You Begin
BEFORE YOU BEGIN Thank you for selecting the revolutionary NordicTrack C2155 treadmill with Universal Dock for iPod. The C2155 treadmill offers a selection of features designed to make your workouts at home more enjoyable and effective. And when you’re not exercising, the unique C2155 treadmill can be folded up, requiring less than half the floor space of other treadmills. -
Page 6: Assembly
During shipping, a small amount of lubricant may be transferred to the top of the walking belt or the shipping carton. This is a normal condition and does not affect treadmill perfor- mance. If there is lubricant on top of the walking belt, simply wipe off the lubricant with a soft cloth and a mild, non-abrasive cleaner. - Page 7 1. Make sure that the power cord is unplugged. With the help of a second person, carefully tip the treadmill onto its left side. Partially fold the Frame (56) so that the treadmill is more stable; do not fully fold the Frame yet.
- Page 8 Press a Base Endcap (77) into the Base (83). 5. With the help of a second person, carefully tip the treadmill onto its right side. Partially fold the Frame (56) so the treadmill is more stable; do not fully fold the Frame yet.
- Page 9 7. Set the console assembly face down on a soft surface to avoid scratching the console assem- bly. Hold the Right Handrail (95) near the con- sole assembly. Next, insert the console wire into the large hole in the Right Handrail and out of the top as shown.
- Page 10 Bolt (4) and a 3/8" Nut (8). Note: It may be nec- essary to move the Frame back and forth to align the Storage Latch with the bracket. Lower the Frame (56) (see HOW TO LOWER THE TREADMILL FOR USE on page 21). Tube Sleeve Large...
- Page 11 Base (91). 13. Make sure that all parts are properly tightened before you use the treadmill. If there are sheets of clear plastic on the treadmill decals, remove the plastic. To protect the floor or carpet, place a mat under the tread- mill.
-
Page 12: Operation And Adjustment
(see drawing 1 at the right). To purchase a surge suppressor, see your local NordicTrack dealer or call the telephone number on the front cover of this manual and order part number 146148, or see your local electronics store. - Page 13 When the manual mode of the console is se- lected, the speed and incline of the treadmill can be changed with the touch of a button. As you exercise, the console will display continuous exercise feedback.
- Page 14 IMPORTANT: The console features a display demo mode, designed to be used if the treadmill is dis- played in a store. If the displays light as soon as you plug in the power cord and switch the circuit breaker to the reset position, the demo mode is turned on.
- Page 15 5. Select a display mode and monitor your progress with the display. As you walk or run on the treadmill, the display can show the following workout information: • The speed of the walking belt.
- Page 16 Step onto the foot rails, press the Stop button, and adjust the incline of the treadmill to the lowest setting. The incline must be at the lowest setting or you may damage the treadmill when you fold it to the storage position.
- Page 17 3. Press the Start button or the Speed increase button to start the workout. A moment after you press the button, the treadmill will automatically adjust to the first speed and in- cline settings for the workout. Hold the handrails and begin walking.
- Page 18 3. Press the Start button or the Speed increase button to start the workout. A moment after the button is pressed, the treadmill will automatically adjust to the first speed and in- cline settings of the workout. Hold the handrails and begin walking.
-
Page 19: Adjusting Cushioning System
Note: The console features a display demo mode, de- signed to be used if the treadmill is displayed in a store. While the demo mode is turned on, the console will function normally when you plug in the power cord, switch the circuit breaker to the reset position, and in- sert the key into the console. -
Page 20: How To Fold And Move The Treadmill
1. Hold a handrail and the frame and place one foot against one of the wheels. 2. Tilt the treadmill back until it rolls freely on the wheels. Carefully move the treadmill to the desired location. Never move the treadmill without tipping it back. To reduce the risk of injury, use extreme caution while moving the treadmill. -
Page 21: How To Lower The Treadmill For Use
HOW TO LOWER THE TREADMILL FOR USE 1. Hold the upper end of the treadmill with your right hand. Pull the latch knob to the left and hold it. It may be neces- sary to push the frame forward as you pull the knob to the left. -
Page 22: Troubleshooting
PROBLEM: The console displays remain lit when you remove the key from the console SOLUTION: a. The console features a display demo mode, designed to be used if the treadmill is displayed in a store. If the displays remain lit when you remove the key, the demo mode is turned on. To turn off the demo mode, hold down the Stop button for a few seconds. - Page 23 SOLUTION: a. With the key in the console, press one of the Incline buttons. While the incline is changing, re- move the key. After a few seconds, re-insert the key. The treadmill will automatically rise to the maximum incline level and then return to the minimum level. This will recalibrate the incline system.
- Page 24 Be careful to keep the walk- ing belt centered. Then, plug in the power cord, in- sert the key, and carefully walk on the treadmill for a few minutes. Repeat until the walking belt is properly tightened.
-
Page 25: Exercise Guidelines
EXERCISE GUIDELINES WARNING: Before beginning this or any exercise program, consult your physi- cian. This is especially important for persons over the age of 35 or persons with pre-exist- ing health problems. The pulse sensor is not a medical device. Various factors may affect the accuracy of heart rate readings. -
Page 26: Part List
PART LIST—Model No. NTL07707.0 To locate the parts listed below, see the EXPLODED DRAWING near the end of this manual. Key No. Qty. Description #8 x 3/4" Screw #8 x 1" Tek Screw Hex Key 3/8" x 2" Bolt 1/4" x 1 1/4" Bolt 3/8"... - Page 27 Key No. Qty. Description Console Ground Wire iFIT Universal iPod Connector Filter Wire Lift Motor Spacer #8 x 2" Screw Right Accessory Tray Key No. Qty. Description Frame/Roller Ground Wire 5/32" Hex Key – 6" Blue Wire, 2F – User’s Manual *These parts are not illustrated.
-
Page 28: Exploded Drawing
EXPLODED DRAWING A—Model No. NTL07707.0 R0907C... - Page 29 EXPLODED DRAWING B—Model No. NTL07707.0 R0907C...
- Page 30 EXPLODED DRAWING C—Model No. NTL07707.0 R0907C...
- Page 31 EXPLODED DRAWING D—Model No. NTL07707.0 R0907C...
-
Page 32: Ordering Replacement Parts
ORDERING REPLACEMENT PARTS To order replacement parts, please see the front cover of this manual. To help us assist you, be prepared to pro- vide the following information when contacting us: • the model number and serial number of the product (see the front cover of this manual) •...