Table of Contents
Advertisement
Patent P ending
Mode!No.NTL1075.0
SerialNo.
Find theseriaU n umber i ntheUocation
shown beUow, Write theseriaU n umber
inthespace above forreference,
SeriaU N umber D ecaU
Asa manufacturer, wearecom-
mittedto providingcomplete
customersatisfaction,
i f you
have questions,
or if parts are
damaged or missing,
PLEASE
CONTACT OUR CUSTOMER
SERVICE DEPARTMENT
DIRECTLY.
CALL TOLL-FREE:
Mon.=Fd., 6 a.m.=6 p.m. MST
ON THE WEB:
www.nordictracksewice.com
Read all precautions
and instruc-
tions in this manual before uei ng
this equipment.
Save this manual
for future reference.
'S
www.nordictrack.com
new products,
prizes,
fitness tips, and much more!
Advertisement
Table of Contents

Related Manuals for NordicTrack C2100


Summary of Contents for NordicTrack C2100
- Page 1 DIRECTLY. CALL TOLL-FREE: Mon.=Fd., 6 a.m.=6 p.m. MST ON THE WEB: www.nordictracksewice.com Read all precautions and instruc- www.nordictrack.com tions in this manual before uei ng this equipment. Save this manual new products, prizes, for future reference. fitness tips, and much more!
- Page 2 HOW TO FOLD AND MOVE THE TREADMHLL ..........TROUBLESHOOTHNG ..............CONDHTHONHNGGUHDELHNES ............... PART LiST ................ORDERING REPLACEMENT PARTS ............LHMHTEDWARRANTY ............... Back Cover Note: An EXPLODED DRAWING is attached in the center of this manual, NordicTrack is a registered trademark of HCONHP,Hnc,...
- Page 3 20. Do not change the incline of the treadmill page 9. To purchase a surge suppressor, placing objects under the treadmill. your local NordicTrack dealer or call the tolF free teJephone number on the front cover of 21. When folding or moving the treadmill, make this manual and order part number 146148, or sure that the storage latch is fully closed.
- Page 4 22. When using iFIT.com programs, an electronic 25. inspect and properly Lighten all parts of the "chirping" sound will alert you when the treadmill regularly. speed and/or incline of the treadmill is about to change. Always listen for the "chirp" 2&...
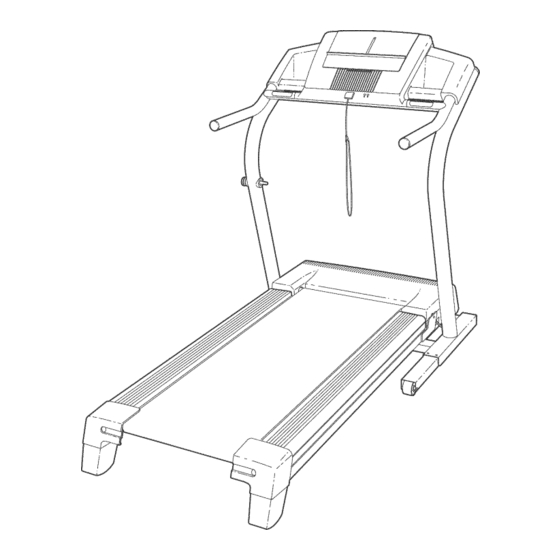
- Page 5 BEFORE YOU BEGIN Thank you for selecting the revolutionary NordicTrack _> ing this manual, see the front cover of this manual, To C21 O0 treadmill, The C2100 treadmill offers a selec- help us assist you, please note the product model...
- Page 6 Assemblyrequirestwo persons.SetthetreadmHU ina cleared areaandremove aHpacking matedaUs, Donot disposeof the packingmaterialsuntil assemMy is completed. Note:Theunderside o fthetreadmHU waUking beUt iscoated withhigh-performance Uubdcant, During shipping, a small a mount o f Dbdcant maybetransferred t othetopofthewaUking beUt ortheshipping carton, T hisis a normaU condition anddoesnotaffect t readmHU performance, if thereis Uubdcant ontopofthewaUMng beUt, simpUy wipeoff theUubricant witha softclothanda mild,non-abrasive cleaner,...
- Page 7 2, With the heUpof a second person, set the consoUe assem- buyon the Uprights (85), Make sure that no wires are pinched. Attach the consoUe assemMy with four ConsoUe BoUts(72), Washers (96), and Star Washers (67) (onUyone side is shown), Start all four Bolts before tightening them.
- Page 8 5, Remove theknobfromthepin,Makesurethatthecollar andthespring areonthepin, Press theLatchinsert ( 77)intotherightsideandthebft Upright ( 85),andpresstheKnobinsert(92)intothebft KnobJ-_ sideofthebft Upright, U sea rubber m allet, i f necessary, Next,insert t hepinintotheLatchinsert, a ndtighten the ring knobbackontothepin, Collar .@(_in 6, Makesurethatall partsarepropertytightenedbeforeyou usethe treadmill.Keep theincluded allen wrench in a secure pUace, Theallenwrench is usedtoadjust t hewaUking beUt (seepage 26),Toprotectthe floor or carpetfromdamage, p lacea matunderthe treadmill.
- Page 9 1 at _rounded Outlet Box the right). To purchase a surge suppressor, Adapter your JocaJ NordicTrack denier or call the toll-free telephone number on the front cover of this man- uaJ and order part number 146148, or see your tocaJ electronics store.
- Page 10 CONSOLE DmAGRAM 135' Distance .rim pu_se Cerl_edPer_on_tT_inerProgr,_m_ _'ai_i_g Zo_e_ Heagt Nate Cor_tro[ _:$ _ _ a_ Note: If there is a thin sheet of plastic on the face of the console, remove it. FEATURES OF THE CONSOLE you can connect the treadmill to your portable stereo, home stereo, computer, or VCR and play special iFIT,com MP3, CD, and video programs (iFIT,com MP3 The treadmill console offers an impressive array of...
- Page 11 HOW TO TURN ON THE POWER walking belt as desired 5olarls" by pressing the Speed Note: To prevent damage to the walking platform, increase and decrease 9. 5 I buttons, Each time a always wear clean shoes when using the treadmill. button is pressed, the Hug in the power cord speed setting will...
- Page 12 and the incline level of the treadmill. Note: Each The Training Zones time the incline changes, the display wiii show the display--Thb incline setting. 7?alnlng dispUayindicates The Time/Pace dis- the approximate intensity bveU of play--This display wiii your exercise, if show the elapsed time five or six indicators are Ht,for exampb, the dispUay and your pace (pace is...
- Page 13 To measure your heart rate, stand on the foot To turn off the fan, press the Auto Breeze Fan button again, Note: if the fan is left on when the rails and hoUdthe metaUcontacts--avoid moving your hands, When your puUseis detected, the walking belt is stopped, the fan will automatically turn off after a few minutes, heart symboU beside the PuUse/Speed dispUay wHU...
- Page 14 of the matrix. (The incline settings are not shown HOW TO USE A PRESET PROGRAM in the matrix.) The speed settings for the next seven segments wiii be shown in the columns to mnsert the key into the console. the right. See HOW TO TURN ON THE POWER on page When only three seconds remain in the first seg- ment of the program, both the Current Segment...
- Page 15 Follow your progress with the displays. HOW TO USE A HEART RATE PROGRAM See step 5 on page 11. Heart rate program 1 wii[ automatically adjust the speed and incline of the treadmill to keep your heart rate near a Measure your heart rate if desired.
- Page 16 alert you, When the first segment ends, all target Enter a target heart rate setting. heart rate settings will move one column to the left, The target heart rate setting for the second If heart rate program is selected, the target Solaris"...
- Page 17 HOW TO CONNECT YOUR PORTABLE STEREO HOW TO CONNECT THE TREADMmLL TO USE mFIT.COM PROGRAMS Note: mf y our stereo has an RCA-type AUDIO OUT jack, see instruction A below, mf y our stereo has a 1/8" LINE OUT jack, see instruction B.
- Page 18 HOW TO CONNECT YOUR HOME STEREO HOW TO CONNECT YOUR COMPUTER Note: mfyour stereo has an unused LmNEOUT jack, A, Hug one end of a long 1/8" to 1/8" stereo audio see instruction A below, mfthe LmNEOUT jack is cable (available at electronics stores) into the input jack on the console, Hug the other end of the cable being used, see instruction into the LINE OUT jack on your computer, Note:...
- Page 19 HOW TO CONNECT YOUR VCR HOW TO USE AN mFIT.COM MP3, CD, OR VmDEO PROGRAM Note: if your VCR has an unused AUDIO OUT jack, see instruction A below, if the AUDIO OUT jack is being used, see instruction B. ff you have a TV To use an iFIT,com MP3, CD, or video program, the with a built-in VCR, see instruction...
- Page 20 if the speed or incline settings are too high or too ,, Make sure that the audio cable is property connected. low, you can manually override the settings at any time by pressing the Speed or Incline buttons on • If you are using a portable CD ptayer and the the console, However, when the next "chirp"...
- Page 21 Hold the handrails, step onto the walking belt, and HOW TOUSE AN IFIT:COM PROGRAM begin walking, During the program, an electronic DIRECTLY FROM OUR WEB SiTE "chirping" sound will alert you when the speed and/or incline of the treadmill is about to change, CAUTION: AJways listen for the "chirp"...
- Page 22 THE mNFORMATmONMODE/DEMO MODE in a store, When the console is in the demo mode, the power cord can be plugged in, the key can be removed The consob features an information mode that keeps from the console, and the indicators in the display will track of the totaUnumber of miles that the waUking beUt automatically light in a preset sequence, although the has moved and the totaUnumber of hours that the...
- Page 23 HOW TO FOLD AND MOVE THE TREADMILL HOW TO FOLD THE TREADMILL FOR STORAGE Before folding the treadmill, adjust the incline to the towest position, ff this is not done, the treadmill may be per- manently damaged. Remove the key and unpIug the power cord.
- Page 24 HOW TO LOWER THE TREADMmLL FOR USE 1, HoHdthe upper end of the treadmHHwith your right hand as shown, Using your Hefthand, puHH the Hatchknob to the Heft and hoHdit, Pivot the treadmHHdown until the frame is past the pin on the Hatchknob, 2, HoHdthe treadmHHfirmHywith both hands, and Howerthe treadmHHto the floor, To decrease the possibility...
- Page 25 TROUBLESHOOTmNG Most treadmill problems can be solved by following the steps below. Find the symptom that applies, and follow the steps listed, mffurther assistance is needed, see the front cover of tHs manual. PROBLEM: The power does not turn on SOLUTmON: a, Make sure that the power cord is plugged into a surge suppressor, and that the surge suppressor is plugged into a properly grounded outlet (see page 9), Use only a single°outlet surge suppressor...
- Page 26 Locate the Reed Switch (22) and the Magnet (18) on the Heftside of the Pulley (17), Turn the Pulley until the View Magnet is aligned with the Reed Switch, Make sure that the gap between the Magnet and the Reed Switch is about 1/8", if necessary, move the Reed 22_- Switch sHghtiy using a shotted screwdriver, Reattach...
- Page 27 PROBLEM: The shock does not assist the towedng of the treadmill frame SOLUTION: a, Environmental factors such as coUdtemperatures can affect the performance of the shock, To re- store shock performance, hoUdthe ends of the frame near the endcaps firmUy with both hands, and carefully Uower the frame to the floor and then raise it severaU times, To decrease the possi- bility of injury, bend your tegs and keep your back straight.
- Page 28 CONDiTiONiNG GUiDELiNES ergy, Only after the first few minutes does your body WARNING: Before beginning th s begin to use stored fat calories for energy, if your goal is to burn fat, adjust the speed and incline of the tread- or any exercise program, consult...
- Page 29 SUGGESTED STRETCHES The correct form for several basic stretches is shown at the right, Move slowly as you stretch--never bounce, 1. Toe Touch Stretch Stand with your knees bent slightly and slowly bend forward from your hips, Allow your back and shoulders to relax as you reach down toward your toes as far as possible, Hold for 15 counts, then relax, Repeat 3 times, Stretches: Hamstrings, back of knees and back,...
- Page 30 PART LiST--Model No. NTL1075,0 Ro3osB To Uocate the parts Hsted beUow,see the EXPLODED DRAWUNG attached in the center of this manual Key No. Qty. Description Key No. Qty. Description Left Foot Rail Plastic Tie Spring Pad Screw Front Right Endcap Front Left Endcap Right Foot Rail Frame...
- Page 31 MODEL NUMBER OF THE PRODUCT (NTL1075,0) the NAME OF THE PRODUCT (NordicTrack C2100 treadmill) the SERIAL NUMBER OF THE PRODUCT (see the front cover of this manual) the KEY NUMBER AND DESCRiPTiON OF THE PART(S) (see the PART LiST on pages 30 and 31 and the...
- Page 32 EXPLODED DRAWING--ModeM No. NTLI075.0 RososB ..6 0// "_ 39 ',,/...
- Page 33 EXPLODED DRAWING--ModeM No. NTLI075.0 ROSOSB --103 .."_ _<_ _ %%_72 ////" // , .---.. _106 _115 114 _...
- Page 34 LiMiTED WARRANTY WHAT iS COVERED--The entire NordicTrack C2100 treadmill ("Product") is warranted to be free of aII defects in mate- riaI and workmanship. iS COVERED--The original purchaser or any person receiving the Product as a gift from the original purchaser.