Table of Contents
Advertisement
Quick Links
Advertisement
Table of Contents

Related Manuals for Q-See QD7015P


Summary of Contents for Q-See QD7015P
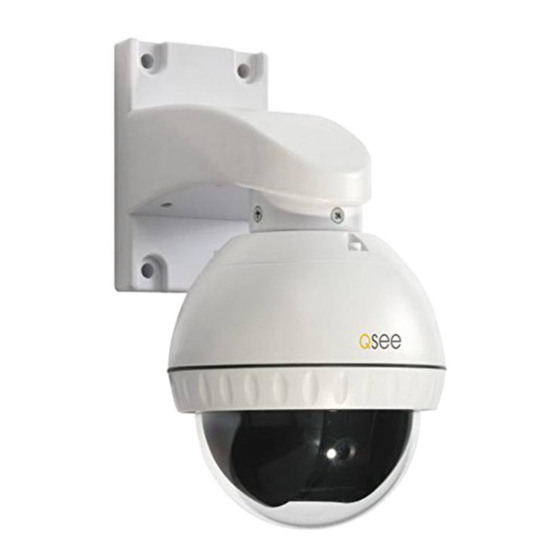
- Page 1 QD7015P USER MANUAL...
- Page 2 Please see the back of this manual for exclusions. © 2014 Q-See. Reproduction in whole or in part without written permission is prohibited. All rights reserved. This manual and software and hardware described herein, in whole or in part, may not be reproduced, translated, or reduced to any machine-readable form without prior written approval.
-
Page 3: Q-See Product Warranty
Thank you for choosing Q-See to provide for your security needs, and welcome to the Q-See community! We stand behind the quality of all of our products, and we want you to know that we’re here to help you should you ever need assistance with your Q-See purchase. - Page 4 INTRODUCTION This manual is written for the QD7015P pan-tilt camera and was accurate at the time it was completed. However, because of our ongoing effort to constantly improve our products, additional features and functions may have been added since that time and on-screen displays may change. We encourage you to visit our website at www.Q-See.com to check for the latest product announcements.
-
Page 5: Specifications
FEATURES Your camera offers the following features: High quality video using 1/3” Sony Exview HAD CCD-II coupled with Sony Effio-E digital signal processor to produce 700 TV lines of resolution. 960H format for wider, distortion-free images Weatherproof IP66 Rating RS485 control. 128 preset positions - 80 preset positions and 48 special function settings. 6mm fixed lens. -
Page 6: Setting Baud Rate And Address
DIP switches are binary - meaning that they are either On (“1”) or Off (“0”). Different combinations of ones and zeroes on the board produce different settings. On the QD7015P, there are a total of 10 DIP switches. The first eight are for setting the address of the camera while positions 9 and 10 control the baud rate - which is the speed in bits per second at which the DVR communicates with the camera for control. -
Page 7: Setting Camera Address
SETTING CAMERA SETTING BAUD RATE ADDRESS Address Switch Baud Rate Switch Number (BIT) (8 digits) Address Code 1 2 3 4 5 6 7 8 1200bps 1 0 0 0 0 0 0 0 2400bps 0 1 0 0 0 0 0 0 4800bps 1 1 0 0 0 0 0 0 9600bps... -
Page 8: Connecting The Camera
CONNECTING THE CAMERA Before you can operate the camera, you must connect it to a system which can support PTZ operations. There are three sets of connectors - power, video and the bare control wires. This latter connection is covered on the next page. We recommend connecting the camera (at least temporarily) to the DVR to test your settings and connections before mounting it in its final location. -
Page 9: Ptz Control Connection
Once you have made your connections, you will need to make settings on the DVR in order to control it. You will need to consult your DVR’s manual for this procedure, but a sample screen (from a Q-See QT-series DVR) is shown on the right. -
Page 10: Installing The Camera
INSTALLING THE CAMERA When installing your camera, it is important to select a proper site not only for field of view, but for other considerations as well: Distance from viewing/recording device. The further the camera is from the DVR or monitor, the higher the chances of signal degradation. Typical 75Ω Video Cable provides acceptable signal at distances up to 200’... -
Page 11: Mounting The Camera
MOUNTING THE CAMERA STEP 1. Run the power/video/data extension cable from the DVR to the camera’s location. STEP 2. Use the mounting bracket to mark the position for the mounting holes. Drill the mounting holes with a 3/16” (5mm) drill bit. If needed, the hole for the cables should also be drilled at this time. - Page 12 WHICH CABLE TO USE? Your cabling needs will depend on the distance between your camera and your DVR. Q-See offers several cables to fit specific needs. These may be purchased from the same location as where you bought your camera, or on our website: www.q-seestore.com QSVRG60 (60’)
-
Page 13: Operation
OPERATION The your camera can be controlled manually through a PTZ keyboard (if supported by your DVR), or by using the PTZ controls on the DVR to which it is connected. Depending on the software used, it is also possible to control the PTZ camera remotely when you are logged into the DVR via the Internet, a remote monitoring program or a smartphone app. - Page 14 EXAMPLE 1: SETTING A CRUISE This example is based on using a QT-Series DVR without an attached PTZ keyboard. Your DVR’s specific commands may differ slightly. Please consult your system’s manual. STEP 1. In your DVR’s PTZ settings window, select the Advanced tab and then Preset 1.
-
Page 15: Troubleshooting
TROUBLESHOOTING Problem Solution No picture or unstable image Check both the power and video connections to the camera. The on-screen image is blurry. 1. Check for fingerprints or dirt on the lens. 2. Check menu settings. The on-screen image is dim. 1. Check for fingerprints or dirt on the lens. 2. Check monitor settings The on-screen image is dark. 1. Adjust the monitor contrast settings. The screen flickers. Camera may be facing sun, television or computer monitor.