Table of Contents
Advertisement
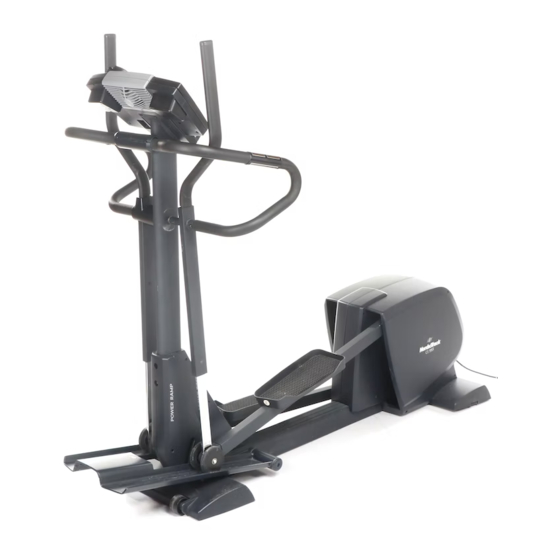
Model No. NTE13920
Serial No.
Serial Number
Decal
QUESTIONS?
If you have questions, or if there
are missing parts, we will guar-
antee complete satisfaction
through direct assistance from
our factory.
TO AVOID DELAYS, PLEASE
CALL DIRECT TO OUR TOLL-
FREE CUSTOMER HOT LINE.
The trained technicians on our
customer hot line will provide
immediate assistance, free of
charge to you.
CUSTOMER HOT LINE:
1-888-825-2588
Mon.–Fri., 6 a.m.–6 p.m. MST
CAUTION
Read all precautions and instruc-
tions in this manual before using
this equipment. Keep this manual
for future reference.
_
USER'S MANUAL
Visit our website at
www.nordictrack.com
new products, prizes,
fitness tips, and much more!
Advertisement
Table of Contents

Related Manuals for NordicTrack NTE13920


Summary of Contents for NordicTrack NTE13920
- Page 1 Model No. NTE13920 Serial No. Serial Number Decal QUESTIONS? If you have questions, or if there are missing parts, we will guar- antee complete satisfaction through direct assistance from our factory. TO AVOID DELAYS, PLEASE CALL DIRECT TO OUR TOLL- FREE CUSTOMER HOT LINE.
-
Page 2: Table Of Contents
LIMITED WARRANTY ............Back Cover NordicTrack is a registered trademark of ICON Health & Fitness, Inc. -
Page 3: Important Precautions
IMPORTANT PRECAUTIONS WARNING: To reduce the risk of serious injury, read the following important precau- tions before using the elliptical exerciser. 1. Read all instructions in this manual before using the elliptical exerciser. 2. It is the responsibility of the owner to ensure that all users of the elliptical exerciser are adequately informed of all precautions. -
Page 4: Before You Begin
(excluding holidays). To help us assist you, please note the product model number and serial number before calling. The model number is NTE13920. The serial number can be found on a decal attached to the elliptical exerciser (see the front cover of this manual for the location of the decal). -
Page 5: Assembly
ASSEMBLY Assembly requires two persons. Place all parts of the elliptical exerciser in a cleared area and remove the packing materials. Do not dispose of the packing materials until assembly is completed. In addition to the included allen wrenches, assembly requires a phillips screwdriver wrenches , a rubber mallet As you assemble the elliptical exerciser, use the drawings below to identify the small parts used in assembly. - Page 6 2. Identify the Pivot Axle (14), which is the longer of the two axles. Slide a Ramp Cover (48) onto an M6 x 16mm Patch Screw (76) as shown. Tighten the Patch Screw into one end of the Pivot Axle. Apply a small amount of the included grease to the Pivot Axle.
- Page 7 5. Slide a Weld Spacer (119) onto the axle on the left side of the Upright (2), with the open side of the Weld Spacer facing the Upright. Locate the Upper Body Arm (118) that has the Left Upper Body Leg (31) inside of it (the Left Upper Body Leg is marked with a sticker).
- Page 8 7. Identify the Left Pedal (10), which is widest at the rear and has an opening on the left side. Attach the Left Pedal to the Left Pedal Leg (4) with two M8 x 58mm Button Screws (83). Attach the Right Pedal (11) to the Right Pedal Leg (5) in the same way.
-
Page 9: How To Use The Chest Pulse Sensor
HOW TO USE THE CHEST PULSE SENSOR To get the best performance from the chest pulse sen- sor, please read the instructions below. HOW TO PUT ON THE CHEST PULSE SENSOR The chest pulse sensor consists of two components: the chest strap and the sensor unit. Follow the steps below to put on the chest pulse sensor. - Page 10 Next, hold the chest pulse sensor near the console. While holding one thumb stationary, begin tapping the other thumb against the electrode area at a rate of about one tap per second. Check the heart rate reading on the console. •...
-
Page 11: How To Use The Elliptical Exerciser
HOW TO USE THE ELLIPTICAL EXERCISER HOW TO PLUG IN THE POWER CORD This product must be Grounded Outlet Box grounded. If it should malfunction or break down, grounding Grounding Pin provides a path of least Grounded Outlet resistance for electric current to reduce the risk of electric shock. - Page 12 CONSOLE DIAGRAM Note: If there is a sheet of clear plastic on the face of the console, remove it before using the console. FEATURES OF THE CONSOLE The state-of-the-art console offers an impressive array of features. When the manual mode of the console is selected, the resistance of the pedals and the angle of the ramp can be changed with a touch of a button.
- Page 13 HOW TO USE THE MANUAL MODE Begin pedaling to activate the console. Make sure that the power cord is properly plugged in (see HOW TO PLUG IN THE POWER CORD on page 11). To activate the console, simply begin pedaling. After a few sec- onds, the console displays will light.
- Page 14 The right side of the main display will show the approxi- mate numbers of calories and fat calo- ries you have burned (see FAT BURNING on page 27). The dis- play will change from one number to the next every few seconds, as shown by the indicators around the display.
- Page 15 HOW TO USE PERSONAL TRAINER PROGRAMS Begin pedaling to activate the console. See step 1 on page 13. Select one of the 15 personal trainer programs. When the power is turned on, the manual mode will be selected. To select a personal trainer pro- gram, repeatedly press the Program Select but- ton until the name of the desired program appears in the main display.
- Page 16 Monitor your progress with the main display. See step 4 on page 13. Measure your heart rate if desired. See step 5 on page 14. Turn on the fan if desired. See step 6 on page 14. When the program is finished, the console will automatically turn off.
- Page 17 Enter your age. You must enter your age to use a heart rate pro- gram. If you have already entered your age, press the Enter button and go to step 4. If you have not entered your age, press the Up Arrow or Down Arrow button repeatedly to enter your age, and then press the Enter button.
- Page 18 HOW TO CONNECT YOUR CD PLAYER, VCR, OR COMPUTER To use iFIT.com CDs, the elliptical exerciser must be connected to your portable CD player, portable stereo, home stereo, or computer with CD player. See pages 18 and 19 for connecting instructions. To use iFIT.com videocassettes, the elliptical exerciser must be con- nected to your VCR.
- Page 19 HOW TO CONNECT YOUR HOME STEREO Note: If your stereo has an unused LINE OUT jack, see instruction A below. If the LINE OUT jack is being used, see instruction B. A. Plug one end of the audio cable into the jack beneath the console.
- Page 20 HOW TO CONNECT YOUR VCR Note: If your VCR has an unused AUDIO OUT jack, see instruction A below. If the AUDIO OUT jack is being used, see instruction B. If you have a TV with a built-in VCR, see instruction B. If your VCR is connected to your home stereo, see HOW TO CONNECT YOUR HOME STEREO on page 19.
- Page 21 HOW TO USE IFIT.COM CD AND VIDEO PROGRAMS To use iFIT.com CDs or videocassettes, the elliptical exerciser must be connected to your portable CD play- er, portable stereo, home stereo, computer with CD player, or VCR. See HOW TO CONNECT YOUR CD PLAYER, VCR, OR COMPUTER on page 18.
- Page 22 HOW TO USE PROGRAMS DIRECTLY FROM OUR WEB SITE Our Web site at www.iFIT.com allows you to play iFIT.com audio and video programs directly from the internet. To use programs from our Web site, the ellip- tical exerciser must be connected to your home com- puter.
- Page 23 HOW TO MEASURE YOUR BODY FAT PERCENTAGE CAUTION : The console uses a bioelectrical impedance analysis method to determine body fat percentage, sending a harmless signal through the body. Do not measure your body fat percentage if you have an internal medical device such as a pacemaker.
- Page 24 HOW TO USE A CUSTOM PROGRAM In addition to offering personal trainer programs, the console can provide custom fat burn, weight loss, or cardio programs based on the personal data that you have entered. Follow the steps below to use a custom program.
- Page 25 HOW TO CHART YOUR PROGRESS Begin pedaling to activate the console. See step 1 on page 13. Press the Progress button. When the Progress button is pressed, the words “TO CHART YOUR PROGRESS USE UP/DOWN ARROWS TO SCROLL AND ‘ENTER’ TO SELECT”...
-
Page 26: Maintenance And Troubleshooting
MAINTENANCE AND TROUBLESHOOTING Inspect and properly tighten all parts of the elliptical exerciser regularly. Replace any worn parts immedi- ately. For smooth operation of the elliptical exer- ciser, inspect and clean the incline ramp regularly using a soft cloth and mild detergent. -
Page 27: Conditioning Guidelines
CONDITIONING GUIDELINES WARNING: Before beginning this or any exercise pro- gram, consult your physician. This is espe- cially important for persons over the age of 35 or persons with pre-existing health problems. The pulse sensors are not medical devices. Various factors, including the user's move- ment, may affect the accuracy of heart rate readings. -
Page 28: Part List
PART LIST—Model No. NTE13920 Key No. Qty. Description Frame Upright Ramp Left Pedal Leg Right Pedal Leg Rear Stabilizer Rear Stabilizer Cover Front Stabilizer Front Stabilizer Cover Left Pedal Right Pedal Incline Motor Incline Axle Pivot Axle Left Side Shield... - Page 29 Key No. Qty. Description Lower Foam Grip M4 x 25mm Tek Screw Spacer Wheel Bushing M8 x 19mm Patch Screw Wheel Belt Pulse Extension Wire Upper Wire Harness Power Cord Power Socket Note: # indicates a non-illustrated part. Specifications are subject to change without notice. See the back cover of this manual for information about ordering replacement parts.
-
Page 32: How To Order Replacement Parts
Friday, 6 a.m. until 6 p.m. Mountain Time (excluding holidays). To help us assist you, please be prepared to give the following information when calling: • The MODEL NUMBER of the product (NTE13920) • The NAME of the product (NordicTrack •...